
Related Manuals for Barco MDSC-8527


Summary of Contents for Barco MDSC-8527
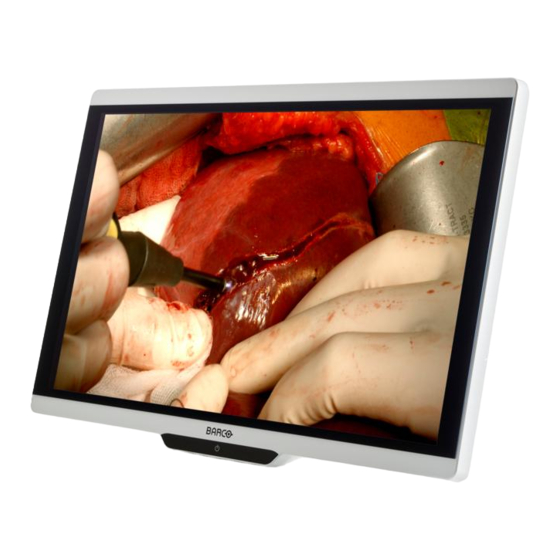
- Page 1 MDSC-8527 27” 4K UHD surgical display User Guide MDSC-8527 SSTP ENABLING BRIGHT OUTCOMES...
- Page 2 Registered office: FIMI S.r.l. Via Vittor Pisani 6, 20124 Milano, Italy www.barco.com/en/support www.barco.com Factory: FIMI S.r.l. Via Saul Banfi 1, 21047 Saronno, Italy...
-
Page 3: Table Of Contents
DisplayPort connector ..............................9 1.4.6 HDMI connector................................10 2 Display installation....................................11 Cover removal ....................................12 Interface connection..................................12 2.2.1 MDSC-8527 SSTP version............................12 Power supply connection ................................13 Cable routing .....................................14 VESA mount installation ................................15 3 Daily operation ......................................17 On/off switching ....................................18 Front keyboard locking/unlocking............................18 Power status LED ..................................19... - Page 4 Display status................................35 5 Troubleshooting ......................................37 Troubleshooting list..................................38 6 Important information..................................39 Safety information...................................40 Cybersecurity ....................................43 Environmental information.................................43 Biological hazard and returns ..............................45 Regulatory compliance information ............................45 EMC notice ......................................46 Cleaning instructions..................................49 Explanation of symbols................................49 Legal disclaimer....................................53 6.10 Technical specifications................................53 R5914634 /00 MDSC-8527...
-
Page 5: Welcome
(BLOS), the surgical display also ensures a long lifetime and low power consumption. Ease of installation The MDSC-8527 comes with a smart cable management system that hides the cables for a clutter-free set-up. Equipped with VESA 100 interface to allow easy mounting on surgical booms and spring arms. Available in different models, this surgical display also features a host of connectivity options and remote control. -
Page 6: What's In The Box
1.2 About this user guide Overview This manual provides support to the user during the installation, set up and utilization of the MDSC-8527 display. Depending on the specific version that has been purchased, some of the features and options described in this document may not apply to the display in user’s hands. -
Page 7: Product Overview
6. HDMI 2 in 7. HDMI 1 in 8. DisplayPort 1.2 in 9. DisplayPort 1.2 out 10. USB 2.0 type A interface 11. USB 2.0 type B interface The BNC SDI connectors match the characteristic impedance of 75 ohm cables. R5914634 /00 MDSC-8527... -
Page 8: Connector Pin Assignments
20. Not connected 21. Not connected 22. GND (clock shield) 23. CK_Rx+ (T.M.D.S.) 24. CK_Rx- (T.M.D.S.) (*) +5 VDC output selectable on either pin 14 or 16 via the OSD menu. (+5V ± 10% @ 500mA (max)) R5914634 /00 MDSC-8527... -
Page 9: Usb Type A Connector
10. ML_Lane 0 (n) 11. GND 12. ML_Lane 0 (p) 13. CONFIG1 14. CONFIG2 15. AUX CH (p) 16. GND 17. AUX CH (n) 18. Hot Plug 19. Return 20. DP_PWR (+3.3 VDC @ 500 mA max) R5914634 /00 MDSC-8527... -
Page 10: Hdmi Connector
7. T.M.D.S. Data0+ 8. T.M.D.S. Data0 Shield 9. T.M.D.S. Data0- 10. T.M.D.S. Clock+ 11. T.M.D.S. Clock Shield 12. T.M.D.S. Clock- 13. CEC 14. Not connected 15. DDC_SCL 16. DDC_SDA 17. DDC/CEC GND 18. +5VDC POWER (in) 19. HDP R5914634 /00 MDSC-8527... -
Page 11: Display Installation
Display installation R5914634 /00 MDSC-8527... -
Page 12: Cover Removal
“Picture-by-Picture (PBP)”, page 30 for more information. Beside the video input connections, the MDSC-8527 also has video output capabilities allowing you to loop- through or duplicate all video inputs connected with the MDSC-8527 to another display, projector, video recorder, ... -
Page 13: Power Supply Connection
1. Connect the supplied external DC power supply unit to the +25 VDC power input of your display. 2. Plug the other end of the external DC power supply into a grounded power outlet by means of the proper power cord delivered in the packaging. Image 2–3 R5914634 /00 MDSC-8527... -
Page 14: Cable Routing
The MDSC-8527 display protective earth connection is provided via a dedicate pin (see next steps). Protective earth Earth the MDSC-8527 by connecting the protective earth pin to a grounded outlet by means of a yellow/green AWG18 wire (maximum admitted cable length according to national regulation requirements). Image 2–4 CAUTION: The display must be earthed. -
Page 15: Vesa Mount Installation
CAUTION: Use an arm that is in compliance with VESA requirements. CAUTION: The monitor VESA interface has been designed for a safety factor 6 (to support 6 times the monitor weight). In the medical system, use an arm with suitable safety factor (IEC60601–1). R5914634 /00 MDSC-8527... - Page 16 Display installation R5914634 /00 MDSC-8527...
-
Page 17: Daily Operation
Daily operation R5914634 /00 MDSC-8527... -
Page 18: On/Off Switching
After unlocking the front keyboard, all keys will light up. Touching any of these keys while the backlight is on will execute the function of the key. However, if no further action is taken within the time-out (10 seconds), the keys will dim again and the keyboard will re-lock. R5914634 /00 MDSC-8527... -
Page 19: Power Status Led
About the front menu The MDSC-8527 has a front menu which is used to activate the OSD main menu but which also supports 3 user key functions. These user keys allow to immediately activate a commonly used function without having to access and browse the OSD menus. - Page 20 Select a gamma preset selectable options in the fron menu is greater than 4) Select a main input source Enable/disable horizontal flip Adjust the brightness level Select a Picture in Picture mode Select a color space preset R5914634 /00 MDSC-8527...
-
Page 21: Osd Menu
1024x768 @ 100 Hz Picture Pro le Picture Brightness advanced Contrast Input select Saturation Con g. Color Temperature 6500K Color Space ITU709 System Gamma Native Sharpness Image 3–4 1. Menu pages 2. Sub-menus (menu items) 3. Status bar R5914634 /00 MDSC-8527... -
Page 22: Control Lock
To unlock the menu 1. Unlock the front keyboard (see “Front keyboard locking/unlocking”, page 18). 2. When the OSD lock window appears, press the following key sequence to unlock the menu: left - right - right - up R5914634 /00 MDSC-8527... -
Page 23: Advanced Operation
Advanced operation Not all features described in the chapter “Advanced operation” are available. The features not available in specific software versions are shown on OSD menu in light-grey. R5914634 /00 MDSC-8527... -
Page 24: Picture Menu
To adjust the contrast level 1. Bring up the OSD main menu. 2. Navigate to the Picture menu. 3. Enter the Contrast submenu. The command bar Contrast is highlighted. 4. Set the contrast level as desired and confirm. R5914634 /00 MDSC-8527... -
Page 25: Saturation
BT.2020 reproducible colors are within the limit of the LCD panel color gamut. Factory calibration – Color space: RGB primary calibration, according to the selected standard, is performed within the physical limitation of the LCD panel used. R5914634 /00 MDSC-8527... -
Page 26: Gamma
To adjust the sharpness level 1. Bring up the OSD main menu. 2. Navigate to the Picture menu. 3. Enter the Sharpness submenu. The command bar Sharpness is highlighted. 4. Set the sharpness level as desired and confirm. R5914634 /00 MDSC-8527... -
Page 27: Picture Advance Menu
2. Navigate to the Picture Advanced menu. 3. Enter the Zoom submenu. The zoom command bar is highlighted. 4. Adjust the zoom level as desired and confirm. 4.2.4 Pan This function is not available when DisplayPort mode is set to DP 1.2 MST. R5914634 /00 MDSC-8527... -
Page 28: Image Flip
Auto Search Available main source options may differ depending on display model. To select the main source 1. Bring up the OSD main menu. 2. Navigate to the Input Select menu. 3. Enter the Main Source submenu. R5914634 /00 MDSC-8527... -
Page 29: Displayport Mode
(7 sec) disabled. To select the failover input 1. Bring up the OSD main menu. 2. Navigate to the Input Select menu. 3. Enter the Failover Input submenu. 4. Select one of the available failover inputs and confirm. R5914634 /00 MDSC-8527... -
Page 30: Picture-By-Picture (Pbp)
(PiP image) is displayed in the following table. Primary input Secondary input DP 1.2 SST HDMI-1 HDMI-2 3G-SDI DP 1.2 SST HDMI-1 HDMI-2 Picture-by-Picture and Picture-in-Picture not available when DisplayPort mode is set to DP 1.2 MST. R5914634 /00 MDSC-8527... -
Page 31: Configuration Menu
The OSD menu of your display is available in multiple languages. To select the language 1. Bring up the OSD main menu. 2. Navigate to the Configuration menu. 3. Enter the Language submenu. 4. Select one of the available languages and confirm. R5914634 /00 MDSC-8527... -
Page 32: Osd Time-Out
• User 3 To save a profile 1. Bring up the OSD main menu. 2. Navigate to the Configuration menu. 3. Enter the Save Profile submenu. 4. Select one of the available profiles to save and confirm. R5914634 /00 MDSC-8527... -
Page 33: Front Menu User Keys
Advanced operation 4.4.6 Front menu user keys About front menu user keys The MDSC-8527 has a front menu (see “Front menu ”, page 19) which supports 3 user key functions. These user keys allow to immediately activate a commonly used function without having to access and browse the OSD menus. -
Page 34: Profile Name
(are) missing. To enable/disable power saving 1. Bring up the OSD main menu. 2. Navigate to the System menu. 3. Enter the Power Saving submenu. 4. Select one of the available options and confirm. R5914634 /00 MDSC-8527... -
Page 35: Video Out
This information shows the SW versions of the main components within the display. To consult display status 1. Bring up the OSD main menu. 2. Navigate to the System menu. 3. The display status information is shown. R5914634 /00 MDSC-8527... - Page 36 Advanced operation R5914634 /00 MDSC-8527...
-
Page 37: Troubleshooting
Troubleshooting R5914634 /00 MDSC-8527... -
Page 38: Troubleshooting List
The display is not powered or the unit is not working. switch on, the front LED is not visible. DP, HDMI, DVI input is available but no image is Check if the input signal has HDCP revision > 1.4 displayed. R5914634 /00 MDSC-8527... -
Page 39: Important Information
Important information R5914634 /00 MDSC-8527... -
Page 40: Safety Information
The user should not touch the equipment, nor its signal input ports (SIP)/signal output ports (SOP) and the patient at the same time. Mission critical applications We strongly recommend there is a replacement monitor immediately available in mission critical applications. R5914634 /00 MDSC-8527... - Page 41 The equipment is IP21 (IP45 front side only) compliant with a tilt of ± 10°. The PSU only is IP20 compliant. Moisture condensation • Do not use monitor under rapid temperature and humidity change condition or avoid cold air from air- conditioning outlet directly. R5914634 /00 MDSC-8527...
- Page 42 Sufficient expertise is required for installing this equipment, especially to determine the strength of the wall for withstanding the display's weight. Be sure to entrust the attachment of this equipment to the wall to licensed contractors of Barco and pay adequate attention to safety during the installation and usage. •...
-
Page 43: Cybersecurity
6.2 Cybersecurity Hospital IT security To prevent unauthorized access to the device, the organization incorporating the MDSC-8527 in their IT network, shall have the necessary state of the art policies, processes, standards and other security measures in place to incorporate, support and protect a medical device into the IT network. This shall include the application of risk management (e.g. - Page 44 Mainland, marked with the Environmental Friendly Use Period (EFUP) logo. The number inside the EFUP logo that Barco uses (please refer to the photo) is based on the “General guidelines of environment-friendly use period of electronic information products” of Chinese Mainland.
-
Page 45: Biological Hazard And Returns
Notice to the user and/or patient Any serious incident that has occurred in relation to the device should be reported to the manufacturer and the competent authority of the Member State in which the user and/or patient is established. R5914634 /00 MDSC-8527... -
Page 46: Emc Notice
The manufacturing country of the product is indicated on the product label (“Made in …”). Importers contact information To find your local importer, contact one of Barco’s regional offices via the contact information provided on our website (www.barco.com). FCC class B This device complies with Part 15 of the FCC Rules. - Page 47 Consult the dealer or an experienced technician for help. Electromagnetic immunity The MDSC-8527 is intended for use in the electromagnetic environment specified below. The customer or the user of the MDSC-8527 should assure that it is used in such an environment.
- Page 48 Important information Electromagnetic Immunity test Compliance level IEC 60601 test levels environment – guidance MDSC-8527 be powered Voltage interruptions: 0% Voltage interruptions: 0% from an uninterruptible residual voltage for 250 residual voltage for 250 power supply or a battery periods at 0°...
-
Page 49: Cleaning Instructions
CAUTION: Do not apply or spray liquid directly to the display as excess liquid may cause damage to internal electronics. Instead, apply the liquid to a cleaning cloth. 6.8 Explanation of symbols Symbols on the device On the device or power supply, you may find the following symbols (nonrestrictive list): R5914634 /00 MDSC-8527... - Page 50 Indicates the device is approved according to the RCM regulations. Indicates the device is approved according to the EAC regulations. Caution: Federal law (United Stated of America) restricts this device to sale by or on the order of a licensed healthcare practitioner. R5914634 /00 MDSC-8527...
- Page 51 Warning: dangerous voltage Caution Consult the Instructions For Use. Consult the Instruction For Use on website address that is provided as eIFU indicator. eIFU indicator Values for xx and yy can be found in the technical specifications paragraph. R5914634 /00 MDSC-8527...
- Page 52 Indicates that the box should not be cut with a knife, a cutter or any other sharp object. Indicates the temperature limits to which the device can be safely exposed when being stored. +60 °C -20 °C R5914634 /00 MDSC-8527...
-
Page 53: Legal Disclaimer
Barco software products are the property of Barco. They are distributed under copyright by Barco NV or Barco Inc., for use only under the specific terms of a software license agreement between Barco NV or Barco Inc. and the licensee. No other use, duplication, or disclosure of a Barco software product, in any form, is authorized. - Page 54 Weight: 0.9 kg (2 lbs) DC power output DP connector: +3.3 V / 500 mA USB connector: +5 V / 1 A HDCP (High-bandwidth Digital Content Protection) is a copyright protection technology using encryption technology of digital video signals. R5914634 /00 MDSC-8527...
- Page 55 Protection level IP21 (IP45 front side only) Warranty 3 years Supported timings Full HD and 4MP timings Format HDMI 720x487@59.94Hz (NTSC) 720x480p@59.94Hz 720x480p@60.00Hz 720x576i@50.00Hz (PAL) 720x576p@50.00Hz R5914634 /00 MDSC-8527...
- Page 56 HDMI 800x600@60.00Hz 800x600@75.00Hz 1024x768@60.00Hz 1024x768@70.00Hz 1024x768@75.00Hz 1152x864@75.00Hz 1280x720p@50.00Hz 1280x720p@59.94Hz 1280x720p@60.00Hz 1280x1024p@60.0Hz 1400x1050p@60.00Hz 1600x1200p@60.00Hz 1680x1050p@60.00Hz 1920x1080p@29.97Hz 1920x1080p@30.00Hz 1920x1080p@50.00Hz 1920x1080p@59.94Hz 1920x1080p@60.00Hz 1920x1200p@60.00Hz 2560x1440p@60.00Hz 2560x1600p@60.00Hz UHD/4K timings Format HDMI 3840x2160@25.00Hz 3840x2160@30.00Hz 3840x2160@50.00Hz 3840x2160@60.00Hz (*) This is a DP 1.1 format R5914634 /00 MDSC-8527...
- Page 58 Barco NV President Kennedypark 35 8500 Kortrijk Belgium R5914634 /00 | 2021-09-09 www.barco.com...
Need help?
Do you have a question about the MDSC-8527 and is the answer not in the manual?
Questions and answers