
Related Manuals for Bernette b48 FUNLOCK


Summary of Contents for Bernette b48 FUNLOCK
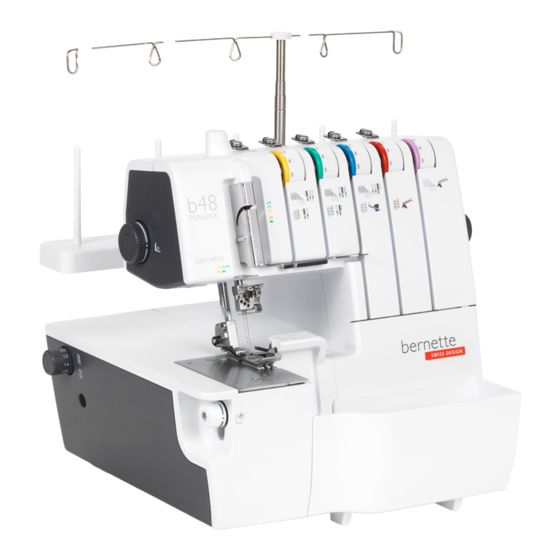
- Page 1 Bernette Funlock B48 Coverstitch/Overlocker Machine View & Buy Here: https://www.thesewingstudio.co.uk/bernette-funlock-b48-overlocker-machine.ir...
- Page 2 Instruction Manual...
-
Page 4: Table Of Contents
TABLE OF CONTENTS Threading Diagram Overlock and Chainstitches NAME OF PARTS Threading Diagram Coverstitches Details of machine Threading the Upper Looper (Blue) ACCESSORIES Threading the Lower Looper (Red) Standard Threading the Chainstitch/ Coverstitch Looper (Violet) Needle Information Threading the Overlock Right Needle (Green) HOW TO OPEN LOOPER COVER Threading the Overlock Left Needle (Yellow) Principal Parts behind the Looper Cover... - Page 5 SPECIFICATION 4-Thread Overlock with integrated safety seam Technical Summary 2-Thread Overlock & Chain 3-Thread Overlock & Chain HOW TO SEW A Coverstitch Machine set up Additional Information about Coverstitch 3-Thread Coverstitch 4-Thread Coverstitch Securing the seam end HOW TO SEW A ROLLED HEM Machine set up Additional information about rolled hemming 3-Thread Narrow Seam...
- Page 6 IMPORTANT Precautions should always be followed, machine they must including the following: supervised. Read all the instructions before using this Never operate this machine if: machine. the cord or the plug are damaged, ⦁ In general when the machine is not in it is not working properly, ⦁...
- Page 7 13. Always use the original BERNINA WARNING: stitch plate. The wrong stitch plate This machine is intended for household can cause needle breakage. use only. If used intensively or commer- 14. This machine is provided with double cially, regular cleaning and especially insulation (except for USA and attentive care is required.
-
Page 8: Name Of Parts
NAME OF PARTS Details of machine Retractable thread stand Looper cover Carrying handle Power / Light switch Left needle thread tension lever (yellow) Stitch length dial Right needle thread tension dial (green) Handwheel Upper looper thread tension dial (blue) Thread stand Lower looper thread tension dial (red) Spool stabilizer Chainstitch looper thread tension dial (violet) - Page 9 Presser foot lifter Differential feed dial Cutting width dial Presser foot pressure wheel Standard presser foot Overlock/Coverstitch...
-
Page 10: Accessories Standard
ACCESSORIES Standard Screw driver (large size) Oiler Spool net (5x) Spare upper knife Spool cap (5x) Brush Needle set (ELx705) Needle Threader / inserter Allen screw driver (small) Tweezers Upper looper converter (ULC) Spool stabilizer (5x) Dust cover Cut-offs Bin Cover-/Chainstitch Insert Needle Information This overlock uses a flat shank industrial needle... -
Page 11: How To Open Looper Cover
HOW TO OPEN LOOPER COVER CAUTION: Be sure to turn off power switch. 1. Push the cover to the right as far as it will go. 2. Pull cover down toward you. CAUTION: Be sure looper cover is closed when sewing. Principal Parts behind the Looper Cover Upper looper... -
Page 12: Cut-Offs Bin
• Polarized plug information (FOR USA & CANADA ONLY) This appliance has a polarized plug (one blade wider than the other). To reduce the risk of electric shock, this plug is intended to fit in a polarized outlet only way. If the plug does not fit fully in the outlet, reverse the plug. -
Page 13: Preparation For Threading
PREPARATION FOR THREADING Setting up the Retractable thread stand – Take out the retractable thread stand from the top of Styrofoam, and insert it as shown on the left illustration. – This machine is shipped with the retractable thread stand on the top of styrofoam. –... -
Page 14: How To Disengage Upper Knife
HOW TO DISENGAGE UPPER KNIFE CAUTION: Be sure to turn off power switch. • To place upper knife in nonworking position – Open looper cover (refer page 10). – Pull the upper knife holder to the right as far as it will go. –... -
Page 15: Upper Looper Converter (Ulc)
UPPER LOOPER CONVERTER (ULC) CAUTION: Be sure to turn off power switch. When not threading the upper looper, the upper looper converter must be engaged into the upper looper eye. Attach the Upper Looper Converter – To engage the upper looper converter, insert the sharp part into the eye of upper looper. -
Page 16: Sew Rolled Hem
Sew Rolled Hem Set seam width finger knob to "R" to retract the seam width finger and set it for rolled hem. PLEASE NOTE: Be sure to push seam width finger knob as far as it will go in the direction of setting "R". HOW TO REMOVE AND INSERT NEEDLES Needle Position... -
Page 17: To Remove Needle(S)
C D E To Remove Needle(s) CAUTION: Be sure to disconnect the machine from the electric outlet before removing needle(s). – Turn the hand wheel counterclockwise until the needles are at their highest position. – Hold the needle to be removed with the needle holder (stored in the looper cover). - Page 18 STITCH OVERVIEW This machine is capable of producing various types of stitches according to the combination of needle positions, threading methods, tension adjustment and the use of upper looper converter ULC. Stitch Type Page 2–needle 4–Thread stitch that is ideal for medium 4–Thread Overlock with integrated to heavyweight stretchy fabrics such as double safety seam...
- Page 19 Stitch Type Page The 5-Thread stitch is a safety stitch made up of combined 3-Thread overlock double 3-Thread Overlock & Chain wide chainstitch. A wide seam is formed by using left needle. 3-Thread Overlock & Chain narrow Overlock and seaming can be done in one operation on non-stretch fabrics.
-
Page 20: Threading The Machine List Of Abbreviations
Depending on the needle positions used, this machine can sew 2-/3- and 4-Thread Overlock Stitches at a width of 4mm and 6 mm. Also, for overedging heavyweight fabrics, the seam width can be increased still more by turning the cutting width dial. -
Page 21: Threading Chart Summary
Threading Chart Summary Machine Settings Thread Tension Stitch Type KG/CSI Yellow Green Blue Violet 4-Thread Overlock with integrated safety seam 3-Thread Super Stretch 3-Thread Overlock wide 3-Thread Overlock narrow 3-Thread Flatlock wide 3-Thread Flatlock narrow 3-Thread Narrow Seam 3-Thread Rolled Hem 2-Thread Wrapped Overlock wide 2-Thread Wrapped Overlock narrow 2-Thread Flatlock wide... -
Page 22: Threading Diagram Overlock Stitches
Threading Diagram Overlock Stitches – A color coded threading diagram is located inside the looper cover for quick reference. – Thread the machine in the order –( PLEASE NOTE: Threads go through the take-up lever cover for Overlock as shown. •... -
Page 23: Threading The Upper Looper (Blue)
Threading the Upper Looper (Blue) CAUTION: Be sure to turn off power switch. – Raise the presser foot to open the tension discs. – Thread the upper looper as indicated –( – Pass thread from back to the front through the thread guide –... -
Page 24: Threading The Lower Looper (Red)
– Thread the looper area of the machine following (4)–(8) the blue color coded thread guides – Thread the hole in the upper looper from front to back PLEASE NOTE: Make sure thread passes behind lower looper. Use of tweezers in the looper cover will make needle eye threading easy. - Page 25 – While holding thread with finger, pass it between the tension discs and pull thread down to make certain it is properly located in between the tension discs – Turn the handwheel toward you until the lower looper extends out 5–10 mm from the stitch plate edge.
-
Page 26: Threading The Chainstitch/Coverstitch Looper (Violet)
Threading the Chainstitch/ Coverstitch Looper (Violet) CAUTION: Be sure to turn off power switch. – Raise the presser foot to open the tension discs. – Thread the chainstitch/coverstitch looper as (1)–(11) indicated – Pass thread from back to the front through the thread guide (1). - Page 27 – Turn the hand wheel toward you until the chainstitch looper extends out 10mm from the throat plate edge. – Thread the looper area of the machine following the violet color-coded thread guides –( PLEASE NOTE: Use of tweezers in the looper cover will make needle eye threading easy.
-
Page 28: Threading The Overlock Right Needle (Green)
Threading the Overlock Right Needle (Green) (B On Needle Clamp) CAUTION: Be sure to turn off power switch. – Raise the presser foot to open the tension discs. – Thread the right needle as indicated –( – Pass thread from back to the front through the thread guide –... -
Page 29: Threading The Overlock Left Needle (Yellow)
– Continue to thread points –( PLEASE NOTE: Slip the thread into the rear slot on the thread guide and into the slot on the take-up lever cover . Then slip the thread into the right slot on the thread guides Before threading eye of needle, slip thread behind thread guide located on the bottom of the needle... - Page 30 – Thread the pre-tension guide by pulling the thread towards the right until it slips under guide . Then pull thread along the right side of pre- tension as illustrated. – While holding thread with fingers, pass it between the tension discs and pull thread down to make certain it is properly located in between the tension discs –...
-
Page 31: Threading The Coverstitch Needles
Threading the Coverstitch Needles • Right Coverstitch Needle (Blue) (E On Needle Clamp) CAUTION: Be sure to turn off power switch. – Raise the presser foot to open the tension discs. – Thread the right coverstitch needle as indicated (1)–(10) –... - Page 32 10). – Continue to thread points –( PLEASE NOTE: Slip thread into the rear slot on the thread guide and bottom slot of take-up lever cover Then slip thread into the right slot on the thread guide , and into the right slot on the thread guide Before threading the eye of the needle, make sure thread is in front of thread guide located on the bottom...
- Page 33 – Pass thread from back to the front through the thread guide (1). – Thread the pre-tension guide by pulling the thread towards the left until it slips under guide . Then pull thread along the right side of pre- tension as illustrated.
- Page 34 (10) – Thread the eye of the center needle PLEASE NOTE: Use of tweezers in the looper cover will make needle eye threading easy. – The position of the thread must be behind the thread guide. – Draw about 10 cm (4 inches) of thread through needle eye towards the rear of machine.
- Page 35 – Thread the pre-tension guide by pulling the thread towards the left until it slips under guide . Then pull thread along the right side of pre- tension as illustrated. – While holding thread with fingers, pass it between the tension discs and pull thread down to make certain it is properly located in between the tension discs 10).
-
Page 36: How To Change Threads
HOW TO CHANGE THREADS Tie on method – To change thread type or color, clip thread near the spool. – Place new thread on stand. – Tie new thread and old thread ends together with a square knot. Clip thread tails to 2–3 cm (1 inch) length. -
Page 37: How To Adjust The Stitch Length
HOW TO ADJUST THE STITCH LENGTH Stitch lenght dial • – The stitch length dial should be set on the " 2.5" setting for most sewing conditions. – Adjust the stitch length to 2.5 – 4 when sewing heavy weight fabrics. –... -
Page 38: How To Adjust The Presser Foot Pressure Presser Foot Pressure Wheel
– Turn the cutting width dial counter clockwise to increase width of cutting, and clockwise to decrease width of cutting. HOW TO ADJUST THE PRESSER FOOT PRESSURE Presser foot pressure wheel The presser foot pressure of this machine is pre- adjusted at the factory to suit the sewing of medium weight fabrics. -
Page 39: Differential Feed
DIFFERENTIAL FEED – Differential feed is a system which "stretches" or "gathers" the fabric, when the amount of feed of front feed dogs in relation to the rear feed dogs is changed. – The differential feed ratio ranges from 0.6–2.0. Adjustment is made by means of the differential feed dial pictured at left. -
Page 40: Stretch Overlock (1 - 0.6)
Stretch Overlock (1 0.6) – Stretch overlock is ideal for sewing decorative collars, sleeves, skirt hems, etc. on loosely knit and woven fabrics. • To set the differential feed dial for stretch – To stretch, set the differential feed between 0.6 and 1. -
Page 41: Chaining Off And Test Sewing
CHAINING OFF AND TEST SEWING PLEASE NOTE: The following instructions do not apply to cover- stitch. For instructions on coverstitch, see page 51 “How to Sew a Coverstitch.” – When the machine is completely threaded, bring all of the threads across the stitch plate and slightly to the left under the presser foot. -
Page 42: How To Sew A Chainstitch
HOW TO SEW A Chainstitch 2-Thread Chainstitch PLEASE NOTE: – These are suggested tension settings only. – Tension settings are effected by; 1. Type and thickness of fabric 2. Needle size 3. Size, type and fiber content of thread Refer page 15 –... -
Page 43: Machine Set Up
Machine set up The 2-Thread chainstitch is sewn with 2 threads, one needle and one looper. Normally, the machine trims the fabric edge while the seam is being sewn. However, a chainstitch seam can be placed at a desired distance from edge of fabric by putting the knife in a nonworking position, disengaging the upper looper and installing the chainstitch seam guide plate. -
Page 44: How To Sew A Overlock Stitch 2-Thread Wrapped Overlock
HOW TO SEW A OVERLOCK STITCH 2-Thread Wrapped Overlock PLEASE NOTE: – These are suggested tension settings only. – Tension settings are effected by; 1. Type and thickness of fabric 2. Needle size Refer page 15 3. Size, type and fiber content of thread Refer page 14/15 •... -
Page 45: 2-Thread Overlock
2-Thread Overlock PLEASE NOTE: – These are suggested tension settings only. – Tension settings are effected by; 1. Type and thickness of fabric 2. Needle size 3. Size, type and fiber content of thread Refer page 15 • Correct balance –... -
Page 46: 2-Thread Flatlock
2-Thread Flatlock PLEASE NOTE: – These are suggested tension settings only. – Tension settings are effected by; 1. Type and thickness of fabric 2. Needle size 3. Size, type and fiber content of thread Refer page 15 • Correct balance –... -
Page 47: 3-Thread Overlock
3-Thread Overlock PLEASE NOTE: – These are suggested tension settings only. – Tension settings are effected by; 1. Type and thickness of fabric 2. Needle size 3. Size, type and fiber content of thread Refer page 15 • Correct balance –... -
Page 48: 3-Thread Flatlock
3-Thread Flatlock PLEASE NOTE: – These are suggested tension settings only. – Tension settings are effected by; 1. Type and thickness of fabric 2. Needle size 3. Size, type and fiber content of thread Refer page 15 • Correct balance Refer page 14/15 –... -
Page 49: 3-Thread Super Stretch
3-Thread Super Stretch PLEASE NOTE: – These are suggested tension settings only. – Tension settings are effected by; 1. Type and thickness of fabric 2. Needle size 3. Size, type and fiber content of thread Refer page 15 • Correct balance Refer page 14/15 –... - Page 50 4-Thread Overlock with integrated safety seam PLEASE NOTE: – These are suggested tension settings only. – Tension settings are effected by; 1. Type and thickness of fabric 2. Needle size 3. Size, type and fiber content of thread Refer page 15 •...
- Page 51 2-Thread Overlock & Chain PLEASE NOTE: – These are suggested tension settings only. – Tension settings are effected by; 1. Type and thickness of fabric 2. Needle size 3. Size, type and fiber content of thread Refer page 15 • Correct balance Refer page 14/15 –...
-
Page 52: 3-Thread Overlock & Chain
3-Thread Overlock & Chain PLEASE NOTE: – These are suggested tension settings only. – Tension settings are effected by; 1. Type and thickness of fabric 2. Needle size 3. Size, type and fiber content of thread • Correct balance Refer page 15 –... -
Page 53: How To Sew A Coverstitch
HOW TO SEW A Coverstitch – This machine can produce a 3-thread 5.6 mm wide bottom coverstitch. – The coverstitch can be used for covering, binding or top-stitching necklines and for hemming the bottom, of T-shirts and sweat suits, etc. in addition to flat joining seams (plain seaming). -
Page 54: Additional Information About Coverstitch
Additional Information about Coverstitch ( a ) • At start of sewing Raise presser foot. Place fabric under presser foot behind the ( c ) needle. Lower presser foot. PLEASE NOTE: When you start to sew from the middle of the fabric, place the fabric at the desired of starting ( d ) point of sewing. -
Page 55: 3-Thread Coverstitch
3-Thread Coverstitch PLEASE NOTE: – These are suggested tension settings only. – Tension settings are effected by; 1. Type and thickness of fabric 2. Needle size 3. Size, type and fiber content of thread – Stitch length for coverstitch should be set at •... -
Page 56: 4-Thread Coverstitch
4-Thread Coverstitch PLEASE NOTE: – These are suggested tension settings only. – Tension settings are effected by; 1. Type and thickness of fabric 2. Needle size 3. Size, type and fiber content of thread – Stitch length for coverstitch should be set at •... -
Page 57: Securing The Seam End
Securing the seam end – Since the seams formed by coverstitch unravel when the looper thread is pulled out at the end of sewing, secure the seam end in the following manner. – When sewing through to the edge of fabric, among the threads coming out of the fabric edge, knot the needle threads (2- or 3-Threads) together first, as shown on the left illustration. -
Page 58: How To Sew A Rolled Hem
HOW TO SEW A ROLLED HEM – This machine can sew three types of rolled hems. – Rolled hemming is done by rolling and overedging the fabric edge. – Light weight fabrics such as lawn, voile, organdy, crepe, etc. perform the best. –... -
Page 59: Additional Information About Rolled Hemming
Additional information about rolled hemming – Hold the thread chain when you begin sewing to keep it from curling into the seam. – Place a slight tension on the material in the sewing direction and a finer seam finish can be obtained. -
Page 60: 3-Thread Narrow Seam
3-Thread Narrow Seam PLEASE NOTE: For a beautiful narrow seam thread the upper and lower looper with wooly nylon and the needle with fine normal overlock thread. • Correct balance Refer page 15 – Set each tension dial to recommended setting and test sew on a sample of your fabric. -
Page 61: 2-Thread Rolled Hem
2-Thread Rolled Hem PLEASE NOTE: For a beautiful rolled hem thread the lower looper with wooly nylon and the needle with light weight regular thread. • Correct balance – Set each tension dial to recommended setting Refer page 15 and test sew on a sample of your fabric. Refer page 14/15 Refer page 33 CL/UL... -
Page 62: Stitch Variations And Sewing Techniques
STITCH VARIATIONS AND SEWING TECHNIQUES How To Sew A Flatlock Decorative Seam A flatlock stitch is achieved by adjusting the tension of the 2-Thread or 3-Thread overlock stitch, sewing the seam, and then pulling the fabric apart to flatten the seam. - Page 63 • Decorative Flatlocking – Disengage the upper knife (page 13). The fabric is not trimmed on this stitch. – Fold fabric wrong sides together. – Position the fabric so the seam is sewn with part of the stitch extending off the fabric. –...
-
Page 64: How To Sew An Overlock Blind Hem
How to sew an Overlock Blind Hem The excess fabric is trimmed and the hem is sewn and the raw edges are overlocked in one operation. The overlock blind hem is best suited for sewing knit wear. It provides a durable finish that is almost invisible. -
Page 65: How To Turning Square Corners
– Fold the fabric with the wrong sides together and sew. – Press the pin tucks in the same direction. How to turning Square Corners • Outside Corner – Cut out approximately 2 cm (51/64 inch) from the corner, in line with the overlock seam edge. 2 cm 2 cm –... - Page 66 • Inside Corner – Cut inside corner up to seam line as shown. – Sew along seam line. – Sew up to end of fold. (Leave needle in fabric) PLEASE NOTE: Presser foot has been removed to show detail. – Raise presser foot.
-
Page 67: How To Reinforce A Seam
How to Reinforce a Seam – Inserting twill tape while overlock sewing will stabilize the seam. – Insert the tape through the hole in the front of the foot. – Position the tape under the foot to the back of the machine and sew the garment seam. -
Page 68: Machine Maintenance
MACHINE MAINTENANCE An overlock machine requires more maintenance than a conventional machine for two reasons: 1. A lot of lint is produced due to the cutting action of the knives. 2. An overlock runs at a very high speed and needs to be oiled frequently to lubricate the internal working parts. -
Page 69: Replace The Upper Knife
Replace the Upper Knife CAUTION: Before replacing the upper knife, disconnect power line plug from the wall receptacle. – The upper knife should be changed when it becomes dull. – The upper knife can be replaced according to the directions provided, however if there are any difficulties experienced, consult your dealer representative to make the replacement. -
Page 70: Optional Accessories
OPTIONAL ACCESSORIES The following optional presser feet specially prepared for this machine are available at extra-charge. PLEASE NOTE: Do not use presser foot made for other machi- nes. Use of such presser foot may result in inter- ference with the needle and knife and can be hazardous. -
Page 71: Optional Overlock Presser Foot
Optional Overlock Presser Feet • Elasticator Foot – This foot is used for attaching elastic tape to the garment and the amount of contraction of the elastic tape can be adjusted as required. • Blind stitch Foot – This foot is for sewing cuffs on knit fabrics, skirt and trouser seams where seam should not be visible. -
Page 72: Optional Cover Presser Foot
Optional Cover Presser Feet • Cording Foot – This presser foot guides decorative and fine cords of up to 2 mm thickness exactly and precisely below the coverstitch seam as they are being sewn on. Alternatively, it can also be used to create and insert piping. -
Page 73: Troubleshooting Overview
TROUBLESHOOTING Overview Condition Cause Remedy Page Fabric does not Lengthen stitch length. feed well. Increase presser foot pressure for heavy weight fabric. Decrease presser foot pressure for light weight fabric. Needle breaks Insert needle correctly. Do not pull fabric while sewing. Tighten needle set screw. -
Page 74: Fabric, Thread And Needle Chart
FABRIC, THREAD AND NEEDLE CHART Overview Woven Fabric Thread Needle ELx705 Lawn Cotton: #100 Organdy Silk/ Rayon: #100 Light weight #80/12 Voile Spun: #80 – #90 Crepe Polyester: #80 – #100 Muslin Cotton: #60 – #80 Seersucker Silk/ Rayon: Medium weight Satin #90/14, #80/12 Spun:... - Page 75 SPECIFICATION Technical Summary Stitch Formations 23 stitches 1-3 needles 2 loopers Needle system ELx705 Cutting width 5-7 mm from the left needle 3-5 mm from the right needle Stitch length 1-4 mm (standard: rolled hemming 1-2, ordinary overlock N=2.5) Differential feed stretching 0.6 - 1 gathering 1 - 2 Presser foot lift...
- Page 77 EN – 06/2017 – 4rd Edition 5040007.0.04 / G8P02 © BERNINA International AG Steckborn CH, www.bernina.com www.mybernette.com/yellow-shirt...
Need help?
Do you have a question about the b48 FUNLOCK and is the answer not in the manual?
Questions and answers