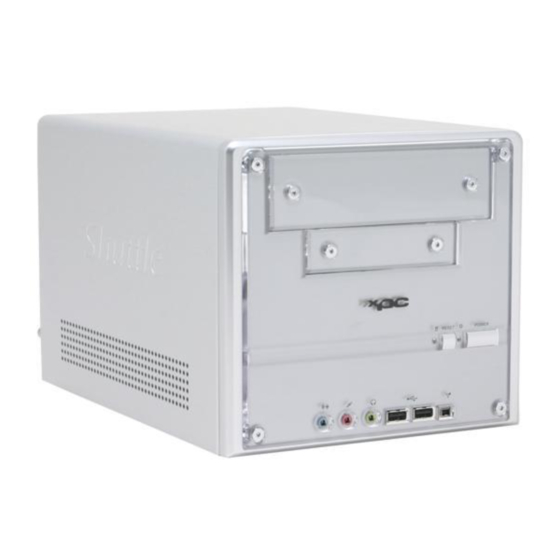
Shuttle XPC User Manual
Hide thumbs Also See for XPC:

Advertisement

Quick Links

XPC User Guide
For the : SS30G2

Advertisement

Table of Contents
loading

Summary of Contents for Shuttle XPC

  • Page 1 XPC User Guide For the : SS30G2...
  • Page 2 Shuttle XPC EMI Test Statement Shuttle XPC have been via the EMI test in terms of series of regulations: EN55022/CISPR22/ AS/NZS3548 Class B, EN55024 (1998/AS/NZS), EN4252.1 (1994), EN61000, ANSI C63.4 (1992), CFR47 Part 15 Subpart B, and CNS13438 (1997). The items tested are illustrated as follows: (A) Voltage: AC 110V/60HZ &...
  • Page 3 200MHz Intel Pentium D 930 3.0 GHz Close 200MHz Intel Pentium D 930 3.0 GHz Open 133MHz Intel Pentium4 2.8 GHz Close 133MHz Intel Pentium4 2.8 GHz Open 133MHz Intel Celeron D 356 3.3 GHz Close 133MHz Intel Celeron D 356 3.3 GHz Open (C) Remedy for the Tested Product &...
  • Page 4 2. This device must accept any interference received, including interference that may cause undesired operation. Trademarks Shuttle is a registered trademark of Shuttle Inc. Intel and Pentium are registered trademarks of Intel Corporation. PS/2 is a registered trademark of IBM Corporation.
  • Page 5 Read the following precautions before setting up a Shuttle XPC. CAUTION Incorrectly replacing the battery may damage this computer. Replace only with the same or equivalent as recommended by Shuttle. Dispose of used batteries according to the manufacturer's instructions. Installation Notices Do not place this device underneath heavy loads or in an unstable position.
  • Page 6: Table Of Contents

    TABLE OF CONTENTS 1 Driver and Software Installation ................1 1.1 Mainboard Driver CD ..................1 1.1.1 Install Mainboard Software ..............2 Appendix ........................3 Enter the BIOS ..................... 3 THE MAIN MENU ....................4 Standard CMOS Features ................6 Advanced BIOS Features ................
  • Page 7: Driver And Software Installation

    Note : The CD contents attached in SS30G2 mainboard are subject to change without notice. The Mainboard Driver CD contains all the motherboard driver necessary to optimize the performance of this XPC in a Windows(R) OS. Install these drivers after installing Microsoft(R) Windows(R). Navigation Bar Description : Install Mainboard Software - SiS VGA Driver, SiS IDE Driver, SiS RAID Driver, SiS LAN Driver, Realtek Audio Driver, SiS USB2.0 Driver, DirectX9 Utility.
  • Page 8: Install Mainboard Software

    Insert the attached CD into your CD-ROM drive. The CD AutoRun screen should appear. If the AutoRun screen does not appear, double click on Autorun icon in My Computer to bring up Shuttle Main-board Software Setup screen. Click the “Install Main-board Software“ bar. Individually install the following drivers.
  • Page 9: Appendix

    Appendix BIOS Settings The SS30G2 BIOS ROM has a built-in Setup program that allows users to modify basic system configuration. This information is stored in battery-backed RAM so that it re- tains Setup information even if the system power is turned off. The system BIOS manages and executes a variety of hardware related functions including: System date and time...
  • Page 10: The Main Menu

    The Main Menu Once you enter the AwardBIOS(tm) CMOS Setup Utility, the Main Menu will appear on the screen. The Main Menu allows you to select from several setup functions and two exit choices. Use the arrow keys to select among the items and press <Enter>...
  • Page 11 Power Management Setup Use this menu to specify your power management settings. PnP / PCI Configurations This entry appears if your system supports PnP / PCI. PC Health Status This entry displays the current system temperature, Voltage, and FAN settings. Frequency Control Use this menu to specify your settings for frequency control.
  • Page 12: Standard Cmos Features

    Standard CMOS Features The items in the Standard CMOS Setup Menu are divided into several categories. Each category includes none, one or more than one setup items. Use the arrow keys to highlight the item and then use the <PgUp> or <PgDn> keys to select the value you want in each item.
  • Page 13 Video Select the default video device. Ø The choice: EGA/VGA, CGA 40, CGA 80, or MONO. Halt On Select the situation in which you want the BIOS to stop the POST process and notify you. Ø The choice: All Errors, No Errors, All, But Keyboard, All, But Diskette, or All, But Disk/Key.
  • Page 14 Access Mode Choose the access mode for this hard disk. Ø The choice: CHS, LBA, Large, or Auto. Capacity Disk drive capacity (Approximated). Note that this size is usually slightly greater than the size of a formatted disk given by a disk checking program. Ø...
  • Page 15: Advanced Bios Features

    Advanced BIOS Features This section allows you to configure your system for basic operation. You have the opportunity to select the system's default speed, boot-up sequence, keyboard operation, shadowing, and security. CPU Feature Options are in its sub-menu. Press <Enter> to enter the sub-menu of detailed options. Thermal Management This item is select Thermal Management .
  • Page 16 Limit CPUID MaxVal Set Limit CPUID MaxVal to 3,Should Be "Disabled" for WinXp. Ø The Choice: Disabled or Enabled. Note: Some older O.S.'s (Win98,WinMe..) cannot handle a CPUID MaxVal greater than 3. Please choose "Enabled" if you use one of those O.S. If your O.S. is WinXP or Win2000, we suggest you "Disabled"...
  • Page 17 CPU L3 Cache This item allows you to enable or disable the CPU L3 Cache. Ø The choice: Enabled or Disabled. Note : CPU support, L3 item appear. Hyper-Threading Technology The latest Intel application defines a high-speed calculating ability to op timize your system by two CUPs supported(one virtual, one physical) in a multi-task environment.
  • Page 18 Boot Up NumLock Status Selects power on state for NumLock. Ø The choice: Off or On. Security Option Select whether the password is required every time the system boots or only when you enter setup. System The system will not boot and access to Setup will be denied if the correct password is not entered promptly.
  • Page 19: Advanced Chipset Features

    Advanced Chipset Features This section allows you to configure the system based on the specific features of the installed chipset. This chipset manages bus speeds and access to system memory resources, such as DRAM and the external cache. It also coordinates communica- tions between the conventional ISA bus and the PCI bus.
  • Page 20 DRAM Timing Control This item allows you to select the value in this field, depending on whether the board using which kind of DDR DRAM. Ø The Choice: Auto or Manual. RAS to CAS Delay(tRCD) Ø The Choice: 2T, 3T, 4T or 5T. Precharge Time(tRP) Ø...
  • Page 21: Integrated Peripherals

    Integrated Peripherals SIS Onboard IDE Device Options are in its sub-menu. Press <Enter> to enter the sub-menu of detailed options. Internal PCI/IDE This chipset contains and internal PCI IDE interface with support for two IDE channels. Ø The choice: Disabled, or Primary. IDE Primary Master/Slave PIO The four IDE PIO (Programmed Input/Output) fields let you set a PIO mode (0-4) for each of the four IDE devices that the onboard IDE interface...
  • Page 22 SiS Serial ATA Controller Use these item to enable or disable the SiS Serial ATA Controller. Ø The Choice: Enabled or Disabled. SiS Serial ATA Mode This item allows you to set the SATA Mode. Ø The Choice: IDE Mode, AHCI Mode or Raid Mode. IDE HDD Block Mode Select Enabled for automatic detection of the optimal number of block read/write per sector the drive can support.
  • Page 23 Onboard Serial Port1 Select an address and corresponding interrupt for the first and second serial ports. Ø The choice: 3E8/IRQ4, 2E8/IRQ3, 3F8/IRQ4, 2F8/IRQ3,Auto, or Disabled. Onboard Parallel Port This item allows you to determine onbaord parallet port controller I/O address setting. Ø...
  • Page 24: Power Management Setup

    Power Management Setup The Power Management Setup allows you to configure your system to most effectively saving energy while operating in a manner consistent with your own style of computer use. ACPI Function This item allows you to enable/disable the Advanced Configuration and Power Management (ACPI) Ø...
  • Page 25 Susp,Stby --> Off Monitor is blanked when the system enters either Suspend or Standby modes. All Modes --> Off Monitor is blanked when the system enters any power saving mode. Ø The choice: Always On, Suspend ->Off, Susp,stby -> Off, or All Modes ->...
  • Page 26 PM Wake Up Events Options are in its sub-menu. Press <Enter> to enter the sub-menu of detailed options. IRQ [3-7, 9-15], NMI When enabled, any event occurring at IRQs 3 through 15 (excluding IRQ 8) will awaken a system, which has been powered down. Ø...
  • Page 27 Power Up by Alarm When set to Enabled, the following three fields become available and you can set the month, date (day of the month), hour, minute and second to turn on your system. Ø The choice: Enabled, Disabled. Month Alarm This is for specifying the alarm month which system will awaken the system from suspend mode.
  • Page 28: Pnp/Pci Configurations

    PnP/PCI Configurations This section describes the configuration of PCI bus system. PCI or Personal Computer Interconnection is a system which allows I/O devices to operate at the speed CPU itself keeps when CPU communicat- ing with its own special components. This section covers some very technical items, and it is strongly recom- mended that only experienced users should make any changes to the default settings.
  • Page 29 choose specific resources by going into each of the sub-menu that fol- lows this field (a sub-menu is proceeded by a ">"). Ø The choice: Auto(ESCD) or Manual. IRQ Resources When resources are controlled manually, assign each system interrupt a type, depending on the type of device using the interrupt.
  • Page 30: Pc Health Status

    PC Health Status CPU Fan Speed Control Set the CPU Fan Speed. Ø The choice: Smart Fan, Ultra-Low, Low , Mid , or Full . Note: Before manually modifying the CPU fan setting, please make sure fan connectors are plug into the correct fan connector designations on the mainboard.
  • Page 31: Frequency/Voltage Control

    Frequency Control CPU Clock Ratio This item allows you to adjust CPU Ratio. Min: 8X Max: 50X Ø Key in a DEC number: (Between Min and Max.) Auto Detect DIMM/PCI Clk This item allows you to enable/disable auto detection DIMM/PCI Clock. Ø...
  • Page 32: Load Fail-Safe Defaults

    Load Fail-Safe Defaults When you press <Enter> on this item, you will get a confirmation dialog box with a message similar to: Load Fail-Safe Defaults (Y/N) ? N Pressing 'Y' loads the BIOS default values for the most stable, minimal system performance. Load Optimized Defaults When you press <Enter>...
  • Page 33: Save & Exit Setup

    2. Key in a new password. The password can not be over eight characters or numbers. 3. The system will then request you to confirm the new password by asking you to key in the new password again. 4. Once the confirmation is completed, new code is in effect. No Password Setting: 5.

This manual is also suitable for:

Ss30g2

Table of Contents