
Related Manuals for Heta Vista


Summary of Contents for Heta Vista
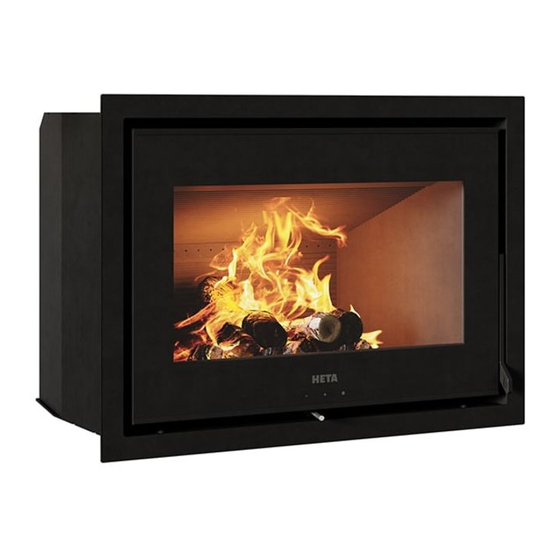
- Page 1 OPERATING AND INSTALLATION INSTRUCTIONS VISTA INSERT STOVE is exempt for use in smoke control areas when burning dry wood ECODESIGN READY www.heta.dk DANISH DESIGN . DANISH QUALITY . DANISH PRODUCTION...
- Page 2 Signed on behalf the manufacturer of 30.09.2020 ____________________________________________________________________________________________________________________ In case of any change of the above-mentioned production type this Declaration of Performance becomes invalid. Heta A/S, Jupitervej 22, DK-7620 Lemvig, Tlf. +45 9663 0600, www.heta.dk Page 1 of 1...
-
Page 3: Table Of Contents
Heta stove. Especially if you follow the following advice and instructions. The Vista insert is approved according to EN 13229, NS 3058 and NS 3059. These approvals, means that the wood stove insert meets a variety of specifications and requirements, ensuring it is made of quality materials, minimum environmental impact and that it has an optimum fuel economy. - Page 4 It is important that upon receipt check your Heta product completely and report any damage or defects to your dealer. The packaging must be disposed of as follows: Wood is untreated and able to burn in the stove.
-
Page 5: With Your New Wood Stove You Should Find The Following
DANSK DESIGN . DANSK KVALITET . DANSK PRODUKTION Heta glove Data plate 8120-0000-DK 8120-0100-DK 8120-0200-DK 8120-0300-DK DOP-Pres�ge Indsats-2237-2016 Heta A/S . Jupitervej 22 7620 Lemvig . Denmark Produk�ons år: 2016 DS/EN 13229/A2:2004/NS 3058/3059 Produkt beskrivelse Serie nr: Pres�ge Indsats Lukket ildsted For indbygning Brændsel... -
Page 6: Operating Instructions
1. OPERATING INSTRUCTIONS 1.1 Before using Before the wood stove is used make sure re- quired installation conditions, are met. See page 18-19. Fully open the combustion air and leave the door ajar (about 1 cm open). Once the fire is established and the chimney is hot (after about ten minutes) closed door and regulate the air into operating position. -
Page 7: Reduced Burning
Be aware that the stove will naturally soot if the ficiency. Heta wood stoves are constructed so operating air is too low. This is not good for the that it itself provides an optimal blend of com- environment. -
Page 8: Fuel
Good draft occurs when: • The difference in temperature in the chimney (warmer) and outside temperature (colder) • It is clear weather • The chimney has the right height min 4 meters Combustion above the stove, and clear of the roof ridge 1.10 Fuel Your new stove is EN approved for firing with wood fuel. -
Page 9: Operational Problems
Examples of fuel values When cleaning the chimney, soot and other deposits may come to fall on the baffle plate, for different woods and their typical densities remove and clean it. In cases where the wood per cubic meter, specified for 100% wood with burns too quickly, this may be due to excessive a moisture content of 18%. -
Page 10: Troubleshooting
1.13 Troubleshooting table Fault Cause Troubleshooting Solution Inadequate chimney draft. Lighting problems. When the You can test using a lighter whether Improve the chimney. The chimney only has stove is cold, smoke seeps flame is drawn into the combustion sufficient draft when it is hot. into the room. -
Page 11: Maintenance
VI = Visual Inspection, pos. cleaning/replacing/adjusting 1.17 Guarantee - Assembly / disassembly of warranty repair. Heta wood stoves, subjected to a strict quality control during production and before delivery to Should you have cause to make a complaint, the dealer. -
Page 12: Cleaning After Sweeping Or Before Replacing Vermiculite Stones
1.18 Cleaning after sweeping or before replacing vermiculite stones Note: it may be necessary to clean/vaccum the holes and air ducts behind the rear stone Removal sequence of stones. Replace in reverse order. Starting with Fig. 6. -
Page 13: Stove Data Table According With En 13229 Testing
Vista 1100 * See Clearances for installation on page 19. 1.20 Stove data table in accordance with EN 13240 testing Tested as a freestanding oven and with uninsulated flue Stove type... -
Page 14: Parts
1.20 Parts Stone Pos. No. Name Qty. 0023-013106 Rear stone, left - (Rib Landscape) 0023-013111 Baffle plate, vermiculite- (Rib Landscape) 1 0023-015049 Left side stone 0023-015530 Right side stone 0023-018885 Rear stone, right - (Rib Landscape) 0023-018901 Bottom stone, left, vermiculit 0023-018902 Bottom stone, midten, vermiculite 0023-018903... - Page 15 Parts Door Pos. No. Name Qty. 0008-0014 M6x6 0008-0035 M6x8 0008-1002 M6x6 0008-1009 M6x10 0008-1406 Nut M6 0008-3503 M6/12x1,6 0008-9082 M6x35 0016-0092 Stop for handle 0021-013611 Glass 10 0023-018940 Gasket ø12 x 1,85 m 11 0030-013025 Door 12 6000-013666 Handle 13 1513-0087 Bracket for roller 14 1013-015944 Door stop...
- Page 16 Installation Instructions Contents Installation instructions ..............17 Distance requirements ..............17 Floor ....................17 Chimney connection ................. 17 Combustion air .................. 18 Clearances for installation ..............19 Stovedrawings/measurments ............20 Assembling the flue collar..............21 Installation of the stove ..............21 Connecting external air supply from below ........
-
Page 17: Installation Instructions
You must ensure that the floor can support the to the chimney. We recommend that you let a weight of the stove and a top-mounted steel professional Heta dealer install the stove. Alter- chimney. natively, you can ask the local chimney sweep before installation. -
Page 18: Combustion Air
(excessive weight may damage stalled to an outside air supply. the stove). Vista has a nominal output of 7 kW Requires ad- ditional ventilation because it exceeds the 5 kW. Houses built after 2008 where the air leakage... -
Page 19: Clearances For Installation
Distance to furniture Seen from above Seen from above Insulated with min. 40 mm Lambda value (Thermal conductivity = 0,066 W/mK) Combustible The dimensions are the minimum dimensions, unless otherwise stated. Distance combustible material Minimum dimensions in mm Variant Vista 1100... -
Page 20: Stovedrawings/Measurments
2.6 Stovedrawings/measurments Wall hole dimensions... -
Page 21: Assembling The Flue Collar
2.7 Assembling the flue collar - 6000-022130 - 1913-018991 The flue collar (6000-022130) is mounted from inside the stove’s combustion chamber with 4 x M6x20 (0008-1114). 2.8 Setting up the insert The entire convection box with the combustion Make sure the insert is level. chamber in must be adjusted in height using It must be ensured that the 4 gaskets lie just adjusting screws. -
Page 22: Connecting External Air Supply From Below
3. Connecting external air supply from below Fresh air connector ø100 mm - 6000- 023302 remove the bottom stones - see page 12. To ensure that the air damper is The air control installed correctly after mounting must be in the the external air supply, follow closed position! these instructions. - Page 23 Tighten the flex pipe around the ø100 mm pipe Replace the air control arm in the notch. on the fresh air connector. Lower it into place and fasten. Tighten screws, bushing and washers. Check that the air control moves freely. Check that all parts are seated correctly.
- Page 24 ”unauthorised volved administrations. fuel” for use within a smoke control area unless The Vista insert has been recommended as sui- it is used in an ”exempt” appliance (”exempted” table for use in smoke control areas when bur- from the controls which generally apply in the ning dry wood logs.
Need help?
Do you have a question about the Vista and is the answer not in the manual?
Questions and answers