Table of Contents
Advertisement
Quick Links
Advertisement
Chapters
Table of Contents

Related Manuals for Heta GREEN200


Summary of Contents for Heta GREEN200
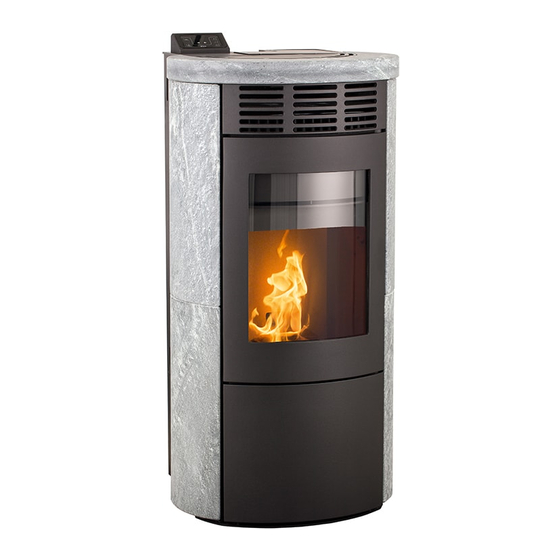
- Page 1 GREEN200 Danish Design • Danish Quality • Danish Produced...
- Page 2 Please read these instructions for use carefully prior to installation and operation to avoid perso- nal injury or damage to building parts or the product itself. HETA A/S Copyright © 2014. HETA Jupitervej 22, 7620 Lemvig, Denmark Tel. +45 96 63 06 00 E-mail: heta@heta.dk...
-
Page 3: Table Of Contents
Installation The stove’s flue gas system Chimney draught External air supply Ignition 3.10 Rear panel Heta Premium Display Table of contents Wood pellets Filling wood pellets Explanation of wood pellets and pellets quality Cleaning and service Daily cleaning Weekly cleaning... -
Page 4: Introduction
The aim of these instructions for use and ser- ensuring that the stove functions correctly. vicing from Heta is to give the user all the ne- The design of the bowl used for combustion cessary safety information, in order to prevent... -
Page 5: Liability
(press the reset button to tions enclosed herein. reactivate the stove) Heta A/S disclaims all liability in relation to in- correct use of the stove, abnormal usage by the customer, unauthorised replacement and/ or repair, or the use of non-original spare parts... -
Page 6: Dimensions Og Installation
3. Dimensions, installation and ignition. 3.1 Dimensions... -
Page 7: Placement
3.3 Proximity to combustible materials. Your Greenfire pellet stove must be installed by • Stove sides 150 mm a technician trained by HETA A/S. • Behind stove 70 mm • Furniture in front of stove 700 mm Adjusting the level of the stove, is done as shown below. - Page 8 Internal flue pipe Mount one of the two 80mm couplings on either A, or C. Remember the gasket before installation.. Use this cover on using or C.
-
Page 9: The Stove's Flue Gas System
3.6 The stove’s flue gas system The flue gas system is dependent on a slight Roll out the room temperature sensor underpressure in th e combustion chamber and placed at the rear of the stove and it is very important that the chimney exhausts ensure it is not in contact with hot to outside air and not to an enclosed or semi- surfaces. -
Page 10: Heta Premium Display
Changing/selecting the operating power level 4.3.2 Target temperature 4.3.3 Setting the target temperature 4.3.4 Start manually through Heta Premium Display 4.3.5 Stop manually through Heta Premium display 4.3.6 Manually through IR remote control unit 4.3.7 Automatically by using the ”delayed start/stop” option 4.3.8... -
Page 11: Warnings And Recommendations
Hold 2 seconds to fire up 4.2.4 Setting the date and time to fire up Set the correct date and time on the Heta b: Tap on to enter the Main menu and Hold Premium Display (for details see chapter 4.2.4). -
Page 12: Stop Manually Through Heta Premium Display
. The display will ask you ‘’Do you really want to delete this timer?’’, confirm with The Heta Premium Display allows you to set up ‘’YES’’, or in case you change your mind, can- the time delay for starting/stopping the heating cel with ‘’NO’’, or with... - Page 13 Weekly timer settings (example) Note: If the actual temperature is already higher than the target temperature inside a time interval which has to be appeared, the heating device will not be turned ON automatically until the actual tempe- rature falls under time intervals target temperature (if the time interval is still active). Start Stop Temp.
-
Page 14: Heta Premium Display Functions
4.4 Heta Premium Display functions 4.4.1 Icons description ICON DESCRIPTION ACTION Touch Enter to temperature menu Touch Actual state Touch Main menu Increase Touch / hold Decrease Touch / hold Delayed Start/Stop menu Touch Read only Delayed Start/Stop active Timer menu... -
Page 15: Checking The Statistics
4.4.2 Checking the statistics 4.4.6 Antifreeze temperature The Heta controller, installed on your heating The Heta Premium Display allows you to set device, monitors the combustion system ope- the minimum ambient temperature to be main- ration and provides different information about tained. -
Page 16: Idle Display Mode
4.5.1 Temperature unit (°C/°F) (OFF, MIN, 2, 3, 4, or MAX)) Note: The Heta Premium Display allows you to choo- se between displaying the temperature in If automatic brightness adaptation is enabled, °C (degrees Celsius) or in °F (degrees Fahren- options b and c are disabled and not present in heit). -
Page 17: Manual Feeding
Note: - Tap on and then on ”Screen lock” to enter When the time to service expires, the Heta Pre- the Screen lock menu. mium Display warns you by displaying the A002 alert (Call service for regular maintenance). The - Select the desired locking level (OFF, LO, HI) heating device is still operational. -
Page 18: Wood Pellets
5 Wood pellets 4.5.6 Language 5.1 Filling wood pellets The Heta Premium Display allows you to choose between different languages. To set the desired language, follow the steps below: - Tap on and then on ”Language” to enter the Language menu. -
Page 19: Explanation Of Wood Pellets And Pellets Quality
(8-10%) they have a high amount of energy. The table below provides an overview of pellet properties and the related threshold values Heta A/S recommends using ENplus -A1 quality pellets to get the most out of their pellet stove. -
Page 20: Cleaning And Service
6 Cleaning and Service. 6.2 Weekly Cleaning 6.1 Daily Cleaning. Cleaning the ash pan Cleaning the burn pot The ash pan must be emptied about once a A clean burn pot is essential to ensure the week, depending on how often the stove is in pellet stove operates correctly and without operation and the quality of the pellets. -
Page 21: Monthly Cleaning
6.3. Monthly. Glass door seal and gaskets It is important that the glass door seal, the ash pan gasket and pellet tank cover seals tightly, as the stove requires underpressure in the combustion chamber for correct operation. The glass seals must be replaced if worn, or glued in place using ceramic glue if loose. - Page 22 Internal flue pipe The internal flue pipe is cleaned with the enclosed round steel brush. Both lids can be removed by loosen the marked screws. ( Spanner size 10mm ) A= Cleaninglid for internal flue pipe. B= Cleaninglid for chimney fan/soot pot.
-
Page 23: Service Interval
Points marked with an asterisk (*) should only be carried out by an authorised dealer. Tools suitable for cleaning can be purchased from your authorised HETA dealer. If the directions and cleaning schedule in this cleaning manual are not observed the warranty will become void. - Page 24 Put the back end of the baffleplate on top of the screw in the right and left side. Push the front of the baffleplate upwards and pull it forwards on top of the front screw in both sides. The baffleplate must be mounted as shown.
-
Page 25: Troubleshooting
Section b: It is important that the burn pot 7 Troubleshooting. is correctly positioned and forms a tight seal Intro to Troubleshooting with the stove, because the combustion air will otherwise flow around the pot. This will result Compared to a conventional wood-burning in poorer combustion and diminish the effect of stove, a pellet stove features a lot more the cleaning function. - Page 26 Alarm- and errorcodes: If any Alarm or Error should occur, the display will show an Alarm or Errorcode. The scheme can help localise the problem. Heta strongly recommends that in case of doubt, contact the dealer immediately. Notes: __________________________________________________________ __________________________________________________________...
- Page 27 Test run relevant solutions. Start the stove and test all combustion levels The stove’s basic settings are based on a pure, (Auto, 4, 3, 2, and 1). During this process, it pale pellet and a chimney with a draught of 4 is important to check that there is sufficient pascals.
- Page 28 Before calling a service technician Comments: __________________________________________ If the stove burns only poorly – dark flames and __________________________________________ black smoke – or does not burn at all, contact __________________________________________ your dealer to arrange a visit from a service __________________________________________ technician. __________________________________________ __________________________________________ When calling a service technician, it will really...
-
Page 29: Warranty Conditions
8. Warranty conditions We would like to thank you for purchasing your Heta Greenfire pellet stove. We recommend that you read: - The instructions for installation, use and maintenance - The warranty conditions specified below: Heta wood-burning stoves are subjected to thorough quality inspections throughout the manu- facturing process and before they leave the factory and are delivered to the dealer. -
Page 30: Eu Declaration Of Conformity
9. EU declaration of conformity... - Page 32 Heta A/S Jupitervej 22 7620 Lemvig - Denmark +45 96630600 www.heta.dk facebook heta@heta.dk...
Need help?
Do you have a question about the GREEN200 and is the answer not in the manual?
Questions and answers