Table of Contents
Advertisement
Quick Links
Advertisement
Table of Contents

Related Manuals for Fasttel Wizard Elite IP


Summary of Contents for Fasttel Wizard Elite IP
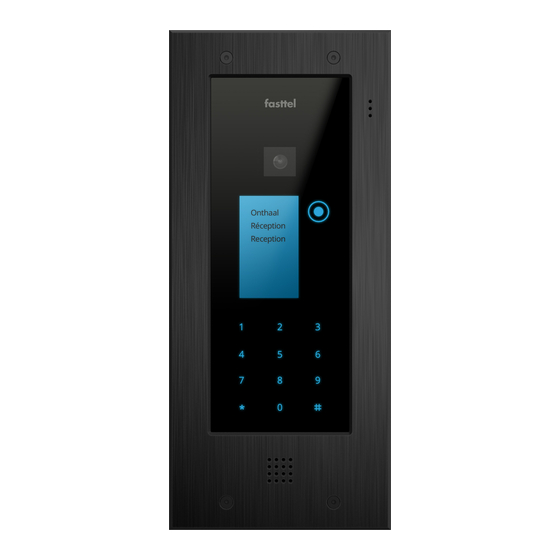
- Page 1 Instruction Manual Wizard Elite IP (from software version 1.2.0) Fasttel reserves the right to change the content of this manual without prior notice. Fasttel Belgium, Klipsenstraat 18A, 9160 Lokeren, Belgium. Tel. +32 (0)9 244 65 20 info@fasttel.com Edition 2.1 pg.1 ...
-
Page 2: Table Of Contents
Contents 1. Connection Diagram .......................... 3 2. Find the Wizard in the Network ...................... 3 3. Configuration ............................ 4 3.1 Logging In ............................ 4 3.2 Status ............................. 4 3.3 Network and time settings ...................... 4 3.4 Phone directory .......................... 4 3.5 Sip connection settings ........................ 6 3.6 Quick Dial Button Settings ...................... 7 3.7 Timing Settings.......................... 7 3.8 Time profiles .......................... 8 3.9 Device settings .......................... 8 3.10 Relay settings .......................... 9 3.11 Audio Settings .......................... 10 3.12 Video Settings .......................... 10 3.13 Camera Settings ......................... 11 3.14 Backup, factory reset & Logs ..................... 11 3.15 Account Settings ........................ 12 3.16 Software update ........................ 12 3.17 Auto provisioning ........................ 12 ... -
Page 3: Connection Diagram
1. Connection Diagram The only way to power the Wizard IP is over a PoE network connection. If the available network switch does not have a PoE, it is recommended to order the Fasttel PoE injector (FTPoE). 1 2 3 4 5 6 7 8 9 10 11 12 Pin 1: GND Wiegand/external button Pin 2: Wiegand D1 Pin 3: Wiegand D0 Pin 4: connection external button (simulates button 1) / reset Pin 5: normally closed contact relay 2 Pin 6: normally open contact relay 2 Pin 7: shared contact relay 2 Pin 8: normally closed contact relay 1 Pin 9: normally open contact relay 1 Pin 10: shared contact relay 1 Pin 11: Not used Pin 12: Not used 2. Find the Wizard in the Network ... -
Page 4: Configuration
3. Configuration All the settings are configured on 1 web page. Next to each item you find . Move the mouse cursor on it and some explanation of the item will appear. 3.1 Logging In Navigate to the address of the Wizard and enter the default Username and Password. Both are admin. A second login is user/user. Change both in section “Account”. Change the language if desired. You will see the configuration menu on the left. 3.2 Status An overview of the default values of what you will have to configure is given here. Nothing can be edited in this page itself. A preview of the camera is also shown here. Note: if you have entered a user and password under Video settings, this preview can only be seen in Firefox. 3.3 Network and time settings IP The device comes in DHCP mode upon delivery. With a program such as “Advanced IP Scanner” (http://www.advanced‐ip‐scanner.com/), you can scan the network and if a DHCP server is active, you will find the device with the name Fasttel000551XXX, and you will see the IP address obtained (see point 2. Find the Wizard in the Network) You can also give the device a static IP address. Attention: after performing a factory reset the Wizard obtains ipaddress 192.168.222.123! Date and time: Within Europe, you generally do not need to change anything here. The date and time can be entered manually here. However, it is better to use the default NTP server. ... - Page 5 2. And the people who must gain access with the optional access control keypad and/or badge reader. Display name: 1. This name is shown in the display if this recipient is assigned to a button. 2. 2. If you wish to create access codes for eg staff members, you can enter their name here without telephone number but up to 2 codes. Phone number: this is the number that the door intercom must call to be able to reach this recipient. With the green and red buttons you can make a test call to this number. Access code relay 1 and relay 2: the optional access keyboard can be operated with these 2 codes. You can choose for both codes from the 2 internal relays or from 8 relays of a maximum of 2 optional I / O switches. (see further 3.10 relay settings) Door open animation + voice: if checked, a spoken message and animation will be played in the display when a relay is activated. Time profile: you can assign a time profile to a recipient. If a call is placed to this recipient outside the time profile, the door intercom will not launch a call or it will call the next recipient who does fall within the time profile. For instance, you can program 3 shift teams under 1 button, each with a different time profile of 8 work hours. The correct shift team will then always be called at the correct time. See the following two points: 3.6 Quick dial Button Settings and 3.8 Time Profiles. Call and enter: if a relay is chosen here, this relay will be activated directly when calling this recipient. Shorten Ring Time to (sec): : if the square is ticked and a value is entered here, the call during Call and Enter will only ring the telephone with that value. This function is useful for, e.g. dentists. When calling, the door is concretely opened directly and the telephone rings, e.g. 1 or 2 times as notification that someone is entering. The Call and Enter function can also be used to provide contact when calling, e.g. to an input of a home automation system. If this is the case, disable the Door open animation. Edition 2.1 pg.5 ...
-
Page 6: Sip Connection Settings
Recipients can therefore be created doubly: first without Call and Enter and then with Call and Enter activated. You can link a different time profile to set automatic opening of the door by times. The double recipient is then programmed under the same button and may or may not be called depending on the time of day. The Call and Enter function then comes with the recipient. RFID Number: if the optional badge reader was activated, you can read out the UID here by holding the card over the Fasttel logo on the door intercom. Stop forwarding with DTMF and stop Forewarding time out: When a call goes to voicemail, the Wizard will see this as an answer and therefore not call the subsequent recipients. This can be resolved by requiring the recipient to send back a code after they have answered the call. When, e.g. * is entered in this field, then the person who answered the call must enter * within a pre‐set time (stop forewarding time out). The conversation then remains open. If * was not entered, then the call is interrupted and the next number from the memory is dialled. 3.5 Sip connection settings Screen name: enter a logical name for the device. The device’s location is useful when you have multiple door intercoms in 1 project. The telephone number is the number of the door intercom on the external SIP server. Edition 2.1 pg.6 ... -
Page 7: Quick Dial Button Settings
Domain: if empty, the SIP server field will be used. Authentication ID and Password must match those given in the SIP server. Server address and server port: enter the data for the external SIP server with which the door intercom is to be integrated. Registration status: Here you can see whether the doorphone has been registered successfully or not. Attention: do not refresh itself after changing data! Push F5 and continue for page refresh. Detect DTMF: for maximum compatibility, leave all these check‐marked. Echo suppression options: it is best to leave this unchanged. Click apply to confirm the changes. 3.6 Quick Dial Button Settings This is used to determine which of the recipients you just created in the Phone directory must be called when a button is pressed. This page is licence‐related: only 1 button is visible here because a door intercom with 1 button was purchased. User name: choose the recipient who is to be called first here. This must be created under Phone Directory. Up to 10 numbers are possible. When a recipient does not answer the call, the next recipient will be called. When a call is launched outside the time profile that is linked to a recipient, the next recipient that does fall within the time profile is chosen automatically. The number of buttons that appears depends on the licence that was purchased. 3.7 Timing Settings Forward time out: indicates the time when a subsequent recipient is called after the previous one does not answer the call. ... -
Page 8: Time Profiles
3.8 Time profiles A time profile can be created here that can be linked to a recipient under Phone Directory. Recipients are only called when the call falls within the time profile. If no time profile is linked to a recipient, the call will always be launched. Two time profiles have already been pre‐programmed: 4/5 and full time (full work week). 3.9 Device settings LCD Mode: if you choose text, the names will appear that you created in the Phone Directory and have linked to a button. You can modify the colour of this text and the overall background colour of the display. LCD backlight: adjusts the intensity of the display. You can also show your own image in the Display. Choose Image for this and search for your own .png image. The device will display this image in the correct format automatically. The best format is 240x320. Use background color to set the colour of the buttons and the optional access control keypad. Choose the different grayscale for less bright white light. Keypad Keypad mode: Keypad as access control: with this option, enter code# on the keypad to activate the relay. Codes are created under Phone Directory. Keypad as access control and phone: with this choice you enter code# on the keypad to activate the relays. You can call a number with *number#. Keypad as quick dial number and access control: when you select this mode, 2 fields will be added under Phone Directory: Forward number and Quick dial number. Enter a three‐digit value in Quick ... -
Page 9: Relay Settings
dial number, eg 105. When 105 is subsequently dialled on the keypad, the telephone number under that user name will be called and the number under Forward number as second. The relay can be activated with * code #. This function is useful when the Wizard is used in an apartment block, for example, and needs to call mobile numbers directly via a sip trunk. Then this shortened numbering is more convenient than entering a full mobile number. Send dtmf during a call: allows the keypad to be used to send dtmf tones during a call. This is useful when, for example, a conversation comes up on a menu. Keypad Code mode: 1. Internal verification: the keypad is used to activate the codes entered under the Phone directory. 2. With external verification, the Wizard only sends the protocol you select here over the wiegand bus (pin 1, 2 and 3 connect to the green connector). You then need an external access control system. Fasttel can help you make the right choice for this. NFC mode: This optional NFC Mifair badge reader is offered as a license that you can activate during or after purchase. In internal verification the second internal contact is always activated (lock2). With external control, 26 bits (4‐6 digits Hex) are output. Auto reboot: You can have the device reboot automatically at three different times. 3.10 Relay settings Internal relays: The two internal relays of the Wizard IP are configured here. They can be disabled and the time duration in milliseconds can be adjusted. This means that a duty cycle of 2000 equals a 2‐second pulse. DTMF: This is the code that must be entered to open the relay with the telephone. ... -
Page 10: Audio Settings
If you prefer to switch the relays indoors for safety reasons, you can purchase up to 2 FT4SWIPs. This is a network module with 8 inputs and 4 outputs. The outputs can be activated here by an http command. In this example, the ip address of the first FT4SWIP = 192.168.10.119 and the default login details admin and password are used. Be sure to change it in the FT4SWIP. DOA1 = 50 at the back of the command represents relay 1 pulse for 5 seconds. The IP address of the second FT4SWIP is 192.168.10.176. This command switches relay 2 for 2 seconds. Door open animation + voice: if checked, a spoken message and animation will be played in the display when a contact is activated. If the same DTMF code is chosen for multiple relays the relays will be activated all together 3.11 Audio Settings The default values for the speaker and microphone are generally correct at 50%. If you do want to make adjustments upward, it is recommended to do this in small steps to avoid oscillation. You can also set the volume of the spoken messages for calling, ending call, open door and incorrect code. You can make changes as required under audio codecs. Enable Auditive feedback: when ringing the bell, opening the door, ending the call and entering an incorrect code, a spoken message can be played together with the animation. Four languages + neutral tones are pre‐programmed, but you can also personalize these texts. Choose custom and upload your own files. 3.12 Video Settings Edition 2.1 pg.10 ... -
Page 11: Camera Settings
If the Wizard IP is equipped with a camera, it can be accessed by going to http://IPADDRESS:8080/?action=stream.jpg, where IPADDRESS is its IP address in the network. If you want a snapshot, the link is http://IPADDRESS:8080/?action=snapshot.jpg You can protect this link against unauthorised access by entering a user and password. An rtsp string is also available: rtsp://IPADDESS:8554/camera You can also adjust the proportions of the camera here. Note: either MJPEG rescale or RTSP. Both at the same time is not possible. Camera backlight: this value determines the strength of the LEDs that illuminate the visitor. 3.13 Camera Settings This is only used when the ambient lighting is strongly different than normal. After experimenting, you can use the default button to return to the default values. 3.14 Backup, factory reset & Logs With download configuration you can take a backup of the entire configuration. With upload you can search for and upload a backup. Factory reset: device returns to factory settings. Attention: when you do a factory reset, the device will start up with the IP address 192.168.222.123! You can also reset the wizard to factory settings by placing it without voltage by disconnecting the network cable. Then make a bridge between pin 1 and 4 of the green connector. Reconnect the PoE network cable. You will hear a first beep after approximately 18 seconds. Five seconds later you will hear a second beep. Remove the bridge and the wizard will start again with ip address 192.168.222.123 and empty configuration. Edition 2.1 pg.11 ... -
Page 12: Account Settings
Logs: Rather, this is for possible fault diagnosis by the manufacturer. Website logo: nice for the installer: upload your own logo here and it will appear at the top left of the main menu. Or you can reboot the device. 3.15 Account Settings You can change the default user admin and default password admin here. Also user/user. Be sure to change both! 3.16 Software update If the wizard is connected to the internet, the device itself checks for new updates (from version 1.1.1). If not, you will find the latest software at www.fasttel.com under downloads. You can then update from the file. Note: All versions lower than 1.1.1 (064‐099 and 1.01‐1.02) must first upgrade to version 1.1.1. Do not unzip the downloaded file! Only then can it be updated to a version higher than 1.1.1. 3.17 Auto provisioning For use with Proximus call connect. Edition 2.1 pg.12 ...
Need help?
Do you have a question about the Wizard Elite IP and is the answer not in the manual?
Questions and answers