
Related Manuals for Perfect Aire 1PACU8000


Summary of Contents for Perfect Aire 1PACU8000
- Page 1 USER’S MANUAL U-SHAPED WINDOW AIR CONDITIONER Models 1PACU8000 1PACU10000 1PACU12000 ENGLISH...
-
Page 2: Table Of Contents
IMPORTANT NOTE: Before using your air conditioner, please read this manual carefully and keep it for future reference. CONTENTS Important Safety Instructions ..................... Installation Instructions ......................Normal Sounds .......................... Air Conditioner Features ......................Care and Cleaning ........................Troubleshooting Tips ........................ -
Page 3: Important Safety Instructions
IMPORTANT SAFETY INSTRUCTIONS READ THIS MANUAL Inside you will find many helpful hints on how to use and maintain your air conditioner properly. Just a little preventive care on your part can save you a great deal of time and money over the life of your air conditioner. You’ll find many answers to common problems in the chart of Troubleshooting Tips. - Page 4 SAFETY & PRECAUTIONS IMPORTANT SAFETY INSTRUCTIONS CONTINUED CONTINUED CONTINUED CONTINUED CAUTION • When the air fi lter is to be removed, do not touch the metal parts of the unit. It may cause an injury. Do not put a pet or house plant where it will be exposed to direct air fl ow. This could injure the pet or plant. Ventilate the room well when used together with a stove, etc.
- Page 5 IMPORTANT SAFETY INSTRUCTIONS CONTINUED WARNING Avoid fire hazard or electric shock. Do not use an extension cord or an adaptor plug. Do not remove any prong from the power cord. Grounding Type Wall Receptacle Do not, under any circumstances, cut, remove, or bypass the grounding prong. Power supply cord with 3-prong grounding plug and current detection device.
- Page 6 OPERATING INSTRUCTIONS IMPORTANT SAFETY INSTRUCTIONS CONTINUED CONTINUED Operation of GFCI Device The power supply cord contains a ground fault circuit interrupter (GFCI) device that senses damage to the power cord. To test your power supply cord, do the following: Plug in the Air Conditioner. The power supply cord will have TWO buttons on the plug head.
- Page 7 IMPORTANT SAFETY INSTRUCTIONS CONTINUED • Any person who is involved with working on or breaking into a refrigerant circuit should hold a current valid certificate from an industry-accredited assessment authority, which authorizes their competence to handle refrigerants safely in accordance with an industry recognized assessment specification. •...
- Page 8 IMPORTANT SAFETY INSTRUCTIONS CONTINUED WARNING (For using R290/R32 refrigerant only) Transport of equipment containing flammable refrigerants • See transport regulations. Marking of equipment using signs • See local regulations. Disposal of equipment using flammable refrigerants • See national regulations. Storage of equipment/appliances •...
- Page 9 IMPORTANT SAFETY INSTRUCTIONS CONTINUED WARNING (For using R290/R32 refrigerant only) Ventilated area • Ensure that the area is in the open or that it is adequately ventilated before breaking into the system or conducting any hot work. A degree of ventilation shall continue during the period that the work is carried out.
- Page 10 IMPORTANT SAFETY INSTRUCTIONS CONTINUED WARNING (For using R290/R32 refrigerant only) Repairs to sealed components • During repairs to sealed components, all electrical supplies shall be disconnected from the equipment being worked upon prior to any removal of sealed covers, etc. If it is absolutely necessary to have an electrical supply to equipment during servicing, then a permanently operating form of leak detection shall be located at the most critical point to warn of a potentially hazardous situation.
- Page 11 IMPORTANT SAFETY INSTRUCTIONS CONTINUED WARNING (For using R290/R32 refrigerant only) Leak detection methods • The following leak detection methods are deemed acceptable for systems containing flammable refrigerants. Electronic leak detectors shall be used to detect flammable refrigerants, but the sensitivity may not be adequate, or may need re-calibration. (Detection equipment should be calibrated in a refrigerant-free area.) Ensure that the detector is not a potential source of ignition and is suitable for the refrigerant used.
- Page 12 IMPORTANT SAFETY INSTRUCTIONS CONTINUED WARNING (For using R290/R32 refrigerant only) Charging procedures • In addition to conventional charging procedures, the following requirements should be followed. Ensure that contamination of different refrigerants does not occur when using charging equipment. Hoses or lines should be as short as possible to minimize the amount of refrigerant contained in them.
- Page 13 IMPORTANT SAFETY INSTRUCTIONS CONTINUED WARNING (For using R290/R32 refrigerant only) Labelling • Equipment should be labelled stating that it has been de-commissioned and emptied of refrigerant. The label should be dated and signed. Ensure that there are labels on the equipment stating the equipment contains flammable refrigerant.
-
Page 14: Installation Instructions
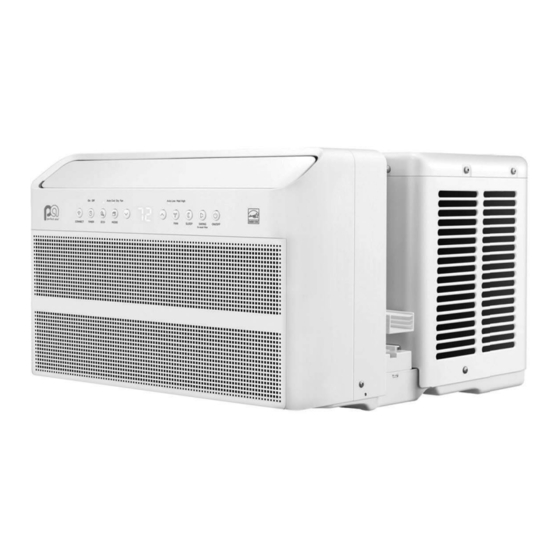
INSTALLATION INSTRUCTIONS Note The unit you purchased may look like the following. All the illustrations in this manual are for explanation purposes only. The air conditioner you have may be slightly diff erent. - Page 15 INSTALLATION INSTRUCTIONS CONTINUED BEFORE YOU BEGIN • Read these instructions completely and carefully. • IMPORTANT - Save these instructions for local inspector’s use. • IMPORTANT - Observe all governing codes and ordinances. • Note to Installer - Be sure to leave these instructions with the Consumer. •...
- Page 16 INSTALLATION INSTRUCTIONS CONTINUED Phillips Screwdriver Level TOOLS YOU WILL NEED TOOLS YOU MAY USE Flathead Screwdriver Phillips Screwdriver Pencil Level Ruler or Tape Measure Flathead Screwdriver Scissors or Knife Pencil PREPARE THE WINDOW Ruler or Tape Measure Lower sash must open suffi ciently to allow a clear vertical opening of 13 inches (330mm). Side louvers and the rear of the AC must have clear air space to allow enough air ow through the condenser, for heat removal.
- Page 17 INSTALLATION INSTRUCTIONS INSTALLATION INSTRUCTIONS CONTINUED CONTINUED ASSEMBLE THE SUPPORT BRACKET Connect the retaining plate and support rail via snaps. Fix the horizontal support plate to the main support connection plate with screws. See Figure 1. Retaining Plate Horizontal Support Plate Figure 1 Figure 1 Attach Legs: Slide leg into support rail while pressing BOTH spring button.
- Page 18 INSTALLATION INSTRUCTIONS INSTALLATION INSTRUCTIONS CONTINUED INSTALL THE SUPPORT BRACKET • Adjust the bracket until the sliding leg is firmly secure against exterior surface. • Place in window. • Rest bracket on the bottom sill. Adjust each sill stop wing until it reaches the outermost side of the window frame.
- Page 19 INSTALLATION INSTRUCTIONS CONTINUED INSTALL AC A. Place the AC unit on support bracket: Align the window to the grooved part of the unit. See Figure 5. Figure 5 Fig.5 B. Fasten the AC with the L plate. See Figure 6. Fig.7 Figure 6 C.
-
Page 20: Normal Sounds
NORMAL SOUNDS High-Pitched Chatter High efficiency compressors may have a high-pitched chatter during the cooling cycle. Pinging or Switching Droplets of water hitting condenser during normal operation may cause “pinging or swishing” sounds. Sound of Rushing Air At the front of the unit, you may hear the sound of rushing air being moved by the fan. -
Page 21: Air Conditioner Features
AIR CONDITIONER FEATURES WARNING To reduce the risk of fire, electric shock, or injury to persons, read the IMPORTANT SAFETY INSTRUCTIONS before operating this appliance. CAUTION Please always wait 3 minutes when turning unit off then on again, and when changing from cool to fan and back to cool. - Page 22 AIR CONDITIONER FEATURES CONTINUED ELECTRONIC CONTROL OPERATING INSTRUCTIONS Note Diff erent models have diff erent control buttons and indicator lights. Not all the control buttons and indicator lights describing below are available for the unit you purchased. Please check the control panel of the unit you purchased.
- Page 23 AIR CONDITIONER FEATURES CONTINUED ITEM DESCRIPTION • Press ECO button to initiate this function. This function is available on COOL, DRY, AUTO (only AUTO-COOLING and AUTO-FAN) modes. The Button fan will continue to run for 3 minutes after the compressor shuts off. The fan then cycles on for 2 minutes at 10-minute intervals until the room temperature is above the set temperature, at which time the compressor turns back on and cooling starts.
- Page 24 AIR CONDITIONER FEATURES CONTINUED ITEM DESCRIPTION • Fan button to select the Fan Speed in four steps-Auto, Low, Med or High. Button Each time the button is pressed, the fan speed mode is shifted. For some models, the fan speed cannot be adjusted. SLEEP •...
- Page 25 AIR CONDITIONER FEATURES CONTINUED Displays Display Shows the set temperature in “ ℃” or “ ℉” and the Auto-timer settings. While on Fan only mode, it shows the room temperature. If the room temperature is too high or low, it will display “ HI” or “ LO”. Error Codes •...
-
Page 26: Care And Cleaning
CARE AND CLEANING CAUTION Clean your air conditioner occasionally to keep it looking new. Be sure to unplug the unit before cleaning to prevent shock or fi re hazards. Air Filter Cleaning The air fi lter should be checked at least once a month to see if cleaning is necessary. Trapped particles in the fi lter can build up and cause an accumulation of frost on the cooling coils. -
Page 27: Troubleshooting Tips
TROUBLESHOOTING TIPS Before calling for service, review this list. It may save your time and expense. This list includes common occurrences that are not the result of defective workmanship or materials in this appliance. Problem Solution Air conditioner does not start Wall plug disconnected. - Page 28 The design and specifications are subject to change without prior notice for product improvement. Consult with the sales agency or manufacturer for details. Any updates to the manual will be uploaded to the service website, please check for the latest version.
- Page 32 Distributed By: Perfect Aire, LLC 5401 Dansher Road Countryside, IL 60625 1220_M558 844-4PA-AIRE | 844-472-2473 www.perfectaire.us Printed in China...
Need help?
Do you have a question about the 1PACU8000 and is the answer not in the manual?
Questions and answers