Advertisement
Advertisement

Related Manuals for Perfect Aire 1PTC07A-3.5


Summary of Contents for Perfect Aire 1PTC07A-3.5
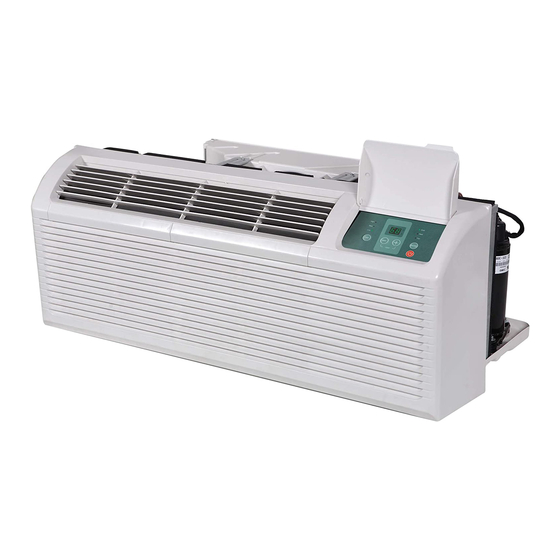
- Page 1 Your Source for Home Comfort PACKAGED TERMINAL AIR CONDITIONER USER MANUAL FOR MODELS: 1PTC07A-3.5, 1PTC09A-3.5, 1PTC12A-3.5, 1PTC12A-5.0, 1PTC15A-3.5, 1PTC15A-5.0 Before using your air conditioner, please read this manual carefully and keep it for future reference,along with your receipt.
-
Page 2: Table Of Contents
CONTENTS SAFETY PRECAUTIONS ..................2 IMPORTANT SAFETY INSTRUCTIONS ...............4 AIR CONDITIONER FEATURES................5 CONTROL PANEL OPERATION .................4 DIP SWITCH CONFIGURATION ................7 INSTALLATION ....................10 CARE AND CLEANING..................12 TROUBLESHOOTING TIPS ................13 This manual provides the information needed for proper use and maintenance of this air conditioner. -
Page 3: Safety Precautions
SAFETY PRECAUTIONS To prevent injury to the user or other people and property damage, the following instructions must be followed. Ignoring instructions or incorrect operation of unit may cause harm to individuals and damage to the unit. The seriousness is classified by the following indicators. WARNING This symbol indicates the possibility of death or serious injury. - Page 4 SAFETY PRECAUTIONS (CONTINUED) ! CAUTION When removing air filter, do not Ensure proper ventilation touch metal parts of the unit. especially in rooms with a stove or other appliances. Doing so may cause an injury. Water may enter the unit and Failure to do so may result in an degrade the insulation causing an oxygen shortage.
-
Page 5: Important Safety Instructions
IMPORTANT SAFETY INSTRUCTIONS For Your Safety WARNING! NOTE The power supply cord with this this air conditioner contains a current DO NOT store or use gasoline or other flammable vapors or liquids in detection device designed to reduce the the vicinity of this or any other appliance. risk of fire. -
Page 6: Air Conditioner Features
Operation of Current Device (Optional) The power supply cord contains a current device that senses damage to the power Plug in & cord. To test your power supply cord do the following: press RESET 1. Plug in the air conditioner. 2. -
Page 7: Control Panel Operation
CONTROL PANEL OPERATION ● FAN (FAN SPEED) Every time you push this button the fan speed cycles through the settings as follows: HIGH → MED → LOW → HIGH. ● DISPLAY Shows the set temperature in ºF or ºC. While in Fan only mode, it shows the room temperature. -
Page 8: Dip Switch Configuration
DIP SWITCH CONFIGURATIONS ● REMOVING THE FRONT PANEL - Dip switch controls are located behind the front panel through an opening below the control panel. To access, remove the front panel. See Fig. 2. - Dip switches are accessible without opening the control box. Fig. - Page 9 WALL THERMOSTAT TERMINAL IMPORTANT: Only trained, qualified personnel should access electrical panel on unit and install electrical accessories. Please contact your local electrical contractor, dealer, or distributor for assistance. INSTALLATION OF UNIVERSAL Thermostat Wire Routing WALL THERMOSTAT Thermostat wire is field supplied. Recommended wire gauge is 18 to 20 gauge solid thermostat wire.
- Page 10 WALL THERMOSTAT TERMINAL (Continued) CAUTION UNIT DAMAGE HAZARD Failure to follow this caution may result in equipment damage or improper operation. Improper wiring may damage unit electronics. Common busing is not permitted. Damage or erratic operation may result. NOTE: ● Use terminal 4-way for heat pump connection only. ●...
-
Page 11: Installation
INSTALLATION HOW TO INSTALL THE UNIT Fig. 1a - Dimensions of Air Conditioner CAUTION 1067mm/42inch There are sharp edges and extreme care should be used to avoid serious cuts. 408mm/16inch The air conditioner is heavy. Always use 2 people when lifting or moving unit. 606mm/23.9inch - For an existing wall sleeve, measure the sleeve’s dimensions. - Page 12 INSTALLATION (Continued) UNIT INSTALLATION (CONTINUED) CAUTION - Rotate the vent control lever to either open or close the vent door.(See Fig. 6.) Do not put obstacles around air-inlet or inside of air-outlet of the unit, such as a window curtain, etc. Vent control lever Always insert the filter securely;...
-
Page 13: Care And Cleaning
CARE AND CLEANING FRONT PANEL AND CASE Fig. 10a - Removing Air Filter - Turn unit off and disconnect power supply. To clean, 2 Air filters DO NOT use water and a mild detergent. use bleach and abrasivers. Some commercial cleaners may damage the plastic parts. -
Page 14: Troubleshooting Tips
TROUBLESHOOTING Before calling for service, please review the chart below. POSSIBLE CAUSES SOLUTIONS UNIT DOES NOT START • Check that plug is plugged securely in wall receptacle. • Unit may have become unplugged. Note: Plug has a test/reset button on it. Make sure that the plug has not tripped. •... - Page 15 Printed in PRC...
Need help?
Do you have a question about the 1PTC07A-3.5 and is the answer not in the manual?
Questions and answers
The unit will power up and stay on for about 3 seconds. Then the board loses power. The fan and compressor never come on. The unit is a1PTH07A-3.5, file number SA33645 with a MFD 6/2017. What would be my next step to get thisunit operating.
To troubleshoot a Perfect Aire 1PTC07A-3.5 unit that powers up for 3 seconds and then loses power, check the following:
1. Power Cord and Plug:
- Make sure the unit is securely plugged into the wall receptacle.
- Check the plug for a tripped test/reset button:
- Press the TEST button; the RESET button should pop out.
- Press the RESET button firmly until it clicks into place.
2. Electrical Issues:
- Check if the fuse has blown; replace it if needed.
- Check if the circuit breaker has tripped; reset it.
3. Unit Controls:
- Make sure the unit is turned on using the bottom right button on the keypad.
4. Protection Mode:
- The unit may be entering a protection mode due to a fault; allow the unit to reset and try again.
If the issue continues, it may require inspection by an authorized service technician.
This answer is automatically generated