Table of Contents
Advertisement
Advertisement
Table of Contents

Related Manuals for Creality CR-6 Max


Summary of Contents for Creality CR-6 Max
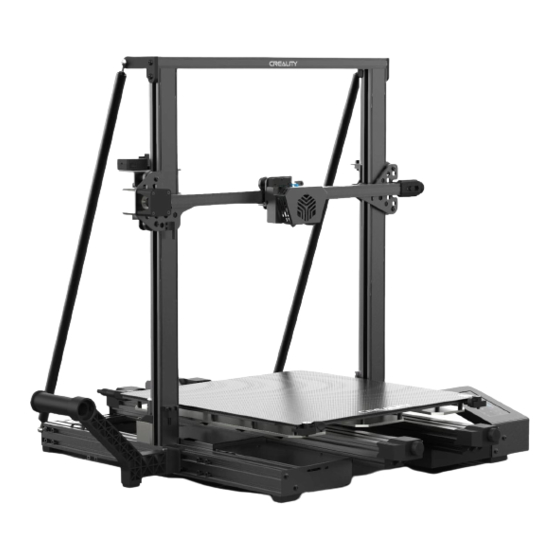
- Page 1 CR-6 Max V1.2...
- Page 2 For a better experience in using our product, you can also learn how to use the Printer in the following ways: View the accompanied instructions and videos in the Storage card. Visit our official website www.creality.com to find relevant software/hardware Assemble the 3D Printer information, contact details and operation and maintenance instructions.
- Page 3 NOTES 使用须知 1.Do not use the printer any way other than described herein in order to avoid personal injury or property damage. 2.Do not place the printer near any heat source or flammable or explosive objects. We suggest placing it in a well-ventilated, low-dust environment. 3.Do not expose the printer to violent vibration or any unstable environment, as this may cause poor print quality.
- Page 4 Introduction 设备简介 Y-axis Belt Tension Adjustment Knob(Left) Timing wheel cover(Right) 同步轮盖(左) X Limit Switch X轴限位开关 Y轴皮带张紧调节旋钮 (右) Extruder 挤出机 Nozzle Kit 喷头套件 Tool Box 工具盒 Filament Detector 断料检测 Filament Holder 料架及料管 Pull rod 拉杆 X-axis Motor X轴电机 Photoelectric Switch 光电开关 X-axis Belt Tension Adjustment Knob Extruder (E) Motor 挤出...
- Page 5 Parameters 设备参数 Basic Parameters 基本参数 Model | 型号 CR-6 Max Printing Size | 成型尺寸 400*400*400mm Molding Tech | 成型技术 Nozzle Number | 喷头数量 Slice Thickness | 切片层厚 0.1mm-0.4mm Nozzle Diameter | 喷嘴直径 Standard 0.4mm | 标配0.4mm Precision | 打印精度 ±0.1mm Filament | 打印材料...
- Page 6 Parts List 零部件清单 Base Frame|底座 Gantry Frame|龙门架 Display|显示屏 Power Cord|电源线 Rack|料架 Spool|料管 M5x20 Hexagon flat round M5×12 Hexagon flat round M5x45 Sems Screw Filament |耗材 Pull rods|拉杆 head screws x2 ×4 head screw x2 M5x45组合螺丝 M5x20 内六角平圆头螺丝 M5x12 内六角平圆头螺丝 M5x10 Hexagon flat round M6 Screw bolt x2 M6 Union bolts ×4...
- Page 7 Install the Gantry Frame 安装龙门架 Base Frame|底座 X-axis bottom profile X轴底部型材 Gantry Frame|龙门架 Two Z-axis profiles, installed on the Twist the coupling to raise the X axis inner step of the X-axis bottom profile. to the position as picture shown. M5x45 Sems Screw 两根Z轴型材,靠X轴底部型材内侧台阶安...
- Page 8 Install the Display 安装显示屏 Display|显示屏 M5x10 Hexagon flat round head screws x2 M5x10内六角平圆头螺丝 After the display is installed, please connect the display cable. 显示屏安装完成后, 请将显示屏线连接好。...
- Page 9 Install the Pull Rod 安装拉杆 Adjust the proper length of assembled pull rod and install in the position shown in the figure 拉杆组装调节到合适的长度, 安装在图示位置 M5×12 Hexagon flat round head screw x2 M5x12 内六角平圆头螺丝 M5x20 Hexagon flat round head screws x2 M5x20 内六角平圆头螺丝...
- Page 10 Install the Rack 安装料架 Rack|料架 Spool|料管 The material rack can be installed in different positions on the front and back of the Z axis, and can be folded. 料架可在Z轴前、 后不同位置安装, 可折叠。...
- Page 11 Easier to replace the platform and adjust the belt 更换平台更容易,调节皮带更方便 1.Rotate the glass pick-and-place handleplate for platform replacement. 1.转动玻璃取放手柄压板可进行平台更换。 2.Then manually turn the knob to the appropriate tightness to avoid belt breakage. (as shown in figure A, three places) 2.然后手动将旋钮左右拧到适合松紧度, 过紧容易造成皮带崩断。 (如图所示A三处)...
- Page 12 Cable Connection 设备接线 Connect the 16pin port to the nozzle adapter board as shown in the figure 按图示16pin端口连接喷头转接板 Connect the extruder adapter board with 14pin port as shown 按图示14pin端口连接挤出机转接板 Connect Z-axis motor cable 连接Z轴电机线 Connect the photoelectric switch wire 连接光电开关线 Connect the power cord 连接电源线...
- Page 13 Level the Platform 调平平台 Select “Level”to automatically level 选择首页调平,即可自动调平 After the leveling is completed, adjust the Z-axis compensation value according to the adhesion of the printing consumables and the glass 调平完 成后,依据打印耗材与玻璃平台的粘附情况,适当调节Z轴补偿值 During the leveling process, please do not touch the Teflon >>...
- Page 14 Preheating Method 1 预热方法1 Method 1 方法1 >> >> 0.00 0.00 0.00 0.00 Notes:...
- Page 15 Preheating Method 2 预热方法2 Method 2 Notes: The print preheating standard is adjusted at the factory, PLA preheating standard: nozzle temperature 200 °, hot bed temperature 60 °, ABS preheating >> >> standard: nozzle temperature 240 °, hot bed temperature 70 °. If you need to adjust it due to printing materials or other reasons, you can adjust the parameters on...
- Page 16 当您等待温度上升时, 把耗材挂在料架上。 为了顺利完成装料, 耗材的末端位置应如图所示。...
- Page 17 (Installation) Wire threading fixture x 1 (安装)穿丝治具...
- Page 18 3. Select language→Next→Select your machine→Next→Finish. >> >> 1. Double click to install the software. | 安装软件 4.Open Creality 3D slicer → Load (Read file) → Select file. 打开创想三维切片软件→Load (读取文件) →选择文件。 2、 Double click to open the software. | 打开软件 CR-6 Max...
- Page 19 Start Printing 开始打印 >> 6.Insert the storage card→ Click print control→ Select the file to be printed. 5.Generate G-code, and save the gcode file to storage card. 插入存储卡→点击打印控件→选择 生成 G 代码→保存到存储卡 要打印的文件 Notes: For details on the software instructions, please refer File names must be Latin letters or numbers, not Chinese to the slicing software manual in the memory card! characters or other special symbols...
- Page 20 Start Printing 开始打印 text1 text2 text3 0 : 0 >> >> text4 200 200 0.00 0.00 text1 text2 text3 0 : 0 text4 >> >> 200 200 0.00 0.00...
- Page 21 Circuit Wiring 电路接线 Z1 axis motor Z2 axis motor Y axis motor Y 轴电机 Z1 轴电机 Z2 轴电机 Cable Port1 排线接口1 Storage Card Slot 存储卡卡槽 Micro USB Port Cable Port2 Micro USB 接口 排线接口2 Screen Interface 屏幕接口 Fuse 保险丝 Power Input Hot Bed Power Output Bed Thermistor Normal Fan...
- Page 22 Trouble-Shooting Extrusion 1、Secure the screw on the top of the extursi- gear loose on gear...
- Page 23 故障检修 1. 擦拭存储卡 存储卡 2.格式化存储卡 3.更换存储卡 1 . 紧固挤出齿轮上的顶丝 挤出齿轮松动...
- Page 24 Due to the differences between different machine models, the physical objects and the final images can differ.The final explanation rights shall be reserved by Shenzhen Creality 3D Technology Co., Ltd. 因每款机型不同,实物与图可能有所差异,请以实物为准,最终解释归深圳市创想三维科技有限公司所有。 SHENZHEN CREALITY 3D TECHNOLOGY CO.,LTD. 11F & Room 1201,Block 3,JinChengYuan,Tongsheng Community, Dalang,Longhua District,Shenzhen,China,518109 Official Website: www.creality.com Tel: +86 755-8523 4565 E-mail: info@creality.com cs@creality.com...
Need help?
Do you have a question about the CR-6 Max and is the answer not in the manual?
Questions and answers