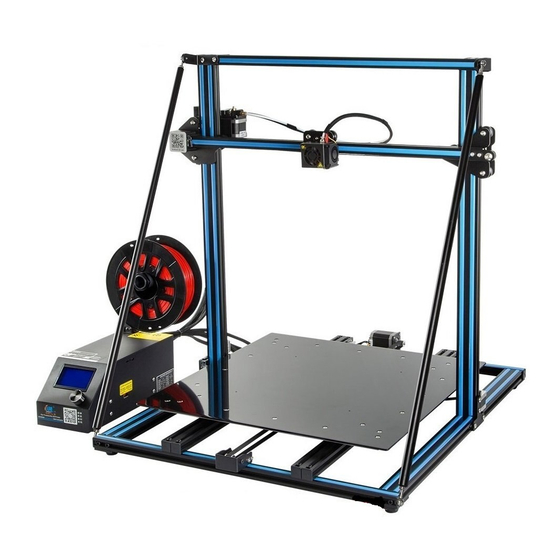
Creality CR-10 S5 User Manual
Hide thumbs Also See for CR-10 S5:

Advertisement

CREATE REALITY,ACHIEVE DREAMS
CR-10 S5
CR-10 S5
3D Printer User Manual
V.6.6

Advertisement

Table of Contents
loading

Summary of Contents for Creality CR-10 S5

  • Page 1 CREATE REALITY,ACHIEVE DREAMS CR-10 S5 CR-10 S5 3D Printer User Manual V.6.6...
  • Page 3 View the accompanied instructions and videos in the storage card. Visit our official website www.creality.com to find relevant software/hardware information,contact details, operation and maintenance instructions. Firmware Upgrade Please login the official website https://www.creality.com/download, switch the language and select the relevant printer and model and download the required firmware.
  • Page 4 Users should comply with the laws and regulations of the corresponding countries and regions where the equipment is located (used), abide by professional ethics, pay attention to safety obligations, and strictly prohibit the use of our products or equipment for any illegal purposes. Creality will not be responsible for any violators' legal liability under any circustance.
  • Page 5: Table Of Contents

    Contents Introduction 01-03 General List 04-04 Device Installion 05-06 Screen Information 07-07 Loading Filament 08-08 V wheel leveling 09-09 10-10 Platform Adjustment Software Installation 11-11 12-12 First Printing...
  • Page 6: Introduction

    1. Introduction Z Gantry Frame Platform Extruder(E) Stepper X Limit Switch Nozzle Kit Filament Holder TF Slot and USB Port Control Box X Stepper Z Stepper Display Screen Nozzle Assembly Connectiom Z Limit Switch Control Knob Y Limit Switch Voltage Selection Platform Connection Power Cable Connection Y Stepper...
  • Page 7 ±0.1mm Fliament 1.75mm PLA File Format STL/ OBJ/ AMF Working Mode Online or TF card offline Slice Software Creality Slicer/ Cura/ Repetier- Host/ Simplify3D Input:AC 115V/ 230V 50/ 60Hz Power Supply Output:DC 12V Total Power 270W 270W 27 0W 270W 270W Bed Temp.
  • Page 8 3.Introduction Connect the Stepper Motors according to the yellow labels on the 6pin (4- wire) side. Y Stepper and Limit Switch Extruder (E) Stepper Connect the Limit Switches according to the yellow labels on the 3pin (2- wire) side. X Stepper and Limit Switch Z Stepper and Limit Switch Connect the aviation connectors to the ports with corresponding pins...
  • Page 9: General List

    4.General List Tool Box Base Frame Control Box Gantry Frame Tool list  Image Name Image Name Image Name Spool & Nuts Power Cable Spade Spool Holder USB Cable Cable Ties TF Card & Card PTFE Tubing Hex keys, Wrench Reader (spare part) &...
  • Page 10: Device Installion

    5.Device Installtion Install the T- shaped fixing block.  Install the Gantry Frame  Note: M ake s ure that the nut f or prof ile ha s be e n turne d by 9 0 ° before fastening the T- shaped fixing block.
  • Page 11 6.Device Installtion Install the Rack  Attach the Bracket Attach Spool Holder Finished with two thumb screws. with included Nuts Install decoration strip  Install decoration belt into the Attach the Decorative Trim to all Cut off the excess material with notch, starting from one end.
  • Page 12: Screen Information

    Print Speed the Nozzle Current Temperature of the Nozzle Device Model Set Temperature of the Hot Bed Current Temperature of the Hot Bed CR-10 S5 Part Cooling Fan Speed Current Location of the nozzle Print Time Print Progress Prompt Message...
  • Page 13: Loading Filament

    8.Loading Filament 2、Feed Filament 1、Preheat Method 1 Press and hold the extruder lever then insert the1.75mm filament through the small hole of the extruder. Continue feeding until you see filament come out Method 2 the nozzle. Tip:How to Replace the Filament? 1、Cutting filament near the Extruder and slowly feed new filament until they are fed into the new filament.
  • Page 14: Wheel Leveling

    9.V wheel leveling Before starting up, please check the tightness of the V wheel. X/Y axis V wheel adjustment: Gently dial the V-wheel by hand to check whether it is idling or stuck. If this phenomenon occurs, use an open-end wrench to adjust the eccentric isolation column to make it rotate smoothly.
  • Page 15: Platform Adjustment

    10.Platform Adjustment 1. Prepare →Auto Home. Waiting for the nozzle to move to the left/ front of the platform.→ Prepare→Disable Steppers(C lose stepper drive,release motor) 1111111 11111 The nozzle is too far away from the platform, so the consumables can not adhere to the platform.
  • Page 16: Software Installation

    11.Software Installation 1. Double click to install the software. 2、Double click to 3. Select language→Next→Select your machine→Next→Finish. open the software.
  • Page 17: First Printing

    12.First Printing 1.Slicing Open the software→Load→Select the file→Wait for slicing to finish ,and save the gcode file to TF card. 2.Printing Insert the TF card→ Print → Select the file to be printed. Warning: Please don't insert or remove storage card.
  • Page 18 13. FDM 3D PRINTING FILAMENTS FDM 3D PRINTING FILAMENTS Upgraded environmentally friendly Targeting at mid-end users, CR series is with HC series is cost-efficient. It’ s widely Ender series is widely applied to general formula, matte effect, high toughness, transparent tray plus black-white color box applicable to general FDM printer product FDM printer design, which meet customers' and fine printing.
  • Page 19 14. UV sensitive resin parameter information Water Dental Jewelry Related High Temperature Standard Resin ABS Like Resin Dental Cast Resin Elastic Resin Toughness Resin Washable Resin Mode Resin Cast Resin Parameters Resin 150-250MPa·s 200-350MPa·s 50-170MPa·s 300-1000MPa·s 100-350MPa·s 150-300MPa·s 150-300MPa·s 150-300MPa·s 100-150MPa·s Viscosity (NDJ-8S Rotational...
  • Page 20 Suitable for 99% FDM models CR-PLA 190-220 50-60 Suitable for 99% FDM models HC/EN-PLA 190-220 50-60 Hot bed is needed, and Creality printer enclosure 220-260 90-110 is recommended for DIY machine Hot bed is needed, and Creality printer enclosure PETG 230-250 60-100...
  • Page 21 Please read the user manual and warranty card carefully before the use. For any service, Please priorly contact local seller or contact us via Email: cs@creality.com for support. See www.creality.com/after-service-policy/ for specific warranty information about your product and procedures to act on a warranty claim.
  • Page 24 SHENZHEN CREALITY 3D TECHNOLOGY CO., LTD. Add:18F,JinXiuHongDu Building, Meilong Blvd., Longhua Dist., Shenzhen, China 518131 Official Website: www.creality.com Tel:+86 755-8523 4565 E-mail: info@creality.com cs@creality.com Scan To Learn More...

This manual is also suitable for:

Cr- 10Cr- 10sCr- 10 s4Cr- 10miniCr-10 smart pro

Table of Contents