Advertisement
Quick Links
Advertisement

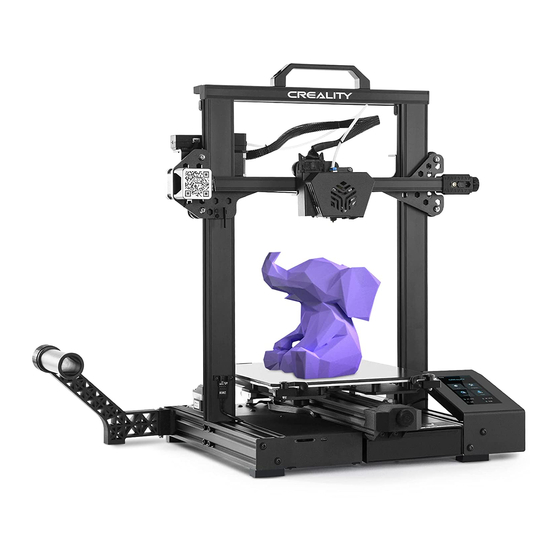
Related Manuals for Creality CR-6 SE


Summary of Contents for Creality CR-6 SE
- Page 1 3 D 列 印 機使 用說 明書 CR-6 SE V1.0...
- Page 2 For a better experience in using our product, you can also learn how to use the Printer in the following ways: View the accompanied instructions and videos in the Storage card. Visit our official website www.creality.com to find relevant software/hardware Assemble the 3D Printer information, contact details and operation and maintenance instructions.
- Page 3 NOTES 使用 須 知 �.Do not use the printer any way other than described herein in order to avoid personal injury or property damage. �.Do not place the printer near any heat source or flammable or explosive objects. We suggest placing it in a well-ventilated, low-dust environment. �.Do not expose the printer to violent vibration or any unstable environment, as this may cause poor print quality.
- Page 4 Introduction 設備 簡 介 Power Cable Connection Filament Holder Z-axis Motor ( Z�) Z 軸 電 機 (Z 2 ) 料架及料管 電 源 組 合 開 關 LCD Screen Y Limit Switch X-axis Belt Tension Adjustment Knob Y 軸 限位 開 關 螢幕...
- Page 5 Parameters 設 備 參 數 Basic Parameters 基本参數 Model | 型號 CR-6 SE Print size | 成型尺寸 235*235*250mm Molding technology | 成型技術 Number of nozzle | 噴頭數量 Layer thickness | 列印層厚 0.1mm-0.4mm Nozzle diameter | 噴嘴直徑 Standard | 標配 0.4mm XY axis precision | 精度...
- Page 6 Card Reader 剪鉗 內六 角扳 手 快 接 卡 扣 S D 卡 和 讀 卡 機 Quick Release Claw x � Nozzle x � Creality Sticker x � �� �� �� 快接卡抓 噴嘴 創 想 三 維 貼 紙...
- Page 7 Install the Gantry Frame 安裝龍門架 � Base Frame x � � 底座 X-axis bottom profile X 軸底部型材 � Gantry Frame x � � 龍門架 �� �� Two Z-axis profiles, installed on the Twist the coupling to raise the X axis inner step of the X-axis bottom profile.
- Page 8 Install the Display 安裝螢幕 � Display x � 螢幕 M�X�� Hexagon Socket �� Button Head Screws x � M5 X1 0 內六角 平圓 頭螺 釘 After the display is installed, please connect the display cable. � 螢幕安裝完成後,請將螢幕線連接好。 ��...
- Page 9 Install the Rack 安裝料架 � � � Rack x � 料 架 x � Spool � 料 管 The material rack can be installed in different positions on the front and back of the Z axis, and can be folded. 料架可在...
- Page 10 Install the Handle �� �� 安裝把手 � � � � Handle x � 把手 M�x�� Hexagon Socket x � �� Button Head Screws M5 X1 0 內六 角平圓 頭螺 釘 M�T nut x � � M5 T 型螺母...
- Page 11 Easier to replace the platform and adjust the belt 更換平台 更容 易 , 調 節 皮 帶 更方 便 �. Rotate the glass pick-and-place handleplate for platform replacement. 轉動玻璃取放手柄壓版可進行平台更換。 �. Then manually turn the knob to the appropriate tightness to avoid belt breakage. (as shown in figure A, two places) 然後手動將旋鈕左右擰到適合鬆緊度,過緊容易造成皮帶斷裂。...
- Page 12 Cable Connection 設 備 連 結 � Connect the ��pin port to the nozzle adapter board as shown in the figure 如圖示 16pin 端連接噴頭轉接板 � Connect the extruder adapter board with ��pin port as shown 如圖示 14pin 端口連接擠出幾轉接板 � Connect Z-axis motor cable �...
- Page 13 Level the Platform 調 平 平 台 � Select “Level”to automatically level 選擇首頁調平,即可自動調平。 � After the leveling is completed, adjust the Z-axis compensation value according to the adhesion of the printing consumables and the glass. 調平完成後,依據列印材料與玻璃平台的黏附情況,適當調節 Z 軸補償數值。 During the leveling process, please do not touch the Teflon >>...
- Page 14 Preheating Method 1 預熱方法 1 Method � 方法� >> >> �� � �� � �� � � �� � �� � �� � �� � �� ��� �.�� ��� �.�� ��� �.�� ��� �.�� 注意:頁面僅供參考,實際以 UI 為準。...
- Page 15 Preheating Method 2 預熱方法 2 Method � Note: The print preheating standard is adjusted at the factory, PLA preheating standard: nozzle temperature ��� °, hot bed temperature �� °, ABS preheating >> >> standard: nozzle temperature ��� °, hot bed temperature �� °. If you need to adjust it due to printing materials or other reasons, ��...
- Page 16 在您等待 溫 度上 升 時 , 把耗 材 掛 在 料 架上 Load Filament be placed as shown above. 為了順利完成列印,耗材的末端位置應如圖所示 45˚...
- Page 17 Load Filament 裝 料 When the current temperature reaches the target temperature, the consumables pass the material breakage detection, and are inserted into the small hole of the extruder until the position of the nozzle. If the consumables flow out at the nozzle, it means that the consumables have been loaded. 當前溫度達到目標溫度時,按住擠出機彈簧,將耗材依次插入裝料檢測孔,再將耗材插入擠出機小孔直至噴嘴位置。...
- Page 18 開 始列 印 �. Select language→Next→Select your machine→Next→Finish. >> >> �. Double click to install the software. �. Open Creality �D slicer → Load (Read file) → Select file. 安裝軟體 �、 Double click to open the software. 打開創想三維切片軟體→Load(讀取文件)→選擇文件 打開軟體 3. 依次選擇語言→Next→選擇對應機型→Next→Finish,完成設定.
- Page 19 Start Printing 開始列印 >> �. Insert the storage card→ Click print control→ Select the file to be printed. �. Generate G-code, and save the gcode file to storage card. 插入記憶卡→點擊列印控件→選擇要列印的文件 生成 G-code→保存 Notes: For details on the software instructions, please refer File names must be Latin letters or numbers, not Chinese to the slicing software manual in the memory card! characters or other special symbols.
- Page 20 Start Printing 開始列印 text� text� text� 0 : 0 >> >> text� �� � �� � ��� ��� �� �� ��� �.�� ��� �.�� text� text� text� 0 : 0 >> >> text� �� � �� � ��� ��� �� ��...
- Page 21 Circuit Wiring Y axis motor Z� axis motor Z� axis motor 電 路接 線 Y 軸 電機 Z 1 軸 電 機 Z 2 軸 電 機 Storage Card Cable Port� S D 卡 卡 槽 排線 接口1 Micro USB Port Cable Port�...
- Page 22 Trouble-Shooting Extrusion 1、Secure the screw on the top of the extursi- gear loose on gear...
- Page 23 故障 檢 修 工作流程 故障診斷 故障原因 故障處理 處理方式 1. 清潔 USB/記憶卡 否 USB/記憶卡 2. 格式化 USB/記憶卡 開始 3. 更換 USB/記憶卡 從記憶卡列印 文件名修改為英文和數字格式 否 文件名 其他文件 1. 移動模型位置並重新切片 是/否 切片 否 文件是否列印 是 是否有亂碼 是 是否 是 2. 使用修復軟體修復模型 列印正常 是 1.
- Page 24 Due to the differences between different machine models, the physical objects and the final images can differ.The final explanation rights shall be reserved by Shenzhen Creality �D Technology Co., Ltd. 因每款機型不同,實物與圖可能有所差異,請以實物為準。最終解釋歸深圳市創想三維科技有限公司所有。 SHENZHEN CREALITY 3D TECHNOLOGY CO.,LTD. 11F & Room 1201,Block 3,JinChengYuan,Tongsheng...
Need help?
Do you have a question about the CR-6 SE and is the answer not in the manual?
Questions and answers
message onscreen says replace consumables to continue or stop
The message "replace consumables to continue or stop" on the Creality CR-6 SE likely means that the printer has detected that the filament is exhausted or has broken. The CR-6 SE has a photoelectric filament sensor that stops printing when filament runs out or breaks. To continue printing, you need to replace the filament and resume the print.
This answer is automatically generated