Advertisement
- 1 Contacts
- 2 NOTES
- 3 Introduction
- 4 Parameters
- 5 Parts List
- 6 Install the Gantry Frame
- 7 Install the Display
- 8 Install the Pull Rod
- 9 Install the Rack
- 10 Easier to replace the platform and adjust the belt
- 11 Cable Connection
- 12 Level the Platform
- 13 Preheating Method 1
- 14 Preheating Method 2
- 15 Load Filament
- 16 Start Printing
- 17 Circuit Wiring
- 18 Trouble-Shooting
- 19 Documents / Resources
Contacts
For the best experience, please read the instructions before operating the Printer. Our teams will always be ready to render you the best services. Please contact us via the phone number or e-mail address provided at the end when you encounter any problem with the Printer.
For a better experience in using our product, you can also learn how to use the Printer in the following ways:
View the accompanied instructions and videos in the Storage card.
Visit our official website www.creality.com to find relevant software/hardware information, contact details and operation and maintenance instructions.
NOTES
- Do not use the printer any way other than described herein in order to avoid personal injury or property damage.
- Do not place the printer near any heat source or flammable or explosive objects. We suggest placing it in a well-ventilated, low-dust environment.
- Do not expose the printer to violent vibration or any unstable environment, as this may cause poor print quality.
- Before using experimental or exotic filaments, we suggest using standard filaments such as ABS or PLA to calibrate and test the machine.
- Do not use any other power cable except the one supplied. Always use a grounded three-prong power outlet.
- Do not touch the nozzle or printing surface during operation as they may be hot. Keep hands away from machine while in use to avoid burns or personal injury.
- Do not wear gloves or loose clothing when operating the printer. Such cloths may become tangled in the printers moving parts leading to burns, possible bodily injury, or printer damage.
- When cleaning debris from the printer hotend, always use the provided tools. Do not touch the nozzle directly when heated. This can cause personal injury.
- Clean the printer frequently. Always turn the power off when cleaning, and wipe with a dry cloth to remove dust, adhered printing plastics or any other material off the frame, guide rails, or wheels. Use glass cleaner or isopropyl alcohol to clean the print surface before every print for consistent results.
- Children under 10 years of age should not use the printer without supervision.
- This machine is equipped with a security protection mechanism. Do not manually move the nozzle and printing platform mechanism manually while booting up, otherwise the device will automatically power off for safety.
- Users shall comply with related nation and region' s laws, regulations and ethical codes where the equipment or produced prints by it is used, and users of our product shall not use aforesaid products to print any end-use products, objects, parts or components or any other physical prints that violate the national or regional laws, regulations and ethical codes where herein referred product and produced prints by it is located.
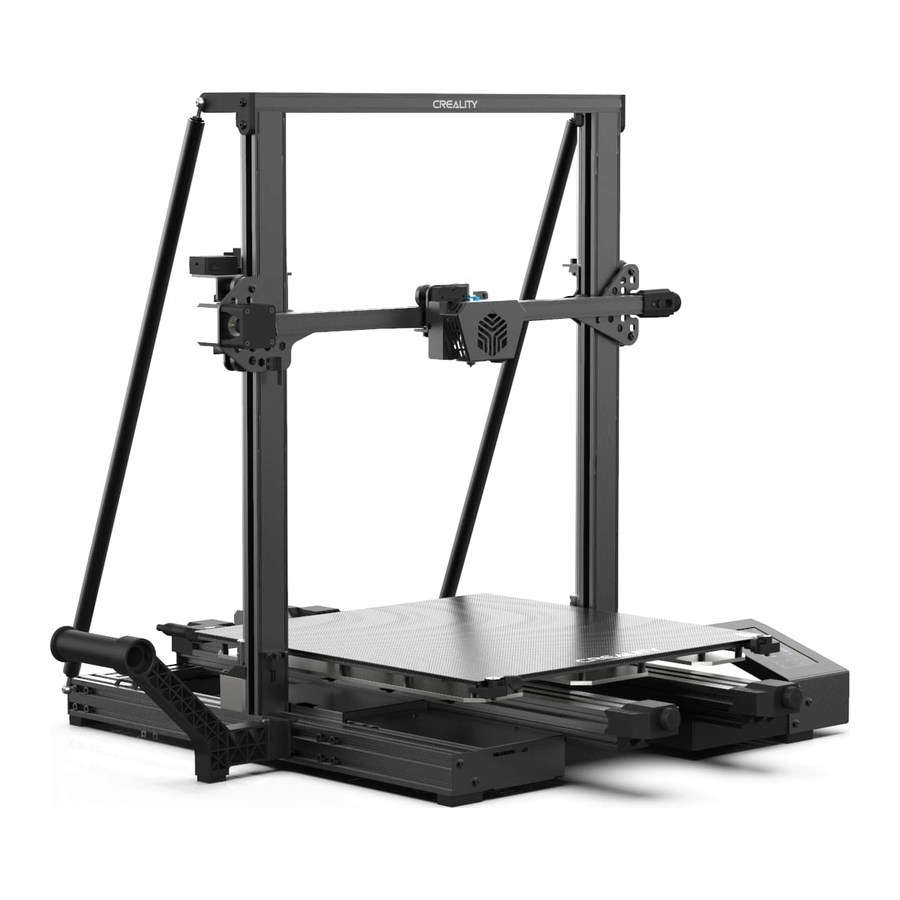
Introduction

- X Limit Switch
- Nozzle Kit
- Filament Holder
- Photoelectric Switch
- Glass Pick And Place Handle Plate
- Storage Card Slot
- SD Card Slot Sticker
- USB Port
- Y-axis Belt Tension Adjustment Knob (Right)
- Y-axis Belt Tension Adjustment Knob (Left)
- Tool Box
- Pull rod
- X-axis Belt Tension Adjustment Knob
- Printing Platform
- Power Cable Connection
- LCD Screen
- Timing wheel cover (Left)
- Y-axis Motor
- Timing wheel cover (Right)
- Extruder
- Filament Detector
- X-axis Motor
- Extruder (E) Motor
- Coupling
- Z-axis Motor (Z2)
- Z-axis Motor (Z1)
Parameters
| Basic Parameters | |
| Model | CR-6 Max |
| Printing Size | 400*400*400mm |
| Molding Tech | FDM |
| Nozzle Number | 1 |
| Slice Thickness | 0.1mm-0.4mm |
| Nozzle Diameter | Standard 0.4mm |
| Precision | ±0.1mm |
| Filament | 1.75mm PLA/ TPU/ PETG/ Wood |
| File Format | STL/ OBJ/ AMF |
| File Transfer | USB/ Storage card |
| Slice Software | Creality Slicer/ Cura/ Repetier-Host/ Simplify3D |
| Power Supply | Input: AC100-240V 50/60Hz, Output: DC 24V |
| Total Power | 500W |
| Bed Temp | ≤90℃ |
| Nozzle Temp | ≤260℃ |
| Resume Printing | Yes |
| Filament Detector | Yes |
| Dual Z-axis | Yes |
| Auto Leveling | Yes |
| Language | English/ Chinese |
| Computer Operating System | Windows XP/7/8/10, MAC/ Linux |
| Printing Speed | 80-100mm/s |
Parts List

Tips: the above accessories are for reference only, please refer to the physical accessories!
Install the Gantry Frame

Install the Display

 After the display is installed, please connect the display cable.
Install the Pull Rod
Adjust the proper length of assembled pull rod and install in the position shown in the figure

Install the Rack

The material rack can be installed in different positions on the front and back of the Z axis, and can be folded.
Easier to replace the platform and adjust the belt
- Rotate the glass pick-and-place handleplate for platform replacement.

- Then manually turn the knob to the appropriate tightness to avoid belt breakage. (as shown in figure A, three places)


Cable Connection

- Connect the 16pin port to the nozzle adapter board as shown in the figure
- Connect the extruder adapter board with 14pin port as shown
- Connect Z-axis motor cable
- Connect the photoelectric switch wire
- Connect the power cord

- Do not connect or disconnect the cables when the machine is powered on.
Level the Platform
- Select "Level" to automatically level
- After the leveling is completed, adjust the Z-axis compensation value according to the adhesion of the printing consumables and the glass

 During the leveling process, please do not touch the Teflon tube and nozzle cable.
Preheating Method 1
Method 1

Notes: The UI information is only for reference, the actual UI may be different.
Preheating Method 2
Method 2

Notes: The print preheating standard is adjusted at the factory, PLA preheating standard: nozzle temperature 200°, hot bed temperature 60°, ABS preheating standard: nozzle temperature 240°, hot bed temperature 70°.
If you need to adjust it due to printing materials or other reasons, you can adjust the parameters on the interface home page control → temperature → PLA / ABS preheat setting.
When you wait for the temperature to rise, hang the filament over the filament holder.

For loading filament smoothly, the end of the filament should be placed as shown below.

Load Filament
When the current temperature reaches the target temperature, the cinsumables pass the material breakage detection, and are inserted into the small hole of the extruder until the position of the nozzle. If the consumables flow out at the nozzle, it means that the consumables have been loaded. Method of adjusting the tightness of the extrusion spring: Arrow to the right is tightening, arrow to the left is loosening. (As shown in figure A)

Tips: How to replace the filament?
- Cut filament near the Extruder and slowly feed in the new filament to the material tube.
- After preparing the nozzle, push the filament a little forward and quickly withdraw the filament, and then feed in the new filament.
Start Printing
- Double click to install the software.
![]()
- Double click to open the software.
- Select language → Next → Select your machine → Next → Finish.

- Open Creality 3D slicer → Load (Read file) → Select file.
![]()
- Generate G-code, and save the gcode file to storage card.

- Insert the storage card → Click print control → Select the file to be printed.
![]()


 File names must be Latin letters or numbers, not Chinese characters or other special symbols
Notes: For details on the software instructions, please refer to the slicing software manual in the memory card!
Circuit Wiring

Trouble-Shooting

Due to the differences between different machine models, the physical objects and the final images can differ. The final explanation rights shall be reserved by Shenzhen Creality 3D Technology Co., Ltd.

SHENZHEN CREALITY 3D TECHNOLOGY CO.,LTD.
11F & Room 1201, Block 3, JinChengYuan, Tongsheng Community, Dalang, Longhua District, Shenzhen, China, 518109
Official Website: www.creality.com
Tel: +86 755-8523 4565
E-mail: info@creality.com cs@creality.com

Documents / Resources
References
Download manual
Here you can download full pdf version of manual, it may contain additional safety instructions, warranty information, FCC rules, etc.
Advertisement


Need help?
Do you have a question about the CR-6 Max and is the answer not in the manual?
Questions and answers