Advertisement
Advertisement
Table of Contents

Related Manuals for Creality CR-10 Max


Summary of Contents for Creality CR-10 Max
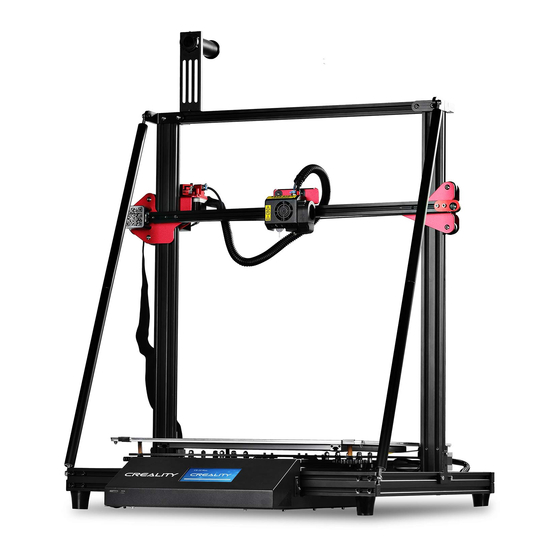
- Page 1 CREATE REALITY,ACHIEVE DREAMS CR-10 Max CR-10 Max 3D Printer User Manual V.1.6...
- Page 2 Visit our official website www.creality.com to find relevant software/hardware information,contact details and operation and maintenance instructions. Firmware Upgrade Please login the official website https://www.creality.com/download, switch the language and select the relevant printer and model and download the required firmware, you can use it after the installation is finished.
- Page 3 Users should comply with the laws and regulations of the corresponding countries and regions where the equipment is located (used), abide by professional ethics, pay attention to safety obligations, and strictly prohibit the use of our products or equipment for any illegal purposes. Creality will not be responsible for any violators' legal liability under any circustance.
-
Page 4: Table Of Contents
Contents 01-01 Introduction 02-03 General List 04-04 Device Installtion Cable Connection 05-05 Software Installation 06-06 Loading Filament 07-07 V wheel leveling 08-08 Bed Leveling 09-10 Software Installation 11-11 12-12 First Printing 13-13 Circuit Wiring... -
Page 5: Introduction
1. Introduction Parameters Model CR-10 Max Molding Size 450 x 450 x 470mm Molding Tech. Nozzle Number Slice Thickness 0.1mm-0.4mm Nozzle 0.4mm 0.8mm Diameter Precision ±0.1mm Fliament φ1.75mm PLA File Format STL/OBJ/AMF Working Mode Online or Storage card offline Creality Slicer/Cura/... -
Page 6: General List
2.General List Tool Box Base Frame Printing Platform Gantry Frame Pull Rod Tool List Filament Image Name Image Name Image Name Filament Holder Tube with Wrench & Screw Driver Spare Parts Nuts Power Cord M5x45 Sems Screw Storage Card Hexagon flat round head Spatula USB Cable... - Page 7 3.General List Pull rod details Pull rod joint Eye bolt M6 x 35 Name M5 T-nut M6 Nut Pull rod 4pcs L-type pull rod 2pcs connecting fittings Eye bolt M6 x 35 4pcs Pull rod M6 nut 4pcs Set screw M6 x 40 2pcs M5 x 12 Hexagon socket 8pcs...
-
Page 8: Device Installtion
4.Device Installtion M4X20 Head Cap Screw 4pcs M4 x 20 6pcs T block 2pcs 3. Gantry Frame Fixation M5X45 4pcs 4. Support Rod Installation 1. Printing Platform Installation 2. Gantry Frame Installation Support Rod 4pcs M4 X 8 Hexagon flat round head 2pcs M6 x 40 Screw rod 2pcs M4 T-Nut... -
Page 9: Cable Connection
5.Cable Connection Ribbon Cable Plug the power cord into a three- hole power jack. -
Page 10: Software Installation
6.Software Installation Screen Information Main Sub Menu Explanation Menu Stop Pause/Continue Automatic Print speed Manual Nozzle temp. Print Storage Card Select “Print” Hot-bed temp. Cooling Adjust Temperature Continue/Stop up/Stop Automatic PLA \ABS(195°\240°) Leveling Nozzle preheat Refuel Manual Temp Hot-bed preheat Moving Cooling Yes\No... -
Page 11: Loading Filament
7.Loading Filament Feeding Preheat Method 1. Method 2. Go through the filament detector to press and hold the extruder spring. Insert the filament to the position of nozzle through the hole on the extruder. Continue feeding until you see filament extrude from the nozzle. Replacing Filament During Printing: 1. -
Page 12: Wheel Leveling
8.V wheel leveling Before starting up, please check the tightness of the V wheel. X/Y axis V wheel adjustment: Gently dial the V-wheel by hand to check whether it is idling or stuck. If this phenomenon occurs, use an open-end wrench to adjust the eccentric isolation column to make it rotate smoothly. -
Page 13: Bed Leveling
9.Bed Leveling 1. Tighten four leveling nuts at the bottom of the platform before initial leveling. 2. Select “Settings” → “Leveling Mode” → “Assisted Leveling”, click number ②. The nozzle is too far away from the platform, so the filament fails to adhere to the platform. - Page 14 10.Bed Leveling Automatic leveling If you need to do automatic leveling , you can change to it in the following interface: Detailed instructions for use are available in the Storage card!...
-
Page 15: Software Installation
11.Software Installation 1. Double click to install the software 2. Double click to Select language → Next → Select your machine → Next → Finish open the software Please refer to the Slice Software User Manual in the Storage card fo details of so tw f are use! -
Page 16: First Printing
12.First Printing 1. Slicing Open the software → Load → Select the file → Wait for slicing to finish ,and save the gcode file to Storage card. * File name must be English or number. Don’t use Chinese or special symbols 2. -
Page 17: Circuit Wiring
13. Circuit Wiring Storage Card... - Page 18 14. FDM 3D PRINTING FILAMENTS FDM 3D PRINTING FILAMENTS Upgraded environmentally friendly Targeting at mid-end users, CR series is with HC series is cost-efficient. It’ s widely Ender series is widely applied to general formula, matte effect, high toughness, transparent tray plus black-white color box applicable to general FDM printer product FDM printer design, which meet customers' and fine printing.
- Page 19 15. UV sensitive resin parameter information Water Dental Jewelry Related High Temperature Standard Resin ABS Like Resin Dental Cast Resin Elastic Resin Toughness Resin Washable Resin Mode Resin Cast Resin Parameters Resin 150-250MPa·s 200-350MPa·s 50-170MPa·s 300-1000MPa·s 100-350MPa·s 150-300MPa·s 150-300MPa·s 150-300MPa·s 100-150MPa·s Viscosity (NDJ-8S Rotational...
- Page 20 Suitable for 99% FDM models CR-PLA 190-220 50-60 Suitable for 99% FDM models HC/EN-PLA 190-220 50-60 Hot bed is needed, and Creality printer enclosure 220-260 90-110 is recommended for DIY machine Hot bed is needed, and Creality printer enclosure PETG 230-250 60-100...
- Page 21 Please read the user manual and warranty card carefully before the use. For any service, Please priorly contact local seller or contact us via Email: cs@creality.com for support. See www.creality.com/after-service-policy/ for specific warranty information about your product and procedures to act on a warranty claim.
- Page 22 Before returning the product and filling in a warranty, please contact after-sale person for going through after-sale formality.And attach this warranty card along with the returned machine.
- Page 24 SHENZHEN CREALITY 3D TECHNOLOGY CO., LTD. Add:18F,JinXiuHongDu Building, Meilong Blvd., Longhua Dist., Shenzhen, China 518131 Official Website: www.creality.com Tel:+86 755-8523 4565 E-mail: info@creality.com cs@creality.com Scan To Learn More...
Need help?
Do you have a question about the CR-10 Max and is the answer not in the manual?
Questions and answers