
Subscribe to Our Youtube Channel
Related Manuals for Creality CR-10 Smart


Summary of Contents for Creality CR-10 Smart
- Page 1 CR-10 Smart 创造现实,成就梦想 Create reality,achieve dreams CR-10 Smart 3D Printer User Manual 3D打印机用户使用手册 V1.0...
- Page 2 随机使用说明: 您可以在TF卡内找到相关使用说明及视频。 您还可以登陆创想三维官网(www.cxsw3d.com)寻找相关软硬件、 联系方式、 设备操作、 设备保养等信息。 Firmware Upgrade Please login the official website https://www.creality.com/download, switch the language and select the relevant printer and model and download the required firmware, you can use it after the installation is finished. 固件升级 请您登录官网https://www.cxsw3d.com/ziliaoxiazai46.html, 选择相关机型与型号, 下载所需固件, 安装完成后即可使用。...
- Page 3 Users should comply with the laws and regulations of the corresponding countries and regions where the equipment is located (used), abide by professional ethics, pay attention to safety obligations, and strictly prohibit the use of our products or equipment for any illegal purposes. Creality will not be responsible for any violators' legal liability under any circustance.
-
Page 4: Table Of Contents
02-02 Parts List 零部件清单 03-03 Assemble the 3D Printer 组装3D打印机 04-08 Use the 3D Printer 使用3D打印机 09-13 Pairing via Bluetooth 蓝牙配网 14-14 Creality Cloud print 创想云打印 15-15 Off-line print 脱机打印 16-17 Start print 开始打印 18-18 Network reset 网络复位 19-19 20-20 Printer maintenance 打印机维护... -
Page 5: Introduction 设备简介
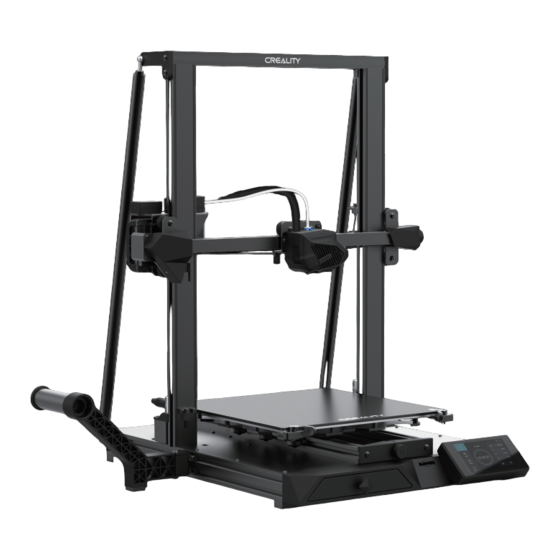
1. Introduction 设备简介 X Limit Switch Tool Box Coupling X轴限位开关 工具盒 联轴器 Spotlight SD Card Slot Z-axis motor (Z1) 射灯 卡槽 Z轴电机 Nozzle Kit Touch screen AC power supply 喷头套件 触摸屏 交流电源 Z-axis photoelectric switch USB interface Power switch USB接口 电源开关... -
Page 6: Parameters 设备参数
2. Equipment parameters 设备参数 Basic Parameters 基本参数 Model | 型号 CR-10 Smart Printing Size | 成型尺寸 300*300*400mm Molding Tech | 成型技术 Nozzle Number | 喷头数量 0.1mm-0.4mm Slice Thickness | 切片层厚 Nozzle Diameter | 喷嘴直径 Standard 0.4mm | 标配0.4mm Precision | 打印精度... -
Page 7: Parts List 零部件清单
3. Package Content 零件清单 Base Frame| 底座 Gantry Frame| 龙门架 Touch screen | 触摸屏 Power Cord| 电源线 Rack|料架 M5×12 Hexagon flat round M5x45 Sems Screw Pull rods| 拉杆 Filament | Spool|料管 耗材 ×4 head screw x2 M5x45组合螺丝 M5x12 内六角平圆头螺丝 M5x20 Hexagon flat round M5 Large Flat gasket head screws x2 ×2... -
Page 8: Assemble The 3D Printer 组装3D打印机
4. Install the Gantry Frame 安装龙门架 Base Frame|底座 Fix the lines on the nozzle kit with a black rolling belt as shown in the figure and re-fix it if any re-assembly before operation. 喷头组件上的线使用黑色轧带和卡扣固定,如图。 若是拆装后使用前请重新固定。 Gantry Frame|龙门架 Two Z-axis profiles, installed on the inner step of the Y-axis bottom profile. - Page 9 5. Pull Rod Installation 拉杆安装 Adjust the proper length of assembled pull rod and install in the position shown in the figure 拉杆组装调节到合适的长度, 安装在图示位置 M5×12 Hexagon flat round head screw x2 M5x12 内六角平圆头螺丝 M5x20 Hexagon flat round head screws x2 M5x20 内六角平圆头螺丝...
- Page 10 6. Install the Rack 安装料架 Rack|料架 Spool|料管...
- Page 11 7.Install the touch screen 安装触摸屏 1. Connect the FFC on the base with the touch screen. 1、把底座的排线与触摸屏连接起来 2. Fix the three screen locks on the touch screen to the studs of the base and press them into place. 2、将触摸屏上的三个屏幕锁固定在底座的螺丝柱上,并按压到位。 Touch screen |...
- Page 12 8. Cable Connection 设备接线 Power Cord|电源线 、Connect the 15pin port to the nozzle adapter board as shown in the figure按图示15pin端口连接喷头转接板 B、Connect Z-axis motor cable 连接Z轴电机线 C、Connect the photoelectric switch wire 连接光电开关线 、Connect the power cord 连接电源线 Caution ●Do not connect or disconnect the cables when the machine is powered on. ●当机器通电时,请勿连接或断开连接线。...
-
Page 13: Use The 3D Printer 使用3D打印机
9. Bed Leveling 调平平台 1. Slelct“Level”to automatically level 选择首页调平,即可自动调平 2. After the leveling is completed,adjust the Z-axis compensation value according to the adhesion of the printing consumables and the glass 调平完成后,依据打印耗材与玻璃平台的粘附情况,适当调节Z轴补偿值 >> >> >> >> During the leveling process,please do not touch the Teflon tube and nozzle cable. 调平过程中... - Page 14 10. Preheating Method 预热方法 Method 1 方法1 Notes: The UI information is only for reference,the actual UI may be different. 注意:界面仅供参考,实际以UI为准。...
- Page 15 10. Preheating Method 预热方法 Method 2 >> 方法2 >> Notes: The print preheating standard is adjusted at the factory, PLA preheating standard: nozzle temperature 200 °, hot bed temperature 60 °, ABS preheating standard: nozzle temperature 240 °, hot bed temperature 70 °.If you need to adjust it due to printing materials or other reasons, you can adjust the parameters on the interface home page control →...
- Page 16 11. Load Filament 装料 When you wait for the temperature to rise,hang the filament over the Filament Holder. 当您等待温度上升时,把耗材挂在料架上。 For loading filament smoothly,the end of the filament should be placed as shown above. 为了顺利完成装料,耗材的末端位置应如图所示。...
- Page 17 11. Load Filament 装料 When it reaches the target temperature, insert the filament into the small hole of the Extruder until it reaches the nozzle through the filament cutting detection module. If the filament flows out from the nozzle, it presents that the filament is properly loaded. 当前温度达到目标温度时,将耗材通过断料检测模块,插入挤出机小孔直至喷嘴位置,看到喷嘴处有耗材流出即表示耗材已经装载完成。...
-
Page 18: Pairing Via Bluetooth 蓝牙配网
12. Pairing via Bluetooth 蓝牙配网 >> >> >> >> 1.Download Creality Cloud 2.Register 3.Log in 4. Scan QR Code 5.Add equipment 5.连接本机蓝牙 1.下载创想云 2.注册 3.登录 4.选择蓝牙 >> >> >> >> >> 9. Printing 6. Connect to local WiFi 7. Select model 8. -
Page 19: Creality Cloud Print 创想云打印
13. Creality Cloud print 创想云打印 >> >> >> >> >> 2.Register 3.Log in 1.Download Creality Cloud 4. Scan QR Code 5. Add equipment 6. Network settings 1.下载创想云 2.注册 3.登录 5.新增设备 6.网络设置 4.扫一扫 >> >> >> >> >> >> 7. Connect machine WiFi 8. -
Page 20: Off-Line Print 脱机打印
3. Select language→Next→Select your machine→Next→Finish. >> >> 1. Double click to install the software. | 安装软件 4.Open Creality 3D slicer → Load (Read file) → Select file. 打开创想三维切片软件→Load (读取文件) →选择文件。 2、 Double click to open the software. | 打开软件 3.依次选择语言→Next→选择对应机型→Next→Finish,完成设置. - Page 21 14. Off-line print 脱机打印 >> 6.Insert the storage card→ Click print control→ Select the file to be printed. 5.Generate G-code, and save the gcode file to storage card. 插入存储卡→点击打印控件→选择 生成 G 代码→保存到存储卡 要打印的文件 Notes: For details on the software instructions, please refer File names must be Latin letters or numbers, not Chinese to the slicing software manual in the memory card! characters or other special symbols...
-
Page 22: Start Print 开始打印
15. Start Printing 开始打印 >> >> >> >>... -
Page 23: Network Reset 网络复位
16. Network reset 网络复位 11. Start Printing 开始打印 >> >> Note: 注意: 1. For the first use or after the WiFi path is reset, the WiFi will be reset after 1 minute. 在首次使用以及WiFi路径进行复位,请等待1分钟之后WiFi复位 2. The interface is for reference only, and the actual UI shall prevail. 界面仅供参考,实际以UI为准。... -
Page 24: Printer Maintenance 打印机维护
17. Printer maintenance 打印机维护 1.Rotate the glass pick-and-place handleplate for platform replacement. 1.转动玻璃取放手柄压板可进行平台更换。 2.Then manually turn the knob to the appropriate tightness to avoid belt breakage. (as shown in figure A, two places) 2.然后手动将旋钮左右拧到适合松紧度, 过紧容易造成皮带崩断。 (如图所示A二处) 3.Use water to clean the printing platform 3.打印平台需要用清水清洗... -
Page 25: Wiring Connection电路接线
18. Circuit Wiring 电路接线 Y axis motor Z1 axis motor Z2 axis motor Y 轴电机 Z1 轴电机 Z2 轴电机 Cable Port1 排线接口1 Storage Card Slot 存储卡卡槽 Cable Port2 排线接口2 WIFI Port WIFI 接口 Screen Interface 屏幕接口 Fuse 保险丝 Power Input Hot Bed Power Output Bed Thermistor Normal Fan... -
Page 26: Troubleshooting 故障检修
19. Trouble-shooting... - Page 27 19. 故障检修...
-
Page 28: Warranty Card 保修卡
Please read the user manual and warranty card carefully before the use. For any service, Please priorly contact local seller or contact us via Email: cs@creality.com for support. See www.creality.com/after-service-policy/ for specific warranty information about your product and procedures to act on a warranty claim. - Page 29 售后服务卡...
- Page 30 售后服务卡 微信公众号:深圳市创想三维科技有限公司...
- Page 33 Notes 笔记...
- Page 34 Notes 笔记...
- Page 36 SHENZHEN CREALITY 3D TECHNOLOGY CO., LTD. Add:18F,JinXiuHongDu Building, Meilong Blvd., Longhua Dist., Shenzhen, China 518131 Official Website: www.creality.com Tel:+86 755-8523 4565 E-mail: info@creality.com cs@creality.com 深圳市龙华区民治街道新牛社区梅龙大道锦绣鸿都大厦18F Scan To Learn More 公司网站:www.cxsw3d.com 扫 码 了 解 更 多 服务热线:400 6133 882 0755-8523 4565...
Need help?
Do you have a question about the CR-10 Smart and is the answer not in the manual?
Questions and answers