Table of Contents

Related Manuals for Pyronix ATLAS 8 PLUS


Summary of Contents for Pyronix ATLAS 8 PLUS
- Page 1 BUMBT QMVT Installation Manual LED & LCD Remote Keypad ATLAS 8 PLUS Pyronix Limited October 2001 This Product is approved for use in the Residential, Commercial and Light Industrial Environment ANALOG Rins163 Issue 9...
- Page 2 This product is sold subject to our standard warranty conditions and is warranted against defects in workmanship for a period of 2 years. In the interest of continuing improvement of quality, customer care and design, Pyronix reserve the right to amend specifications without giving prior notice.
-
Page 3: Table Of Contents
10.15 Atlas End of Line Wiring Diagram 10.16 Atlas Double Pole Wiring Diagram 10.17 Atlas End of Line Wiring Diagram with Negative Tamper Return ATLAS 8 PLUS LED - PROGRAMMING 11.1 Factory Defaults 11.2 Entering Engineer Mode 11.3 Setting Volume Control 11.4... - Page 4 11.11.4 System Option 2 11.11.5 System Option 3 11.11.6 System Option 4 11.11.7 Programmable Re-Sets 11.11.8 Alarm Receiving Centre Telephone Number 11.11.9 Alarm Receiving Centre Second Telephone Number 11.11.10 Customer Account Code 1 11.11.11 Downloading Access Code 11.11.12 Zone Alarm Reporting Codes 11.11.13 Zone Tamper Alarm Report Codes 11.11.14 System Set / Unset Reporting Codes 11.11.15 User Set Reporting Codes...
- Page 5 ATLAS 8 PLUS LCD - PROGRAMMING 12.1 Factory Defaults 12.2 Entering Engineer Mode 12.3 Setting Volume Control 12.4 Resetting The Non-Volatile Memory (NVM) to Factory Settings 12.5 Setting The Panel When Mains Fails 12.6 Programming Set Modes 12.7 Setting the Alarm Bell Time 12.8...
- Page 6 12.11.50 Exiting Engineer Mode 12.11.51 System Faults TECHNICAL SPECIFICATION 13.1 Power supply 13.2 Control PCB 13.3 Mechanical 13.4 Environmental 13.5 Cleaning 1 4. ENGINEER QUICK REFERENCE PROGRAMMING 1 5. COMMUNICATION PROGRAMMING ATLAS 8 PLUS SERVICE HISTORY 8 ZONE PROGRAMMING LABEL Page 6...
-
Page 7: Introduction
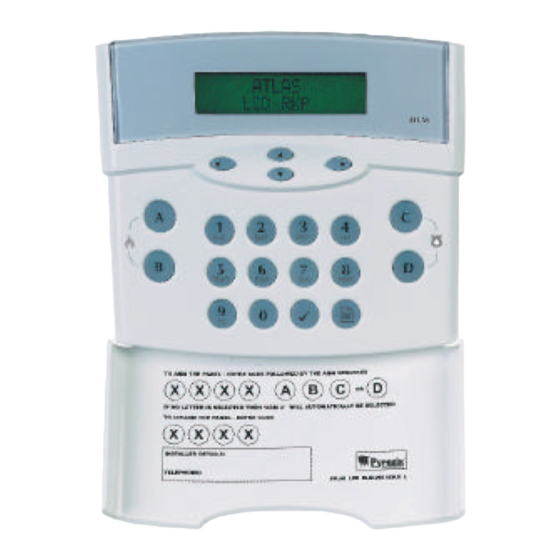
INTRODUCTION The Atlas is a fully featured intruder alarm control panel, based around a micro-controller with 8 fully programmable zones. It may be operated via a single Remote Keypad, a maximum of 3 remote keypads (Atlas RKPs) may be fitted at convenient points around the premises. -
Page 8: Safety
SAFETY 1. The mains electrical installation should be carried out in accordance with National and local regulations by a technically competent person. 2. Always remove / isolate the mains supply before carrying out servicing of the panel. 3. Connect the unit to a single pole fused spur. If the neutral cannot be identified use a double pole disconnect version. - Page 9 Rins163 Issue 9 Page 9...
-
Page 10: Access Levels
ACCESS LEVELS User Codes (Codes 3 to 7) 1. Panel setting and unsetting with a unique pass code. 2. Setting and unsetting of the door chime facility. 3. Event log viewing. Master & Manager Codes All User facilities plus Master Code 1, Manager Code 2) 4. -
Page 11: Functional Description
FUNCTIONAL DESCRIPTION Operating Modes Day Mode This is the state of the panel when unset. Fire, Personal Attack and Tamper inputs, however, remain active 24 hours a day. (These are referred to as 24-hour zones). Set Modes When the panel is set an activation of any Access, Immediate or 24 hour zone will cause an alarm condition. -
Page 12: Zones
ZONES Engineer Programmable Zones Entry / Exit This is a zone which allows limited-time access to the premises in order to set or unset the system. Access This is a zone which, on setting the panel, allows access to the Entry / Exit zone. However, if the panel is set and an Access zone is triggered before an Entry / Exit zone then an alarm will be generated immediately. -
Page 13: Functions
This option will allow the PIR LEDs to be enabled during Walk test mode if they have been originally disabled by removing the link pin. This option will only work if the PIR has a remote LED enable facility (e.g. Pyronix Enforcer Super). - Page 14 is active again. Follow Kiss Off: This option will allow the programmable output to switch on for a few seconds when a communication kiss off has been successfully completed. Shock Sensor Reset: When the panel is reset after an alarm activation and the panel is set, power to the shock sensors will be momentarily disconnected to reset any sensors connected to the programmable output.
- Page 15 System Option 3. The system may be configured for use with the following: Engineer Code Lock N.V.M Reset: This option allows the control panel programmable settings to be reverted back to factory default when in Engineer mode only. Engineer Power Up N.V.M Reset: This allows the control panel programmable settings to be reverted back to factory default when in User Mode.
- Page 16 System Option 6. The system may be configured for use with the following: Abort Digi Active High: This will switch from 0 to 12V at the Abort digi com output when the panel is reset after an alarm activation if a code is entered before a 90 second time out period.
- Page 17 Alarm Receiving Centre Second Telephone Number: This is an alternative number which will be used by the Atlas if the first telephone line is busy. If after four attempts connection with the first number fails then this number will be dialled.
-
Page 18: Installation And Wiring
INSTALLATION AND WIRING Before beginning any installation work read through this section carefully. Plan out the various areas and degrees of protection required from each zone. It is important to decide which type each zone should be if selective sets are to be used. - Page 19 Rins163 Issue 9 Page 19...
-
Page 20: Panel Assembly - Polymere
PANEL ASSEMBLY The Atlas 8 Plus is packaged with the transformer, speaker and tamper switch in place. The speaker cover, tamper switch pin and cable knock out should be removed from the panel prior to affixing to the wall. Tamper switch... -
Page 21: Panel Assembly - Metal
9B Panel Assembly - Metal 9B.1 Tamper Switch If required assemble the tamper switch from the optional kit of parts as indicated If necessary place the transformer and fasten into position using the screws supplied with the transformer kit Wall Mounting Rins163 Issue 9 Page 21... - Page 22 9B.1 PCB cable Entry holes Peg Holes Cable Entry Ensure the star / washer is placed under the earthing / grounding screw Note: If you are assembling the transformer and mains terminal block. Check that the outside of the bottom metalwork has a clear non-contaminated area for the head of the earthing / grounding screw.
-
Page 23: Power Connections
POWER CONNECTIONS 10.1 Mains Connection The mains supply should be carefully wired to an a.c. mains supply using suitably rated 3 core cable with a current capacity of not less than 5 amps. It should be connected to a fuse spur with a fuse rating of not more than 3 Amps. The mains connections at the power supply input are coded as follows, L –... -
Page 24: Digital Communicators
10.6 Digital Communicators The Digital communicators may be programmed to switch between 0 to 12 volts or 12 to 0 volts depending upon how the system options are programmed. 10.7 Auxiliary and Push To Set Auxiliary Negative (-) Push To Set Auxiliary Positive (+) The Push To Set or door bell switch must be a normally open contact switch. - Page 25 Rins163 Issue 9 Page 25...
-
Page 26: Double End Of Line Resistor
10.11 Double End of line resistors When a Sensor, and tamper are wired into the same zone this is called End of Line Zone (EOL). The Atlas panel uses resistors on all of its end of line zones. Two resistor values are used, these are 2K2 and 4K7. To identify the two resistors, coloured bands on the body are used. -
Page 27: Battery Capacity
: 130mA (0.130 A) Steady state current for detectors : 120mA (0.120 A) (e.g. 8 x 15mA for 8 hours - Pyronix PIRs) Typical standby current for external sounder : 50mA (0.050 A) (e.g. Self Actuating Bell for 8 hours) Typical on state current for external sounder (20 mins) : 350mA (0.35 A) - Page 28 Page 28...
- Page 29 Rins163 Issue 9 Page 29...
- Page 30 Page 30...
-
Page 31: Factory Defaults
ATLAS 8 PLUS LED - PROGRAMMING 11.1 Factory Defaults The panel is pre-programmed to the factory settings shown below. Master User code : 1234 (0000-9999) Manager : 5678 (0000-9999) Engineer code : 9999 (0000-9999) Bell timer : 20 minutes (programmable 2 to 20 mins) -
Page 32: Entering Engineer Mode
System Faults Off System Option 17 : Alarm Off P.A. On Fire On Confirmed Alarm Off System Option 18 : Abort Alarm On Set / Unset Off System Faults Off System Option 19 : Alarm Off P.A. On Fire On Confirmed Alarm Off System Option 20 : Abort Alarm On... -
Page 33: Programming Set Modes
11.6 Programming Set Modes. Any zone may be programmed to be any one of the following: Entry / Exit = e Access = a immediate = i omit = 0 momentary key = y latched key = d tamper = t personnal attack = p 24 hour = h fire = f... -
Page 34: Programmable Output
Shock Sensor Reset. 11.11.2 Programmable Output 2 Enter followed by for following options: OFF (programmable output 2 not used). PIR remote LED enable. PIR latch memory. Limited User Code 7 Switches Output for 5 secs. Output switch reflecting setting and unsetting of panel. Follow zone. -
Page 35: Alarm Receiving Centre Second Telephone Number
Enter followed by the number of re-sets required = continuous re-setting) 11.11.8 Alarm Receiving Centre Telephone Number Enter followed by the telephone number. (Up to 16 digits) By pressing the a " " is displayed to cause a 2 second pause during dial out. Press to store entry. -
Page 36: System Set / Unset Reporting Codes
11.11.13 Zone Tamper Alarm Reporting Codes Enter Enter 2 digits for each tamper zone. To disable an event insert blanks for both digits. To use hex codes, use the up key to select the character required and the key to accept. Example Tamper zone 1 Tamper zone 2... - Page 37 Rins163 Issue 9 Page 37...
-
Page 38: User Unset Reporting Codes
11.11.16 User Unset reporting codes Enter Enter 2 digits for seven reporting codes. To disable an event insert blanks for both digits. To use hex codes, use the up key to select the character required and the key to accept. Example Unset User 1 Unset User 2... -
Page 39: Digicom Codes
11.11.19 Digicom Codes Enter Enter digit 0 - 6 to program. SIA DTMF SIA pulse format P1 - 1400 Hz handshake 10pps SIA pulse format P2- 2300 Hz handshake 20pps SIA pulse format P3 - 1400 Hz handshake 20pps BSIA Format Serial events. -
Page 40: Bell Delay
11.11.24 Bell Delay Enter followed by the required bell delay time in minutes ( minutes). Enter to accept. 11.11.25 Anti Code First Digit Enter followed by the anti code prefix required, 11.11.26 Engineers P.C. Third Telephone Number Enter followed by the telephone number (up to 16 digits). By pressing the a "... -
Page 41: Communicator Test
11.11.31 Communicator Test Enter press the following keys to toggle through the following communication outputs. NOTE: If the reporting format option is set to BSIA fast format, the following event tests will be sent to the alarm receiving centre as events. - Alarm - P.A. - Page 42 11.11.36 System Option 14 Set A Send Options cont. Enter followed by . The RKP LED will toggle on and off as the numbered keys are pressed. Key Press Display Alarm Tamper P.A. Fire Abort On Set / Unset On System Fault On Spare Abort Off...
-
Page 43: Set A Set Option
11.11.42 System Option 20 Set D Send Options cont. Enter followed by . The RKP LED will toggle on and off as the numbered keys are pressed. Key Press Display Alarm Tamper P.A. Fire Abort On Set / Unset On System Fault On Spare Abort Off... -
Page 44: Final Door
Enter for final door. Enter for silent set. 11.11.48 Final Door Enter followed by the time required in seconds ( seconds) followed by Incorrect entry gives an audible error tone and correct entry gives three bleeps. Final door delay is factory set to seven seconds. - Page 45 Rins163 Issue 9 Page 45...
-
Page 46: Atlas 8 Plus Lcd - Programming
ATLAS 8 PLUS LCD - PROGRAMMING 12.1 Factory Defaults The panel is pre-programmed to the factory settings shown below. Master User code : 1234 (0000-9999) Manager : 5678 (0000-9999) Engineer code : 9999 (0000-9999) Bell timer : 20 minutes (programmable 2 to 20 mins) - Page 47 Rins163 Issue 9 Page 47...
-
Page 48: Entering Engineer Mode
System Option 17 : Alarm Off P.A. On Fire On Confirmed Alarm Off System Option 18 : Abort Alarm On Set / Unset Off System Faults Off System Option 19 : Alarm Off P.A. On Fire On Confirmed Alarm Off System Option 20 : Abort Alarm On Set / Unset Off... -
Page 49: Programming Set Modes
12.6 Programming Set Modes. Any zone may be programmed to be any one of the following: Entry / Exit Access immediate omit momentary key latched key tamper personnal attack 24 hour fire The attribute for each zone is changed by pressing until the required attribute appears in the display. -
Page 50: Programming Options
12.11 Programming Options 12.11.1 Programmable Output 1 Enter followed by for following options: OFF (programmable output 1 not used). PIR remote LED enable. PIR latch memory. Limited User Code 7 Switches Output for 5 secs. Output switch reflecting setting and unsetting of panel. Follow zone. -
Page 51: Programmable Re-Sets
12.11.6 System Option 4 Enter followed by . The RKP will toggle as the numbered keys are pressed. Key Press Display Anti code reset enabled Open Zones Displayed Alarm on line fail - Alarm on line fail - PC Anti code reset Open Zones Disabled No alarm on line fail - No alarm on line fail -... -
Page 52: System Set / Unset Reporting Codes
12.11.13 Zone Tamper Alarm Reporting Codes Enter Enter 2 digits for each tamper zone. To disable an event insert blanks for both digits. To use hex codes, use the up key to select the character required and the key to accept. Example Tamper zone 1 Tamper zone 2... -
Page 53: User Unset Reporting Codes
12.11.16 User Unset reporting codes Enter Enter 2 digits for seven reporting codes. To disable an event insert blanks for both digits. To use hex codes, use the up key to select the character required and the key to accept. Example Unset User 1 Unset User 2... -
Page 54: Digicom Codes
12.11.19 Digicom Codes Enter Enter digit 0 - 6 to program. SIA DTMF SIA pulse format P1 - 1400 Hz handshake 10pps SIA pulse format P2- 2300 Hz handshake 20pps SIA pulse format P3 - 1400 Hz handshake 20pps BSIA Format Serial events. -
Page 55: Engineers P.c. Third Telephone Number
12.11.25 Anti Code Enter followed by the anti code prefix required, 12.11,26 Engineers P.C. Third Telephone Number Enter followed by the telephone number (up to 16 digits). By pressing the a " " is displayed to cause a 2 second pause during dial out. Enter to accept. -
Page 56: Communicator Test
12.11.31 Communicator Test Enter press the following keys to toggle through the following communication outputs. NOTE: If the reporting format option is set to BSIA fast format, the following event tests will be sent to the alarm receiving centre as events. - Alarm - P.A. - Page 57 12.11.36 System Option 14 Set A Send Options cont. Enter followed by . The RKP will toggle as the numbered keys are pressed. Key Press Display Abort On Set / Unset On System Fault On Spare Abort Off Set / Unset Off System Fault Off Spare Enter...
-
Page 58: System Option
12.11.42 System Option 20 Set D Send Options cont. Enter followed by . The RKP will toggle as the numbered keys are pressed. Key Press Display Abort On Set / Unset On System Fault On Spare Abort Off Set / Unset Off System Fault Off Spare Enter... -
Page 59: Exiting Engineer Mode
12.11.48 Final Door Enter followed by the time required in seconds ( seconds) followed by Incorrect entry gives an audible error tone and correct entry gives three bleeps. Final door delay is factory set to seven seconds. If the exit door is reopened the delay is reset and the countdown commences when the exit door is finally closed. -
Page 60: Technical Specification
TECHNICAL SPECIFICATION 13.1 Power supply Mains input Voltage: : 230V +/- 10% Current: : 250mA Fuse: : F1 250mA slow blow T250mAH ceramic PCB input : 17V a.c. Fuses Low voltage output fuse – Bell : F1 1A quick blow F1AL glass Low voltage output fuse –... -
Page 61: Engineer Quick Reference Programming
ENGINEER QUICK REFERENCE PROGRAMMING SECTION LCD LED Set A Zone Attributes. Set B Zone Attributes. Set C Zone Attributes. Set D Zone Attributes. Bell Time Entry Time Exit Time Engineer Code Change Programmable Outputs 1 Programmable Outputs 2 System Option 1 System Option 2 System Option 3 System Option 4... - Page 62 Digicom Outputs Test Line Fail Reporting Codes System Option 11 System Option 12 System Option 13 System Option 14 System Option 15 System Option 16 System Option 17 System Option 18 System Option 19 System Option 20 System Option 21 Set A Set Option Set B Set Option Set C Set Option...
-
Page 63: Communication Programming
COMMUNICATION PROGRAMMING Programmable Outputs Programmable Output 1 Default Off Programmable Output 2 Default Off System Option 1 1 Default End Of Line 2 Default User log Reset Disabled 3 Default Tone Dial 4 Default Internal Sounder Only System Option 2 1 Default 24 Hour Test Dial 2 Default No Dial-in 3 BSIA Test Dial No... - Page 64 System Option 11 1 Alarm Off 2 P.A. On 3 Fire On 4 Confirmed Alarm On 1 Abort Alarm On System Option 12 2 Set / Unset Off 3 System Faults Off 4 Spare 1 Alarm On System Option 13 2 P.A.
- Page 65 No. of Re-Sets Tel. No. 1 Tel. No. 2 Tel. No. 3 Customer account code Download access code Event reporting Codes Zone Alarm Reporting Codes. Zone 1 Alarm Zone 2 Alarm Zone 3 Alarm Zone 4 Alarm Zone 5 Alarm Zone 6 Alarm Zone 7 Alarm Zone 8 Alarm...
- Page 66 Code User Set Reporting Codes Set User 1 Set User 2 Set User 3 Set User 4 Set User 5 Set User 6 Set User 7/Keyswitch User Unset Reporting Codes Unset User 1 Unset User 2 Unset User 3 Unset User 4 Unset User 5 Unset User 6 Unset User...
- Page 67 Restoral Reporting Codes Panel reset Restoral Bell Timeout Restoral Battery Restoral A.C. Restoral Test Transmission Line Fail on board comms Restoral Line Fail stu Restoral Full Power Up Restoral Miscellaneous Reporting Codes On-board comms line fail Off-board stu line fail Digicom Format Keyswitch Configuration...
-
Page 68: Atlas 8 Plus Service History
ATLAS 8 PLUS SERVICE HISTORY Page 68... - Page 69 Rins163 Issue 9 Page 69...
Need help?
Do you have a question about the ATLAS 8 PLUS and is the answer not in the manual?
Questions and answers