
Related Manuals for Insportline SM-3276


Summary of Contents for Insportline SM-3276
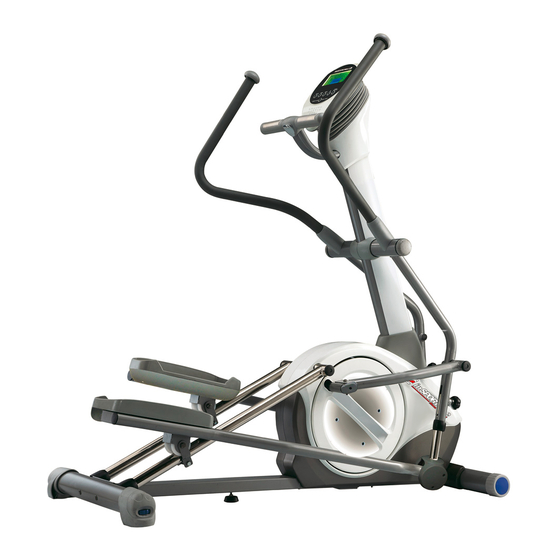
- Page 1 USER MANUAL – EN IN 6447 Climber For Home Use inSPORTline SM-3276 Product May Vary Slightly From Picture MADE IN TAIWAN...
-
Page 2: Table Of Contents
CONTENTS SAFETY INSTRUCTION ............................3 ASSEMBLY PARTS .............................. 4 HARDWARE IDENTIFICATION CHART ......................5 ASSEMBLE INSTRUCTIONS ..........................8 OPERATION INSTRUCTIONS .......................... 13 HOW TO ADJUST THE ADJUSTING ENDCAPS OF THE REAR STABILIZER ........13 HOW TO ADJUST CONSOLE ANGLE ......................14 HOW TO TOW THE ITEM SAFELY ...................... -
Page 3: Safety Instruction
Exercise can present a health risk. Consult a physician before beginning any exercise program with this equipment. If you feel faint or dizzy, immediately discontinue use of this equipment. Serious bodily injury can occur if this equipment is not assembled and used correctly. Serious bodily injury can also occur if all instructions are not followed. -
Page 4: Assembly Parts
WARNING: Before starting any exercise or conditioning program you should consult with your personal physician to see if you require a complete physical exam. This is especially important if you are over the age of 35, have never exercised before, are pregnant, or suffer from any illness READ AND FOLLOW THE SAFETY PRECAUTIONS. -
Page 5: Hardware Identification Chart
Handrail Base Cover Pedal Bottom Case Adaptor HARDWARE IDENTIFICATION CHART Unpack the box in a clear area. Follow the List of Hardware Kit below. This chart is provided to help identify the hardware used in the assembly process. Place the washers, the end of bolts, or screws on the circles to check for the correct diameter. - Page 6 see if it has been pre-assembled HARDWARE KIT A Part No. and Description Q’TY 79 Lock Washer (M8) 6 pcs 80 Washer (8x16x2.0t) 2 pcs 93 Bolt (M6xp1.0x25mm) 2 pcs 94 Bolt (M8xp1.25x16mm) 4 pcs 101 Bolt (M8xp1.25x90mm) 2 pcs 106 Bolt (M8xp1.25x90mm) 2 pcs 109 Carriage Bolt (M8xp1.25x90mm)
- Page 7 BEFORE YOU BEGIN Thank you for choosing the Climber. We take great pride in producing this quality product and hope it will provide many hours of quality exercise to make you feel better, look better and enjoy life to its fullest. Yes, it's a proven fact that a regular exercise program can improve your physical and mental health.
-
Page 8: Assemble Instructions
THE FOLLOWING TOOLS ARE INCLUDED FOR ASSEMBLY: PHILLIPS ALLEN WRENCH WRENCH SCREWDRIVER (6mm) (5 mm) (10 & 13 mm) ASSEMBLE INSTRUCTIONS STEP 1 – Front Stabilizer Assembly Attach the Front Stabilizer (2) to the Main Frame (1). NOTE: “Small Tip: Attach screws and bolts to the assembly parts first before secure” To assemble the Front Stabilizer (2) to the Maine Frame (1) with more efficient and easy way, it is suggested to attach two Washers (8x16x2.0t)(80), two Lock Washers (M8)(79) and two Bolts (M8xp1.25x90mm)(101) to the Front Stabilizer (2) and the Maine Frame (1) first before fully secure. - Page 9 NOTE: For shipping purpose, 1pcs Washer (8x16x2.0t)(80), 1pcs Lock Washer (M8)(79) and 1pcs Bolt (M8xp1.25x20mm)(103) are attached on the Main Frame (1) as the draft shown on the left. a. Remove 1pcs Washer (8x16x2.0t)(80), 1pcs Lock Washer (M8)(79) 1pcs Bolt (M8xp1.25x20mm)(103) from the Main Frame (1).
- Page 10 Slide the Upright Sleeve (37) onto the Upright Post (6). NOTE: For shipping purpose, 5pcs Nylon Nuts (M8xp1.25)(112) are attached on the Main Frame (1). Remove 5pcs Nylon Nuts (M8xp1.25)(112) from the Main Frame (1). Refer to FIG.A’s 3 following drawings, in order to let point A (Middle Handlebar) and point B (Pedal Arm Connector) could connect nicely, before attaching the Upright Post (6) to the Main...
- Page 11 d. Repeat the above same procedure for the left side. e. Go back to Step 4 to fully tighten 5pcs Nylon Nuts (M8xp1.25)(112) on the bottom of the Upright Post (6). f. Slide the Upright Sleeve (37) down to cover the open area of the Main Frame (1). STEP 7 –...
- Page 12 STEP 9 – Handrail Base Cover Assembly To assemble the Handrail Base Cover (42, 43), place the Left Handrail Base Cover (128) at the inner side of the Right Middle Handlebar (11). Place the Right Handrail Base Cover (129) at the outer side of the Right Middle Handlebar (11).
-
Page 13: Operation Instructions
Attach the Right Console Sleeve (35) and the Left Console Sleeve (34) to the Upright Post Assembly (6). Bolt the Console Sleeve (34, 35) with 4pcs Bolts (M5xp0.8x15mm)(91). NOTE: Make sure that the Right Console Sleeve (35) and the Left Console Sleeve (34) would cover the Upright Cover and the lowest layer of the Console Bottom Cover (33) as the following illustration shown. -
Page 14: How To Adjust Console Angle
HOW TO ADJUST CONSOLE ANGLE To get the best console angle, it’s suggested to use both hands to hold the upper and lower end of the console and gently adjust the console angle to the proper position. HOW TO TOW THE ITEM SAFELY Hold the Rear Stabilizer (3) up with two hands and tow the item to the desired place carefully •... -
Page 15: How To Adjust The Stride Length
HOW TO ADJUST THE STRIDE LENGTH The Climber is equipped with three adjustable stride lengths from 19’’ (483mm) to 21’’ (539mm) To adjust the stride length, loosen and pull the Spring Knob (48). Move the Pivoting Arm (12) to the proper desired position Release the Spring Knob (48) and make sure the pin on the knob get into the adjustment hole in the Pivoting Arm (12). -
Page 16: Console Instructions
CONSOLE INSTRUCTIONS Take a few minutes to review the console layout. Below is an overview of the console’s features and functions We recommend that you use the console to help vary your workout routine and keep you focused on your process toward your fitness goals. -
Page 17: Console Buttons
Console Buttons Press START/PAUSE to begin your exercise Press START/PAUSE again to stop and pause all functions during your exercise program. All the date on the display will then freeze. Press START/PAUSE again to resume the program and all the date displayed will continue until the program has finished. - Page 18 During workout (after pressing START/PAUSE), the user could press MODE to select SPEED, DISTANCE and CALORIES, or RPM, ODO (Odometer) and WATT RPM, ODO, WATT will show at the same SPEED, DISTANCE, CAL. will show at time the same time DISTANCE and ODO (ODOMETER) information: DISTANCE: This measures the total distance from 0 to 999 km/Mile.
-
Page 19: Console Functions
after the console counts down to zero, which means the HEART RATE SENSORS won’t be able to pick up the signals. Press any keys to stop the long beep sound, then press PULSE RECOVERY button again and make sure to hold the HEART RATE SENSORS on the handrails with both hands properly this time. - Page 20 The console would automatically shut off after 4 minutes of inactivity. The DISTANCE value’s counting will restart to zero after pedaling or pressing any keys to active the console again RESET INFO. of ODO: To reset ODO’s distance value, press UP, MODE, DOWN and ENTER at the same time to let the motor automatically calibrate to reset ODO value to zero FAT%:...
-
Page 21: Manual Program (P1)
HEART RATE: You must place both of your hands on the Pulse Sensors on the Handlebar. Your pulse will be displayed approximately few seconds after the heart symbol “ ” is displayed If you do not place your hands correctly and a few seconds passes without a pulse input, the console will turn off the pulse circuit. - Page 22 A. ENTER MANUAL PROGRAM (P1) ENTER button: START/PAUSE button: If you have selected other program (P2~P16), When the power is turned on, the manual program pressing START/PAUSE button to pause the (P1) will be selected, pressing ENTER button to current program confirm and enter MANUAL PROGRAM (P1) UP or DOWN button: Press UP or DOWN button to select MANUAL...
- Page 23 C. SET THE DESIRED CALORIES and YOUR AGE 1. ENTER button and then UP or DOWN button: Press ENTER button to confirm TIME or DISTANCE value and enter the mode to set the CALORIES b. Use UP or DOWN buttons to set the desired CALORIES (10 TO 9990KCAL;...
- Page 24 F. DURING WORKOUT, THE TORQUE/TENSION LEVEL IS EASILY CHANGED AT ANY TIME UP or DOWN button: You can change the torque/tension level (from 1 to 16 levels) at any time during workout by pressing UP or DOWN button G. DURING WORKOUT, ALWAYS NOTICE TARGET HEART RATE – A EASY WAY TO SET A GOAL TO “STRENGTHEN YOUR CARDIOVASCULAR WORKOUT To improve your cardiovascular condition, while input your personal age during the setting mode, the console will calculate the appropriate TARGET HEART...
-
Page 25: Program (P2 ~ P7)
PROGRAM (P2 ~ P7) Prior information: Press any button on the console or begin pedaling to turn on the console Make sure that the power cord is properly plugged into the socket The console would automatically shut off after 4 minutes of inactivity Press any button on the console or begin pedaling to turn on the console. - Page 26 A. ENTER MANUAL PROGRAM (P2~P7) a. START/PAUSE button: If you have selected other program (P1 or P8 ~ P16), pressing START/PAUSE button to pause the current program b. UP or DOWN button: Press UP or DOWN button to select PROGRAM (P2 ~ P7) c.
- Page 27 a. Press ENTER button to confirm the TIME or DISTANCE value and enter the mode to set the CALORIES b. Use UP or DOWN buttons to set the desired CALORIES (10 TO 9990KCAL; 10 KCAL INCREMENT) NOTE for CALORIES: Count Up: If target calories was not selected, this would measure total calories burned during exercise Count Down: If you have set the preference value of calories, the console will count down from that selected value down to 0 ENTER button and then UP or DOWN button:...
- Page 28 UP or DOWN button: You can change the torque/tension level (from 1 to 16 levels) at any time during workout by pressing UP or DOWN button G. DURING WORKOUT, ALWAYS NOTICE TARGET HEART RATE – A EASY WAY TO SET A GOAL TO “STRENGTHEN YOUR CARDIOVASCULAR WORKOUT To improve your cardiovascular condition, while input your personal age during the setting mode, the console will calculate the appropriate...
-
Page 29: Body Fat Program (P8)
BODY FAT PROGRAM (P8) Prior information: Press any button on the console or begin pedaling to turn on the console Make sure that the power cord is properly plugged into the socket. The console would automatically shut off after 4 minutes of inactivity Press any button on the console or begin pedaling to turn on the console. - Page 30 UP or DOWN button: After pressing the ENTER button, the GENDER function mode will appear with the display flashing “ ”. Use UP or DOWN buttons to set your GENDER ENTER button and then UP or DOWN button: Press ENTER button to confirm your GENDER and enter the mode to set your HEIGHT b.
- Page 31 BMI (BODY MASS INDEX): Body Mass Index is a height / weight formula used by health and weight professionals around the world to asses a person’s body weight, measuring the level of body fatness in an individual. From your body mass index number you can see if you are underweight, normal weight, overweight or obese BMI conclusion very THE RESULT...
- Page 32 ERROR INFORMATION: If you do not place your hands on the Pulse Sensors correctly, the Pulse Sensors won’t be able pick up the signals. The console would then display an error message “E3”. To test it again, be sure to place your hands back on the Pulse Sensors correctly...
-
Page 33: Program (P9 ~ P12)
H. R. C. PROGRAM (P9 ~ P12) Prior information: Press any button on the console or begin pedaling to turn on the console Make sure that the power cord is properly plugged into the socket The console would automatically shut off after 4 minutes of inactivity Press any button on the console or begin pedaling to turn on the console. - Page 34 c. ENTER button: Press ENTER button to confirm and enter H.R.C. PROGRAM (P9 ~ P12) B. SET THE DESIRED TIME or DESIRED DISTANCE To avoid the user to select TIME and DISTANCE in the same program to confuse the user couldn’t distinguish which one (TIME or DISTANCE) as the first priority.
- Page 35 If you have selected PROGRAM 9, select TARGET If you have selected PROGRAM 10~12, select your HEART RATE: AGE: ENTER button and then UP or DOWN button: ENTER button and then UP or DOWN button: a. Press ENTER button to confirm the CALORIES a.
- Page 36 so you TARGET HEART RATE ZONE in this example is 109 to 119. The program will monitor your pulse and adjust the torque/resistance level automatically to keep your pulse within the HEART RATE ZONE (109 – 119) during workout F. START EXERCISE START/ PAUSE button: Press START/ PAUSE to begin exercise.
-
Page 37: User Setting Program (P13 ~ P16)
About ODO (odometer), the function is similar to DISTANCE, will accumulate the total distance traveled by the item during workout. If there is any necessary to reset ODO’s distance value, press UP, MODE, DOWN and ENTER at the same time to let the motor automatically calibrate to reset ODO value to zero USER SETTING PROGRAM (P13 ~ P16) Prior information: Press any button on the console or begin pedaling to turn on the console... - Page 38 A. ENTER USER MODE PROGRAM (P13~P16) a. START/PAUSE button: If you have selected other program (P1 ~ P12), pressing START/PAUSE button to pause the current program UP or DOWN button: Press UP or DOWN button to select USER MODE PROGRAM (P13 ~ P16) c.
- Page 39 Count Down: If you have set the preference value of calories, the console will count down from that selected value down to 0 D. SET THE DESIRED CALORIES and YOUR AGE ENTER button and then UP or DOWN button: Press ENTER button to confirm the CALORIES value and enter the mode to set the AGE b.
- Page 40 UP or DOWN button: You can change the torque/tension level (from 1 to 16 levels) at any time during workout by pressing UP or DOWN button I. DURING WORKOUT, ALWAYS NOTICE TARGET HEART RATE – A EASY WAY TO SET A GOAL TO “STRENGTHEN YOUR CARDIOVASCULAR WORKOUT To improve your cardiovascular condition, while input your personal age during the setting mode, the console will calculate the appropriate...
-
Page 41: Console Trouble Shooting Guide
CONSOLE TROUBLE SHOOTING GUIDE PROBLEM POSSIBLE CAUSE SOLUTION 1. Motor Malfunction Replace Motor 2. Magnetic System Replace Magnetic System/Flywheel Malfunction or got stuck No Motor signal 3. Connection Wires are Check whether the wires are well-connected or not well-connected or replace the broke wires with the new wires broken 4. -
Page 42: Conditioning Guidelines
Verify that the sensor Magnet is installed correctly The Sensor is faulty Replace the Speed Sensor The Computer is faulty Replace the Computer The connection between the Circuit Board and the LCD Membrane is loose. Verify that the Circuit Board is securely fastened to the Computer Case. Gently press down Retighten the Screws. - Page 43 During the first few months of your exercise program, keep your heart rate near the low end of your target zone as you exercise. After a few months, your heart rate can be increased gradually until it is near the middle of your target zone as you exercise.
- Page 44 While sitting on the floor, have legs apart one leg straight and one knee bent. Pull the chest down to touch the thigh on the leg that is bent and twist at the waist. Hold this position at least 10 seconds. Repeat 10 times on each side.
-
Page 45: Product Parts Drawing (A)
PRODUCT PARTS DRAWING (A) -
Page 46: Product Parts Drawing (B)
PRODUCT PARTS DRAWING (B) -
Page 47: Parts List
PARTS LIST Part Name Q'ty Main Frame Front Stabilizer Rear Stabilizer Left Sliding Rail Right Sliding Rail Upright Post Fixed Handlebar Left Upper Handlebar Right Upper Handlebar Left Middle Handlebar Right Middle Handlebar Pivoting Arm Left Pedal Support Arm Right Pedal Support Arm Linkage Pedal Arm Connector Left Chain Cover... - Page 48 Console Bottom Cover Left Console Sleeve Right Console Sleeve Rotator Cuff Upright Sleeve Hand Pulse Upper Cover Hand Pulse Bottom Cover Handlebar Decoration Cover Round Plug Foam Grip for Upper Handlebar Handheld Plug Handlebar Sleeve Middle Handlebar Bushing Securing Cap (ψ60) Round Plug (25.4mm) Spring Knob Bushing (12×38mm)
- Page 49 Bearing (6000) Bearing (6004) Bearing (6300) Spacer (10×14×2mm) C-Ring E-Ring Eye Bolt Tension Bracket Wave Washer Lock Washer Washer (8×16×2.0t) Washer (8×60×2.0t) Washer (10×23×2.0t) Washer (17×33.4×0.5t) Washer (21×30×0.5t) Washer (21×30×1.0t) Screw (M3×25mm) Screw (M4×16mm) Screw (M4×16mm) Bolt (M5×18mm) Bolt (M5×p0.8×25mm) Bolt (M5×p0.8×15mm) Bolt (M5×p0.8×25mm) Bolt (M6×p1.0×25mm)
- Page 50 106 Bolt (M8×p1.25×90mm) 107 Bolt (M10×p1.5×85mm) 108 Bolt (M8×p1.25×16mm) 109 Carriage Bolt (M8×p1.25×90mm) 110 Nylon Nut (M6×p1.0) 111 Thin Nylon Nut (M8×p1.25) 112 Nylon Nut (M8×p1.25) 113 Nylon Nut (M10×p1.5) 114 Nut (M8×p1.25) 115 Flange Nut (M10) 116 Flange Nut - Black Color (M10) 117 Upper Connection Wire 118 Middle Connection Wire 119 Lower Connection Wire...
-
Page 51: Terms And Conditions Of Warranty, Warranty Claims
TERMS AND CONDITIONS OF WARRANTY, WARRANTY CLAIMS General Conditions of Warranty and Definition of Terms All Warranty Conditions stated hereunder determine Warranty Coverage and Warranty Claim Procedure. Conditions of Warranty and Warranty Claims are governed by Act No. 40/1964 Coll. Civil Code, Act No. 513/1991 Coll., Commercial Code, and Act No. - Page 52 +420 556 770 190, Mobile: +420 604 853 019, servis@insportline.cz Fax: +420 556 770 192, (Service +420 556 770 191) Web: www.insportline.cz, www.worker.cz, www.worker-moto.cz INSPORTLINE, s.r.o. Bratislavska 36, 911 05 Trencin, Slovakia CRN: 36311723, VAT ID: SK2020177082 Orders: +421(0)326 526 701, +421(0)917 649 192, objednavky@insportline.sk...
Need help?
Do you have a question about the SM-3276 and is the answer not in the manual?
Questions and answers