Table of Contents
Advertisement
Quick Links
Advertisement
Table of Contents

Related Manuals for Insportline ZenStride 300


Summary of Contents for Insportline ZenStride 300
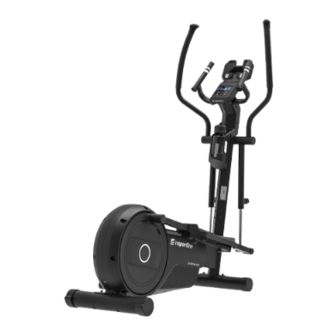
- Page 1 USER MANUAL – EN IN 27568 Elliptical Trainer inSPORTline ZenStride 300...
-
Page 2: Table Of Contents
CONTENTS SAFETY INSTRUCTIONS ........................3 PARTS LIST ............................4 ASSEMBLY ............................. 5 CONSOLE ............................. 10 BUTTONS ............................10 DISPLAY ............................11 PROGRAMS ............................12 iCARDIO APPLICATION ........................20 iCONSOLE APPLICATION ........................25 SIGN IN .............................. 26 HISTORY ............................27 REST HR TEST ..........................28 SUPPORT ............................ -
Page 3: Safety Instructions
SevenSport s.r.o. reserves the right to make any changes and improvements to its product without prior notice. Visit our website www.insportline.eu where you will find the latest version of the manual. SAFETY INSTRUCTIONS • Please read the manual before use and keep it for future reference. -
Page 4: Parts List
• Load capacity: 150 kg • WARNING! The heart rate monitoring system may not be accurate. Overexertion during training can cause serious injury or death. If you feel nauseous, stop exercising immediately! PARTS LIST... -
Page 5: Assembly
ASSEMBLY Remove the nuts (J1), spring washers (J2), washers (J3), and screws (J17) from the rear stabilizer (C). Attach the rear stabilizer (C) to the main frame (A) using the nut (J1), spring washer (J2), washer (J3), and screw (J17). Remove the bolts (J4), washers (J5), and spring washers (J15) from the main frame (A). - Page 6 Slide the washers (J8) onto the column axes. Slide the handle (E2) onto the axle, then secure with the washer (J7), cap (N1), and bolt (E1). Repeat on the other side. Connect the pedals to the handles using the hand knob (E4). Set the sides evenly. Make sure you tighten the hand knob.
- Page 7 Unscrew the bolts (J9), spring washers (J2), washers (J5) from the pedal frame (A49). Attach the reinforcement plate (A54) to the pedal frame (A49) with screws (J9), spring washer (J2), washer (J5). Attach the pedals (H) with hand screws (H1), spring washers (J10), and washers (J11). Repeat for the other side.
- Page 8 Be careful not to pinch the cables. Unscrew the bolts (G1) from the console (G). Connect the cables (L2, L3, L4, L5). Attach the console (G) to the console bracket with removed bolts (G1). Be careful not to pinch cables. You can level the trainer using the leveling feets (C2 and C3).
- Page 9 Place the bottle (K) in the holder (A). You can move the trainer by tilting it on the wheels on the front stabilizer. Always ask another person for help.
-
Page 10: Console
CONSOLE BUTTONS Button Function Increasing the value of e.g. load, performance, time UP (+) Navigation button Reduction of the value of e.g. load, power, time DOWN (-) Navigation button MODE Selecting a function or setting Hold for 2 seconds to restart the console RESET Press the button to return to the main menu if the program is paused START/STOP... -
Page 11: Display
DISPLAY Function Description Current speed SPEED Range: 0.0 ~ 99.9 Revolutions per minute Range: 0~999 Exercise time TIME Range: 0:00 ~ 99:59 Distance DISTANCE Range: 0.0 ~ 99.9 Burned calories CALORIES Range: 0~9999 Power WATT Range: 0~999 Pulse PULSE Range: 0-30~230 U1 ~ U4 profiles Gender: male / female U1~U4... -
Page 12: Programs
PROGRAMS TURN ON • Plug in the power (or hold RESET for 2 seconds), the console will start, and the display will show all segments for 2 seconds (Fig. 1). • The LCD display will display the wheel diameter, the unit (Km or mile) for 1 second (Fig. 2), the resistance will be set to 1 level. - Page 13 • The LCD display will show MANUAL (Fig. 8), the user can use the navigation buttons to select programs WATT (Fig. 9) – H.R.C (Fig. 10) – USER (Fig. 11) – PROGRAM (Fig. 12) – MANUAL. Confirm program selection by pressing MODE. Fig.
- Page 14 Manual program • Press START/STOP to start the program immediately. • Use the navigation buttons to select MANUAL, confirm the program by pressing MODE/ENTER. • Press the navigation buttons to set the load (fig. 13), confirm the load by pressing MODE. •...
- Page 15 WATT program • Use the navigation buttons to select the WATT program, confirm by pressing MODE (fig. 9). • The WATT value will flash, set the value (the original value is 120, Fig. 19). Adjust the value using the navigation buttons. Press MODE to confirm the value. You will pass the time setting. •...
- Page 16 HRC program • Use the navigation buttons to select the HRC program (Fig. 10). Confirm by pressing MODE. • Use the navigation buttons to select the values 55%, 75%, 90% and TARGET (Fig. 20 ~ 23). The original value is calculated from the entered age in the profile and will be displayed on the PULSE display.
- Page 17 USER program • Use the navigation buttons to select USER (fig. 11), confirm by pressing MODE (fig. 24). • Use the navigation buttons to set the load (Fig. 25). Each value must be confirmed by pressing MODE. 10 segments need to be set. After setting all 10 segments, it is necessary to set the training time.
- Page 18 RECOVERY program • After your workout, wear the chest strap or grab the heart rate sensors and press RECOVERY. A countdown starts from 00:60 to 00:00 (Fig. 28). After the calculation is completed, the result F1 ~ F6 will be displayed (Fig. 29). F1 is the best result, F6 the worst. •...
- Page 19 Bluetooth Not connected (Fig. 31) Connected (Fig. 32) Preset programs...
-
Page 20: Icardio Application
iCARDIO APPLICATION • Download the iCARDIO app to your smart device. • *The application is compatible with Android 9 / iOS 13 and above systems Android • Start Bluetooth on your smart device. • Start the application and enter the iCardio password, the password must be entered only the first time the application is launched. - Page 21 Tablet Smartphone Select Bluetooth Tablet Smartphone Check if the numbers on the back of the machine are identical to the number in the application, if so, confirm by pressing confirm.
- Page 22 If the device does not appear in the application, try the following steps: 1. Press the arrow icon in the lower right corner. 2. Unplug and plug in the machine adapter. 3. Restart your smart device. *Make sure Bluetooth is turned on on your smart device. *If none of the three options above work, contact the service center.
- Page 23 Press and select language. Tablet Smartphone Manual for the iCardio application Press the icon in the left-hand corner. Tablet Smartphone Press...
- Page 24 Tablet Smartphone *The language of the manual changes according to the set language of the application. Apart from the iCardio application, it is possible to pair the machine via Bluetooth with the KINOMAP and Zwift applications. You can find apps in Google or Apple store. The applications are operated by a third party and the seller responsible operation...
-
Page 25: Iconsole Application
iCONSOLE APPLICATION Android In iConsole +, select MY TRAINING. Here you can see a summary of your training (total distance, total time, calories burned) -
Page 26: Sign In
SIGN IN 1. Choose your avatar on left side to enter profile 2. Log in with your Facebook, Gmail or WeChat settings account 3. If you forgot your password you can choose Reset my password. Your new password will be send to your email. -
Page 27: History
MEMBERSHIP • Choose your profile picture to enter profile settings. • You can change profile picture or update your profile information. (If don’t enter all required information, calculated data may not be calculated correctly.) SIGN OUT • Choose your profile picture to enter profile settings. •... -
Page 28: Rest Hr Test
REST HR TEST WARNING! A system for monitoring heart rate may not be accurate. Overloading during training may cause serious injury or death. If you feel any discomfort, immediately stop the exercise! Select your profile picture to expand the menu. Select source: Apple watch or BLE HRM Select REST HR TEST. -
Page 29: Support
After connecting, select START and 60s countdown will begin. After the countdown, the rest heart rate is displayed at and the heart rate is calculated for the most accurate training program. SUPPORT Select your profile picture to expand the menu. Select SUPPORT. -
Page 30: Setting
SETTING Select your profile picture to expand the menu. Select unit: metric or imperial. Select SETTING. Select source: Apple watch or BLE HRM... -
Page 31: Quick Start
Check the program version QUICK START 1. Bluetooth connection: Select the device you are using. If you are using a heart rate monitor, you can select it below. 2. Once the devices are paired, click> icon in the top right corner. 3. - Page 32 4. After turning on the program, you can adjust the load or pause / stop the program. 5. Select the pin icon to pin the data. 6. When you finish the exercise a summary of the exercise is displayed. You can compare results with...
-
Page 33: Interval
INTERVAL 1. You can select the number of repetitions (interval cycles) (number in green circle), time (exercise time and rest time), level, target RMP, select go to start the program 2. After turning on the program, you can set the load or pause / stop the program. - Page 34 3. Select the pin icon to pin the data. 4. When you finish the exercise a summary of the exercise is displayed. You can compare results with previous workouts.
-
Page 35: Map My Route
MAP MY ROUTE 1. Select a location. 2. Select a start point. 3. Select the route and swipe the yellow GO button to the left. You can reset the route with the green button. 4. If you do not want to set the route yourself, you can select one of the preset routes. -
Page 36: Constant Power
CONSTANT POWER 1. After pairing with Bluetooth, set time, target power, target RPM, target cadence 2. Training graphs are displayed, select one of the two graphs (Cadence Power). following information displayed or by pined with the pin button... - Page 37 3. Touch the display to pause or stop the training. 4. Workout at constant speed.
-
Page 38: Programs
5. When you finish the exercise a summary of the exercise is displayed. You can compare the results with previous workouts. PROGRAMS 1. After pairing with Bluetooth, select the program. preset programs displayed. - Page 39 2. The display shows the progress of the training. 3. Select the pin icon to pin the data. 4. Touch the screen to stop or pause the program or select the load.
-
Page 40: Ai Training
5. When you finish the exercise a summary of the exercise is displayed. You can compare results with previous workouts. AI TRAINING 1. After pairing with Bluetooth, select the machine (you select multiple machines). - Page 41 2. Select your goal / program 3. Set your schedule.
-
Page 42: Gym Center
4. Training Overview 5. Training time, machine and goal / program change GYM CENTER In GYM CENTER, the user can download various training programs. 1. Download the selected program 2. Turn on iRoute + program 3. For iRoute + (Google Maps) training, the user must have wifi on and be logged in. USE OF ELEPTICAL TRAINER The elliptical trainer is a popular fitness machine, one of the newest and most effective home training machines. - Page 43 2. EXERCISING This phase is the most physically demanding part. Regular exercise strengthens the muscles. You can determine the tempo yourself, but it is very important that it is the same throughout the exercise. Heart rate should be within the target zone (see figure below). This phase should last at least 12 minutes.
-
Page 44: Maintenance
MAINTENANCE • Use only a soft cloth and a mild detergent. • Do not clean the plastic parts with abrasives or solvents. • Wipe the sweat after each use. • Protect the device from moisture and extreme temperatures. • Protect your device, computer and console from direct sunlight. •... - Page 45 6-month battery warranty – we guarantee that battery's nominal capacity does not fall below 70% of its total capacity within 6 months of the product’s sale. The Warranty does not cover defects resulting from (if applicable): • User’s fault, i.e. product damage caused by unqualified repair work, improper assembly, insufficient insertion of seat post into frame, insufficient tightening of pedals and cranks •...
- Page 46 Phone: +420 556 300 970 E-mail: eshop@insportline.cz reklamace@insportline.cz servis@insportline.cz Web: www.inSPORTline.cz inSPORTline s.r.o. Headquaters, warranty & service center: Električná 6471, Trenčín 911 01, SK CRN: 36311723 VAT ID: SK2020177082 Phone: +421(0)326 526 701 E-mail: objednavky@insportline.sk reklamacie@insportline.sk servis@insportline.sk Web: www.inSPORTline.sk...
Need help?
Do you have a question about the ZenStride 300 and is the answer not in the manual?
Questions and answers