Table of Contents
Advertisement
Quick Links
Advertisement
Table of Contents

Related Manuals for Insportline inCondi ET660i II


Summary of Contents for Insportline inCondi ET660i II
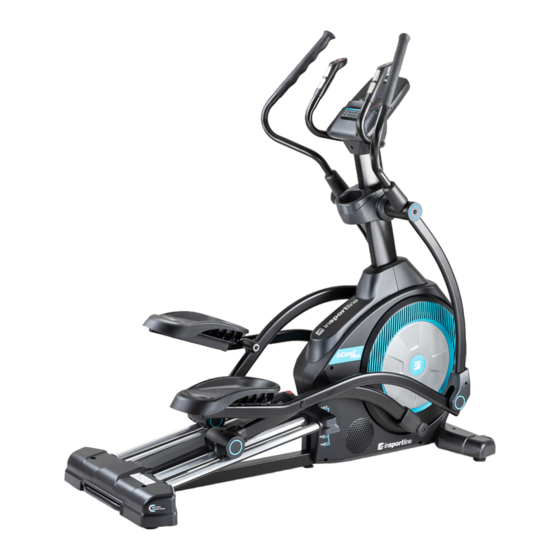
- Page 1 USER MANUAL – EN IN 21341 Elliptical inSPORTline inCondi ET660i II...
-
Page 2: Table Of Contents
CONTENTS SAFETY INSTRUCTIONS ........................3 IMPORTANT NOTES ..........................3 ASSEMBLY ............................. 4 INCLINE ADJUSTMENT ......................... 9 CONSOLE ............................... 9 USE ..............................12 APPLICATION MEPANEL ........................17 USE OF ELEPTICAL TRAINER ......................21 THE WARM UP PHASE ........................21 MAINTENANCE ............................ 22 DIAGRAM .............................. -
Page 3: Safety Instructions
SAFETY INSTRUCTIONS • Read the manual carefully and keep it for future reference. • To ensure the best safety of the exerciser, regularly check it on damages and worn parts. • If you pass on this exerciser to another person or if you allow another person to use it, make sure that that person is familiar with the content and instructions in these instructions. -
Page 4: Assembly
contents of the delivery is complete by referring to the parts list of the assembly and operating instructions. • Be sure to set up the exerciser in a dry and even place and always protect it from humidity. If you wish to protect the place particularly against pressure points, contamination, etc., it is recommended to put a suitable, non-slip mat under the exerciser. - Page 5 STEP 2 The main frame (1) is supported by the packing material (A). There are 3 bolts (33) and 3 washers (34) on the right and left stabilizer (3, 2) with foot. The screws (21) are screwed in front of the main frame (1).
- Page 6 STEP 3 Remove the 2 screws (21) from the main frame and attach the rear stabilizer cover with the 2 screws (21). STEP 4 Attach the chain guards (42 and 43) to the main frame (1) as shown.
- Page 7 STEP 5 Connect the console cables (51) as shown. Connect the cables (A1 - A2), (B1 - B2), (C1 - C2), (D1 - D2), (E1 - E2) and plug the excess cables into the post (44). Then attach the console (51) to the post (44) with 4 screws (52).
- Page 8 STEP 7 Remove the 4 screws (74) and 4 nuts (7) from the left and right handlebars (72 and 73). Install the covers (75) on the left and right handlebars (72 and 73). Then attach the left and right handlebars with the screws (74) and nuts (7).
-
Page 9: Incline Adjustment
INCLINE ADJUSTMENT You can adjust pedal's incline with handle. You can choose from levels 1 – 5. CONSOLE Console contains 21 programs: 1 Manual program 10 presets programs P1: Rolling P2: Valley P3: Fat burn P4: Ramp... - Page 10 P5: Mountain P6: Interval P7: Cardio P8: Endurance P9: Slope P10: Rally WATT program HRC program 55% H.R 75% H.R...
- Page 11 90% H.R TARGET H.R User programs 1 - 4 User program 1 User program 2 User program 3 User program 4 BODY FAT Gender, height, weight, and age data are saved even when you disconnect the device. The dot display shows the current status.
-
Page 12: Use
The heart rate is displayed. Speed, RPM, time, distance, power, WATT, pulse, level are displayed at the same time. The console will automatically shut down if the console does not receive the signal for 4 minutes. BUTTONS ENTER If no program is running (the display shows STOP), press ENTER to enter the program selection 1. - Page 13 Pic. 25 Pic. 26 4. Then set DISTANCE using the UP / DOWN navigation buttons to set the value, then press ENTER to confirm (Pic. 27) 5. Then set CALORIES using the UP / DOWN navigation buttons to set the value, then confirm with ENTER (Pic.
- Page 14 D. TARGET HEART RATE The user can set his own heart rate value 1. Choose TARGET HEART RATE 2. Confirm with ENTER and set the time 3. Use the navigation buttons to set the time and confirm with ENTER, then set the distance 4.
- Page 15 Pic. 35 Pic. 36 Pic. 37 Pic. 38 Pic. 39 Pic. 40 NOTE: Grasp both body pulse plates. FAT%, BMR, BMI and body status results are displayed. (Pic. 40). FAT%: Body fat measured in %. BMR: Metabolism BMI: Body mass index If the pulse pads do not work properly and do not transmit a signal during the measurement, ERROR2 is displayed.
- Page 16 Pic. 41 Pic. 42 G. MEASUREMENT OF THE PULSE Grasp both pulse sensors. The heart rate is displayed after 3-4 seconds. The heart icon is displayed along with the ECG. NOTE: Values are for guidance only and not for medical purposes. You can use the chest strap, if supported.
-
Page 17: Application Mepanel
Volume down APPLICATION MEPANEL DOWNLOAD 1. Download the application using QR code: For android For iOS 2. Download the app using Google Play (Pic. C) or App Store (Pic. D), search for the MePanel app. Pic. C Pic. D BLUETOOTH CONNECTION Devices are paired using Bluetooth 4.0. - Page 18 Select your smart device and access the app. The console display turns off when you start the application. When you turn off the app, the console display turns on again. FUNCTION You can connect to the device a smart device with Bluetooth 4.0 and MEPANEL application installed. 1.
- Page 19 A. Program selection Choose a program: B. Parameter settings Setting personal data: Select MENU in the upper left corner to set the height, weight, age and gender. Then return to the main menu. Setting program parameters: When selecting a program, you can set the time, move the slider up or down and confirm with OK.
- Page 20 Press to expand the map Setting the route: After zooming in the map, hold the start symbol for 2 seconds and then set the start of your route, press the location on the map again to set the destination. The application automatically sets the route.
-
Page 21: Use Of Eleptical Trainer
One-minute counts down begins, then results from F1 (best) - F6 (worst) Statistics: Enter MENU - STATISTICS, you can look at the exercise curve. USE OF ELEPTICAL TRAINER The elliptical trainer is a popular fitness machine, one of the newest and most effective home training machines. -
Page 22: Maintenance
Inside upper thigh Sit on the floor and place your feet together. Knees are pointed outwards. Pull your feet as close as possible to your groin. Press your knees carefully downwards. Keep this position for 30-40 seconds if possible. Calves and Achilles tendon Lean against a wall with your left leg in front of the right one and your arms forward. -
Page 23: Diagram
DIAGRAM... -
Page 24: Parts List
PARTS LIST Name Qty. Name Qty. Main frame Screw M8*70 Left front foot tube connection Screw M4*10 assembly Right front pipe connecting Motor cable assembly Stopper M8 Motor cable Short crank sleeve Front support cover Belt Rear cover Nut M8 Front chain cover Belt wheel Rear chain cover... -
Page 25: Environment Protection
Handle cover Pedal pad Left Handle Flat washer Right handle Screw M6*15 Screw Right pedal assembly Crank cover Cover Left crank assembly Cover Ridge ending Cover Crankcase Cover Large sealing ring Spacer Rotating seal Outer spring Right crank assembly Roller Left crank cover Gasket Right crank cover... - Page 26 According to valid legal regulations it depends whether the Buyer is the End Customer or not. “The Buyer who is the End Customer” or simply the “End Customer” is the legal entity that does not conclude and execute the Contract in order to run or promote his own trade or business activities. “The Buyer who is not the End Customer”...
- Page 27 26847264 VAT ID: CZ26847264 Phone: +420 556 300 970 E-mail: eshop@insportline.cz reklamace@insportline.cz servis@insportline.cz Web: www.inSPORTline.cz inSPORTline s.r.o. Headquaters, warranty & service center: Električná 6471, Trenčín 911 01, SK CRN: 36311723 VAT ID: SK2020177082 Phone: +421(0)326 526 701 E-mail: objednavky@insportline.cz reklamacie@insportline.cz servis@insportline.cz...
Need help?
Do you have a question about the inCondi ET660i II and is the answer not in the manual?
Questions and answers