Table of Contents
Advertisement
Quick Links
Advertisement
Table of Contents

Subscribe to Our Youtube Channel
Related Manuals for Insportline IN 14170


Summary of Contents for Insportline IN 14170
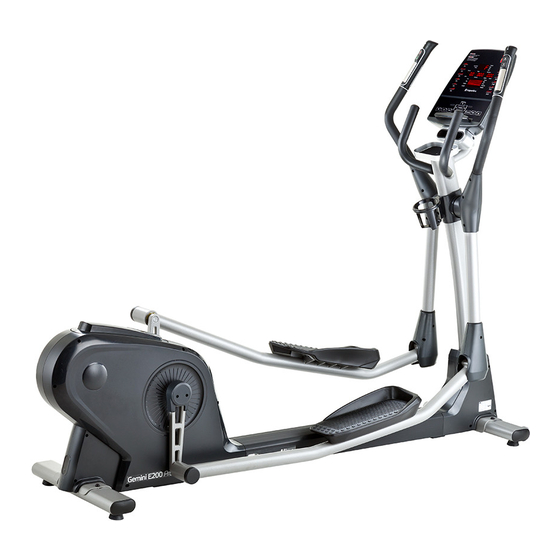
- Page 1 USER MANUAL – EN IN 14170 Elliptical trainer Gemini E200...
-
Page 2: Table Of Contents
CONTENTS SAFETY PRECAUTIONS ........................3 PARAMETERS ............................4 PARTS LIST ............................4 Screw bag ............................5 ASSEMBLY ............................. 7 HOW TO USE............................10 CONTROL PANEL ..........................10 Display modes ........................... 11 Key functions............................11 PROGRAMS ............................11 Preset programs (P1 – P12) ......................11 Manual mode ............................. -
Page 3: Safety Precautions
SAFETY PRECAUTIONS You should always take basic precautions when using this product, including the following: Please read these instructions carefully before using this product. DANGER: Always unplug the product from the electrical outlet immediately after using it and before cleaning and maintenance, otherwise you rick an electric shock. -
Page 4: Parameters
PARAMETERS Dimensions before assembly 2122 x 624 x 1592 mm Dimensions after assembly 2180 x 515 x 773 mm Weight 97.1 kg Stride length 510 mm PARTS LIST A. Console mast set B. Main frame set C. Front stabilizer set D. -
Page 5: Screw Bag
K. Swing shaft decoration cover L. Left swing shaft lower J. Console set (LED) (right/front; left/rear) decoration cover (outer/inner) M. Right swing shaft lower N. Console lower decoration P. Middle cover decoration cover (outer/inner) cover Screw bag ITEM Description Qty ITEM Description K01 Truss inner hex screwM8xP1.25x25 K12 Nylon nut M10xP1.5 K02 Spring washer M8... -
Page 7: Assembly
ASSEMBLY Step 1 Fix and fasten the main frame set (B) and the front and rear stabilizer (C, D) with screw (K01) and spring washer (K02), washer (K03). - Page 8 Step 2 According to the image, connect the relative wires, and assemble the console mast (A) to the main frame set with screw (K04), washer (K05) to fix and fasten. And then, fix the main frame front cover (G) to the main frame with screw (K14), and lock the console mast decoration cover (H) with screw (K14).
- Page 9 Next, connect the handle bar lower terminal to the end terminal of the interlock pedal, and ensure them are fastened tightly with screw (K10), washer (K11) and screw nut (K12) abiding by the image. According to the image, connect the middle and lower wires of the hand grip fast key, and please notice the direction.
-
Page 10: How To Use
Lean the swing lower decoration cover set (L, M) to the swing tube tightly and fix with screw (K13, K14). Attention: Please check whether the rubber covers match with each other, and whether the rubber covers are connected tightly. HOW TO USE ... -
Page 11: Display Modes
Display modes 1. Standby mode After the console turns on, the dot matrix displays the user’s basic values – U1 (in km). You can choose from U1 – U4. 2. Sleep mode 3. When the console in the standby mode, if RPM is lower than 30 or keys no operation for 15 seconds, the program will enter the prompt mode for 16 seconds (after 16 beeps the scale enters sleep mode). -
Page 12: Manual Mode
2. Press Enter to get into the target value setting page. 3. After press ENTER, the TIME indicator light up and the LED indicator light shines on the display of “TIME”. The initial value of “TIME” is “0:00”. Press direction keys to set “TIME”. 4. -
Page 13: User Mode
During exercise, if RPM has not been reached to 30, screen will appear twice the rolling string of “RPM↑” for 5 seconds. After the message, if the RPM still not reach to 30, program will be paused and screen will appear twice the rolling string of “PAUSE” for 5 seconds. User mode 1. - Page 14 5. After the setting of AGE, press ENTER, the “SEX” indicator light up and the Dot Matrix display will show GENDER. The initial value of “SEX” is “M” as male (“F” as female). Press direction keys to set “SEX”.. 6. After the setting of SEX, press ENTER, the “TARGET, 90%, 75%, 55%” indicator light up and at “PULSE”...
-
Page 15: Watts Mode
6. When actual heart rate reaches preset heart rate for consecutive 3 minutes, or preset time is over, the program will automatically stop “Heart Rate Control” function, and enter into “COOL DOWN”. Cool down 1. When start “1-minute COOL DOWN” function, the program makes a long sound of “beep”, and the Dot Matrix display will show “COOL”. -
Page 17: Expolded Drawing
EXPOLDED DRAWING... -
Page 18: Components List
COMPONENTS LIST ITEM ITEM Control shaft decoration cover Frame Assembly (front) Control shaft decoration cover Bearing 6005ZZ (front) Crank shaft insulation tube B Bottle shelf Hex screw nut M8xP1.25 Truss cross screw M4xP0.7x15 Adjusting feet pad M8X25mm Counter sink cross screw (AS004) M4xP0.7x10 Hand grip fast key connection wire... - Page 19 Nylon nut M8xP1.25 Spring washer M8 Truss inner hex screw Spring adjusting hook M8xP1.25x15 Spring hook Computer console set (LED) Computer console front decoration Nylon nut M6xP1.0 cover (left) Computer console front decoration Belt 52"x8 groove cover (right) Computer console lower Digital generator lower controller decoration cover Truss cross screw M5xP0.8x10...
-
Page 20: Terms And Conditions Of Warranty, Warranty Claims
Flat washer Φ10xΦ20x2.0t Hand grip pulse cover (long) Hand grip pulse cover (short) Nylon nut M10xP1.5 Membrane handrail key transform Allen steel screw M10xP1.5x75 board Round head cross self-tapping Washer Φ8xΦ16x1.5t screw Φ2x6 Counter sink inner cross screw Spring washer M8 M3xP0.5x25 stainless steel Truss inner hex screw Membrane key <STOP&START>... - Page 21 The seller is SEVEN SPORT s.r.o. with its registered office in Borivojova Street 35/878, Prague 13000, Company Registration Number: 26847264, registered in the Trade Register at Regional Court in Prague, Section C, Insert No. 116888. According to valid legal regulations it depends whether the Buyer is the End Customer or not. “The Buyer who is the End Customer”...
- Page 22 VAT ID: CZ26847264 Phone: +420 556 300 970 E-mail: eshop@insportline.cz reklamace@insportline.cz servis@insportline.cz Web: www.insportline.cz INSPORTLINE s.r.o. Headquarters, Warranty & Service centre: Elektricna 6471, 911 01 Trencin, Slovakia CRN: 36311723 VAT ID: SK2020177082 Phone: +421(0)326 526 701 E-mail: objednavky@insportline.sk reklamacie@insportline.sk servis@insportline.sk Web: www.insportline.sk...
Need help?
Do you have a question about the IN 14170 and is the answer not in the manual?
Questions and answers