Table of Contents
Advertisement
Quick Links
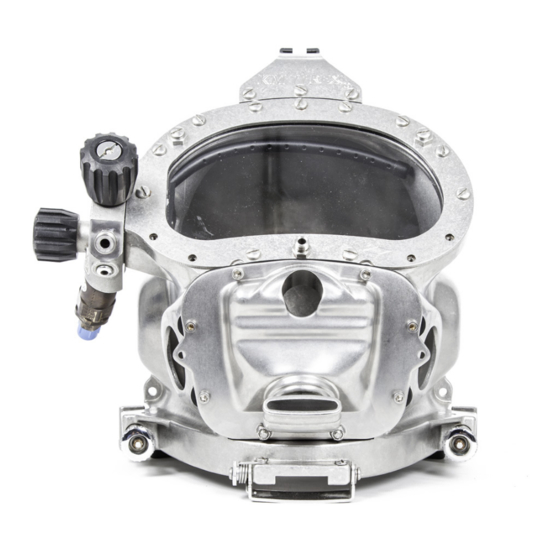
455 Balanced Regulator Installation Guide
E-Mail: KMDSI@KirbyMorgan.com, Web Site:www.KirbyMorgan.com
Diving with compressed breathing gas is a hazardous activity. Even if you do every-
thing properly there is always the danger that you may be killed or injured. No piece of
diving equipment can prevent the possibility that you may be killed or injured any time
you enter the water.
The 455 balanced regulator meets or exceeds all performance and testing requirements of all gov-
ernment and non-government testing agencies throughout the world. Only Kirby Morgan masks and
helmets have achieved the Dive Lab
Kirby Morgan, SuperLite
al, EXO, REX
, SuperFlow
®
Use of these terms to describe products that are not manufactured by KMDSI is illegal.
The two dimensional images (such as photographs and illustrations) of our products are © copyright-
ed and trademarks of Kirby Morgan Dive Systems, Inc. The three dimensional forms of our products are
trademark, trade design and trade dress protected.
© MMXXI Kirby Morgan Dive Systems, Inc. All rights reserved. This manual is made available for the ex-
press use of the owner of this Kirby Morgan product. No part of this manual may be reproduced, stored
in any retrieval system, or transmitted, or used in any form or by any means, whether graphic, electronic,
mechanical, photocopy, or otherwise by technology known or unknown, without the prior written per-
mission of Kirby Morgan Dive Systems, Inc.
K
irby
KMDSI Part #100-204
Patented, patents pending, foreign patents apply
Kirby Morgan Dive Systems, Inc.
1430 Jason Way
Santa Maria, CA 93455, USA
Telephone (805) 928-7772, FAX (805) 928-0342
B WARNING
, CR (Commercial Rated) mark.
®
, BandMask, Band Mask, KMB, KMB-Band Mask, DSI, Diving Systems Internation-
®
and DECA are all registered trademarks of Kirby Morgan Dive Systems, Inc.
®
M
organ
TM
®
Advertisement
Table of Contents

Related Manuals for Kirby Morgan 525-769


Summary of Contents for Kirby Morgan 525-769
- Page 1 © MMXXI Kirby Morgan Dive Systems, Inc. All rights reserved. This manual is made available for the ex- press use of the owner of this Kirby Morgan product. No part of this manual may be reproduced, stored in any retrieval system, or transmitted, or used in any form or by any means, whether graphic, electronic, mechanical, photocopy, or otherwise by technology known or unknown, without the prior written per- mission of Kirby Morgan Dive Systems, Inc.
-
Page 2: Table Of Contents
Installing the 455 Balanced Regulator onto a KMB 18/28 Band Mask ® 1.1 SuperFlow 350 Regulator Removal ® 1.1.1 Bent Tube Removal 1.1.2 Nose Block Device Removal © MMXXI Kirby Morgan Dive Systems, Inc. All rights reserved. Document # 210607001... - Page 3 1.2.5 Oral Nasal Mask and Microphone Installation 1.2.6 Nose Block Device Installation 1.2.7 Chin Strap Replacement 1.2.8 Head Cushion Snaps 1.3 Test the regulator for proper function © MMXXI Kirby Morgan Dive Systems, Inc. All rights reserved. Document # 210607001...
-
Page 4: Ce Certification
NOTE The name and the address of the manu- Category of PPE: III facturer; Harmonized reference standard: EN 15333-1; PPE model; The year of production; CE marking: © MMXXI Kirby Morgan Dive Systems, Inc. All rights reserved. Document # 210607001... -
Page 5: Notified Body
1.1.2 Notified Body The Notified Body is: Eurofins Product Testing Italy Srl Address: Via Courgné 21-10156 Torino, ITALY Identification number: 0477. © MMXXI Kirby Morgan Dive Systems, Inc. All rights reserved. Document # 210607001... -
Page 6: Installing The 455 Balanced Regulator Onto A Km 37Ss
Always start removal at the side block end. 2. Loosen the lower bent tube nut by using the two 7/8 inch wrenches. Place one wrench on the © MMXXI Kirby Morgan Dive Systems, Inc. All rights reserved. Document # 210607001... -
Page 7: Superflow® 350 Regulator Removal
If using this exhaust system for the 455 regu- lator installation, cut the tie wrap that secures the whisker assembly to the regulator body and © MMXXI Kirby Morgan Dive Systems, Inc. All rights reserved. Document # 210607001... -
Page 8: 455 Balanced Regulator Installation
Valve and Tri-Valve section in our modular manual 1. Clean the bent tube in accordance with the cleaning procedures in "1.3 General Cleaning & Inspection Procedures" on page GENPRE-4. The © MMXXI Kirby Morgan Dive Systems, Inc. All rights reserved. Document # 210607001... - Page 9 ALWAYS REFERENCE Appendix Contents, Torque Specs starting on page APNDX-19 in the modular manual to confirm correct torque. © MMXXI Kirby Morgan Dive Systems, Inc. All rights reserved. Document # 210607001...
-
Page 10: Oral Nasal Mask And Microphone Installation
ALWAYS REFERENCE Appendix Contents, Torque Specs starting on page APNDX-19 in the modular manual to confirm correct torque. © MMXXI Kirby Morgan Dive Systems, Inc. All rights reserved. Document # 210607001... -
Page 11: Test The Regulator For Proper Function
For all maintenance and adjustment procedures, refer to the 455 Balanced Regulator module found in the “Manuals and Exploded Views” link under the “Support” NOTE link at www.kirbymorgan.com. © MMXXI Kirby Morgan Dive Systems, Inc. All rights reserved. Document # 210607001... -
Page 12: Installing The 455 Balanced Regulator Onto A Sl 17C, Sl
The bent tube assembly can be rotated back and forth to aid removal, if necessary. © MMXXI Kirby Morgan Dive Systems, Inc. All rights reserved. Document # 210607001... -
Page 13: Superflow® 350 Regulator Removal
3. Pull the oral nasal mask off the regulator mount NOTE nut. It is held on by a snap fit. 4. Cut the tie wrap sealing the whisker main body © MMXXI Kirby Morgan Dive Systems, Inc. All rights reserved. Document # 210607001... -
Page 14: 455 Balanced Regulator Installation
If replacing valves or rebuilding the exhaust valve © MMXXI Kirby Morgan Dive Systems, Inc. All rights reserved. Document # 210607001... -
Page 15: Bent Tube Assembly And Regulator Installation
REFERENCE Appendix Contents, Torque Specs starting on page APNDX-19 in the modular manual to 3. Inspect the regulator mount nut for confirm correct torque. contaminants and damage. Use a tooth brush © MMXXI Kirby Morgan Dive Systems, Inc. All rights reserved. Document # 210607001... -
Page 16: Oral Nasal Mask And Microphone Installation
ALWAYS REFERENCE Appendix Contents, Torque Specs starting on page APNDX-19 in the modular manual to confirm correct torque. © MMXXI Kirby Morgan Dive Systems, Inc. All rights reserved. Document # 210607001... -
Page 17: Test The Regulator For Proper Function
For all maintenance and adjustment procedures, refer to the 455 Balanced Regulator module found in the “Manuals and Exploded Views” link under the “Support” NOTE link at www.kirbymorgan.com © MMXXI Kirby Morgan Dive Systems, Inc. All rights reserved. Document # 210607001... - Page 18 Removing the bent tube. Always start removal at the side block end. © MMXXI Kirby Morgan Dive Systems, Inc. All rights reserved. Document # 210607001...
-
Page 19: Superflow® 350 Regulator Removal
Inspect this assembly and replace parts as needed. © MMXXI Kirby Morgan Dive Systems, Inc. All rights reserved. Document # 210607001... -
Page 20: 455 Balanced Regulator Installation
Valve and Tri-Valve section in our modular manual 1. Align and insert the threaded mounting tube on the regulator, into the mounting hole on the Band Mask ® © MMXXI Kirby Morgan Dive Systems, Inc. All rights reserved. Document # 210607001... -
Page 21: Bent Tube Assembly And Regulator Installation
6. Using a torque wrench, tighten the bent tube mount nut onto the side block. ALWAYS REFERENCE Appendix Contents, Torque Specs starting on page APNDX-19 in the modular manual to confirm correct torque. © MMXXI Kirby Morgan Dive Systems, Inc. All rights reserved. Document # 210607001... -
Page 22: Oral Nasal Mask And Microphone Installation
Exploded Views” link under the “Support” NOTE the interior of the link at www.kirbymorgan.com. oral nasal mask. 3. Place both o-rings on the shaft, followed by the packing nut and the knob. © MMXXI Kirby Morgan Dive Systems, Inc. All rights reserved. Document # 210607001... -
Page 23: Installing The 455 Balanced Regulator Onto A Km 77
The regulator and REX pod can be removed as one unit. Along with the corresponding equipment manuals, a two part video illustrating this process can be viewed at the Kirby Morgan YouTube channel or by locating the 525-769 kit in the Kirby Morgan website. Parts Included in the 525-769 Kit:... - Page 24 6. Remove the communication module from the helmet per "1.3.3 Removal of Communications Assembly" on page COM-3. 7. Remove the oral nasal mask by pulling it off the regulator mount nut. © MMXXI Kirby Morgan Dive Systems, Inc. All rights reserved. Document # 210607001...
-
Page 25: 455 Balanced Regulator Installation
(lock nuts are on the outside of the pod). © MMXXI Kirby Morgan Dive Systems, Inc. All rights reserved. Document # 210607001... -
Page 26: 455 Balanced Regulator Installation
Use section "1.1.4 Quad Valve and Tri-Valve Assembly Installation", ® in module QUAD beginning on page QUAD-7 as a reference guide. © MMXXI Kirby Morgan Dive Systems, Inc. All rights reserved. Document # 210607001... -
Page 27: Exhaust System Installation
3. Inspect the regulator mount nut for contaminants and damage. Use a tooth brush to clean threads as needed. Lightly lubricate the regulator mounting tube threads and the sealing O-ring with Christo-Lube ® © MMXXI Kirby Morgan Dive Systems, Inc. All rights reserved. Document # 210607001... -
Page 28: Bent Tube Assembly Installation
2. Lightly lubricate the O-ring on the bent tube tube mount nut onto the side block. ALWAYS assembly. REFERENCE Appendix Contents, Torque Specs starting on page APNDX-19 in the modular manual to confirm correct torque. © MMXXI Kirby Morgan Dive Systems, Inc. All rights reserved. Document # 210607001... - Page 29 1 3/8 inch socket or regulator mount tool P/N 525-625 found in the KMDSI tool kit P/N 525- 630 and extension to torque the regulator mount © MMXXI Kirby Morgan Dive Systems, Inc. All rights reserved. Document # 210607001...
-
Page 30: Oral Nasal Mask And Microphone Installation
3. Tighten the screws with a torque screwdriver in accordance to the correct torque specification. ALWAYS REFERENCE Appendix Contents, Torque Specs starting on page APNDX-19 in the modular manual to confirm correct torque. © MMXXI Kirby Morgan Dive Systems, Inc. All rights reserved. Document # 210607001... -
Page 31: Head Cushion Snaps
For all maintenance and adjustment procedures, refer to the 455 Balanced Regulator module found in the “Manuals and Exploded Views” link under the “Support” NOTE link at www.kirbymorgan.com. © MMXXI Kirby Morgan Dive Systems, Inc. All rights reserved. Document # 210607001... - Page 32 Kirby Morgan Dive Systems, Inc. 1430 Jason Way Santa Maria, CA 93455, USA Telephone (805) 928-7772, FAX (805) 928-0342 E-Mail: KMDSI@KirbyMorgan.com, Web Site:www.KirbyMorgan.com...
Need help?
Do you have a question about the 525-769 and is the answer not in the manual?
Questions and answers