
Related Manuals for Clarke METALWORKER CMPS1


Summary of Contents for Clarke METALWORKER CMPS1
- Page 1 MULTI PURPOSE SHARPENER MODEL NO: CMPS1 PART NO: 6480235 OPERATION & MAINTENANCE INSTRUCTIONS GC0513...
- Page 2 INTRODUCTION Thank you for purchasing this CLARKE Multi-purpose Sharpener. Before attempting to use this product, please read this manual thoroughly and follow the instructions carefully. In doing so you will ensure the safety of yourself and that of others around you, and you can look forward to your purchase giving you long and satisfactory service.
-
Page 3: General Safety Rules
GENERAL SAFETY RULES WARNING: WHEN USING ELECTRIC TOOLS, MACHINES, OR EQUIPMENT, BASIC SAFETY PRECAUTIONS SHOULD ALWAYS BE FOLLOWED TO REDUCE THE RISK OF FIRE, ELECTRIC SHOCK, AND PERSONAL INJURY. 1. KEEP WORK AREA CLEAN. Cluttered areas invite injuries. Keep work area well lit. 2. -
Page 4: Electrical Connections
ELECTRICAL CONNECTIONS WARNING! Read these electrical safety instructions thoroughly before connecting the product to the mains supply. Before switching the product on, make sure that the voltage of your electricity supply is the same as that indicated on the rating plate. This product is designed to operate on 230VAC 50Hz. -
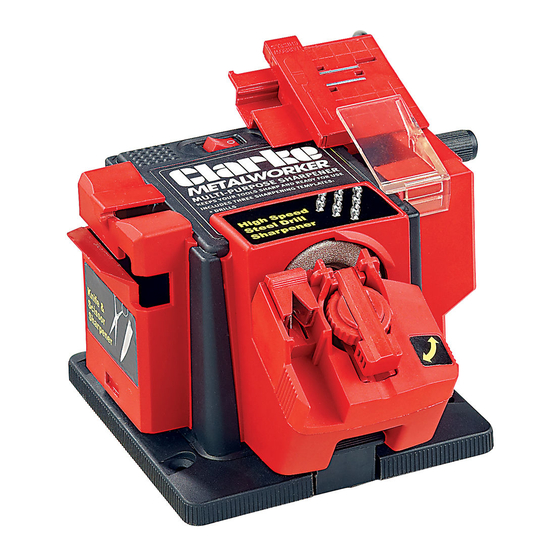
Page 5: Product Overview
PRODUCT OVERVIEW DESCRIPTION Chisel & Plane Sharpener Attachment Knife & Scissor Sharpener Attachment High Speed Steel Drill Sharpener Attachment Power Unit ON/OFF Switch Retaining Catch/Interlock Switch Parts & Service: 020 8988 7400 / E-mail: Parts@clarkeinternational.com or Service@clarkeinternational.com... -
Page 6: Setting Up The Sharpener
SETTING UP THE SHARPENER This sharpener should only be used on a stable, horizontal surface. It is intended to be screwed down onto a workbench using the mounting holes in the base. Use 4 x 1” No 8 counter-sunk screws (not supplied) for this purpose. The sharpener is fitted with an interlock which prevents the motor from starting unless one of the sharpening attachments is clipped into its operating position on the power unit. - Page 7 2. Remove the drill clamp from the clamp holder and insert a drill bit such that the bit tip is either flush with the end face of the holder or protrudes a small amount. Grip the bit lightly with the drill clamp so that the driil can still move.
-
Page 8: Sharpening Hints
8. The drill bit should exactly touch the grinding wheel and will be held at the correct angle. 9. Turn the unit on and start sharpening. • Exert a slight downward pressure onto the bit and pivot. • The bit should be constantly moved during sharpening by swinging the bit holder back and forth as indicated by the arrows. -
Page 9: Knife And Scissor Sharpener
KNIFE AND SCISSOR SHARPENER Using this attachment, you can sharpen any straight or curved blade but not serrated blades. SHARPENING KNIVES 1. Slide the knife and scissor attachment onto the power unit. 2. Switch on the power unit. 3. Hold the knife by its handle, insert the blade into the guide slot. -
Page 10: Sharpening Scissors
SHARPENING SCISSORS 1. Slide the knife and scissor attachment onto the power unit 2. Switch on the power unit. 3. Open the scissors fully and slide the first blade through the front guide slot with the other blade to the right hand side. 4. - Page 11 3. Take care that the sharpening angle matches the existing bevelled angle of the blade tip. This avoids removing too much metal unnecessarily and keeps the plane blade at its optimum cutting angle. 4. Adjust it to suit and set the angle securely using the adjusting knob.
-
Page 12: Maintenance
MAINTENANCE CLEANING 1. Keep the surface of your sharpener free of grit, dirt, and grease. Use soapy water or non-toxic solvents. Do not use petroleum based solvents. 2. If the motor does not operate, it needs to be serviced or replaced by a qualified technician. -
Page 13: Parts List Diagram
PARTS LIST DIAGRAM Parts & Service: 020 8988 7400 / E-mail: Parts@clarkeinternational.com or Service@clarkeinternational.com... -
Page 14: Parts Diagram
PARTS DIAGRAM DESCRIPTION PART NO DESCRIPTION PART NO Motor Housing HTCMPS101 21 End Stop HTCMPS121 Base HTCMPS102 22 Steel Strip HTCMPS122 Rocker Switch HTCMPS103 23 Steel Blade HTCMPS123 Motor HTCMPS104 24 Pivot Screw HTCMPS124 Wheel Boss HTCMPS105 25 Knife/Scissors Module HTCMPS125 Grinding Wheel HTCMPS106 26 Plane/blade Module HTCMPS126... -
Page 15: Declaration Of Conformity
DECLARATION OF CONFORMITY Parts & Service: 020 8988 7400 / E-mail: Parts@clarkeinternational.com or Service@clarkeinternational.com...
Need help?
Do you have a question about the METALWORKER CMPS1 and is the answer not in the manual?
Questions and answers