Table of Contents
Advertisement
Quick Links
VIDEO CASSETTE RECORDER
OWNER'S GUIDE
EJECT
POWER
REC SPEED
PLAY
REW
FF
SP/EP
CHANNEL
STOP
PAUSE
REC
START TIME
REC LENGTH
OPEN
1
2
2
OTR
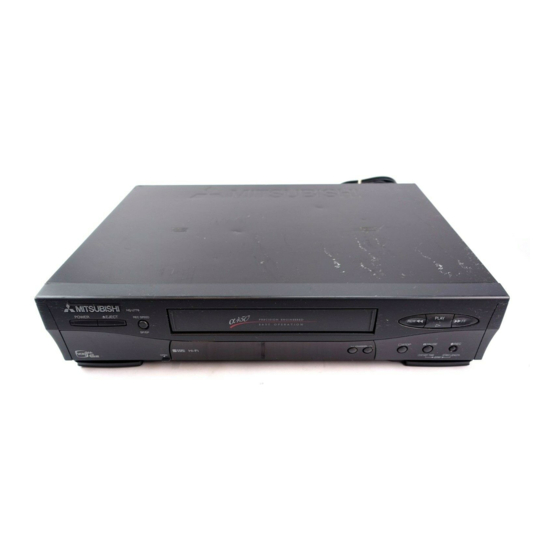
MODEL HS-U776
®
As an ENERGY STAR
Partner, Mitsubishi Digital Electronics America, Inc. has determined that this product
®
or product model meets the ENERGY STAR
guidelines for energy efficiency.
®
®
VCR Plus+
and PlusCode
are registered trademarks of Gemstar Development Corporation. The VCR Plus+
system is manufactured under license from Gemstar Development Corporation.
3 ®
With VCR Plus+C
system, this video cassette recorder can automatically select the appropriate channel on
3 ®
3
your compatible cable box or satellite receiver. C
and VCR Plus+C
are trademarks of Gemstar Develop-
ment Corporation.
This Video Cassette Recorder is based on the S-VHS and VHS formats. Only video cassette tapes with the
mark or the
mark may be used with this model.
Advertisement
Table of Contents

Subscribe to Our Youtube Channel
Related Manuals for Mitsubishi HS-U776


Summary of Contents for Mitsubishi HS-U776
- Page 1 PAUSE START TIME REC LENGTH OPEN MODEL HS-U776 ® As an ENERGY STAR Partner, Mitsubishi Digital Electronics America, Inc. has determined that this product ® or product model meets the ENERGY STAR guidelines for energy efficiency. ® ® VCR Plus+ and PlusCode are registered trademarks of Gemstar Development Corporation.
- Page 2 Special Features HS-U776 SMART: FAST: EASY: ♦ Program Conflict Warning ♦ Alfa 400 Precision High ♦ ViewPoint ® Menu Oper- ♦ S-VHS and S-VHS ET Speed Mechanism with ating System ♦ VCR Plus+ 400x rewind/fast for- ® record/playback easy pro- ward speed ♦...
-
Page 3: Table Of Contents
SHORTCUTS To connect your VCR, go to page 4. To play a tape, go to page 10. To record a program, go to page 21. To learn about Advanced Features, go to page 38. ○ ○ ○ ○ ○ ○ ○ ○ ○ ○ ○ ○ ○ ○ ○ ○ ○ ○ ○ ○ ○ ○ ○ ○ ○ ○ ○ ○ ○ ○ ○ ○ ○ ○ ○ ○ ○ ○ ○ ○ ○ ○ ○ ○ ○ ○ ○ ○ ○ ○ ○ ○ ○ ○ ○ ○ ○ ○ ○ ○ ○ TABLE OF CONTENTS IMPORTANT SAFEGUARDS .... -
Page 4: Important Safeguards
IMPORTANT SAFEGUARDS Please read all these instructions carefully regarding your VCR before you begin operating it. Follow all warnings and instructions marked on the VCR. Thank you. A product and cart combination Read Instructions 13 Power-Cord Protection should be moved with care. Quick All the safety and operating in- Power-supply cords should be stops, excessive... - Page 5 overhead power lines or other (d) If the product does not oper- CONDENSATION electric light or power circuits, or ate normally by following the Leave the VCR on, without a tape in it, where it can fall into such power operating instructions.
-
Page 6: Hooking Up Your Vcr
Hooking Up Your VCR Unpacking Your VCR As you unpack your new VCR, please make sure the following items are included: • Remote control • 1 S-Video cable • 1 Coaxial cable • 1 Audio/Video cable • 1 IR emitter •... - Page 7 VCR. Connect the other end to VIDEO OUT on the cable box. IMPORTANT IMPORTANT Your TV Owner’s Guide may have additional suggestions for antenna/cable hookups. If your TV has more than one antenna jack, ask your Mitsubishi dealer for advice on additional accessories.
- Page 8 Hooking Up Your VCR Connections to TV with Audio Video Inputs Because you purchased a Hi-Fi VCR, you will want to take advantage of its superior sound capability and connect it IMPORTANT IMPORTANT to a stereo TV system with audio and video inputs. This Your TV Owner’s Guide may have additional connection also helps maintain the best picture quality.
- Page 9 Hooking Up Your VCR Connections to Satellite Receiver ® ® ® If you have an RCA DSS , Sony DSS , Toshiba DSS IMPORTANT IMPORTANT ® ® ® Panasonic DSS , Hughes DSS , PRIMESTAR , or DISH You cannot connect both a satellite receiver and a ™...
- Page 10 Hooking Up Your VCR Connections to Home Theater Receiver You may wish to connect your VCR to a Home Theater Connect an S-video cable to the MONITOR S- Receiver so that you can take advantage of the Surround VIDEO OUTPUT of the Home Theater Receiver. Sound audio recordings that are common with many Connect the other end to the S-VIDEO INPUT on movies.
- Page 11 This cable may be included with IMPORTANT IMPORTANT your Mitsubishi TV. If not, you can purchase a cable For Active A/V Network to work properly, you with mini jacks at your Mitsubishi dealer or must make these connections shown and your VCR electronics store.
-
Page 12: Playback
TV with Audio/ Video Inputs Turn on your TV and switch it to the correct external input. For most Mitsubishi TVs, this means pressing the TV’s INPUT button until you see POWER the words Ext-1 or Input-1 on the screen. If you do not have a Mitsubishi TV, please refer to your TV Owner’s Guide for this procedure. - Page 13 Operating the VCR with the Remote Control The HS-U776 has two VCR remote control operational settings: VCR-A and VCR-B. The HS-U776 is pre-set to VCR-A setting. See page 54 for information about VCR operational setting. Set the VCR/TV slide switch on the remote control to VCR position. This “tells”...
- Page 14 Playback Using Basic Playback Controls Rewinding a tape While the tape is stopped, press REW on the remote control or on the front panel. Fast forwarding a tape While the tape is stopped, press FF on the remote control or on the front panel.
-
Page 15: Setting Up Your Vcr
Digital Cable box only option in step 4 on the next page and turn the cable box on. Your HS-U776 will use its Converter Box Control technology to change the channels on the cable box. Make sure you have properly placed the IR Emitter (see page 9). - Page 16 Setting Up Your VCR You will see the menu for sources connected to the VCR. Using the list ∆Memorize channels below as a reference, press the ADJUST buttons to select the kind of What type of sources are antenna you connected. connected to the VCR? ’Cable •...
-
Page 17: Satellite Receiver Control
Setting Up Your VCR Cable Box Brand Code Manufacturer Code Number Manufacturer Code Number Manufacturer Code Number 1, 2, 11 Magnavox 59, 61, 67 Sheritech Archer 29, 58, 65 Movietime 30, 31, 51, 54 SL Marx 5, 14, 29 Century 29, 65 20, 51, 52 Sprucer... -
Page 18: Adding And Deleting Channels
Setting Up Your VCR Press ENTER to select the correct code for your satellite receiver. Manufacturer Code RCA or GE ® PRIMESTAR Sony DISH Network Toshiba Panasonic Hughes none After you have selected, press MENU twice to exit the menus. IMPORTANT IMPORTANT After you have connected the satellite receiver and set the brand code,... - Page 19 Setting Up Your VCR Selecting a Channel Now that you have memorized channels, and added or deleted some, you will want to be able to select channels. If you have not yet memorized channels, see page 13, Memorizing Channels Automatically. (If you selected digital cable box, you cannot select any satellite channels.) Antenna/Cable selections Your VCR can receive...
-
Page 20: Setting The Clock
Setting Up Your VCR Setting the Clock You have to set the clock using either Setting the Auto Clock or Setting the Clock Manually before you can program your VCR to record. Setting the Auto Clock Your VCR can set the clock automatically by picking up a time signal which some TV and cable channels transmit with their broadcasts. - Page 21 Setting Up Your VCR If the VCR displays the wrong time Follow the procedure on the previous page to step 3. Then press ENTER. You will see the Set the clock menu. Channel will be highlighted. If you know the channel that carries a time signal, press the ADJUST buttons to ≈Set the clock ƒChannel (AUTO)
- Page 22 IMPORTANT Any time you adjust this setting, check your programmed recordings to be sure they are set to the correct times. If you have a Mitsubishi TV with StarSight ® feature, the TV can set the time on your VCR. See your TV Owner’s Guide for details.
-
Page 23: Recording
Recording Your new VCR offers a wide variety of recording options that take full advan- tage of our advanced electronics. First, you can learn how to record a current broadcast. Then, in another section of this book called Timer Recording, you can learn how to program your VCR to record at a later time and day. - Page 24 Recording Using One-Touch Recording (OTR) One-Touch Recording (OTR) is a way to begin recording immediately, and have your VCR stop recording and turn off automatically after your show is over. Load a tape with its erasure prevention tab intact into the VCR. Set the recording format.
-
Page 25: Otr
Network satellite receiver, leave the cable box or receiver turned ON. If the HS-U776 does not control your cable box, leave the box tuned the station you wish to record. After 30 seconds, the power will turn off and the programmed recording light will be lit. -
Page 26: Using S-Vhs Set-Up Menu
Using S-VHS Set-Up Menu Selecting Recording Format The HS-U776 allows you to choose between recording in standard VHS or Super VHS (S-VHS) when you use an S-VHS tape. If you use a VHS tape, you can choose to record in S-VHS ET (Expansion Technology) mode or VHS. S- ªVCR Main Menu... - Page 27 Recording Selecting S-input Setting To watch the picture from other equipment through the VCR, you have to ªVCR Main Menu select the S-video input jack or video input jack that matches the equipment. If ¬Program to record PrograManager you connect the satellite receiver to the VCR with an S-video cable, you have to √Customize choices set Rear S-input to ON.
-
Page 28: Audio And Video Functions
Recording Using Audio and Video Functions The audio and video function menus allow you to set things such as listening to the stereo track of your recording, or setting the tape length to have the remaining time display function work properly. The VCR will display the functions and settings on your TV screen. - Page 29 Recording Descriptions of Video Functions Tape Adjust this function to ensure the accuracy of the Remaining Time display. The remaining time function does not work properly with a tape that is less than 30 minutes long. Length of tape Use Setting 2 hours long or less (T-30 through T-120) T-120...
-
Page 30: Timer Recording
Timer Recording Mitsubishi offers 3 ways to set your VCR to record upcoming broadcasts. Choose from: Conventional VCR timer recording Quick Program (easy) -- VCR does not need to be on to begin programming ® VCR Plus+ system programming (easy) You can schedule up to 8 recording events within a one month period. - Page 31 Timer Recording Day will flash. Press the ADJUST buttons to choose the day on which you ¬Program to record want to record; for example, Monday the 13th. ƒChannel Your choices are: ƒDay Monday 13 ƒStart time --:-- • a single day up to one month away ƒStop time --:--...
-
Page 32: Quick Program
VCR Plus+ forwarding, rewinding, or off. (Quick program does not work while using OTR Quick Program is also an Active A/V Network feature. If you have a Mitsubishi TV with Active A/V Network, see page 45 for more information. Press QUICK PROGRAM/VCR Plus+ on the remote control. If the VCR is ¬Program to record... -
Page 33: Vcr Plus+ System Programming
Timer Recording IMPORTANT IMPORTANT If you press QUICK PROGRAM/VCR Plus+, but the clock is not set, Set the clock menu will appear. Set the clock manually. If you have set the A/V Network to ACTIVE, point your remote control at the TV when using Quick Program. ®... - Page 34 Timer Recording Recap screen Recap screen will appear. The program you have chosen to record will be highlighted. ¬Program to record The channel number will appear in blue color. Make sure that the correct CH DAY § 2 MO13 11:30a 1:30pSP channel number is shown on the screen.
-
Page 35: Timer Recording Hints
Timer Recording Timer Recording Hints To use the VCR before timer recording begins, press POWER on the remote POWER once. This turns the programmed recording light off and the VCR on. If you use POWER on the front panel for this purpose, press it twice. Pressing POWER it once turns off the programmed recording light;... - Page 36 Timer Recording program caution Program caution If your VCR is set to record, but the power is still ON within 3 minutes before timer recording starts, this screen will appear to remind you to turn off the REC in 3 min VCR.
- Page 37 Timer Recording Canceling a timer recording before the recording starts Press MENU on the remote control. Your VCR will turn on and VCR Main Menu will appear on your screen. Use the ADJUST buttons on the remote control to select Program to record. Press ENTER. Recap screen Recap screen will display for 4 seconds.
-
Page 38: Editing Features
One way is to use the HS-U776 to record and another VCR for playback. The other way is to use another VCR to record and use the HS-U776 for playback. Regardless of which method you may choose, you will need one RCA audio cable and one S-video cable to connect the two VCRs. - Page 39 R on the recording VCR, and to AUDIO OUT Put a blank tape into the recording VCR. If the L and R on the HS-U776. If the other VCR is recording VCR is an S-VHS VCR, be sure to use an mono, you need a Y-adapter to record both audio S-VHS tape.
-
Page 40: Advanced Features
Advanced Features Advanced Playback Controls Special effects You can use FF and REW on the front panel, or the on the remote to control the playback speed of the tape. INDEX Using the FF and REW on the front panel to control the playback speed While the VCR is playing a tape, press PAUSE to freeze the picture. - Page 41 Advanced Features Adjusting the Tracking automatic tracking Your VCR automatically adjusts the tape to give you the best quality picture. D (digital tracking) light When you start playback of a newly inserted tape, the DIGITAL TRACKING light (D) will flash, showing that the VCR is adjusting the picture. When the VCR PLAY has finished adjusting the picture, the DIGITAL TRACKING light will shine steadily.
-
Page 42: Searching Techniques
Advanced Features Searching Techniques Your VCR lets you search through a tape in a number of ways. These include: Quick search (CM skip) -- 30 second intervals Speed search -- visually search Counter zero stop -- direct to start of recording Index search -- find specific index points Quick search (CM skip) Quick search lets you skip over the tape you are playing in about 30 second... - Page 43 Advanced Features Counter zero stop Counter zero stop allows you to quickly access the beginning of a recorded or playback section of a tape. The counter zero stop will automatically fast forward or rewind the tape to “0H00M00S” and stop. Press CANCEL on the remote control at the point you wish to locate later.
-
Page 44: Using Programanager
Advanced Features repeat playback You can playback a section of tape over and over using repeat playback. The tape will play until the next index mark, rewind to the previous index mark, and resume playing. If there is only one index mark on the tape, then the VCR will play or rewind to that mark and resume playback. - Page 45 Advanced Features The screen for selecting the data to display will appear. Press the ADJUST PrograManager buttons to select Display current data and press ENTER. Your choices are: ƒDisplay current data ƒDisplay memorized data Use ADJUST to select, and ENTER. Press MENU to go back.
- Page 46 Advanced Features The screen for selecting the tape number appears. Press the number PrograManager button that corresponds to the desired tape number (for example, no.0). Tape No.0 Page 1/1 Press ENTER. ππππππππππππππππππππππππ Use 0-9 to select number to memorize, and ENTER. Press CANCEL to clear.
- Page 47 Advanced Features The message to confirm the selected tape number will appear. Press PrograManager ENTER to enter the displayed number. You selected Tape No.3 Press ENTER to use. Press CANCEL to cancel. Press MENU to go back. The contents of the selected tape number will be displayed as the data of PrograManager the tape currently loaded.
- Page 48 Advanced Features Comfirming/erasing the memorized data Press MENU on the remote control. VCR Main Menu appear. Press the ªVCR Main Menu ADJUST buttons to select PrograManager. Press ENTER. ¬Program to record PrograManager √Customize choices »S-VHS Set-Up ƒFirst Time Set-Up ∫πMENU to go back ∂...
-
Page 49: Displaying Time Gauge, Remaining Time, Current Time
Advanced Features Displaying the Time Gauge and the Remaining Time Time gauge The time gauge is a graphic representation of your position on a video tape. The left side of the gauge is the tape start (S), and the right side is the tape end (E). -
Page 50: Customize Choices Menu
Advanced Features Customize Choices Menu ªVCR Main Menu ¬Program to record PrograManager In the Customize Choices menu are 7 options that you can set. For each of the √Customize choices 7 options, start with these 2 steps: »S-VHS Set-Up ƒFirst Time Set-Up ∫πMENU to go back Press MENU on the remote control. - Page 51 PerfecTape ® PerfecTape is an exclusive Mitsubishi feature that tests the quality of video tapes you will record on. After each test, the VCR will adjust its internal circuitry in order to make the best possible recording on your tape.
- Page 52 Advanced Features If you would like to know whether your VHS tape is suitable for S-ET recording, set the S-ET record in the S-VHS Set Up menu to AUTO then test the VHS tape. If the tape is suitable, S-ET record: ON is shown on the screen and the tape will record in S-ET mode.
- Page 53 Active A/V Network Active A/V Network allows you to directly operate many of the combined functions of certain Mitsubishi TVs and your VCR at the press of one button. If you have a Mitsubishi TV with Active A/V Network, check the following: •...
- Page 54 Advanced Features PrograManager (auto mode) √Customize choices ƒVideo mute (ON ) To avoid failing to memorize the contents of the tape caused by not setting the ƒAuto power save (OFF) tape number, the screen to decide whether you set the tape number will appear ƒRF converter (ON ) ƒPerfecTape...
-
Page 55: Advanced Options
TV. You only need one remote to operate both your VCR and TV. The HS-U776 remote control is pre-set to operate Mitsubishi televisions, but it can also operate TVs from other manufacturers. To set your remote control for your particular brand of television, follow these instructions. - Page 56 SP/EP For VCR: Make sure the HS-U776 is plugged in but turned off. On the VCR front panel, press REC SPEED and REW at the same time. To confirm that the VCR responds to VCR-B signals, b appears on the front panel display.
-
Page 57: Location Of Controls
Location of Controls Remote Control STOP Stops a tape. POWER CHANNEL VOLUME POWER Rewinds a tape or reverse searches. EJECT MUTE CM SKIP Fast forwards a tape or fast forward searches. VCR/TV slide switch QUICK PROGRAM INPUT Operates the VCR when set to the VCR position, the TV VCR Plus+ when set to the TV position. - Page 58 Location of Controls Front Panel POWER EJECT REC SPEED PLAY cassette slot SP/EP S VIDEO VIDEO AUDIO IN L/MONO CHANNEL STOP PAUSE front panel display START TIME REC LENGTH audio input 2 jacks video input 2 jack remote control sensor S-video input 2 jack POWER CHANNEL...
- Page 59 Location of Controls Front Panel Display play light digital tracking AM PM OTR 2 PROG REC S-ET PLAY LOCK record light time counter/current time/remaining time display channel display OTR light : OTR lock light : LOCK Lights up during recording the program with One-Touch Lights up when Child Lock feature is in use.
- Page 60 VIDEO INput and OUTput jacks ACTIVE A/V NETWORK jacks Yellow jacks for receiving (IN) and sending (OUT) video Connects the VCR to other Mitsubishi products with signals to a monitor TV or from another VCR. Active A/V Network or A/V Network jacks.
-
Page 61: Trouble Checks
Trouble Checks If your VCR malfunctions, try the following steps prior to contacting your Mitsubishi Dealer: Check the Trouble Checks below to see if there is a solution to the current problem that you are experiencing. If the problem is not addressed on the Trouble Checks, the safety circuits in the VCR may be in operation, thus please try the following: (the clock setting and the timer recording will be deleted.) - Page 62 Trouble Checks Problem Try This... Noise in the picture and distorted sound. • Check the tracking control. Adjust manually if necessary. Poor or no Hi-Fi sound. • Check the monitor settings. • Check the quality of the video tape. Playback is noisy or “snowy”. •...
-
Page 63: Specifications
Specifications S-VHS/VHS NTSC standard with Hi-Fi audio ORMAT EIA standard; NTSC color IDEO IGNAL YSTEM Video -- 4 heads ECORD LAYBACK YSTEM Audio -- 2 Hi-Fi channels and 1 monaural audio control 75-ohm external VHF/UHF combined antenna terminal NTENNA 181 channels capability UNER VHF -- Channels 2 - 13 UHF -- Channels 14 - 69... - Page 64 Index power button ..... 55, 56 still adjustment ......38 ® PRIMESTAR light ..... 57 stop button ......55, 56 daylight savings time ....19 PrograManager ......42 S-VHS Set-Up menu ....24 digital tracking light ....57 auto mode ......52 S-VHS indicator ......
- Page 65 Note...
- Page 66 Note...
-
Page 67: Warranty
MITSUBISHI service center. c. Notice. T o obtain warranty service, you must notify an authorized MITSUBISHI service center of any defect within the applicable warranty time period. 1 TO OBTAIN WARRANTY SERVICE, deliver your VCR to the nearest MITSUBISHI service center. - Page 68 For your nearest Mitsubishi Authorized Service Center call 1-800-332-2119 MITSUBISHI DIGITAL ELECTRONICS AMERICA, INC. 9351 Jeronimo Road Irvine, CA 92618-1904 www.mitsubishi-tv.com © 2000 Mitsubishi Digital Electronics America, Inc. Printed in Japan 872C243A0...
Need help?
Do you have a question about the HS-U776 and is the answer not in the manual?
Questions and answers