Table of Contents
Advertisement
Quick Links
Advertisement
Table of Contents

Related Manuals for Linde BOC RAPTOR


Summary of Contents for Linde BOC RAPTOR
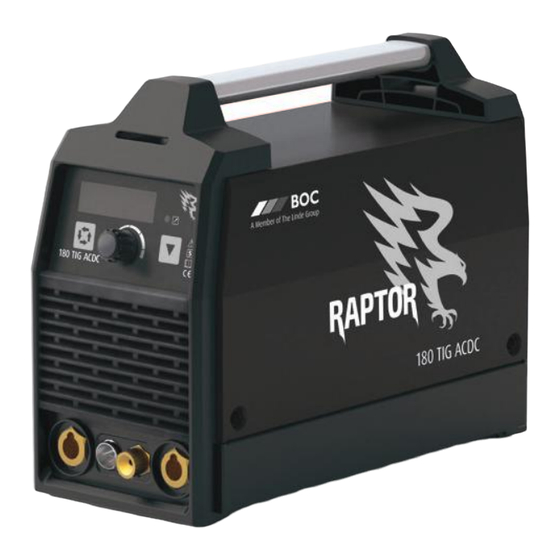
- Page 1 180 TIG ACDC Operating Manual...
- Page 2 Welcome to a better way of welding Congratulations on puchasing the Raptor 180 TIG ACDC welding machine. The products in BOC's range perform with reliability and have the backing of one of South Pacific's leading welding suppliers. This operating manual provides the basic knowledge required for TIG welding, as well as highlighting important areas of how to operate the Raptor machine.
-
Page 3: Table Of Contents
Contents Recommended Safety Guidelines 9.3 Process variables 9.4 Shielding gas selection 2.0 Recommended Safety Precautions 9.5 Welding wire selection 2.1 Health Hazard Information 9.6 Tungsten electrode selection 2.2 Personal Protection 9.7 Welding techniques 2.3 Cylinder Safety 9.8 Torch movement during welding 2.4 Electrical Shock 9.9 Positioning torch tungsten for various 2.5 User Responsibility... -
Page 4: Recommended Safety Guidelines
1.0 Recommended Safety Guidelines Some safety precautions BOC recommends are as follows: Repair or replace defective cables immediately. Keep fire extinguishing equipment at a handy • • location in the shop. Never watch the arc except through • lenses of the correct shade. Keep primary terminals and live parts effectively •... -
Page 5: Recommended Safety Precautions
2.0 Recommended Safety Precautions Health Hazard Information Wear a respirator when natural or forced • ventilation is not good enough. The actual process of welding is one that Eye protection can cause a variety of hazards. All appropriate safety equipment should be worn at all times, i.e. A welding helmet with the appropriate welding headwear, respiratory, hand and body protection. -
Page 6: Cylinder Safety
2.3 Cylinder Safety Cylinder Valve Safety When working with cylinders or operating Cylinder valve hand-wheel cylinder valves, ensure that you wear appropriate protective clothing – gloves, boots and safety Back-plug glasses. Bursting disc Ensure cylinder value is closed before moving or disconnecting equipment. -
Page 7: Electrical Shock
STOP 2.4 Electrical Shock Never touch ‘live’ electrical parts. • Always repair or replace worn or damaged parts. • PLEASE NOTE that under no circumstances should Disconnect power source before performing any • any equipment or parts be altered or changed in maintenance or service. -
Page 8: Switch On To Electrical Safety
Switch on to electrical safety for single-phase equipment BOC welding machines are designed and manufactured to conform to IEC 60974 or AS 60974. This Standard not only covers the machine but also the input cable and plug requirements including the size of the plug that should be used. - Page 9 How important is the correct input cable and plug on a welding machine? The size of the plug depends on a formula that ✓ Use the correct input current, ✓ cable and not only uses the maximum current draw but ✓...
- Page 10 DON‘T ✖ Don’t risk damage to your machine or cause tripping and/or fire by using the wrong input current, cable or plug. ✖ Don’t tamper with plugs or file down earth pins. Doing so will void warranty. Check the rating plate on your machine. Example of BOC rating plate All welding machines that comply with IEC 60974 or AS 60974 must have a rating plate similar to the one shown.
-
Page 11: Package Contents
3.0 Package Contents Package consists of the following: Power source with input cable and plug • Work return lead • TIG torch • MMA electrode holder and cable • Regulator • Gas hose • Operating manual •... -
Page 12: Connections
4.0 Connections Power 4.4 MMA operation The machine is designed to operate on a 240V The Raptor 180 TIG ACDC can be used as an MMA ±15% input single phase AC outlet. The machine welding machine by fitting an electrode holder is supplied with a heavy duty 10A input plug. - Page 13 Front Connections of Raptor 180 TIG ACDC Back Connections of Raptor 180 TIG ACDC 1 Welding cable quick socket 5 Power switch (+ Positive output terminal) Use this switch to supply single phase 240V In TIG mode, connect with work piece; AC power for welding machine.
-
Page 14: Control Panel And Display
5.0 Control Panel and Display Control Panel of Raptor 180 TIG DC Control Panel Icon Name Description Rotate the knob directly to set welding current. Adjustment knob With the “menu button”, rotate the knob to set pre-gas time, start current, up-slope time, etc. Welding mode Used to switch the MMA and TIG mode. -
Page 15: Display Symbols For Mma Welding
5.2 Display symbols for MMA welding Icon Name Description Under the MMA mode, open/close the VRD function by pressing and VRD indicator holding the “menu button”. Please select the type of electrode according to the actual situation. E6013: acid electrode Electrode type E6010: cellulose electrode E7018: basic electrode... -
Page 16: Installation & Operation Tig Welding
6.0 Installation & Operation TIG welding Installation for TIG setup Installation for TIG welding 1 Plug the work return lead into output socket , and tighten firmly. 2 Connect work return clamp to the work piece. 3 Plug the 8-pin plug of TIG torch into the welding machine control socket. -
Page 17: Starting Up
1. TIG/DC (without pulse) 2. TIG/AC (without pulse) 4. TIG/AC (with pulse) 3. TIG/DC (with pulse) 6.2 Starting up IMPORTANT Switch on the machine using the Power Switch. The panel will display the previous settings that were Before you begin a welding operation, saved in the last shutdown. -
Page 18: Adjusting Parameters
5. 2T mode Choose 2T / 4T / Spot mode Under the TIG welding mode, there are three modes: 2T, 4T and Spot. Press the welding menu button for 3 seconds, and then release to choose the mode, as shown in figures 5-7. 6. -
Page 19: Start Welding
6.5 Start welding The machine uses HF to initiate the welding arc. HF: Keep 2-4 mm space between tungsten electrode and work piece, press the torch switch, the machine will start to work after the pre gas flow time. When welding is terminated, keep the torch directed at the weld pool to allow the shielding gas to protect and cool the solidifying weld metal in order to prevent defects. -
Page 20: Installation & Operation Mma Welding
7.0 Installation & Operation MMA welding Installation for MMA process Please check the welding electrode manufacturer's Installation for MMA welding (DCEP) polarity recommendation before commencing with 1 Plug the work return lead into output socket , MMA welding. and tighten firmly. Direct Current Electrode Negative (DCEN): 2 Connect the work return clamp to the work The positive output terminal is connected to the... -
Page 21: Operation For Mma Mode
15. MMA mode (Electrode not configured) 16. MMA mode (Electrode configured) 17. MMA mode (without VRD) 18. MMA mode (with VRD) 19. Adjusting parameters (Electrode type) 7.2 Operation for MMA mode Set welding mode Adjusting parameters Press the welding mode button on the front Under the MMA mode, select the parameter panel to choose MMA mode. -
Page 22: Installing Adjustable Shoulder Strap
7.3 Installing Adjustable Shoulder Strap... -
Page 23: Machine Specifications
8.0 Machine Specifications Raptor 180 TIG ACDC Part No. Raptor 180 TIG ACDC Input voltage Single phase AC 240V ±15% Frequency 50/60 Hz TIG (DC) TIG (AC) Maximum rated input current (I1max) 24.2 A 28.7 A 35 A Maximum effective supply current (I1eff) 9.4 A 9.1 A 9.9 A... -
Page 24: Gas Tungsten Arc Welding Process (Gtaw/Tig)
9.0 Gas Tungsten Arc Welding Process (GTAW/TIG) Schematic of the TIG welding process Collet Shielding gas Tungsten electrode TIG filler rod Weld pool Workpiece Introduction 9.2 Process The Tungsten Inert Gas, or TIG process, uses the Direct or alternating current power sources heat generated by an electric arc struck between with constant current output characteristics are a non-consumable tungsten electrode and the... -
Page 25: Process Variables
9.3 Process variables Process variable Explanation Usage When direct-current electrode- For a given diameter of tungsten DCEN negative (straight polarity) is electrode, higher amperage can be Narrow bead, used: used with straight polarity. Straight deep penetration polarity is used mainly for welding: Electrons strike the part being •... -
Page 26: Shielding Gas Selection
9.4 Shielding gas selection 9.5 Welding wire selection The following table includes the recommended Shielding welding consumable for the most commonly Material Benefits welded materials. Brass Argon Stable arc Low fume Base material BOC Consumable Cobalt-based Argon Stable and easy to C-Mn and low carbon steels BOC Mild steel TIG alloys control arc... -
Page 27: Tungsten Electrode Selection
9.6 Tungsten electrode selection Base metal Thickness Desired Welding Electrode Shielding Tungsten performance type range results current type characteristics Copper General DCSP 2% Thoriated 75% Argon/ Best stability at medium alloys, Cu-NI purpose (EW-Th2) 25% Helium currents. Good arc starts alloys and Medium tendency to spit Nickel alloys... - Page 28 Tungsten tip preparation Tungsten extension Gas Lens Parts DCSP (EN) or DCRP (EP) General purpose = Diameter Flat 3x Dia 1/4–1/2x Dia Maximum 6x Dia (in draft free areas) Taper length 2–3x Dia Tungsten electrode tip shapes and current ACHP General Purpose ranges Max.
-
Page 29: Welding Techniques
9.7 Welding techniques Tungsten With Filler Rod Welding TIG Welding techniques direction Vertical Welding Rod 75° 75° Form pool 60–75° Shield gas Nozzle 15–30° 75° Tungsten electrode Direction of travel The suggested electrode and welding rod angles for welding a bead on plate are shown above. The 75°... -
Page 30: Positioning Torch Tungsten For Various Weld Joints
10° 15° 10° 15° 10° 9.9 Positioning torch tungsten for various weld joints 10° 90° 90° Butt Weld and Stringer bead Corner Joint 90° 20° 20° 70° 75° 90° 90° 70° ° 90° 70° 70° 90° 90° 15° 75° 20° 15° 90°... -
Page 31: Joint Preparation
9.10 Joint preparation 10° 10° 10° 6-20 6-20 6-20 10° 10° 10° 1.5-3 6-20 0- S 1.5-3 1.5-3 6-20 6-20 0- S 0- S 10° 10° 10° 6-20 1.5-3 1.5-3 1.5-3 0- S 0- S 0- S 6-20 6-20 10° 10°... - Page 32 Condition Result Long arc length Undercut Porosity Wide bead profile Loss of gas Acute angle coverage Oxides Unsymmetrical bead Angular profile mis-alignment Incomplete Mis-alignment penetration Filler rod removed from gas shield Oxides Oxides movement Tungsten inclusions Tungsten inclusions Electrode contact with the weld pool...
-
Page 33: Tig Welding Of Materials
10.0 TIG welding of materials 10.1 Application summary Material Type of current Polarity C-Mn steel Direct current (-) DC negative Alloyed steel Direct current (-) DC negative Copper and Cu alloys Direct current (-) DC negative Nickel and Ni alloys Direct current (-) DC negative Titanium and Ti alloys... -
Page 34: Alloyed Steel
10.3 Alloyed steel 10.4 Stainless steel TIG welding may be used for welding alloy steels TIG is a high quality process ideally suited for but because deposition rates are low, it is usually welding of stainless steels, particularly thin sheet only used for welding sheet and thin sections up to about 5 mm thick where weld integrity and for high quality applications, small components,... -
Page 35: Copper And Copper Alloys
10.5 Copper and copper alloys Cleanliness is important when welding copper, and TIG consumables are solid filler rods based on pure all dirt, grease, and other contaminants must be copper and several copper alloy compositions, removed before welding. Copper alloys containing including aluminium bronzes, silicon bronzes, aluminium will form a surface oxide film and this and cupro-nickels. -
Page 36: Welding Parameter For Tig
10.6 Welding Parameter for TIG Reference welding process of flat butt TIG welding of different materials. Tungsten Gas flow (L/min) Thickness of electrode Wire workpiece diameter diameter Stainless (mm) Current (A) (mm) (mm) steel Copper Titanium 0.3~0.5 10~40 0.5~1.0 20~40 1.0~2.0 40~70 8~10... -
Page 37: Manual Metal Arc Welding Process (Mmaw)
11.0 Manual Metal Arc Welding Process (MMAW) Installation for MMA process TIG Welding techniques Flux Covering Core Wire Weld Metal Slag Weld Pool Workpiece 11.1 Process voltage in the circuit changes from positive to negative with changes in direction of current flow. Manual Metal Arc welding is the process of joining This complete reversal is called a ‘half cycle’... -
Page 38: Welding Technique
Basic Welding Machine and Cables 11.4 Electrode Selection The choice of welding machine is based mostly on As a general rule the selection of an electrode the following factors: is straight forward, in that it is only a matter of primary voltage, e.g. - Page 39 Electrodes and Typical Applications Name Class. Application A premium quality electrode for general structural and sheet metal work BOC Smootharc 13 E6013 in all positions including vertical down using low carbon steels An iron powder electrode for high speed welding for H-V fillets and flat BOC Smootharc 24 E7024 butt joints.
- Page 40 The limits of this range should not normally be Correct Travel Speed exceeded. The electrode should be moved along in the direction of the joint being welded at a speed that The following table shows the current ranges will give the size of run required. At the same time generally recommended for BOC Smootharc 13.
-
Page 41: Types Of Joints
Butt Welding FACE REINFORCEMENT WELD FACE ROOT FACE ROOT GAP 11.5 Types of Joints Two terms relating to the preparation of butt welds require explanation at this stage. They are: Butt Welds Root Face: the proportion of the prepared edge A butt weld is a weld made between two plates that has not been bevelled. - Page 42 Welding Progression Angle Electrode 70–85˚ Weld Metal Slag Weld Pool Workpiece Direction of Welding Used on thick plates an alternative to a single ‘V’ preparation. It has advantages as regards speed of welding. It takes less weld metal than a single ‘V’, there is less contraction and therefore a lessened tendency to distortion.
-
Page 43: Fillet Welds
Convex Fillet Weld Concave Fillet Weld CONVEXITY ACTUAL THROAT CONVEXITY SIZE ACTUAL THROAT CONCAVITY SIZE LENGH CONCAVITY ACTUAL THROAT LENGH AND EFFECTIVE ACTUAL THROAT SIZE LEG THROAT AND EFFECTIVE EFFECTIVE THROAT SIZE LEG THROAT EFFECTIVE THROAT THEORETICAL THROAT THEORETICAL THROAT THEORETICAL THROAT THEORETICAL THROAT It is necessary to maintain the root gap by tacking... - Page 44 ‘T’ Joints Corner Joints A fillet weld may be placed either on one or both sides, depending on the requirements of The members are fitted as shown, leaving the work. The weld metal should fuse into or a ‘V’-shaped groove in which a fillet weld is penetrate the corner formed between the two deposited.
- Page 45 Convex Fillet Weld is too low will produce a rounded narrow bead with poor penetration at the root. The first run A fillet weld in which the contour of the weld metal in the corner of a joint requires a suitably high lies outside a straight line joining the toes of the current to achieve maximum penetration at the weld.
-
Page 46: Typical Defects Due To Faulty Technique
Recommended Angles for Overhead Fillet Welds 45˚ 15˚ 30˚ Multi-run horizontal fillets have each run made In overhead fillet welds, careful attention to using the same run lengths (run length per technique is necessary to obtain a sound weld of electrode table). - Page 47 Defects caused by welding technique Undercutting Slag Inclusions UNDERCUTTING Undercutting is a groove melted in the base metal SLAG INCLUSIONS next to the toe or root of a weld that is not filled by Slag inclusions occur when slag particles are the weld metal.
- Page 48 Lack of Fusion LACK OF FUSION Lack of fusion is when the weld metal is not fused to the base metal. This can occur between the weld metal and the base metal or between passes in a multiple pass weld. Causes of this defect can be: excessive travel speed •...
-
Page 49: Welding Parameter For Mma
11.8 Welding Parameter for MMA Please refer to the following table for the welding process parameters of MMA welding, and the details shall be subject to the actual conditions. Electrode Electrode Connection Welding Diameter Current type model type post (mm) range (A) 50~90 90~140... -
Page 50: Periodic Maintenance
12.0 Periodic Maintenance The working environment or amount of use the machine receives should be taken into consideration when planning maintenance frequency of your RAPTOR welder. Preventative maintenance will ensure trouble-free welding and increase the life of the machine and its consumables. -
Page 51: Troubleshooting And Fault Finding
13.0 Troubleshooting and Fault Finding 13.1 Environment Note: The power source should not be used in rain or No more than 50% at 40°C. snow environment. No more than 90% at 20°C The recommended external environment for The environment where the equipment is •... -
Page 52: Fault Finding
13.3 Fault Finding Only authorised repair agents with valid certifications should carry out repairs IMPORTANT: and internal servicing. Faults symptom Reasons Solution 1 No display on panel 1 Not connected to the power 1 Make sure the input power supply supply is normal. -
Page 53: Warranty Information
14.0 Warranty Information 14.1 Terms of Warranty The Raptor machine has a limited warranty that covers manufacturing and material defects only. The warranty is affected on the day of purchase and does not cover any freight, packaging and insurance costs. Verbal promises that do not comply with terms of warranty are not binding 14.3 Warranty Period on warrantor. - Page 56 BOC is a trading name of BOC Limited, a subsidiary of Linde plc. © BOC Limited 2021. Reproduction without permission is strictly prohibited. Details given in this document are believed to be correct at the time of printing. Whilst proper care has been taken in the preparation, no liability for injury or damage resulting from its improper use can be accepted.
Need help?
Do you have a question about the BOC RAPTOR and is the answer not in the manual?
Questions and answers