Advertisement
Quick Links
Installation and Operation Guide
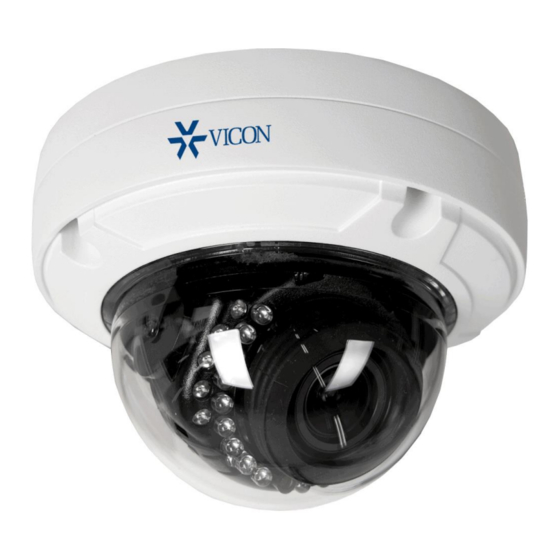
V672V-1 HD Analog Vandal Dome Cameras
Vicon Industries Inc. does not warrant that the functions contained in this equipment will meet
your requirements or that the operation will be entirely error free or perform precisely as
described in the documentation. This system has not been designed to be used in life-critical
situations and must not be used for this purpose.
Document Number: 8009-8299-41-00 Product specifications subject to change without notice.
Issued: 4/18 Copyright © 2018 Vicon Industries Inc. All rights reserved.
XX299-41
Vicon Industries Inc.
Tel: 631-952-2288) Fax: 631-951-2288
Toll Free: 800-645-9116
24-Hour Technical Support: 800-34-VICON
(800-348-4266) UK: 44/(0) 1489-566300
www.vicon-security.com
Advertisement

Subscribe to Our Youtube Channel
Related Manuals for Vicon V672V-1


Summary of Contents for Vicon V672V-1
- Page 1 V672V-1 HD Analog Vandal Dome Cameras XX299-41 Vicon Industries Inc. does not warrant that the functions contained in this equipment will meet Vicon Industries Inc. your requirements or that the operation will be entirely error free or perform precisely as Tel: 631-952-2288) Fax: 631-951-2288 described in the documentation.
- Page 2 FCC COMPLIANCE STATEMENT This device complies with Part 15 of the FCC Rules. Operation is subject to the following two conditions: (1) this device may not cause harmful interference, and (2) this device must accept any interference received, including interference that may cause undesired operation.
- Page 3 IMPORTANT SAFETY INSTRUCTIONS 1. Read these instructions. 2. Keep these instructions.\ 3. Heed all warnings. 4. Follow all instructions. 5. Do not block any ventilation openings. Install in accordance with the manufacturer’s instructions. 6. Do not install near any heat sources such as radiators, heat registers, stoves, or other apparatus (including amplifiers) that produce heat.
- Page 4 PRECAUTIONS Before installation, carefully read the manual to ensure correct operation and setup, heeding all warnings and instructions. Do not block any ventilation openings. Install in accordance with the manufacturer's instructions. Ensure manual is kept in good condition for future use. Do not install the device near any heat sources such as radiators, heat registers, stoves, or other equipment(including amplifiers) that produce heat.
-
Page 5: Table Of Contents
TABLE OF CONTENTS INTRODUCTION ------------------------------------------------------------------------- 6 CAMERA CONNECTION -------------------------------------------------------------- 7 LENS ADJUSTMENT ------------------------------------------------------------------- 7 CONTENTS OF PACKAGE ----------------------------------------------------------- 8 INSTALLATION --------------------------------------------------------------------------- 9 STRUCTURE OF THE SETUP MENU --------------------------------------------- 10 DC AUTO IRIS LENS ------------------------------------------------------------------- 16 SPECIFICATIONS ----------------------------------------------------------------------- 17 EXTERNAL DIMENSION ------------------------------------------------------------ 18... - Page 6 INSTRUCTION The 1/2.8” 2.1M Full HD CMOS camera, especially for closed circuit television CCTV and security surveillance application. Features: • High performance SONY 1/2.8” 2.1M STARVIS CMOS • Min. illumination 0.03 lux (Color), 0 lux(BW, IR LED ON) • Auto electronic shutter [1/30 (1/25) ~ 1/30,000] and manual electronic shutter modes •...
-
Page 7: Camera Connection
CAMERA CONNECTION ① Lens: Allows a wide area to be monitored. ② Power: 24V AC/ 24 VAC/12 VDC power source from a 12 VDC or 24 VAC ±10%, 60/50Hz±1Hz; use Certified/Listed Class 2 power source only. 12 VDC Type => 12 VDC ±10% (12 VDC is polarity dependent) *If using 12 VDC power adaptor, use power supply capable of supplying 8 Watts. -
Page 8: Lens Adjustment
LENS ADJUSTMENT Tact Switch for motorized lens control without being in the OSD: Up – Zoom in Down – Zoom out The lens will then autofocus based on the overall scene being viewed. CONTENTS OF PACKAGE Installation of the camera must be performed by qualified service personnel in accordance with all local and national electrical and mechanical codes. -
Page 9: Installation
INSTALLATION See the line diagram at the end of this manual for dimensions. 1. Loosen the four torx screws located the front of the housing; do not remove the screws. 2. Drill the mounting holes and cable hole in the proper location (ceiling or wall) using the drilling guide label. -
Page 10: Structure Of The Setup Menu
STRUCTURE OF THE SETUP MENU Use the joystick switch on the rear of the camera to navigate the setup menus. Use up or down to move the cursor to select the menu option, left or right to view setting options; press Enter to select. - Page 11 FOCUS SETUP The FOCUS SETUP menu provides the ability to adjust the AF MODE, SCANNING, ONEPUSHAF, SYCN TDN and INIT functions of the camera. 1) AF MODE Auto, Manual. Select the range of focusing during Auto mode. ▶ HALF, FULL 2) SCANNING 3) ONEPUSHAF Will focus the camera.
- Page 12 <EXPOSURE> Mode MAIN MENU SHUTTER EXPOSURE FOCUS SETUP MODE INDOOR ▶ EXPOSURE IRIS RETURN ┃-----┃ BACKLIGHT BRIGHTNESS DAY&NIGHT SHUTTER EXTERN AUTO AUTO SENS-UP ┃-----┃ IMAGE RETURN SYSTEM EXIT BACKLIGHT The BACKLIGHT menu is used to the ability to prevent back lighting from the image. 1) HLC: Improves the ability to identify subjects in brightly lit situations by filtering out (masking) the strength of the light.
- Page 13 <BACK LIGHT> Mode MAIN MENU FOCUS SETUP EXPOSURE LEVEL ┃-----┃ H-POS ▶ BACKLIGHT COLOR V-POS DAY&NIGHT RETURN H-SIZE EXTERN AUTO V-SIZE RETURN IMAGE SYSTEM EXIT MODE NORMAL WEIGHT MIDDLE RETURN DAY&NIGHT The DAY&NIGHT menu is used to configure how the camera handles color and changes between the day and night modes.
- Page 14 <DAY & NIGHT> Mode MAIN MENU EXTERN AUTO FOCUS SETUP ┃-----┃ ┃-----┃ EXPOSURE ANTI-SAT. ANTI-SAT. ┃-----┃ BACKLIGHT EXTERN SW AGC THRES ▶ DAY&NIGHT D>N THRES ┃-----┃ AGC MARGIN ┃-----┃ EXTERN AUTO N>D THRES ┃-----┃ DELAY DELAY RETURN ...
- Page 15 The DNR menu provides the ability to adjust the DNR (Digital Noise Reduction) functions of the camera. Select Digital Noise Reduction. ▶ LOW, MIDDLE, HIGH 1) DNR Note: When CVBS video is connected, the DNR function cannot be turned on. IMAGE The IMAGE menu provides the ability to adjust the COLOR GAIN, SHARPNESS, GAMMA, MIRROR, FLIP, D-WDR, DEFOG, PRIVACY and MOTION functions of the camera.
- Page 16 Select the motion area Filled ▶ ON, OFF MDRECT FILL When On, the motion area box fills with transparent red when motion is detected; when Off, the box will just have a border. Adjust the motion sensitivity level: ▶ 0 - 10 SENSITIVITY Select the motion OSD: ▶ON, OFF MOTION OSD...
-
Page 17: Dc Auto Iris Lens
Adjust the CR gain: ▶ 0 ~ 255 CR GAIN: Adjust the position: ▶ 0 ~ 255 POSITION: Adjust the burst frequency: ▶ 0 ~ 255 BURST FREQ: Adjust the burst gain: ▶ 0 ~ 255 BURST GAIN: Select the B&W mode burst on/off: ▶ BURST ON, BURST OFF B&W: Select the TVI_UTC Protocol: ▶... -
Page 18: Specifications
SPECIFICATION MODEL 2M HD-Hybrid Vandal-Proof CAMERA Power Source 24 VAC ± 10%/12 VDC ± 10% Power Power Consumption Max 7.2 Watts (600mA) Image Sensor 1/2.8" 2.1M Sony CMOS Total Pixels 1945 (H) x 1109 (V) Active Pixels 1937 (H) x 1097 (V) Scanning System 16:9 Progressive Sync. -
Page 19: External Dimension
One Shot AF Enter SYNC TDN OFF/ON Lens Initialize Enter EXIT EXIT (Auto Save) Power input Terminal Block Video output BNC 1 Connector (TVI/AHD)/BNC 2 Connector (CVBS) Transmission Distance Over 500m via 5C-2V coaxial cable Lens mount Fixed mount Connector &... - Page 20 Shipping Instructions Use the following procedure when returning a unit to the factory: 1. Call or write Vicon for a Return Authorization (R.A.) at one of the locations listed below. Record the name of the Vicon employee who issued the R.A.
- Page 21 “autopan” or “tour” modes of operation. Such continuous operation is outside the scope of this warranty. Any product sold as “special” or not listed in Vicon’s commercial price list: One year from date of original retail purchase.
- Page 22 THE TERMS OF THIS WARRANTY APPLY ONLY TO SALES MADE WHILE THIS WARRANTY IS IN EFFECT. THIS WARRANTY SHALL BE OF NO EFFECT IF AT THE TIME OF SALE A DIFFERENT WARRANTY IS POSTED ON THE COMPANY’S WEBSITE, WWW.VICON-SECURITY.COM. IN THAT EVENT, THE TERMS OF THE POSTED WARRANTY SHALL APPLY EXCLUSIVELY.
- Page 23 23...
Need help?
Do you have a question about the V672V-1 and is the answer not in the manual?
Questions and answers