Table of Contents
Advertisement
Quick Links
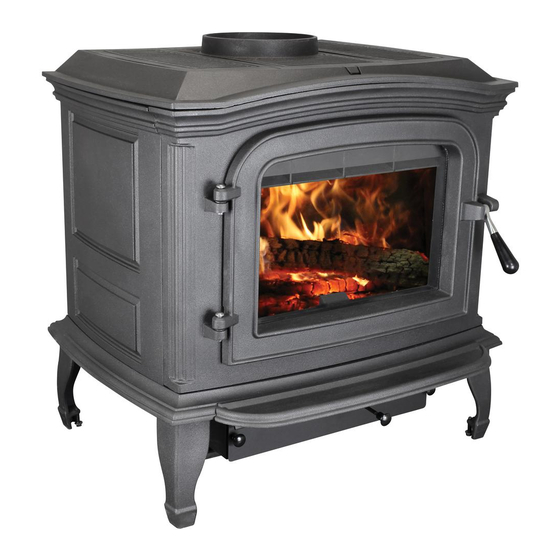
Owner's Manual MODEL: AC1100
CAUTION!
Please read this entire manual before you install
or use your new room heater. Failure to follow
instructions may result in property damage, bodily
injury, or even death.
Improper Installation Could Void Your Warranty!
SAFETY NOTICE:
If this heater is not properly installed, a house fire
may result. For your safety, follow the installation
instructions. Never use make-shift compromises
during the installation of this heater. Contact local
building or fire officials about permits, restrictions and
installation requirements in your area.
Approved for installation in the U.S.A.
CONFORMS TO UL 1482, AND CERTIFIED TO ULC-S627
ALSO SUITABLE FOR MOBILE HOME INSTALLATION.
U.S. Environmental Protection Agency
Certified to comply with 2015 particulate emissions standards.
French version is available for download from the U.S. Stove website: http://www.usstove.com/
La version française est disponible pour téléchargement à partir du site U.S. Stove: http://www.usstove.com/
SAVE THESE INSTRUCTIONS
THIS MANUAL WILL HELP YOU TO OBTAIN EFFICIENT, DEPENDABLE SERVICE FROM THE HEATER, AND ENABLE YOU
TO ORDER REPAIR PARTS CORRECTLY. KEEP IN A SAFE PLACE FOR FUTURE REFERENCE.
U.S. Stove
227 Industrial Park Road
South Pittsburg, TN 37380
(800) 750-2723 • www.usstove.com
852263F-2502G
Advertisement
Table of Contents

Related Manuals for Ashley AC1100


Summary of Contents for Ashley AC1100
- Page 1 Owner’s Manual MODEL: AC1100 CAUTION! Please read this entire manual before you install or use your new room heater. Failure to follow instructions may result in property damage, bodily injury, or even death. Improper Installation Could Void Your Warranty! SAFETY NOTICE: If this heater is not properly installed, a house fire may result.
-
Page 2: Specifications
Future generations will thank you. This manual describes the installation and operation of the Ashley, AC1100 wood heater. This heater meets the 2015 U.S. Environmental Protection Agency’s crib wood emission limits for wood heaters sold after May 15, 2015. -
Page 3: Unpack And Inspect
PRE-ASSEMBLY UNPACK AND INSPECT Remove the packing from the appliance and inspect for any damage. Ensure that the bricks are positioned correctly and not broken (see illustration for proper brick arrangement). Make sure that the baffle board, above the air tubes, is in place and undamaged. DO NOT remove the baffle board. Brick Configuration TOOLS AND MATERIALS NEEDED FOR INSTALLATION A 7/16”... -
Page 4: Installation
INSTALLATION SAFETY NOTICE • If this stove is not properly installed, a house fire may result. To reduce the risk of fire, follow the installation instructions. • Consult your municipal building department or fire officials about permits, restrictions and installations requirements in your area. -
Page 5: Floor Protector
FLOOR PROTECTOR The stove must be placed on solid concrete, solid masonry, or when installed on a combustible floor, on a floor protector. The floor protector is required to provide heat, live ember, and ash protection and must be of a non- combustible, continuous solid surface to protect against infiltration of live embers and ash. - Page 6 Ventilation COMBUSTION AIR ASSEMBLY INSTRUCTIONS This appliance requires a source of combustion air. If your home is of tight construction or has negative pressure problems, you will need an outside source of air. Below is a list of possible indicators that a source of outside combustion air may be required.
-
Page 7: Masonry Chimney
MASONRY CHIMNEY Ensure that a masonry chimney meets the minimum standards of the National Fire Protection Association (NFPA) by having it inspected by a professional. Make sure there are no cracks, loose mortar or other signs of deterioration and blockage. Have the chimney cleaned before the stove is installed and operated. When connecting the stove through a combustible wall to a masonry chimney, special methods are needed as explained in the “5.5 Combustible Wall Chimney Connector Pass-Throughs”... -
Page 8: Combustible Wall Chimney Connector Pass-Throughs
COMBUSTIBLE WALL CHIMNEY CONNECTOR PASS-THROUGHS Method A. 12” (304.8 mm) Clearance to Combustible Wall Member: Using a minimum thickness 3.5” (89 mm) brick and a 5/8” (15.9 mm) minimum wall thickness clay liner, construct a wall pass-through. The clay liner must conform to ASTM C315 (Standard Specification for Clay Fire Linings) or its equivalent. -
Page 9: Chimney Connector (Stove Pipe)
CHIMNEY CONNECTOR (STOVE PIPE) Your chimney connector and chimney must have the same diameter as the stove outlet. If this is not the case, we recommend you contact your dealer in order to insure there will be no problem with the draft. The stove pipe must be made of aluminized or cold roll steel with a minimum thickness of 0.021”... -
Page 10: Factory Built Chimney
FACTORY BUILT CHIMNEY When a metal prefabricated chimney is used, the manufacturer’s installation instructions must be followed. You must also purchase (from the same manufacturer) and install the ceiling support package or wall pass-through and “T” section package, firestops (where needed), insulation shield, roof flashing, chimney cap, etc. Maintain proper clearance to the structure as recommended by the manufacturer. -
Page 11: Do Not Burn
WOOD STOVE UTILIZATION This heater is designed to burn natural wood only. Higher efficiencies and lower emissions generally result when burning air dried seasoned hardwoods, as compared to softwoods or to green or freshly cut hardwoods. DO NOT BURN: (1) Garbage; (10) Salt water driftwood or other previously salt water (2) Lawn clippings or yard waste;... -
Page 12: Testing Your Wood
CAUTIONS: • Ashes could contain hot embers even after two days without operating the stove. • The ash pan can become very hot. Wear gloves to prevent injury. • Never burn the stove with the stove door or ash clean out opening unsealed . This would result in over firing the stove. -
Page 13: Operational Tips
OPERATION Controlled combustion is the most efficient technique for wood heating because it enables you to select the type of combustion you want for each given situation. The wood will burn slowly if the wood stove air intake control is adjusted to reduce the oxygen supply in the combustion chamber to a minimum. -
Page 14: Ash Disposal
RELOADING Once you have obtained a good bed of embers, you should reload the unit. In order to do so, open the air controls to maximum a few seconds prior to opening the stove’s door. Then proceed by opening the door very slowly;... -
Page 15: Maintenance
Maintenance Your wood stove is a high efficiency stove and therefore requires little maintenance. It is important to perform a visual inspection of the stove every time it is emptied, in order to insure that no parts have been damaged, in which case repairs must be performed immediately. -
Page 16: Repair Instructions
PAINT Remember to only clean your stove with a dry soft cloth that will not harm the stoves finish. Your stove has two types of coatings that are used in the final finish; porcelain enamel and high temperature stove paint. ENAMEL REPAIR The porcelain enamel finish will maintain its color and luster for the life of the stove. -
Page 17: Troubleshooting
Troubleshooting High Fuel Consumption Possible Cause Possible Remedies (Unplug blower first if equipped) Close air inlet control as much as possible to maintain desired heat output. Improper regulation of draft or air inlet Check all gaskets, reinstall if necessary (see maintenance for gasket replacement procedure). -
Page 18: Repair Parts
REPAIR PARTS Key Part No Description 40619 Top Cast Grate Left 40620 Top Cast Grate With Flue 69942 Heatshield Weldment 40621 Top Cast Grate Right 891492 Blower Assembly 83614 15" Threaded Rod 88147 Baffle Board 86655 Secondary Air Tube, Rear 86656 Secondary Air Tubes 89066... - Page 19 REPAIR PARTS When ordering cast-iron repair parts Key Part No Description you must specify the desired color. 40675 Glass Brace 88087 Fiberglass Gasket Cast Repair Parts Color 892342 Door Glass Key Description 88057 1/2” Robe Gasket 3.5’ Mahogany 40695 Cast Door W/Webbing 40626 Door Latch Black...
- Page 20 Limited Warranty Plate Steel Heaters (Inserts, Freestanding, and Pedestal) The operation of this heater in a manner inconsistent with the owner’s manual will void the warranty and is also against federal regulations. United States Stove Company warrants to the original purchaser its products against premature failure of any component due to workmanship, quality, or materials as follows: TIME PERIOD: Firebox ............................
-
Page 21: Service Record
Service Record It is recommended that your heating system is serviced regularly and that the appropriate Service Interval Record is completed. Service Provider: Before completing the appropriate Service Record below, please ensure you have carried out the service as described in the manufacturer’s instructions. - Page 22 How to Order Repair Parts / Commande De Pièces De Rechange This manual will help you obtain efficient, dependable service from your stove, and enable you to order repair parts correctly. Keep this manual in a safe place for future reference. When writing, always give the full model number which is on the nameplate attached to the stove.
Need help?
Do you have a question about the AC1100 and is the answer not in the manual?
Questions and answers