Table of Contents
Advertisement
Quick Links
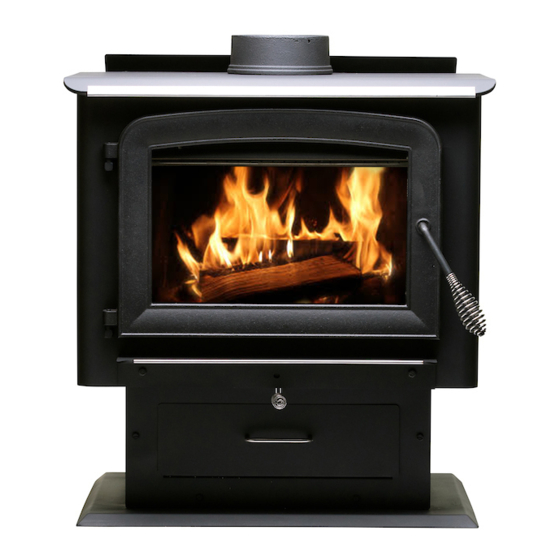
Owner's Instruction and Operation Manual
Model Numbers:
AW2020E-P • AW2020E-BP
AW2020E-L • AW2020E-BL
Report Number: F19-476
Tested Per EPA Methods ALT-125, ASTM
E2515, ASTM E3053 and CSA B415
Mobile Home / Transportable Building
approved
* All Pictures In This Manual Are For Illustrative Purposes Only. Actual Product May Vary.
U.S. Environmental Protection Agency
THIS MANUAL IS SUBJECT TO CHANGE WITHOUT NOTICE.
© 2023 United States Stove Company, 227 Industrial Park Rd., South Pittsburg, TN 37380
R
CALIFORNIA PROPOSITION 65 WARNING:
This product can expose you to chemicals including carbon
monoxide, which is known to the State of California to cause
cancer, birth defects, and/or other reproductive harm. For
more information, go to
853576K-0604M
www.P65warnings.ca.gov
Ph. 800-750-2723
Advertisement
Table of Contents

Related Manuals for Ashley AW2020E-P


Summary of Contents for Ashley AW2020E-P
- Page 1 Owner’s Instruction and Operation Manual Model Numbers: AW2020E-P • AW2020E-BP AW2020E-L • AW2020E-BL Report Number: F19-476 Tested Per EPA Methods ALT-125, ASTM E2515, ASTM E3053 and CSA B415 Mobile Home / Transportable Building approved * All Pictures In This Manual Are For Illustrative Purposes Only. Actual Product May Vary.
- Page 2 The instructions pertaining to the installation of your wood stove comply with UL 1482-2022 and CAN/ULC S627:2023 standards. This manual describes the installation and operation of the Ashley, AW2020E wood heater. This heater meets the 2020 U.S. Environmental Protection Agency’s cordwood emission limits for...
-
Page 3: Installation Checklist
INSTALLATION CHECKLIST CUSTOMER SERVICE 1-800-750-2723 ext 5050 Text to 423-301-5624 Email to: Customerservice@usstove.com COMMISSIONING CHECKLIST future reference. Failure to install and commission according to the manufacturer’s instructions and complete this checklist will invalidate the warranty. Please Print Customer Name: Telephone Number: Address: Model: Serial Number:... -
Page 4: Tools And Materials
ASSEMBLY INSTRUCTIONS TOOLS AND MATERIALS ASH PAN ASSEMBLY You will need a drill with a 1/8” bit to install sheet metal screws into connector pipe. A 5/16” socket/wrench there are two brackets; Slide the ash pan into these brackets. blower assembly described. A 1/2” socket/wrench and chimney connector components required for your particular chimney installation. -
Page 5: Installation
ASSEMBLY INSTRUCTIONS FIREBRICK CONFIGURATION AIR DEFLECTOR ASSEMBLY Replace the Firebrick as shown in the illustration. to the rear of the unit. INSTALLATION SAFETY NOTICE SAFETY NOTICE • IF THIS STOVE IS NOT PROPERLY INSTALLED, • THIS ROOM HEATER SHALL A HOUSE FIRE MAY RESULT. TO REDUCE THE INSTALLED IN A FACTORY-BUILT FIREPLACE RISK OF FIRE, FOLLOW THE INSTALLATION INSTRUCTIONS. -
Page 6: Floor Protector
INSTALLATION since an excessive accumulation of heat may occur. A wood stove must never be installed in a hallway pipe. or near a staircase, since it may block the way in • The chimney connector must not pass through an attic or roof space, closet or similar concealed FLOOR PROTECTOR •... - Page 7 INSTALLATION mobile home/transportable building. This type of FOR USE IN MOBILE HOME/TRANSPORTABLE installation is also required in air tight houses and BUILDINGS houses with negative pressure problems. You can • WARNING! DO NOT INSTALL IN SLEEPING purchase this option through your heater dealer. ROOM.
-
Page 8: Importance Of Proper Draft
INSTALLATION chimney, local geography, nearby obstructions and other factors. Too much draft may cause excessive temperatures in the appliance. An inadequate “plugging” of the chimney. An inadequate draft will cause the appliance to leak smoke into the room through appliance and chimney connector joints. An uncontrollable burn or excessive temperature In addition to the previously detailed installation indicates an excessive draft. -
Page 9: Factory Built Chimney
INSTALLATION creates the draft effect; your stove’s performance is When a metal prefabricated chimney is used, the directly dependent on an adequate draft from your manufacturer’s installation instructions must be chimney. Do not connect this unit to a chimney followed. You must also purchase (from the same The following manufacturer) and install the ceiling support recommendations may be useful for the installation... -
Page 10: Combustible Wall Chimney
INSTALLATION COMBUSTIBLE WALL CHIMNEY METHOD - 12” (304.8 mm) Clearance to Combustible Wall Member: Using a minimum thickness 3.5” (89 mm) brick and a 5/8” (15.9 mm) minimum wall thickness clay liner, construct a wall pass-through. The clay liner must conform to ASTM its equivalent. - Page 11 INSTALLATION chimney connector by way of sheet metal support plates at both ends of chimney section. Cover • Connectors to a masonry chimney, excepting opening with and support chimney section on both method B, shall extend in one continuous section sides with 24 gage minimum sheet metal supports.
- Page 12 OPERATION INSTRUCTIONS NEVER OPERATE THIS PRODUCT WHILE UNATTENDED CAUTIONS: HOUSE FIRE HAZARDS • DO STORE WOOD FLOOR • NEVER CHEMICALS, GASOLINE, PROTECTOR, UNDERNEATH STOVEPIPE(S) GASOLINE-TYPE LANTERN FUEL, OR ANYWHERE WITHIN CLEARANCES TO KEROSENE, CHARCOAL LIGHTER FLUID, OR COMBUSTIBLE SURFACES SPECIFIED FOR SIMILAR FLAMMABLE LIQUIDS TO START OR THIS APPLIANCE.
-
Page 13: Testing Your Wood
OPERATION INSTRUCTIONS 12. Paper products, cardboard, plywood, TESTING YOUR WOOD particleboard. The prohibition against burning • When the stove is thoroughly warmed, place one starters made from paper, cardboard, sawdust, parallel to the door on the bed of red embers. •... -
Page 14: Fueling Instructions
OPERATION INSTRUCTIONS PAINT WITH A SPECIAL HIGH TEMP PAINT WHICH 4 lb Proper curing of the high-temp paint requires a series of three initial burns. The appliance should be Pull the air control out fully. Light the newspaper and leave the door slightly open for 2 minutes. Close (250°F) for a duration of 20 minutes each. -
Page 15: Air Tubes
OPERATION INSTRUCTIONS 13 minutes. After 15 minutes begin to push the air VISIBLE SMOKE control in to the “Low” position (air control fully The amount of visible smoke being produced can be Closing the air too quickly will cause the unit to the combustion process is taking place in the given smoke. -
Page 16: Chimney Maintenance
CHIMNEY MAINTENANCE NEVER OPERATE THIS PRODUCT WHILE UNATTENDED • Leave the air control fully open for about 5 min. CAUTION: every time you reload the stove to bring it back DO NOT OVERFIRE APPLIANCE. YOU ARE to proper operating temperatures. The secondary OVERFIRING IF ANY PART OF THE APPLIANCE GLOWS RED. -
Page 17: Glass Care
OPERATION INSTRUCTIONS SMOKE & CO MONITORS the stores where wood stoves are sold. The glass should be washed only when cold. Burning wood naturally produces smoke and GASKET CARE gas when exposed to elevated concentrations for extended periods. While the modern combustion systems in heaters drastically reduce the amount of WARNING: NEVER OPERATE THE STOVE WITHOUT THE... - Page 18 OPTIONAL CB36 BLOWER WIRING DIAGRAM WHITE / BLACK / BLACK / BLANC NOIR NOIR BLACK / BLACK / BLACK / NOIR NOIR NOIR BLOWER BLOWER MOTOR RHEOSTAT / BLOWER SPECS: 120VAC, 60 Hz AC,0.55amp RHÉOSTAT DU MOTEUR DE VENTILATEUR VENTILATEUR SPÉCIFICATIONS DU VENTILATEUR : 120 V CA, 60 hz CA, 0,55 AMP GREEN /...
-
Page 19: Repair Parts
To order parts: Call 1-800-750-2723 Ext 5051 or Email to: parts@usstove.com IN ORDER TO MAINTAIN WARRANTY, COMPONENTS MUST BE REPLACED USING ASHLEY PARTS PURCHASED THROUGH YOUR DEALER OR DIRECTLY FROM ASHLEY. USE OF THIRD PARTY COMPONENTS WILL VOID THE WARRANTY. - Page 20 To order parts: Call 1-800-750-2723 Ext 5051 or Email to: parts@usstove.com IN ORDER TO MAINTAIN WARRANTY, COMPONENTS MUST BE REPLACED USING ASHLEY PARTS PURCHASED THROUGH YOUR DEALER OR DIRECTLY FROM ASHLEY. USE OF THIRD PARTY COMPONENTS WILL VOID THE WARRANTY.
-
Page 21: Service Record
SERVICE RECORD It is recommended that your heating system is serviced regularly and that the appropriate Service Interval Record is completed. SERVICE PROVIDER Before completing the appropriate Service Record below, please ensure you have carried out the service replacement is necessary. Service 01 Date: _____________________ Service 02... - Page 22 NOTES © 2023 United States Stove Company...
- Page 23 NOTES © 2023 United States Stove Company...
Need help?
Do you have a question about the AW2020E-P and is the answer not in the manual?
Questions and answers
I’m having trouble keeping my fire lit I need to know how to position the know for air into the wood
To keep the fire lit on the Ashley AW2020E-P, you should leave the air control fully open for about 5 minutes every time you reload the stove. This helps bring the firebox back to proper operating temperatures.
This answer is automatically generated