Table of Contents
Advertisement
Owner's Instruction and Operation Manual
Model Number:
AW1820E
Report Number: F19-552
Tested Per EPA Methods ALT-125, ASTM E2515, ASTM
E3053 and CSA B415
Certified to: UL 1482-2011 (R2015), ULC-628-93
Do not install this heater in a mobile home or trailer.
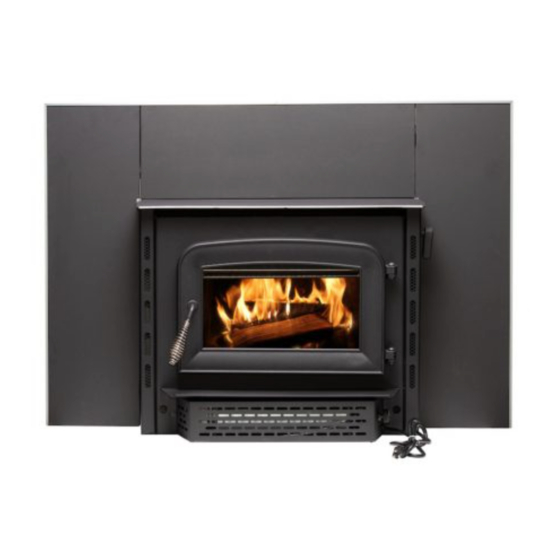
* All Pictures In This Manual Are For Illustrative Purposes Only. Actual Product May Vary.
Save These Instructions In A Safe Place For Future Reference.
SAFETY NOTICE: If this heater is not properly installed, a house fire may result.
For your safety, follow the installation instructions. Never use make-shift
compromises during the installation of this heater. Contact local building or
fire officials about permits, restrictions and installation requirements in your
area. NEVER OPERATE THIS PRODUCT WHILE UNATTENDED.
CAUTION! Please read this entire manual before you install or use your new room
heater. Failure to follow instructions may result in property damage, bodily injury,
or even death. Improper Installation Will Void Your Warranty!
U.S. Environmental Protection Agency
Certified to comply with 2020 particulate
emissions standards.
THIS MANUAL IS SUBJECT TO CHANGE WITHOUT NOTICE.
© 2021 United States Stove Company, 227 Industrial Park Rd., South Pittsburg, TN 37380
R
CALIFORNIA PROPOSITION 65 WARNING:
This product can expose you to chemicals including carbon
monoxide, which is known to the State of California to cause
cancer, birth defects, and/or other reproductive harm. For
more information, go to
853668D-1804K
www.P65warnings.ca.gov
Ph. 800-750-2723
Advertisement
Table of Contents

Related Manuals for Ashley AW1820E


Summary of Contents for Ashley AW1820E
- Page 1 Owner’s Instruction and Operation Manual Model Number: AW1820E Report Number: F19-552 Tested Per EPA Methods ALT-125, ASTM E2515, ASTM E3053 and CSA B415 Certified to: UL 1482-2011 (R2015), ULC-628-93 Do not install this heater in a mobile home or trailer.
- Page 2 The instructions pertaining to the installation of your wood stove comply with UL 1482-2011 (R2015) and ULC-628-93 standards. This manual describes the installation and operation of the Ashley, AW1820E wood heater. This heater meets the 2020 U.S. Environmental Protection Agency’s crib wood emission limits for wood heaters sold after May 15, 2020.
-
Page 3: Installation Checklist
INSTALLATION CHECKLIST Your Wood Stove should be installed by a qualified installer only. An NFI qualified Installer can be found at www.nficertified.org/public/find-an-nfi-pro/ CUSTOMER SERVICE 1-800-750-2723 ext 5050 Text to 423-301-5624 Email to: Customerservice@usstove.com COMMISSIONING CHECKLIST This Checklist is to be completed in full by the qualified person who installs this unit. Keep this page for future reference. -
Page 4: Firebrick Installation
ASSEMBLY INSTRUCTIONS FOR CUSTOMER SERVICE CALL: 800-750-2723 EXT 5050 ASSEMBLE THE SURROUND Figure 6. Surround Installation SPRING SURROUND Slots in surround slide of rebox top 6. Connect power cord of blower to grounded SURROUND ASSEMBLY receptacle. VIEW FROM BACK Firebrick extends the life of your stove and radiates heat more evenly. -
Page 5: Blower Installation
ASSEMBLY INSTRUCTIONS BLOWER INSTALLATION Remove blower assembly from packaging and check for any damage. Notify your dealer if any damages exist. Securely mount the blower to the heater with the two (2) screws and washers provided. INSTALLATION SAFETY NOTICE WARNING: •... -
Page 6: Floor Protector
INSTALLATION FLOOR PROTECTOR A solid non-combustible floor, concrete or solid masonry, must extend 6” (153 mm) to either side of the body of the appliance and 17” (432 mm) in front of the face of the appliance. When combustible flooring falls within these minimum dimensions, it must be covered with a listed floor protector, with an R-Value of at least 1.4. - Page 7 INSTALLATION spillage, and to maximize performance. Gauges to parts must be stored and readily available for measure draft are readily available at stove stores replacement if the appliance is ever removed. and are economical to rent or purchase. Factors The removal of any parts that render the such as wind, barometric pressure, trees, terrain and fireplace unusable for burning solid fuel chimney temperature can have an adverse effect...
- Page 8 INSTALLATION RAIN CAP COVER PLATE If, once installed, the solid-fuel appliance does (non-combustible) STORM not draw steadily, burns poorly or inefficiently, seal cover plate COLLAR back-drafts or experiences back-puffing when with silicone. adding fuel. UL 1777 STAINLESS STEEL LINER Extend to the top of VENTING (DRAFT) REQUIREMENTS chimney cap.
-
Page 9: Importance Of Proper Draft
INSTALLATION warning label. Permanently attach the warning 3. If the fire burns well but sometimes creates plate to a visible location in the fireplace. After excessive smoke or burns slowly, it may be choosing a visible location in the fireplace, caused by the chimney top being lower than permanently attach the warning plate by another part of the house or a nearby tree. -
Page 10: Masonry Chimney
INSTALLATION IMPORTANT INSTALLATION POINTS 4. Never use a chimney to ventilate a cellar or basement. WARNING: Contact your local building authority for approved methods of installation and any necessary permits SURE YOUR CHIMNEY SAFELY and/or inspections. CONSTRUCTED AND IN GOOD REPAIR. HAVE CHIMNEY INSPECTED FIRE... - Page 11 OPERATION INSTRUCTIONS NEVER OPERATE THIS PRODUCT WHILE UNATTENDED OPERATING SAFETY PRECAUTIONS CAUTIONS: HOUSE FIRE HAZARDS • NEVER OVERFIRE THIS APPLIANCE BY • DO STORE WOOD FLOOR BUILDING EXCESSIVELY HOT FIRES AS A PROTECTOR, UNDERNEATH STOVEPIPE(S) HOUSE/BUILDING FIRE MAY RESULT. YOU OR ANYWHERE WITHIN CLEARANCES TO ARE OVERFIRING THE APPLIANCE IF IT COMBUSTIBLE SURFACES SPECIFIED FOR...
-
Page 12: Testing Your Wood
OPERATION INSTRUCTIONS or freshly cut hardwoods. The following resources sizzles in the fire, even though the surface is dry, can assist in learning the burn characteristics of it may not be fully cured and should be seasoned various species of wood: longer. -
Page 13: Fueling Instructions
OPERATION INSTRUCTIONS or freshly cut (green). Do not use this wood in ATTENTION: your stove. Large amounts of creosote could be THE PAINT ON YOUR APPLIANCE IS DURABLE deposited in your chimney, creating potential BUT WILL NOT STAND ROUGH HANDLING conditions for a chimney fire. - Page 14 OPERATION INSTRUCTIONS WARNING: RISK OF FIRE. KEEP THE FEED DOOR TIGHTLY CLOSED AT ALL TIMES EXCEPT WHEN TENDING THE FIRE. DO NOT OPERATE THE UNIT WITH BROKEN GLASS THIS WILL RESULT IN AN OVERFIRE SITUATION. For a cold start-up, place 3 to 4 pieces of newspaper into the firebox.
-
Page 15: Blower Operation
OPERATION INSTRUCTIONS VISIBLE SMOKE The amount of visible smoke being produced can be an effective method of determining how efficiently the combustion process is taking place in the given settings. Visible smoke consists of unburned fuel and moisture leaving your stove. Learn to adjust the air settings of your specific unit to produce the smallest amount of visible smoke. -
Page 16: Chimney Maintenance
CHIMNEY MAINTENANCE NEVER OPERATE THIS PRODUCT WHILE UNATTENDED • Leave the air control fully open for about 5 min. CAUTION: every time you reload the stove to bring it back DO NOT OVERFIRE APPLIANCE. YOU ARE to proper operating temperatures. The secondary OVERFIRING IF ANY PART OF THE APPLIANCE combustion can only take place if the firebox is GLOWS RED. -
Page 17: Glass Care
CHIMNEY MAINTENANCE GASKET CARE CAUTIONS: • ASHES COULD CONTAIN HOT EMBERS EVEN WARNING: AFTER TWO DAYS WITHOUT OPERATING NEVER OPERATE THE STOVE WITHOUT A THE STOVE. GASKET OR WITH A BROKEN ONE. DAMAGE • THE ASH PAN CAN BECOME VERY HOT. TO THE STOVE OR EVEN HOUSE FIRE MAY WEAR GLOVES TO PREVENT INJURY. -
Page 18: Wiring Diagram
WIRING DIAGRAM FEMALE MALE BLACK WHITE BLACK BLACK BLOWER MALE MALE RHEOSTAT BLOWER FEMALE MOTOR GREEN FEMALE ATTACH TO BACK OF BLOWER HOUSING CAUTION! WARNING! DO THE BLOWER ASSEMBLY NOT ROUTE THE MUST BE DISCONNECTED SUPPLY CORD FROM THE SOURCE OF NEAR OR ACROSS ELECTRICAL SUPPLY HOT SURFACES! -
Page 19: Repair Parts
REPAIR PARTS Part # Description 83913 Extension Spring 892176 Top Trim 26269 Top Surround 892177 Hearth Plate Trim 26270 Side Surround 80857 Assembly, Blower 891992-1 Surround Trim-R 611008 Right Cabinet 891992-2 Surround Trim-L 893261 Damper Slide 891992-3 Surround Top Trim-L 29301 Slide Brace 891992-4 Surround Top Trim-R... - Page 20 REPAIR PARTS Part # Description 893241-AW Complete Door Handle 40883 Medium Arched Door 88324 1” Rope Gasket 5 ft 29229 Side Glass Retainer 29227 Top Glass Retainer 893159 Clear Glass 29230 Gasket Clamp 29228 Bottom Glass Retainer To order parts: Call 1-800-750-2723 Ext 5051 or Email to: parts@usstove.com Part #...
-
Page 21: Service Record
SERVICE RECORD It is recommended that your heating system is serviced regularly and that the appropriate Service Interval Record is completed. SERVICE PROVIDER Before completing the appropriate Service Record below, please ensure you have carried out the service as described in the manufacturer’s instructions. Always use the manufacturer's specified spare part when replacement is necessary. - Page 22 NOTES © 2021 United States Stove Company...
- Page 23 NOTES © 2021 United States Stove Company...
Need help?
Do you have a question about the AW1820E and is the answer not in the manual?
Questions and answers
Dimensions ?
How hold in secondary burn tubes
The secondary burn tubes in the Ashley AW1820E are held in position by screws or snap pins. To remove or replace a tube, locate these fasteners on either side of the tube and remove them.
This answer is automatically generated