Ashley AP5660L Installation And Operating Manual
Hide thumbs
Also See for AP5660L:
- Installation and operating manual (32 pages) ,
- Owner's operation and instruction manual (60 pages)
Table of Contents
Advertisement
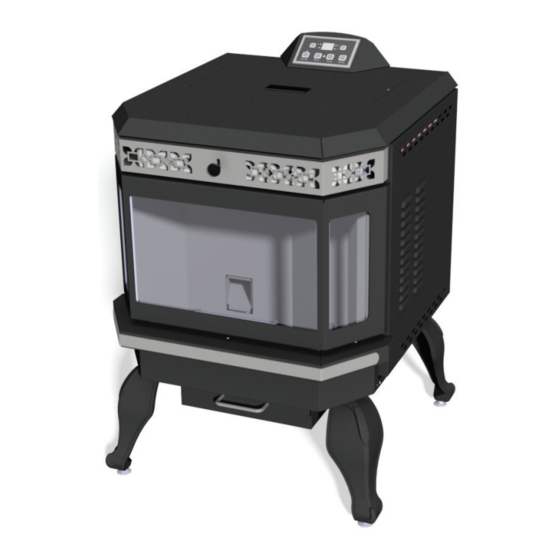
Installation and Operating Manual
Model AP5660L
Certifi ed for installations in the USA
and Canada.
U.S. Environmental Protection Agency
Certified to comply with 2015 particulate emissions standards.
This unit is not intended to be used as a primary source of heat.
SAFETY NOTICE
Please read this entire manual before installation and use of this pellet fuel-burning room heater. Failure to follow instructions
may result in property damage, bodily injury, or even death.
If your heater is not properly installed, a house fi re may result. For everyone's safety, follow all Installation and Operating
Directions. Never use makeshift compromises during the installation of this appliance.
Contact your local building or fi re offi cials about restrictions and installation inspection requirements in your area.
These Pellet Stove Room Heaters have been designed for use in the US and Canada and are suitable for mobile homes.
French version is available for download from the Vogelzang website: http://www.usstove.com/
Version française est disponible pour téléchargement à partir du site Vogelzang: http://www.usstove.comSave These
Instructions
United States Stove Company • 227 Industrial Park Road, South Pittsburg, TN 37380 • Phone #: (800) 750-2723
852072H-1903E
Advertisement
Table of Contents

Subscribe to Our Youtube Channel
Related Manuals for Ashley AP5660L


Summary of Contents for Ashley AP5660L
-
Page 1: Safety Notice
Installation and Operating Manual Model AP5660L Certifi ed for installations in the USA and Canada. U.S. Environmental Protection Agency Certified to comply with 2015 particulate emissions standards. This unit is not intended to be used as a primary source of heat. -
Page 2: Safety Precautions
Safety Precautions IMPORTANT: Read this entire manual before installing and a safety concern may arise from sparks or fumes and operating this product. Failure to do so may result entering the room. in property damage, bodily injury, or even death. Proper ... - Page 3 WARRANTY INFORMATION CARD Name__________________________________________ Telephone #: (_____)_____________ City____________________________________________ State_______ Zip_________________ Email Address __________________________________________________________________ Model # of Unit________________________________ Serial #___________________________ Fuel Type: Wood Coal Pellet Gas Other _________________________ Place of Purchase (Retailer)______________________________________________________ City____________________________________________ State_______ Zip_________________ If internet purchase, please list website address___________________________________ Date of Purchase _______________________________________________________________ Alternative Heat Main Heat Source...
- Page 4 Fold Here Fold Here Fold Here PLACE STAMP HERE United States Stove Company P.O. Box 151 South Pittsburg, TN 37380...
-
Page 5: Heating Specifications
SPECIFICATIONS HEATING SPECIFICATIONS 5.1 lbs./hr. Fuel Burn Rate* (lowest setting) Burn Time (lowest setting) 32hrs. (approximate) Hopper Capacity 55 lbs. BTU’S 43,900 per hour * Pellet size may effect the actual rate of fuel feed and burn times. Fuel feed rates may vary by as much as 20%. Use PFI listed fuel for best results. DIMENSIONS Height 34.05 in. -
Page 6: Installation Options
INSTALLATION INSTALLATION OPTIONS READ THIS ENTIRE MANUAL BEFORE YOU INSTALL AND USE YOUR PELLET STOVE. FAILURE TO FOLLOW INSTRUCTIONS MAY RESULT IN PROPERTY DAMAGE, BODILY INJURY, OR EVEN DEATH! (See specifi c installation details for clearances and other installation requirements) A Freestanding Unit—supported by pedestal/legs and placed on a non-combustible fl... -
Page 7: Floor Protection
Installation FLOOR PROTECTION the fuel loading and ash removal openings. Your heater will need a minimum 31” x 38” fl oor protector. Floor protection This heater must have a non-combustible fl oor protector must extend under and 2 in. (50.8mm) to each side of the (ember protection) installed beneath it if the fl... -
Page 8: Venting Requirements
Installation VENTING REQUIREMENTS Install vent at clearances specified by the vent manufacturer. Do not connect the pellet vent to a vent serving any other appliance or stove. Do not install a flue damper in the exhaust venting system of this unit. The following installation guidelines must be followed to ensure conformity with both the safety listing of this stove and to local building codes. -
Page 9: Vent Termination Clearances
Installation VENT TERMINATION CLEARANCES A. Minimum 4-foot (1.22m) clearance below or beside any door or window that opens. B. Minimum 1-foot (0.3m) clearance above any door or window that opens. C. Minimum 3-foot (0.91m) clearance from any adjacent building. D. Minimum 7-foot (2.13m) clearance from any grade when adjacent to public walkways. E. - Page 10 ASSEMBLY INSTRUCTIONS STEP 1 Pull the factory installed wires out of the top of the stove. There will be two wire harnesses, ash shown. STEP 2 Unpack the top mount controls and ensure that the wiring harness shown is attached securely. STEP 3 Connect the factory installed wiring harnesses to the control panel as shown.
- Page 11 Installation You have already made the important decision of choosing 4. Locate the center of the exhaust pipe of your unit. This your U.S. Stove Pellet Burning Room Heater; now your next point should then be extended to the interior wall of your step is to determine where to install your new pellet stove house.
- Page 12 Installation HORIZONTAL EXHAUST VENT INSTALLATION Figure 8 Listed Horizontal Cap Exhaust Vent Combustion Air Intake with approved cap Wall Thimble Mfg. by Pellet Vent Mfg. 6” (152mm) Clearance to Combustibles Floor Protector 6” (152mm) Clearance Front Figure 9 6” (152 mm) Clearance Wall to Back of Unit Wall Thimble Exhaust Vent...
- Page 13 Installation FREESTANDING INTERIOR VERTICAL INSTALLATION 1. Locate your Pellet Stove Room Heater in a location 5. Install the combustion air intake pipe. which meets the requirements of this manual, but in an 6. Secure all vent joint connections with 3 screws. Seal the area where it does not interfere with the house framing, exhaust vent joint connections with high temperature wiring, etc.
- Page 14 Installation FREESTANDING EXTERIOR VERTICAL INSTALLATION 1. Locate your Pellet Stove Room Heater in a location 6. Locate the center of the exhaust pipe, at the back of the which meets the requirements of this manual, but in an unit. Line up the center with the same spot on the exterior area where it does not interfere with the house framing, wall a cut a 7”...
- Page 15 Installation SELKIRK DIRECT-TEMP VENT SYSTEM FOR PELLET STOVE HEATERS Images courtesy of Selkirk UP AND OUT HORIZONTAL TERMINATION KIT STRAIGHT OUT HORIZONTAL TERMINATION KIT STRAIGHT OUT HORIZONTAL TERMINATION KIT...
-
Page 16: Mobile Home Installation
Mobile Home Installation Mobile home installation should be done in accordance with IT IS MANDATORY TO TAKE THE COMBUSTION AIR FROM the Manufactured Home and Safety Standard (HUD), CFR THE OUTSIDE WHEN INSTALLING THIS UNIT IN AIR TIGHT 3280, Part 24. Canadian installations require that the heater OR MANUFACTURED/MOBILE HOMES. - Page 17 Installation SELKIRK DIRECT-TEMP VENT SYSTEM FOR PELLET STOVE HEATERS Images courtesy of Selkirk...
-
Page 18: Control Panel
Control Panel PANEL CONTROLS MODE (M/T) BUTTON The blowers and automatic fuel supply are controlled from • The Mode of the stove can be switched between manual a panel on the top of the stove. The control panel functions and controlled with a Thermostat. Separate LEDs to the are a follows. -
Page 19: Operation
Operation • DO NOT USE CHEMICALS OR FLUIDS TO START THE FIRE - Never use gasoline, gasoline-type lantern fuel, kerosene, charcoal lighter fl uid, or similar liquids to start or “freshen up” a fi re in this stove. Keep all such liq- uids well away from the stove while it is in use. -
Page 20: Opening Door
Operation SHUTDOWN PROCEDURE by turning the dampener to the left a little bit. As a general rule, on lower feed rate settings, the damper Turning your stove off is a matter of pressing the “POWER” should be farther to the left closing it off. On higher feed button on the display board. - Page 21 Maintenance DOOR AND GLASS GASKETS • Failure to clean and maintain this unit as indicated can result in poor performance and safety hazards. Inspect the main door and glass window gaskets periodically. • Unplug your stove’s electrical cord prior to removing the The main door may need to be removed to have frayed, back panel or opening the exhaust system for any inspec- broken, or compacted gaskets replaced by your authorized...
-
Page 22: Spring Shutdown
Maintenance DO NOT abuse the door glass by striking, slamming or similar able to spray the inside of the cleaned hopper with an aerosol trauma. Do not operate the stove with the glass removed, silicone spray if your stove is in a high humidity area. The cracked or broken. -
Page 23: Disposal Of Ashes
Maintenance DISPOSAL OF ASHES Ashes should be placed in a steel metal container with a tight fi tting lid. The closed container of ashes should be placed on a non-combustible fl oor or on the ground well away from all combustible materials, pending fi nal disposal. If the ashes are disposed of by burial in soil or otherwise locally dispersed, they should be retained in the closed container until all cinders have been thoroughly cooled. - Page 24 Maintenance CLEANING Periodically remove the clean outs on either side of the heat exchanger. Clean out the ash, then follow the instructions for Heat Exchanger Tubes – Your Pellet Stove Room Heater is ash removal. Check the gasket before replacing the clean designed with a built in heat exchanger tube cleaner.
-
Page 25: Troubleshooting Guide
Trouble Shooting Guide When your stove acts out of the ordinary, the fi rst reaction is to call for help. This guide may save time and money by enabling you to solve simple problems yourself. Problems encountered are often the result of only fi ve factors: 1) poor fuel; 2) poor operation or maintenance;... - Page 26 Trouble Shooting Guide Display is Flashing “E2” Possible Causes Possible Remedies: (Unplug stove fi rst when possible) Unhook air hose from the air switch and blow through it. 1. Airfl ow switch hose or stove attachment pipes for hose If air fl ows freely, the hose and tube are fi ne. If air will not are blocked.
- Page 27 Trouble Shooting Guide Display is Flashing “E3” Possible Causes Possible Remedies: (Unplug stove fi rst when possible) 1. The hopper is out of pellets Refi ll the hopper. If on the low setting, you may need to close the dampener 2.
- Page 28 Trouble Shooting Guide 4. The hopper is out of Pellets. Refi ll the hopper. When operating the unit, be sure the hopper lid is closed so that the hopper safety switch will activate. Check the wires leading from the hopper safety switch to the control 5.
- Page 29 Trouble Shooting Guide SMOKE SMELL COMING BACK INTO THE HOME Possible Causes: Possible Remedies: (Unplug stove fi rst when possible) There is a leak in the vent pipe system. Inspect all vent pipe connections. Make sure they are sealed with RTV silicone that has a temperature rating on 500 degree F or higher.
- Page 30 Trouble Shooting Guide HIGH LIMIT SWITCH KEEPS TRIPPING Possible Causes: Possible Remedies: (Unplug stove fi rst when possible) 1. The convection blower is overheating and tripping the Clean any dust off of the windings and fan blades. If oiling internal temperature shutoff. the blower does not help, the blower may be bad.
-
Page 31: Parts Diagram
Parts Diagram... -
Page 32: Parts List
Parts List Key Parts No. Description Qty. 88161 Glass w/Gasket, Center 88162 Glass w/Gasket, Side 88082 Gasket, Door 6 ft 891994 Burn Pot 88163 Brick Panel - Center 88164 Brick Panel - Left 88165 Brick Panel - Right 892275 Ash Pan 892274 Ash Pan Drawer 891997... -
Page 33: Wiring Diagram
Wiring Diagram... -
Page 34: Limited Warranty
Limited Warranty The operation of this wood heater in a manner inconsistent with the owner’s manual will void your warranty and is also against federal regulations. United States Stove Company warrants to the original purchaser its products against premature failure of any component due to workmanship, quality, or materials as follows: TIME PERIOD: Firebox ............................ - Page 35 Notes...
-
Page 36: How To Order Repair Parts
HOW TO ORDER REPAIR PARTS THIS MANUAL WILL HELP YOU OBTAIN EFFICIENT, DEPENDABLE SERVICE FROM YOUR KING OR ASHLEY, AND ENABLE YOU TO ORDER REPAIR PARTS CORRECTLY. KEEP THIS MANUAL IN A SAFE PLACE FOR FUTURE REFERENCE. WHEN WRITING, ALWAYS GIVE THE FULL MODEL NUMBER WHICH IS ON THE NAMEPLATE ATTACHED TO THE HEATER.
Need help?
Do you have a question about the AP5660L and is the answer not in the manual?
Questions and answers