Table of Contents
Advertisement
Quick Links
MODEL T32304
10" 3/4 HP MEAT CUTTING
BANDSAW
OWNER'S MANUAL
(For models manufactured since 02/21)
COPYRIGHT © APRIL, 2021 BY GRIZZLY INDUSTRIAL, INC.
WARNING: NO PORTION OF THIS MANUAL MAY BE REPRODUCED IN ANY SHAPE
OR FORM WITHOUT THE WRITTEN APPROVAL OF GRIZZLY INDUSTRIAL, INC.
#KS21596 PRINTED IN CHINA
V1.04.21
Advertisement
Table of Contents

Related Manuals for Grizzly T32304


Summary of Contents for Grizzly T32304
- Page 1 (For models manufactured since 02/21) COPYRIGHT © APRIL, 2021 BY GRIZZLY INDUSTRIAL, INC. WARNING: NO PORTION OF THIS MANUAL MAY BE REPRODUCED IN ANY SHAPE OR FORM WITHOUT THE WRITTEN APPROVAL OF GRIZZLY INDUSTRIAL, INC. #KS21596 PRINTED IN CHINA V1.04.21...
- Page 2 This manual provides critical safety instructions on the proper setup, operation, maintenance, and service of this machine/tool. Save this document, refer to it often, and use it to instruct other operators. Failure to read, understand and follow the instructions in this manual may result in fire or serious personal injury—including amputation, electrocution, or death.
-
Page 3: Table Of Contents
Table of Contents INTRODUCTION ..........2 SECTION 5: CLEANING & SANITIZING ..33 Contact Info............ 2 Cleaning Saw ..........33 Manual Accuracy ........... 2 Proper Sanitation ......... 35 Identification ........... 3 SECTION 6: ACCESSORIES ......36 Controls & Components ......... 4 Machine Data Sheet ........ -
Page 4: Introduction
ID label (see below). This information is required for us to provide proper tech support, and it helps us determine if updated documenta- tion is available for your machine. Manufacture Date Serial Number Model T32304 (Mfd. Since 02/21) -
Page 5: Identification
Do not remove jammed cutoff pieces until blade has stopped. Maintain proper adjustment of blade tension, blade guides, and thrust bearings. d) Adjust upper guide to just clear workpiece. Hold workpiece firmly against table during operation. Model T32304 (Mfd. Since 02/21) -
Page 6: Controls & Components
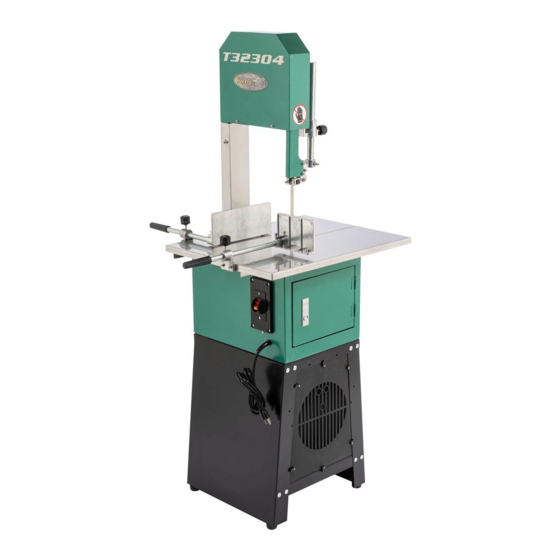
"–" button to turn motor ON. Push the Figure 2. Rear components. red "O" button to turn motor OFF. Meat Grinder: Grinds hamburger or sau- sage. Automatically engages when installed. Figure 3. Meat grinder. Figure 1. Front components. Model T32304 (Mfd. Since 02/21) -
Page 7: Machine Data Sheet
MACHINE DATA SHEET Customer Service #: (570) 546-9663 · To Order Call: (800) 523-4777 · Fax #: (800) 438-5901 MODEL T32304 10" 3/4 HP MEAT CUTTING BANDSAW Product Dimensions: Weight................................94 lbs. Width (side-to-side) x Depth (front-to-back) x Height..............44-1/2 x 24 x 58 in. - Page 8 The information contained herein is deemed accurate as of 4/7/2021 and represents our most recent product specifications. Model T32304 PAGE 2 OF 2 Due to our ongoing improvement efforts, this information may not accurately describe items previously purchased. Model T32304 (Mfd. Since 02/21)
-
Page 9: Section 1: Safety
Never operate under the influence of drugs or injury or blindness from flying particles. Everyday alcohol, when tired, or when distracted. eyeglasses are NOT approved safety glasses. Model T32304 (Mfd. Since 02/21) - Page 10 Make sure they are properly installed, you experience difficulties performing the intend- undamaged, and working correctly BEFORE ed operation, stop using the machine! Contact our operating machine. Technical Support at (570) 546-9663. Model T32304 (Mfd. Since 02/21)
-
Page 11: Additional Safety For Meat Saws
DO NOT try to stop or slow blade with your This machine is NOT designed to cut wood, hand or the workpiece. metal, glass, stone, tile, etc. Model T32304 (Mfd. Since 02/21) -
Page 12: Section 2: Power Supply
-10- Model T32304 (Mfd. Since 02/21) - Page 13 Two-prong outlets do not meet the grounding requirements for this machine. Do not modify or use an adapter on the plug provided—if it will not fit the outlet, have a qualified electrician install the proper outlet with a verified ground. -11- Model T32304 (Mfd. Since 02/21)
-
Page 14: Section 3: Setup
IMPORTANT: Save all packaging materials until you are completely satisfied with the machine and have resolved any issues between Grizzly or the shipping agent. You MUST have the original pack- aging to file a freight claim. It is also extremely helpful if you need to return your machine later. -
Page 15: Inventory
Box 1 (Figures 5–7) A. Model T32304 Saw Body ......1 B. Stand Legs ..........2 C. Stand Top ............ 1 D. Upper Brace ..........1 E. -
Page 16: Hardware Recognition Chart
Hardware Recognition Chart USE THIS CHART TO MATCH UP HARDWARE DURING THE INVENTORY AND ASSEMBLY PROCESS. Flat Head Screw -14- Model T32304 (Mfd. Since 02/21) -
Page 17: Site Considerations
Only install in an Shadows, glare, or strobe effects that may distract access restricted location. or impede the operator must be eliminated. Minimum 30" 31" 18¼" Cutting Path 23½" 48" Figure 8. Minimum working clearances. -15- Model T32304 (Mfd. Since 02/21) -
Page 18: Assembly
Brace Mount Figure 12. Attaching motor mount to stand. Make sure stand top is centered over stand sides and tighten all loose hex nuts. Stand Top Figure 10. Attaching stand legs to stand top. -16- Model T32304 (Mfd. Since 02/21) - Page 19 (4) motor mount hex bolts, then repeat Step 9 until properly tensioned. Belt Pulley ¼" Deflection Motor Pulley Figure 16. Testing for ⁄ " V-belt deflection. Figure 14. Attaching saw body to stand top. -17- Model T32304 (Mfd. Since 02/21)
- Page 20 Belt Pulley Table Slot Open End Touching Evenly Motor Figure 17. Checking pulley alignment with a straightedge. Table Lock Figure 19. Table lock located, and open table slot aligned with blade. -18- Model T32304 (Mfd. Since 02/21)
- Page 21 Figure 22. Location of fence and meat pusher end of table and secure with (4) M6-1 x 10 components (saw body removed for clarity). cap screws (see Figure 21). Cap Screw (1 of 4) Retention Bracket Figure 21. Retention bracket installed. -19- Model T32304 (Mfd. Since 02/21)
- Page 22 22. Loosen lock handle on meat grinder, and line up fixed key on grinder with keyway on grinder mount (see Figure 24). Lock Handle Keyway Figure 26. Meat grinder installed. Figure 24. Installing meat grinder. -20- Model T32304 (Mfd. Since 02/21)
-
Page 23: Adjusting Blade Tracking
Cover (1 of 2) The Model T32304 has crowned wheels. As the wheels spin, a properly tracking blade naturally tracks at the center of the wheel (see Figure 29). Figure 27. Catch tabs on stand cover. - Page 24 Pitch Control Screws Jam Nut (1 of 3) Tilt Control Screw Figure 31. Blade tracking control screws. -22- Model T32304 (Mfd. Since 02/21)
-
Page 25: Test Run
To prevent illness or death, never use a product that will make the meat unsafe for human consumption. -23- Model T32304 (Mfd. Since 02/21) -
Page 26: Section 4: Operations
Read books/magazines or get formal training before beginning any proj- ects. Regardless of the content in this sec- tion, Grizzly Industrial will not be held liable for accidents caused by lack of training. -24- Model T32304 (Mfd. Since 02/21) -
Page 27: Adjusting Blade Guard
This ating. ALWAYS disconnect machine from will provide adequate support for the blade where power before adjusting blade tension. the pressure is greatest. This adjustment is crucial when cutting through bone! -25- Model T32304 (Mfd. Since 02/21) -
Page 28: Adjusting Blade Support Bearings
⁄ " ings and blade guides must be re-adjusted away from back of blade. before resuming operation to ensure proper blade support. Tighten support bearing adjustment screw. Re-install blade guard removed in Step 2. -26- Model T32304 (Mfd. Since 02/21) -
Page 29: Adjusting Blade Guides
DISCONNECT MACHINE FROM POWER! Remove blade guard. Loosen (2) guide adjustment screws (see Figure 36), adjust blade guides approximate- ly 0.004" (about the thickness of a dollar bill) away from blade, and tighten screws. -27- Model T32304 (Mfd. Since 02/21) - Page 30 Blade blade teeth (see Figure 38), and secure. Blade Guide Gullets Re-install table removed in Step 5. 10. Re-install blade guard removed in Step 2. Figure 38. Blade guides positioned just behind blade gullets. -28- Model T32304 (Mfd. Since 02/21)
-
Page 31: Changing Blade
Changing Blade Remove table and covers, then open cabinet door (see Figure 41). The saw blade included with the Model T32304 is a general purpose 4 TPI (Teeth Per Inch) blade. Under normal conditions, the saw blade should be replaced after cutting approximately 4400 lbs. of meat or bone. - Page 32 Figure 45. Location of blade tension nut. Put on a pair of heavy leather gloves to pro- tect your hands from blade teeth, then care- fully remove blade. Figure 47. Correct tracking of blade on wheel. -30- Model T32304 (Mfd. Since 02/21)
-
Page 33: Cutting Meat & Bone
If you are not familiar with safe meat handling tech- niques, contact your local Board of Health or the USDA for proper sanitizing procedures. -31- Model T32304 (Mfd. Since 02/21) -
Page 34: Grinding Meat
Always remove meat grinder when not being used. Failure to comply may result in Lock Handle damage to meat grinder due to insufficient lubrication without meat being processed. Figure 50. Meat grinder lock handle. -32- Model T32304 (Mfd. Since 02/21) -
Page 35: Section 5: Cleaning & Sanitizing
To prevent illness or death, never use a product that will make the meat unsafe for human consumption. Figure 52. Table and meat grinder components disassembled. -33- Model T32304 (Mfd. Since 02/21) - Page 36 (minimum 19. Cover machine with a clean, dry cloth until 171°F [77°C]). If it is an option, use the dish- next use. washer to dry parts with hot air. -34- Model T32304 (Mfd. Since 02/21)
-
Page 37: Proper Sanitation
If porous surfaces, such as wood, are used in the cutting process, clean as previously described, then soak for two minutes in a solution of three tablespoons of bleach to one gallon of COOL water. Rinse items thoroughly after sanitizing! -35- Model T32304 (Mfd. Since 02/21) -
Page 38: Section 6: Accessories
T32848—82" x ⁄ " 4 TPI Bandsaw Blade T20451 Food-grade stainless steel replacement blade for the Model T32304 Meat Cutting Bandsaw. H6572—Grease-Resistant Mat 3' x 3' x ⁄ " These Black Grease Resistant Mats are engi- neered for proper back and leg support, using T20456 super-tough virgin rubber material. -
Page 39: Section 7: Maintenance
Check the V-belt as part of a monthly inspection after cutting 4400 lbs. of meat or bone. for proper tension and belt condition. Cracking and glazing could result in belt failure. Replace the belt if such conditions appear. -37- Model T32304 (Mfd. Since 02/21) -
Page 40: Section 8: Service
11. Move machine closer to power supply; use shorter extension cord. 12. Centrifugal switch/contact points at fault. 12. Adjust centrifugal switch/clean contact points. Replace either if at fault. 13. Motor or motor bearings at fault. 13. Replace motor. -38- Model T32304 (Mfd. Since 02/21) - Page 41 3. Blade is twisted. 3. Adjust/replace blade (Page 29). 4. Blade is slipping on wheel. 4. Adjust blade tension (Page 25). 5. Blade guides hitting teeth and damaging 5. Adjust blade guides/support bearings (Page 27). tooth set. -39- Model T32304 (Mfd. Since 02/21)
-
Page 42: Tensioning/Replacing V-Belt
Figure 58. Location of motor mount hex nuts. Press down on center of motor to tension V-belt, then tighten (4) hex bolts to secure motor. Make sure that motor does not twist while applying pressure. -40- Model T32304 (Mfd. Since 02/21) - Page 43 Re-install table and both stand covers, then close cabinet door. Belt Pulley Touching Evenly Motor Figure 59. Checking pulley alignment with a straightedge. Re-install table, fences, and both stand cov- ers, then close cabinet door. -41- Model T32304 (Mfd. Since 02/21)
-
Page 44: Section 9: Wiring
Technical Support at (570) 546-9663. The photos and diagrams included in this section are best viewed in color. You can view these pages in color at www.grizzly.com. -42- Model T32304 (Mfd. Since 02/21) -
Page 45: Wiring Diagram
ON/OFF Switch WARNING! GAOYOU KJD6 SHOCK HAZARD! Disconnect power before working on wiring. Ground MOTOR 120V Run Capacitor 35µF 250VAC Ground MOTOR JUNCTION BOX Neutral 120VAC 5-15 Plug Ground READ ELECTRICAL SAFETY -43- Model T32304 (Mfd. Since 02/21) ON PAGE 42! -
Page 46: Electrical Components
Electrical Components Figure 61. Motor junction box. READ ELECTRICAL SAFETY -44- Model T32304 (Mfd. Since 02/21) ON PAGE 42! -
Page 47: Section 10: Parts
Please Note: We do our best to stock replacement parts whenever possible, but we cannot guarantee that all parts shown here are available for purchase. Call (800) 523-4777 or visit our online parts store at www.grizzly.com to check for availability. - Page 48 BUSHING 19ID X 28.5OD X 30.5L PT32304115 TERMINAL BLOCK PA10-2P PT32304061 HEX BOLT M8-1.25 X 20 PT32304116 TAP SCREW M2.9 X 20 BUY PARTS ONLINE AT GRIZZLY.COM! -46- Model T32304 (Mfd. Since 02/21) Scan QR code to visit our Parts Store.
- Page 49 MOTOR CORD 18G 3W 18" 5-15P PT32304138 TABLE LOCK PIN PT32304127 KEY 5 X 5 X 30 PT32304139 DOOR LATCH PT32304128 CABLE HOLDER BUY PARTS ONLINE AT GRIZZLY.COM! -47- Model T32304 (Mfd. Since 02/21) Scan QR code to visit our Parts Store.
-
Page 50: Labels & Cosmetics
Safety labels help reduce the risk of serious injury caused by machine hazards. If any label comes off or becomes unreadable, the owner of this machine MUST replace it in the original location before resuming operations. For replacements, contact (800) 523-4777 or www.grizzly.com. BUY PARTS ONLINE AT GRIZZLY.COM! -48- Model T32304 (Mfd. -
Page 51: Warranty & Returns
WARRANTY & RETURNS Grizzly Industrial, Inc. warrants every product it sells for a period of 1 year to the original purchaser from the date of purchase. This warranty does not apply to defects due directly or indirectly to misuse, abuse, negligence, accidents, repairs or alterations or lack of maintenance.
Need help?
Do you have a question about the T32304 and is the answer not in the manual?
Questions and answers