
Related Manuals for Nautilus Hyosung MX5600


Summary of Contents for Nautilus Hyosung MX5600
- Page 1 Installation Manual MX5600 System V01.00.02 (2015.04.12) © 2012 Nautilus Hyosung Inc. All Rights Reserved.
- Page 2 V01.00.01 2012/10/11 Chapter1 V01.00.02 2015/04/12 Added the weight of MX5600 Chapter3 © 2012 Nautilus Hyosung All Rights Reserved. The content of this specification is protected by copyright laws. 2015.04. 12. 3rd Release © 2012 Nautilus Hyosung Inc. All Rights Reserved.
-
Page 3: Table Of Contents
Fascia Item Locations for Voice Guidance ....................3-6 Recommended Installation and Service Clearance ..................3-7 Chapter4. System Installation ....................... 4-1 Unpacking the ATM ............................4-1 Bolting Down the MX5600 ..........................4-2 Adjusting the Height ............................4-5 Notes ............................Notes-1 © 2012 Nautilus Hyosung Inc. All Rights Reserved. -
Page 4: Chapter1. Preface
Purpose ▶ This manual is produced to provide the guidelines for installers to comply with while installing it. ▶ This manual describes how to prepare for and to proceed the installation of MX5600 in advance. Audience ▶ This manual is for persons related to installing MX5600 in branches of banks, such as designers and construction workers of the branches and ATM installers, to work efficiently and conveniently. -
Page 5: Terminologies
Elementary Program Encryption PIN Pad Hardware Interface International Standard Organization Journal Printer Liquid Crystal Display Magnetic Card Unit Operation Panel for Customers to Operate OSD board On Screen Display Board Power Supply © 2012 Nautilus Hyosung Inc. All Rights Reserved. - Page 6 Installation Manual Chapter1.Preface Abbreviations Description Personal Identification Number Panel Control Board Switch Sensor and Indications Unit Service Provider Slip Printer (Receipt Printer) Text Terminal Unit (OPL or SPL) Vacuum Fluorescent Display © 2012 Nautilus Hyosung Inc. All Rights Reserved.
-
Page 7: Safety Precautions (English)
▪ Do not touch the equipment when it is running. ▪ The equipment can get extremely hot and may cause a burn. ▪ Make sure to close the cover before running the equipment. © 2012 Nautilus Hyosung Inc. All Rights Reserved. - Page 8 TYPE. DISPOSED OF USED BATTERIES ACCORDING TO THE INSTRUCTIONS 3. FOR PLUGGABLE EQUIPMENT, THE SOCKET-OUTLET SHALL BE INSTALLED NEAR THE EQUIPMENT AN SHALL BE EASILY ACCESSIBLE 4. THE EQUIPMENT IS TO BE SECURED TO THE BUILDING STRUCTURE BEFORE OPERATION © 2012 Nautilus Hyosung Inc. All Rights Reserved.
-
Page 9: Précautions Pour La Sécurité (French)
• Ne pas retirer le couvercle. Seul le technicien d'entretien est autorisé à ouvrir le couvercle. • Ne pas toucher. Vous pouvez avoir un choc électrique. • Assurez-vous d'éteindre l'appareil lors de l'entretien de l'équipement. © 2012 Nautilus Hyosung Inc. All Rights Reserved. - Page 10 2. RISQUE D'EXPLOSION SI LA BATTERIE EST REMPLACEE PAR UN TYPE INCORRECT. DISPOSER POUR UTILISATION DES BATTRIES SELON LES INSTRUCTIONS 3. POUR LES APPAREILS RACCORDES, LA PRISE DOIT ETRE INSTALLEE PRES D’EQUIPEMENT POUR ÊTRE FACILEMENT ACCESSIBLE © 2012 Nautilus Hyosung Inc. All Rights Reserved.
-
Page 11: Related Document
▶ The related documents are listed as follows. If needed, please contact staffs of our technical support team and maintenance team. ▪ Operator Manual ▪ Maintenance Manual ▶ For the contact of maintenance staffs of Nautilus Hyosung, see the E-mail addresses and telephone numbers provided separately. © 2012 Nautilus Hyosung Inc. All Rights Reserved. -
Page 12: Chapter2. Introduction
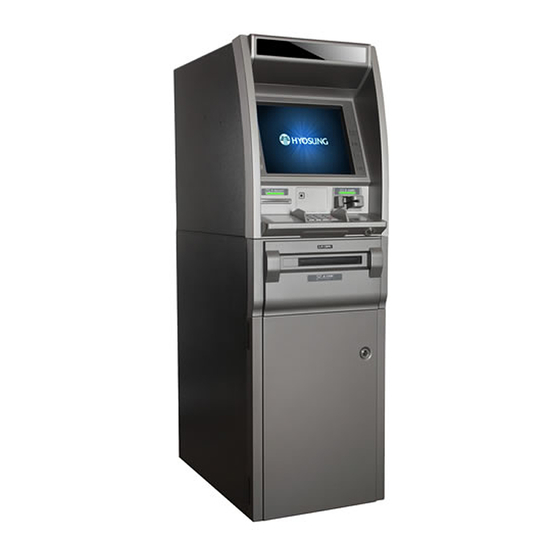
This machine is connected to your network to dispense cash, transfer funds and inquiry balance through the insertion of a customer’s card. MX5600 ATM is easy to use, easy to be service and able to support customer’s demands perfectly. ► The benefits that the new concept MX5600 provides are as follows. -
Page 13: System Identification Label
Installation Manual Chapter2.Introduction System Identification Label ▶ The System Label below shows the layout of the product identification label which is fixed inside the side box of the ATM © 2012 Nautilus Hyosung Inc. All Rights Reserved. -
Page 14: Chapter3. Installation Information
Chapter3. Installation Information Chapter3. Installation Information Installation Condition and Space ► When you determine the location of your MX5600 ATM, ensure that the physical environment, including the temperature and humidity, meets the requirements. Following conditions should be met before installing equipment. -
Page 15: Packing Dimensions & Weight
In some cases it may be necessary to store the ATM (in its box) before it is installed. See figure below for information on the dimensions of a boxed Monimax5600 ATM. ► The weight of MX5600 is 426kg (939.2lbs) © 2012 Nautilus Hyosung Inc. All Rights Reserved. -
Page 16: Atm Dimensions
Installation Manual Chapter3. Installation Information ATM Dimensions ▶ The figure below shows the dimensions of MX5600 ATM viewed from front based on UL-291 Level-1. © 2012 Nautilus Hyosung Inc. All Rights Reserved. - Page 17 Installation Manual Chapter3. Installation Information ▶ The figure below shows the dimensions of MX5600 ATM viewed from side based on UL-291 Level-1. © 2012 Nautilus Hyosung Inc. All Rights Reserved.
-
Page 18: Height And Depth Main Fascia Items
The top of the function key 982.3mm (38.67inch) Receipt Printer 800.2mm (31.50inch) Cash Dispenser 470.0mm (18.50inch) 941.6mm (37.07inch) 983.1mm (38.71inch) Card Reader 229.7mm (9.04inch) 176.9mm (6.97inch) 1220.0mm (48.03inch) 703.0mm (27.68inch) 1464.4mm (57.65inch) © 2012 Nautilus Hyosung Inc. All Rights Reserved. -
Page 19: Fascia Item Locations For Voice Guidance
Chapter3. Installation Information Fascia Item Locations for Voice Guidance ► Fascia Item Locations for Voice Guidance. Unit Symbol Distance From 144.1mm 118.3mm 135.5mm No.5 Key (5.68 inch) (4.66 inch) (5.3 inch) Clock Face Position © 2012 Nautilus Hyosung Inc. All Rights Reserved. -
Page 20: Recommended Installation And Service Clearance
Installation Manual Chapter3. Installation Information Recommended Installation and Service Clearance ▶ Following diagram is describing the recommended areas required for installing and servicing the MX5600. (Plan View) © 2012 Nautilus Hyosung Inc. All Rights Reserved. - Page 21 Installation Manual Chapter3. Installation Information ▶ Following diagram is describing the recommended areas required for installing and servicing the MX5600. (Side View) © 2012 Nautilus Hyosung Inc. All Rights Reserved.
-
Page 22: Chapter4. System Installation
4. Verify the contents carefully with the packing list to be sure all items listed are included. Notify your distributor of any shortages. 5. If only the palette needs to be removed, lift the whole machine from the bottom and set it aside. © 2012 Nautilus Hyosung Inc. All Rights Reserved. - Page 23 4. Moving this ATM machine to the installation site. PRECAUTION: MX5600 ATM machine is very heavy equipment and can cause injuries if not handled with caution. Read the following carefully. ▪ Firmly close the vault door and lock the door by turning the knob completely.
-
Page 24: Bolting Down The Mx5600
► To bolt down the MX5600 using the Anchor Bolt Location Sheet (template), perform the following steps: 1. Ensure that the surface where the MX5600 is to be placed is level so that the unit will not tip over when opening the upper/lower modules or the door. - Page 25 Installation Manual Chapter4. System Installation ► Anchor bolts Location Sheet Sample © 2012 Nautilus Hyosung Inc. All Rights Reserved.
-
Page 26: Adjusting The Height
Installation Manual Chapter4. System Installation Adjusting the Height ▶ Adjust the height by turning the adjuster nut. © 2012 Nautilus Hyosung Inc. All Rights Reserved. -
Page 27: Notes
Installation Manual Notes Notes © 2012 Nautilus Hyosung Inc. All Rights Reserved. Notes-1...
Need help?
Do you have a question about the MX5600 and is the answer not in the manual?
Questions and answers