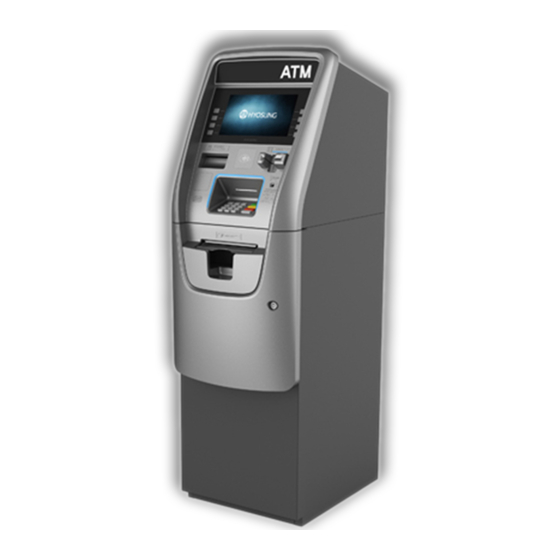
Nautilus Hyosung MX2600SE Operator
Hide thumbs
Also See for MX2600SE:
- Quick reference manual (2 pages) ,
- Installation manual (18 pages) ,
- Service manual (132 pages)
Table of Contents
Advertisement
Quick Links
Advertisement
Table of Contents

Related Manuals for Nautilus Hyosung MX2600SE


Summary of Contents for Nautilus Hyosung MX2600SE
- Page 1 Operator Function MX2600SE V01.00.00 (2015.03.18)
- Page 2 Description of Change Chapter V06.01.XX_ V01.00.00 2015/03/18 New Publication © 2015 Nautilus Hyosung All Rights Reserved. The contents of this document could be changed as the document revises. 2015. 3.18 1st Release © 2015 Nautilus Hyosung Inc. All Rights Reserved.
-
Page 3: Table Of Contents
OPTIONAL FUNCTION2 ........................3-55 3.6 SYSTEM SETUP ..........................3-90 DATE & TIME ............................3-91 SPEAKER VOLUME ..........................3-92 TERMINAL IP ............................3-93 LANGUAGE ............................3-94 CHANGE PASSWORD ......................... 3-97 MODEM PARAMETERS ........................3-101 © 2015 Nautilus Hyosung Inc. All Rights Reserved. - Page 4 Transaction Screen Flow ......................Appendix-12 Transaction Process (ENGLISH) ..................... Appendix-12 Transaction Process (SPANISH) ..................... Appendix-22 Transaction Process (FRENCH) ..................... Appendix-32 Supported USB Memory and HUB ..................Appendix-42 Advertisement Image Update Guide ..................... Appendix-44 Preparation ..........................Appendix-44 © 2015 Nautilus Hyosung Inc. All Rights Reserved.
- Page 5 Background Image Update Guide ....................Appendix-54 Preparation ..........................Appendix-54 Executing Software Update ..................... Appendix-56 Making MoniView update media ....................Appendix-60 Weather Service Guide ......................... Appendix-61 Anti Skimming Service (Warning against illegal trials to card reader) ........... Appendix-62 © 2015 Nautilus Hyosung Inc. All Rights Reserved.
-
Page 6: Chapter 1. How To Install New Software
1.4 SET THE TYPE OF MACHINE AFTER UPDATING S/W (NH1800SE, MX4000W, NH2600, MX2600SE, NH2700, MX5000SE) ▶ If you install the newly released S/W to NH1800SE, MX4000W, NH2600, MX2600SE, NH2700 and MX5000SE the thing you should take into consideration is whether the type of machine is right or not. -
Page 7: Chapter 2. Basic System Operation
(In case of Rear Type Machine, press the IN SUPERVISOR button) The default password is “555555”(6 digits). The default password is changeable in Supervisor mode. If the correct password is entered, the OPERATOR FUCNTION menu will be displayed. © 2015 Nautilus Hyosung Inc. All Rights Reserved. - Page 8 3RD CST 4TH CST APPLY SETTLE- MENT DAY TOTAL TRIAL DAY TOTAL CASSETTE TOTAL TRIAL CASSETTE TOTAL CLEAR JOURNAL CLEAR TRANS. SEQUENCE PREV JOURNAL NEXT VIEW PREV 50 JOURNAL NEXT 50 MOVE START © 2015 Nautilus Hyosung Inc. All Rights Reserved.
- Page 9 ERROR REPORT CODE VERSION PRINT ALL SETUP PRINT CLEAR ERROR SUMMARY PREV NEXT PRINT REJECT ANALYSIS CLEAR INITIALIZE RECEIPT PRINTER CASH DISPENSE DIAGNOSTI MODEM (DIAL UP) TCP/IP (TCP/IP) MCU TEST IC TEST © 2015 Nautilus Hyosung Inc. All Rights Reserved.
- Page 10 TAIL RECEIPT ADDRESS & PHONE NUMBER PREV EXTENDED BIN LIST CUSTOME NEXT R SETUP BIN LIST EDIT DELETE DELETE ALL MOD 10 EN/DISABLE CHECK OPTIONAL FUNCTION EN/DISABLE BALANCE CONTINUE AT START EN/DISABLE © 2015 Nautilus Hyosung Inc. All Rights Reserved.
- Page 11 SCREEN FUNCTION SCREEN 4 SCREEN 5 CHANGE SCREEN 6 BACKGROU SCREEN EN/DISABL SCREEN 1 SERVICES EN/DISABL SCREEN 2 EN/DISABL SCREEN 3 EN/DISABL SCREEN 4 EN/DISABL SCREEN 5 EN/DISABL SCREEN 6 NOTICE EN/DISABL © 2015 Nautilus Hyosung Inc. All Rights Reserved.
- Page 12 SETTING OPTION COUPON1 COUPON2 ADVERTISE ENHANCE COUPON3 MENT D COUPON COUPON4 COUPON5 COUPON6 TIMER EN/DISABL SCREEN 1 EN/DISABL SCREEN 2 WELCOME ADVERTISE EN/DISABL SCREEN 3 MENT EN/DISABL SCREEN 4 EN/DISABL SCREEN 5 © 2015 Nautilus Hyosung Inc. All Rights Reserved.
- Page 13 TERMINAL STATUS EN/DISABLE STANDARD HOST ERROR OPTION EN/DISABLE REVERSAL REASON EN/DISABLE DIALUP COMMUNIC ATION TCP/IP GENERAL OPTIONAL EOT/ENQ NO EOT SELECT OPTION REQUIRED PROCESSO NO ENQ REQUIRED STANDARD MESSAGE STANDARD FORMAT STANDARD © 2015 Nautilus Hyosung Inc. All Rights Reserved.
- Page 14 CERT. is set ‘ENABLE’) REVERSAL RETRY COUNT YEAR MONTH DATE & TIME HOUR MINUTE APPLY SPEAKER SYSTEM VOLUME DOWN SETUP IP ADDRESS SUBNET MASK TERMINAL GATEWAY (TCP/IP) DHCP EN/DISABLE TRANSACTI DEFAULT LANGUAGE LANGUAGE © 2015 Nautilus Hyosung Inc. All Rights Reserved.
- Page 15 CDU TYPE (N/A to CASSETTE MX4000W) VOLUME EXECUTE CALRIBRATI (Rear Type Only) DEVICE NH DIP SETUP NH EMV NH EMV2 EN/DISABL CARD READER SETUP ANTI SHUTTER SKIMMING EN/DISABL (NH EMV Only TIME THRESHOL © 2015 Nautilus Hyosung Inc. All Rights Reserved.
- Page 16 SET THE TYPE OF CLEAR ALL SYSTEM MACHINE CONTROL (MX4000W) SET THE TYPE OF CLEAR MACHINE SETTING (MX4000W) CLEAR NVRAM CLEAR JOURNAL CLEAR TRANS SEQUENCE NUMBER CLEAR LOG BACK NVRAM RESTORE NVRAM 2-10 © 2015 Nautilus Hyosung Inc. All Rights Reserved.
- Page 17 EN/DISABLE DOWNLOAD MASTERKE HOST TELEPHON PHONE 1 E NUMBER HOST (DIAL UP) PHONE 2 EN/DISABLE HOST ADDRESS 1 HOST PORT ADDRESS NUMBER 1 (TCP/IP) HOST ADDRESS 2 PORT NUMBER 2 TERMINAL © 2015 Nautilus Hyosung Inc. All Rights Reserved. 2-11...
- Page 18 (TCP/IP) LISTENING PORT (TCP/IP) PASSWORD ROUTING EN/DISABLE TOTAL TYPE AUTO DAY TOTAL HOUR MINUTE DISPENSE LIMIT LB 0 LB 1 TRANSACT ION SETUP FAST CASH LB 2 RB 0 RB 1 2-12 © 2015 Nautilus Hyosung Inc. All Rights Reserved.
- Page 19 Operator Function Chapter 2. BASIC SYSTEM OPERATION RB 2 CURRENCY CHECK EN/DISABL CASSETTE CASSETTE DENOMINA TION CASSETTE CASSETTE SERVICE 10 SITE MAP QUICK REPLENIS QUICK CONFIGUR ATION © 2015 Nautilus Hyosung Inc. All Rights Reserved. 2-13...
-
Page 20: When An Error Occurs
If the machine goes out of service, the error code will not always appear on the screen. If you do not see an error code, enter operator function and go to reports. Look in the error summary for error codes. 2-14 © 2015 Nautilus Hyosung Inc. All Rights Reserved. -
Page 21: How To Use Keypad (Function Key Type)
[Default KeyPad Character Table Screen] Shift Status NUMBE ‘ < “ > Space UPPER ALPHA Space LOWE The character on the current cursor position on the TABLE screen wil be selected © 2015 Nautilus Hyosung Inc. All Rights Reserved. 2-15... - Page 22 J. F6 key and CANCEL key in pinpad are used to exit. (If you didn’t press F5 key after changing, the changes will be ignored.) K. F7 key is used to move the cursor position UP. L. F8 key is used to move the cursor position DOWN. 2-16 © 2015 Nautilus Hyosung Inc. All Rights Reserved.
-
Page 23: How To Use Keypad (Touch Screen Type)
+ - : ; < > ? 2 3 4 5 6 7 8 9 0 ( ) { } [ ] _ = “ ‘ , . / | \ £ © 2015 Nautilus Hyosung Inc. All Rights Reserved. 2-17... -
Page 24: Chapter 3. Supervisor Menu
1. IN SERVICE 2. SITE MAP 3. QUICK REPLENISH 4. QUICK CONFIGURATION F1. SETTLEMENT F2. CUSTOMER SETUP F3. JOURNAL F4. SYSTEM SETUP F5. REPORT F6. HOST SETUP F7. DIAGNOSTICS F8. TRANSACTION SETUP © 2015 Nautilus Hyosung Inc. All Rights Reserved. - Page 25 NH-2700 / NH-2700T / NH-1800SE / MACHINE KIND MX4000W / NH-2600 / MX2600SE / MX5000SE / MX-5200SE COUNTRY CODE PROGRAM VERSION V06.01.XX TCP/IP LINE TYPE DIAL-UP STANDARD1 STANDARD2 MESSAGE FORMAT STANDARD3 TERMINAL ID 1234567 © 2015 Nautilus Hyosung Inc. All Rights Reserved.
- Page 26 CST3(Media Status) MX4000W EMPTY FULL Not Available to CST4(Media Status) MX4000W REJECT COUNT(CDU) – (0) REJECT Card ERROR Pinpad ERROR Cash Dispenser ERROR Receipt Printer ERRPR RFID Reader ERROR Optional NOT USED © 2015 Nautilus Hyosung Inc. All Rights Reserved.
-
Page 27: Settlement
3. TRIAL DAY TOTAL : Just do settlement with host. (Not clear transaction info.) 4. CASSETTE TOTAL : Show note count and then clear note count. 5. TRIAL CASSETTE TOTAL : Just show note count. (Not clear note count.) © 2015 Nautilus Hyosung Inc. All Rights Reserved. -
Page 28: Add Cash
Left : Current note count of each cassette Right : Note count to be added for each cassette SUM TOTAL : Current total amount of each cassette ADDED AMT : Amounts to be added for each cassette © 2015 Nautilus Hyosung Inc. All Rights Reserved. -
Page 29: Journal
5. PRINT LAST X Go to the next screen 6. UPLOAD JOURNAL TO HOST Go to the next screen for determining whether to use the function of ‘Electric Journal Upload (EJ UPLOAD)’ or not. © 2015 Nautilus Hyosung Inc. All Rights Reserved. - Page 30 MOVE LAST button, you can see first or last journal. Besides, you can check up journal data you would try to search by using SEARCH JOURNAL button and just print out the current journal by pressing PRINT THIS button. © 2015 Nautilus Hyosung Inc. All Rights Reserved.
- Page 31 Operator Function Chapter 3. SUPERVISOR MENU SEARCH JOURNAL ▶ You can search a specific journal with a journal index and see it if the index is valid. © 2015 Nautilus Hyosung Inc. All Rights Reserved.
- Page 32 JOURNAL main screen and then press ENTER key. Then the data you request is printed. If you want to stop printing, you may stop by pressing CANCEL key. © 2015 Nautilus Hyosung Inc. All Rights Reserved.
- Page 33 Operator Function Chapter 3. SUPERVISOR MENU UPLOAD JOURNAL TO HOST ▶ You can select whether to use ‘EJ UPLOAD’ or not on the screen as depicted as below. 3-10 © 2015 Nautilus Hyosung Inc. All Rights Reserved.
-
Page 34: Report
VERSION, PRINT ALL SETUP and REJECT ANALYSIS. You can print out all information regarding each device as well as system value set up. If you want to go back the previous screen, press the CANCEL key. © 2015 Nautilus Hyosung Inc. All Rights Reserved. 3-11... -
Page 35: Error Code
PRINT THIS button is for printing information about the error code displaying in the screen. SEARCH ERROR CODE button is to search for a specific error code immediately. 3-12 © 2015 Nautilus Hyosung Inc. All Rights Reserved. -
Page 36: Search Error Code
▶ You can search a specific error code if that exists. In order to use the function, please input the specific error code in the field and select OK button. If there is no result in database, “INVALID ERROR CODE” displays. [Function Key Type] [Touch Type] © 2015 Nautilus Hyosung Inc. All Rights Reserved. 3-13... -
Page 37: Sw Version
Operator Function Chapter 3. SUPERVISOR MENU SW VERSION ▶ This menu shows each software version. (APPLICATION, CDU EP, CDU SP, SPR EP, SPR SP, MCU EP, MCU SP and etc.) 3-14 © 2015 Nautilus Hyosung Inc. All Rights Reserved. -
Page 38: Print All Setup (List)
TRANSACTION SETUP DENOMINATION FAST CASH LOW CURRENCY CHECK TERMINAL ID STANDARD 3 OPTION ROUTING ID HOST PHONE NUMBER HOST SETUP HEALTH CHECK OPTION AUTO DAY TOTAL OPTION RMS OPTION MASTER KEY INFO © 2015 Nautilus Hyosung Inc. All Rights Reserved. 3-15... - Page 39 TRANSACTION SETUP DENOMINATION FAST CASH LOW CURRENCY CHECK TERMINAL ID STANDARD 3 OPTION ROUTING ID HOST ADDRESS INFO HOST SETUP HEALTH CHECK OPTION AUTO DAY TOTAL OPTION RMS OPTION MASTER KEY INFO 3-16 © 2015 Nautilus Hyosung Inc. All Rights Reserved.
-
Page 40: Error Summary
CLEAR button erases the history stacked in an ATM machine and set START DATE to the present date as well. (START DATE displays “01/01/2000 00:00:00” in ATM machines which have never done the CLEAR function.) © 2015 Nautilus Hyosung Inc. All Rights Reserved. 3-17... -
Page 41: Reject Analysis
‘0’on the screen. You might be curious about the necessity of “CLEAR” button. The reason why this button is necessary is to cancel out the information of notes for statistical purpose. 3-18 © 2015 Nautilus Hyosung Inc. All Rights Reserved. -
Page 42: Diagnostics
Please press each button on this menu to go to next screen or to operate the related function. To go back to the previous screen, press the CANCEL key in pinpad. [Function Key Type] [Touch Type] © 2015 Nautilus Hyosung Inc. All Rights Reserved. 3-19... - Page 43 4. If you cancel a test and then perform another test, the test count will be initialized. e.g. If you cancel a test when the tested count is 3, and then perform another test, the tested count starts at 0. 3-20 © 2015 Nautilus Hyosung Inc. All Rights Reserved.
-
Page 44: Initialize
1. Select DIAGNOSTICS in the OPERATOR FUNCTION 2. Select the INITIALIZE in the DIAGNOSTICS menu. All units will be initialized. 3. When the ATM is in the normal state, the SUCCESS message will be displayed. © 2015 Nautilus Hyosung Inc. All Rights Reserved. 3-21... -
Page 45: Receipt Printer
2. Select the RECEIPT PRINTER in the DIAGNOSTICS menu. Test String will be printed from the receipt printer. 3. When the ATM is in the normal state, the SUCESS message will be displayed. 3-22 © 2015 Nautilus Hyosung Inc. All Rights Reserved. -
Page 46: Cash Dispenser
1. Select DIAGNOSTICS in the OPERATOR FUNCTION. 2. Select the CASH DISPENSER in the DIAGNOSTICS menu. The CASH DISPENSER test will be performed. 3. When the ATM is normal state, the SUCCESS message will be displayed. © 2015 Nautilus Hyosung Inc. All Rights Reserved. 3-23... -
Page 47: Modem
Accessing the MODEM 1. Select DIAGNOSTICS in the OPERATOR FUNCTION. 2. Select the MODEM in the DIAGNOSTICS menu. 3. The MODEM TEST will be displayed. 3-24 © 2015 Nautilus Hyosung Inc. All Rights Reserved. -
Page 48: Tcp/Ip
CONNECT for line test. This function is used to check the function of the TCP/IP. Accessing the TCP/IP 1. Select DIAGNOSTICS in the OPERATOR FUNCTION. 2. Select the TCP/IP in the DIAGNOSTICS menu. 3. The TCP/IP menu will be displayed. © 2015 Nautilus Hyosung Inc. All Rights Reserved. 3-25... -
Page 49: Card Scan (Nh Dip)
1. Select DIAGNOSTICS in the OPERATOR FUNCTION. 2. Select CARD SCAN in the DIAGNOSTICS menu. And if the display is ready, please insert and remove the card quickly. 3. The card data will be displayed. 3-26 © 2015 Nautilus Hyosung Inc. All Rights Reserved. -
Page 50: Card Scan (Nh Emv, Nh Emv2)
However, in case of testing IC card, insert and do not remove the card.. 3. The card data will be displayed. © 2015 Nautilus Hyosung Inc. All Rights Reserved. 3-27... -
Page 51: Auxiliary Unit
▶ This AUXILIARY UNIT contains SENSOR, FLICKER and RFID CARD SCAN. Please press each button on this menu to go to the next screen. To go back to the previous screen, press the CANCEL key in pinpad. 3-28 © 2015 Nautilus Hyosung Inc. All Rights Reserved. - Page 52 AUXILIARY menu. 3. DOOR STATUS and ADA JACK data will be displayed on the center. If you want to see the CDU SENSOR or SPR SENSOR, then press the button in each. © 2015 Nautilus Hyosung Inc. All Rights Reserved. 3-29...
- Page 53 1. Select DIAGNOSTICS in the OPERATOR FUNCTION. 2. Select AUXILIARY UNIT in the DIAGNOSTICS menu 3. Select SENSOR in the AUXILIARY menu and then select CDU SENSOR in the SENSOR menu. 3-30 © 2015 Nautilus Hyosung Inc. All Rights Reserved.
- Page 54 1. Select DIAGNOSTICS in the OPERATOR FUNCTION. 2. Select AUXILIARY UNIT in the DIAGNOSTICS menu 3. Select SENSOR in the AUXILIARY menu and then select SPR SENSOR in the SENSOR menu. © 2015 Nautilus Hyosung Inc. All Rights Reserved. 3-31...
- Page 55 ON, OFF or FLICKING. In MX4000W, there are no flickers attached to SPR, MCU. So ‘N/A’ would be displayed on the screen corresponding to the blank of SPR, MCU. [Screen for MX4000W] 3-32 © 2015 Nautilus Hyosung Inc. All Rights Reserved.
- Page 56 SOLID, FADE, FLICKING HALO LED COLOR CYAN, BLUE, YELLOWGREEN, WHITE, GREEN, PINK To check the MCU flicker, press the MCU FLICKER button of right side of the screen. [Screen for NH-2600] © 2015 Nautilus Hyosung Inc. All Rights Reserved. 3-33...
- Page 57 1. Select DIAGNOSTICS in the OPERATOR FUNCTION. 2. Select AUXILIARY UNIT in the DIAGNOSTICS menu and then select FLICKER in the AUXILIARY menu. 3. Select the button you want to test. 3-34 © 2015 Nautilus Hyosung Inc. All Rights Reserved.
- Page 58 2. Select AUXILIARY UNIT in the DIAGNOSTICS menu. 3. Select RFID CARD SCAN in the AUXILIARY UNIT menu. And if the display is ready, please contact your card to RFID reader. 4. The card data will be displayed. © 2015 Nautilus Hyosung Inc. All Rights Reserved. 3-35...
-
Page 59: Aging
1. Select DIAGNOSTICS in the OPERATOR FUNCTION. 2. Select AGING in the DIAGNOSTICS menu. 3. All units will be tested unlimitedly. When you press CANCEL key, the testing will be stopped. 3-36 © 2015 Nautilus Hyosung Inc. All Rights Reserved. -
Page 60: Anti Skimming (Nh Emv Only)
If you set threshold time as 10 sec, the anti skimming board will send the detection signal to S/W to notify it after 10 sec. passes by. © 2015 Nautilus Hyosung Inc. All Rights Reserved. 3-37... -
Page 61: Customer Setup
[STANDARD 3] <Note!> STANDARD3 OPTION is displayed only if the message format is STANDARD3 [STANDARD 1, 2, EPS] <Note!> STANDARD1 OPTION is displayed only if the message format is STANDARD1 3-38 © 2015 Nautilus Hyosung Inc. All Rights Reserved. -
Page 62: Change Message
RECEIPT ADDRESS & PHONE NUMBER display. You can set the information about ADDRESS and PHONE NUMBER in the RECEIPT. At last, the display can go back to the previous menu by pushing the CANCEL key in pinpad © 2015 Nautilus Hyosung Inc. All Rights Reserved. 3-39... - Page 63 Refer to figure of the Sample Receipt below for the location of the messages. The default receipt format will not include any messages. Spanish transactions will be printed in English. Location of Messages on Receipt 3-40 © 2015 Nautilus Hyosung Inc. All Rights Reserved.
-
Page 64: Welcome Message
▶ The WELCOME MESSAGE function is used to edit the welcome text. Please input the welcome message in the field and select OK button. If it succeeded, “OPERATION SUCCESSFUL!” displays [Function Key Type] [Touch Type] © 2015 Nautilus Hyosung Inc. All Rights Reserved. 3-41... -
Page 65: Receipt Header
▶ The RECEIPT HEADER function is used to edit the message at the header of receipt. Please input the receipt header in the field and select OK button. If it succeeded, “OPERATION SUCCESSFUL!” displays. [Function Key Type] [Touch Type] 3-42 © 2015 Nautilus Hyosung Inc. All Rights Reserved. -
Page 66: Receipt Tail
▶ The RECEIPT TAIL function is used to edit the message at the tail of receipt. Please input the receipt tail in the field and select OK button. If it succeeded, “OPERATION SUCCESSFUL!” displays. [Function Key Type] [Touch Type] © 2015 Nautilus Hyosung Inc. All Rights Reserved. 3-43... -
Page 67: Receipt Address & Phone Number
& phone number of receipt. Please input the receipt address & phone number in the field and select OK button. If it succeeded, “OPERATION SUCCESSFUL!” displays. [Function Key Type] [Touch Type] 3-44 © 2015 Nautilus Hyosung Inc. All Rights Reserved. -
Page 68: Bin (Bank Identification Number) List
You can input and edit it by using such as ADD, DELETE, EDIT, DELETE ALL button. Please press EXTENDED BIN LIST button on this menu to see the Extended Bin List. To go back to the previous screen, press the CANCEL key in pinpad. © 2015 Nautilus Hyosung Inc. All Rights Reserved. 3-45... -
Page 69: Extended Bin List
BIN LIST exclusive of the basic 20 BIN LIST. Use PREV or NEXT button to show BIN LIST before or after. You can change EXTENDED BIN LIST via FILE UPDATE using RMS or USB. To go back to the previous screen, press the CANCEL key in pinpad. 3-46 © 2015 Nautilus Hyosung Inc. All Rights Reserved. -
Page 70: Optional Function1 (Except For Ic Card Readable Card Reader)
To go back to the previous screen, press the CANCEL Key in pinpad. <Note!> 1. PRE DIALING is available only when the current network is Dial-up. 2. BALANCE AT START is supported in some specific countries only. © 2015 Nautilus Hyosung Inc. All Rights Reserved. 3-47... - Page 71 Operator Function Chapter 3. SUPERVISOR MENU MOD 10 CHECK ▶ MOD 10 CHECK is to check the card data’s validation. Please press EN/DISABLE button to set up MOD 10 CHECK. 3-48 © 2015 Nautilus Hyosung Inc. All Rights Reserved.
- Page 72 Please press EN/DISABLE button to set up BALANCE AT START and CONTINUE. EN/DISABLE button to set up whether it’ll CONTINUE the TRANSACTION after BALANCE AT START. © 2015 Nautilus Hyosung Inc. All Rights Reserved. 3-49...
- Page 73 ▶ ACCOUNTS is to set up the accounts which is used on transaction. You can see CHECKING ACCOUNT, SAVINGS ACCOUNT and CREDIT CARD ACCOUNT. However, only CREDIT CARD ACCOUNT can be set up. Please press CREDIT CARD EN/DISABLE button to set up CREDIT CARD ACCOUNT. 3-50 © 2015 Nautilus Hyosung Inc. All Rights Reserved.
- Page 74 ▶ When SELECT RECEIPT is ENABLED, customers can select whether printing the receipt or not after a transaction. If SELECT RECEIPT is DISABLED, the ATM will print out the receipt automatically without customer’s selection. To en/disable the function, press SELECT RECEIPT button. © 2015 Nautilus Hyosung Inc. All Rights Reserved. 3-51...
- Page 75 Please press EN/DISABLE button to set up PRE DIALING and one of three buttons (AFTER CARD, ATER PIN and AFTER ACCOUNT) to determine the time when the ATM MACHINE makes a connection. 3-52 © 2015 Nautilus Hyosung Inc. All Rights Reserved.
- Page 76 ▶ When the EMV button is pressed (or touched), the screen would be changed into the one as depicted below. A supervisor can choose transaction type (EMV or magnetic card) and latch option using EN/DISABLE button. IC transaction will be unavailable when EMV option is disabled. © 2015 Nautilus Hyosung Inc. All Rights Reserved. 3-53...
- Page 77 ▶ If a supervisor of an ATM pushes (or touches) AID LIST button, the screen would be changed into the one as depicted as below. The AID is the abbreviation of ‘Application ID’ and it is needed in EMV transaction. 3-54 © 2015 Nautilus Hyosung Inc. All Rights Reserved.
-
Page 78: Optional Function2
Operator Function Chapter 3. SUPERVISOR MENU OPTIONAL FUNCTION2 ▶ OPTIONAL FUNCTION2 menu contains DEVICE OPTION and SCREEN SERVICES. To go back to the previous screen, press the CANCEL Key in pinpad © 2015 Nautilus Hyosung Inc. All Rights Reserved. 3-55... - Page 79 Please press each button on this menu to set up items. To go back to the previous screen, press the CANCEL Key in pinpad <Note!> EPP LED GUIDE OPTION is only available for MX2600SE. 3-56 © 2015 Nautilus Hyosung Inc. All Rights Reserved.
- Page 80 ▶ SCREEN SERVICES menu contains CHANGE BACKGROUND and NOTICE Please press CHANGE BACKGROUND and NOTICE button on this menu to go to next screen. To go back to the previous screen, press the CANCEL Key in pinpad © 2015 Nautilus Hyosung Inc. All Rights Reserved. 3-57...
- Page 81 To go back to the previous screen, press the CANCEL Key in pinpad [DISABLED] [ENABLED] The change background image can be updated by SW Update with JPG format images. For more information, please refer to “Background image Update Guide” document. 3-58 © 2015 Nautilus Hyosung Inc. All Rights Reserved.
- Page 82 Operator Function Chapter 3. SUPERVISOR MENU CHANGE BACKGROUND SCREEN n ▶ Please press SCREEN n EN/DISABLE button to set up SCREEN n, © 2015 Nautilus Hyosung Inc. All Rights Reserved. 3-59...
- Page 83 ▶ DEFAULT SCREEN function provides SIX different Background screens. You can set up only one screen on the six screens Please press DEFAULT SCREEN n EN/DISABLE button to set up SCREEN n, 3-60 © 2015 Nautilus Hyosung Inc. All Rights Reserved.
- Page 84 ▶ NOTICE menu contains TITLE and MESSAGE. You can set up TITLE(1 line 30 column) and MESSAGE(3 line 40 column). If you set up NOTICE ENABLE, ATM will be displayed notice information on idle screen. © 2015 Nautilus Hyosung Inc. All Rights Reserved. 3-61...
- Page 85 AMOUNT will be displayed in the surcharge warning screen during transaction. The factory default is surcharge enabled, surcharge amount is $1.50 and the surcharge owner is none. The additional surcharge can be set in ADDITIONAL SURCHARGE MODE. 3-62 © 2015 Nautilus Hyosung Inc. All Rights Reserved.
- Page 86 ▶ The SURCHARGE OWNER function is used to edit the surcharge owner. Please input the surcharge owner in the field and select OK button. If it succeeded, “OPERATION SUCCESSFUL!” displays. [Function Key Type] [Touch Type] © 2015 Nautilus Hyosung Inc. All Rights Reserved. 3-63...
- Page 87 ▪ Moves to the next screen where provides the advanced surcharge option. The button will disappear when the current mode is set to ‘NOT USED’. ▪ PERCENT SURCHARGE PERCENT screen will be shown. 3-64 © 2015 Nautilus Hyosung Inc. All Rights Reserved.
- Page 88 ▪ AFTER AMOUNT : Shows Surcharge warning screen after customer selected amount. 3. WARNING MANNER ▪ Set whether to use maximum value or minimum value between PERCENTAGE and SURCHARGE AMOUNT. (GREATER: Maximum value, LESSER: Minimum value.) © 2015 Nautilus Hyosung Inc. All Rights Reserved. 3-65...
- Page 89 Operator Function Chapter 3. SUPERVISOR MENU ADVERTISEMENT ▶ ADVERTISEMENT function provides COUPON, WELCOIME ADVERTISEMENT and TRANSACTION ADVERTISEMENT. Please press each button on this menu to go to next screen. 3-66 © 2015 Nautilus Hyosung Inc. All Rights Reserved.
- Page 90 COUPON setting screen will be displayed. BASIC COUPON supports 2line 39column, ENHANCED COUPON supports 16line 39column. If you set the ENHANCED COUPON and select COUPON SETTING button, ENHANCED COUPON setting screen will be displayed. © 2015 Nautilus Hyosung Inc. All Rights Reserved. 3-67...
- Page 91 Operator Function Chapter 3. SUPERVISOR MENU BASIC COUPON SETTING ▶ Please press each button on this menu to go to next screen 3-68 © 2015 Nautilus Hyosung Inc. All Rights Reserved.
- Page 92 BASIC COUPON n. ▶ Please press BASIC COUPON n EN/DISABLE button to set up BASIC COUPON n, Please press COUPON n TEXT button on this menu to go to next screen © 2015 Nautilus Hyosung Inc. All Rights Reserved. 3-69...
- Page 93 ▶ The COUPON n TEXT function is used to edit the coupon n text. Please input the welcome message in the field and select OK button. If it succeeded, “OPERATION SUCCESSFUL!” displays. [Function Key Type] [Touch Type] 3-70 © 2015 Nautilus Hyosung Inc. All Rights Reserved.
- Page 94 Chapter 3. SUPERVISOR MENU ENHANCED COUPON SETTING ▶ Please press CUT OPTION button to set up AFTER RECEIPT or NOT USE, Please press each button on this menu to go to next screen © 2015 Nautilus Hyosung Inc. All Rights Reserved. 3-71...
- Page 95 START TIME and END TIME is only used USE TIME option and the range is 00 ~ 23 Please press COUPON n TEXT button on this menu to go to next screen 3-72 © 2015 Nautilus Hyosung Inc. All Rights Reserved.
- Page 96 ▶ The ENHANCED COUPON n TEXT function is used to edit the coupon n text. Please input the welcome message in the field and select OK button. If it succeeded, “OPERATION SUCCESSFUL!” displays. © 2015 Nautilus Hyosung Inc. All Rights Reserved. 3-73...
- Page 97 Operator Function Chapter 3. SUPERVISOR MENU [Function Key Type] 3-74 © 2015 Nautilus Hyosung Inc. All Rights Reserved.
- Page 98 Operator Function Chapter 3. SUPERVISOR MENU © 2015 Nautilus Hyosung Inc. All Rights Reserved. 3-75...
- Page 99 Operator Function Chapter 3. SUPERVISOR MENU [Touch Type] 3-76 © 2015 Nautilus Hyosung Inc. All Rights Reserved.
- Page 100 The welcome advertisement image can be updated by SW Update with JPG format images. For more information, please refer to “Image File Update Guide” document. © 2015 Nautilus Hyosung Inc. All Rights Reserved. 3-77...
- Page 101 Operator Function Chapter 3. SUPERVISOR MENU SCREEN n. ▶ Please press SCREEN n EN/DISABLE button to set up SCREEN n, 3-78 © 2015 Nautilus Hyosung Inc. All Rights Reserved.
- Page 102 The transaction advertisement image can be updated by SW Update with JPG format images. For more information, please refer to “Image File Update Guide” document. © 2015 Nautilus Hyosung Inc. All Rights Reserved. 3-79...
- Page 103 Operator Function Chapter 3. SUPERVISOR MENU SCREEN n. ▶ Please press SCREEN n EN/DISABLE button to set up SCREEN n, 3-80 © 2015 Nautilus Hyosung Inc. All Rights Reserved.
- Page 104 The COMMUNICATION ID has to be set if using the COMMUNICATION HEADER function. 4. CRC(Cyclic Redundancy Checking) OPTION function is to set up whether CRC is used or not during communication with host. © 2015 Nautilus Hyosung Inc. All Rights Reserved. 3-81...
- Page 105 ▶ The COMMUNICATION ID function is used to edit the communication id. Please input the communication id in the field and select OK button. If it succeeded, “OPERATION SUCCESSFUL!” displays. [Function Key Type] [Touch Type] 3-82 © 2015 Nautilus Hyosung Inc. All Rights Reserved.
- Page 106 2. HOST ERROR function is to decide whether reversal message is sent or not when communication error occurred. 3. REVERSAL REASON function is decide whether reason code(“n”) is sent or not when reversal message send to the host. © 2015 Nautilus Hyosung Inc. All Rights Reserved. 3-83...
- Page 107 <Note!> 1. EOT / ENQ OPTION is displayed only if the Network is Dial up or TCP/IP Type is VISA FRAMED 2. TCP/IP TYPE is displayed only if Network is TCP/IP 3-84 © 2015 Nautilus Hyosung Inc. All Rights Reserved.
- Page 108 TCP/IP, communicate with host using LAN. <Note!> In case of selecting “IN SERVICE” on OP MAIN, if the value is different from the original value when entering in OP mode, exit OP and execute reboot. © 2015 Nautilus Hyosung Inc. All Rights Reserved. 3-85...
- Page 109 Operator Function Chapter 3. SUPERVISOR MENU EOT/ENQ OPTION ▶ EOT/ENQ OPTION contains GENERAL, EOT OPTIONAL, NO EOT REQUIRED and NO ENQ REQUIRED functions. You can select one of these options 3-86 © 2015 Nautilus Hyosung Inc. All Rights Reserved.
- Page 110 CUSTOMER SETUP Screen. STANDARD 1 is a HYOSUNG message type and STANDARD 2 is a CSP200 message type, STANDARD 3 is Triton 9600 message type and EPS is an extended CSP200 message type. © 2015 Nautilus Hyosung Inc. All Rights Reserved. 3-87...
- Page 111 If a owner of ATM want to use the certificate issued by a host, what he/she have to do is to copy certificate file ,renamed as “rootcert.pem” to USB root path. And then just push DOWNLOAD CERT. FROM USB button for downloading it from USB. 3-88 © 2015 Nautilus Hyosung Inc. All Rights Reserved.
- Page 112 You can enter the count and then press ENTER (or CONFIRM) if you want to change try count of reversal transaction. (You should ask your DP about count of reversal transaction before change try count.) © 2015 Nautilus Hyosung Inc. All Rights Reserved. 3-89...
-
Page 113: System Setup
CANCEL key in pinpad. <Note!> 1. TERMINAL IP is displayed only if the Network is TCP/IP. 2. MODEM PARAMETERS is displayed only if Network is Dial up. 3-90 © 2015 Nautilus Hyosung Inc. All Rights Reserved. -
Page 114: Date & Time
DAY button. If you press each menu, the cursor will be positioned and you can change the value. This value is saved by pressing APPLY key, on the other hand, to go back to the previous screen, press the CANCEL key in pinpad. © 2015 Nautilus Hyosung Inc. All Rights Reserved. 3-91... -
Page 115: Speaker Volume
Operator Function Chapter 3. SUPERVISOR MENU SPEAKER VOLUME ▶ The SPEAKER VOLUME function is used to set speaker volume by using DOWN and UP buttons. Once the button is pressed, ATM beeps. 3-92 © 2015 Nautilus Hyosung Inc. All Rights Reserved. -
Page 116: Terminal Ip
ATM uses STATIC IP. If you change DHCP value from ENABLE to DISABLE, you should set up STATIC IP again use IP ADDRESS, SUBNET MASK, GATEWAY and DNS buttons. It is able to input up to 15 units such as XXX.XXX.XXX.XXX © 2015 Nautilus Hyosung Inc. All Rights Reserved. 3-93... -
Page 117: Language
▶ This menu contains TRANSACTION LANGUAGE and SUPERVISOR LANGUAGE. Please press each button on this menu to go to next screen. To go back to the previous screen, press the CANCEL key in pinpad. 3-94 © 2015 Nautilus Hyosung Inc. All Rights Reserved. - Page 118 You can change default language pressing DEFAULT LANGUAGE SELECT button. If you press each EN/DISABLE button, each language will be activated or inactivated. <Note!> The Language which is selected as DEFAULT LANGUAGE cannot be changed. © 2015 Nautilus Hyosung Inc. All Rights Reserved. 3-95...
- Page 119 SUPERVISOR LANGUAGE ▶ You can select language type to be displayed in supervisor screen. There are two types of language. ENGLISH, FRENCH Press the button of the language you want to use. 3-96 © 2015 Nautilus Hyosung Inc. All Rights Reserved.
-
Page 120: Change Password
Operator Function Chapter 3. SUPERVISOR MENU CHANGE PASSWORD ▶ You can change PASSWORD. Depending on authority, there are three passwords OPERATOR PASSWORD, SERVICE PASSWORD and MASTER PASSWORD. © 2015 Nautilus Hyosung Inc. All Rights Reserved. 3-97... - Page 121 ▶ This menu enables you to change current operator password as new one. To change the current password, you should input the proper one in current password field. The factory default value of operator password is "111111". 3-98 © 2015 Nautilus Hyosung Inc. All Rights Reserved.
- Page 122 ▶ This menu enables you to change current service password as new one. To change the current password, you should input the proper one in current password field. The factory default value of service password is "222222". © 2015 Nautilus Hyosung Inc. All Rights Reserved. 3-99...
- Page 123 ▶ This menu enables you to change current master password as new one. To change the current password, you should input the proper one in current password field. The factory default value of master password is "555555". 3-100 © 2015 Nautilus Hyosung Inc. All Rights Reserved.
-
Page 124: Modem Parameters
Before editing the initial string, consult with service personnel. 2. MODEM TEST The MODEM TEST function is used to perform the modem reset test. When the error is occurred, contact the service personnel. © 2015 Nautilus Hyosung Inc. All Rights Reserved. 3-101... - Page 125 ▶ The HOST INITIAL STRING function is used to edit the host initial string. Please input the host initial string in the field and select OK button. If it succeeded, “OPERATION SUCCESSFUL!” displays. [Function Key Type] [Touch Type] 3-102 © 2015 Nautilus Hyosung Inc. All Rights Reserved.
- Page 126 ▶ The RMS INITIAL STRING function is used to edit the rms initial string. Please input the rms initial string in the field and select OK button. If it succeeded, “OPERATION SUCCESSFUL!” displays. [Function Key Type] [Touch Type] © 2015 Nautilus Hyosung Inc. All Rights Reserved. 3-103...
-
Page 127: Device Setup
In MX4000W, if this button is not hidden, there is possibility to set CDU from stable condition to unknown, not defined state. <Note!> RFID EN/DISABLE is only available for MX2600SE and MX5200SE only.. 3-104 © 2015 Nautilus Hyosung Inc. All Rights Reserved. - Page 128 If you changed the information correctly, press the EXECUTE button to APPLY. 1. COUNTRY AUSTRA CANADA MEXICO OTHER ZEALAND 2. CDU TYPE 3. CASSETTE VOLUME 1 CASSETTE 2 CASSETTE 3 CASSETTE 4 CASSETTE © 2015 Nautilus Hyosung Inc. All Rights Reserved. 3-105...
- Page 129 ▶ In CARD READER SETUP, you can select CARD READER (NH DIP Type, NH EMV Type, NH EMV2 Type) in the screen as shown as below. If you choose ‘NH EMV’ button, the hidden button-ANTI SKIMMING- would appear as depicted as below. 3-106 © 2015 Nautilus Hyosung Inc. All Rights Reserved.
- Page 130 For example, if the value of ‘AUTO RECOVERY TIME’ is set as 10 seconds, after 10 seconds from the time when an obstacle would be removed from ATM, the ATM will be in normal condition. 5. APPLY: Used to apply the configuration of ‘ANTI SKIMMING’. © 2015 Nautilus Hyosung Inc. All Rights Reserved. 3-107...
- Page 131 To change the led color, press LED COLOR button on the right side of the screen. There are six led colors. - CYAN / BLUE / YELLOWGREEN / WHITE / GREEN / PINK You can restore values to default settings using DEFAULT button. 3-108 © 2015 Nautilus Hyosung Inc. All Rights Reserved.
-
Page 132: System Control
NVRAM button is to use the backup and restore terminal configurations. <Note!> 1. How to update the software, please refer to the Appendix. 2. BACKUP NVRAM and RESTORE NVRAM Button is only displayed when security door is opened. © 2015 Nautilus Hyosung Inc. All Rights Reserved. 3-109... - Page 133 Operator Function Chapter 3. SUPERVISOR MENU REBOOT ▶ If you press the YES button, the ATM will restart. 3-110 © 2015 Nautilus Hyosung Inc. All Rights Reserved.
- Page 134 ▶ Input the START DATE and END DATE using FROM and TO buttons. And press the SEARCH button. Then, the journal date between START DATE and END DATE will be sent to USB drive. © 2015 Nautilus Hyosung Inc. All Rights Reserved. 3-111...
- Page 135 Terminal ID numbers and want to keep new records. 5. CLEAR LOG This will delete all logs permanently <Note!> Be careful when using these features (NVRAM clearing) – The initialized data can NOT be recovered. 3-112 © 2015 Nautilus Hyosung Inc. All Rights Reserved.
- Page 136 ▶ After you select CLEAR ALL or CLEAR SETTING button, the screen will be changed into the screen as same as below. [ NH2700 / MX5000SE / NH2600 / MX2600SE ] Since S/W can’t detect the machine type automatically, you need to select the type of machine before clearing NVRAM.
- Page 137 After selecting the type of machine, just push APPLY AND CLEAR button. And then the screen would be changed into one as same as below to confirm your wish of clearing data in NVRAM. 3-114 © 2015 Nautilus Hyosung Inc. All Rights Reserved.
-
Page 138: Host Setup
Pressing function key beside menu button goes to next screen. To go back to the previous screen, press the CANCEL key in pinpad. [DIALUP] [TCP/IP] <Note!> ROUTING ID is displayed only if the message format is STANDARD1, 2 and EPS © 2015 Nautilus Hyosung Inc. All Rights Reserved. 3-115... -
Page 139: Key Management (For 128K Epp)
(Default PASSWORD 1 is ‘000000’. And default PASSWPRD 2 is ‘000000’ as well) If you enter PASSWORD 1 and PASSWORD 2 correctly, the main screen of KEY MANAGEMENT will be displayed as below. 3-116 © 2015 Nautilus Hyosung Inc. All Rights Reserved. - Page 140 1. Select the HOST SETUP in the OPERATOR FUNCTION menu. 2. Select the KEY MANAGEMENT in the HOST SETUP menu. 3. Select the KEY MODE in the KEY MANAGEMENT menu. Change the KEY MODE.. © 2015 Nautilus Hyosung Inc. All Rights Reserved. 3-117...
- Page 141 1. Select the HOST SETUP in the OPERATOR FUNCTION menu. 2. Select the KEY MANAGEMENT in the HOST SETUP menu. 3. Select the KEY INDEX in the KEY MANAGEMENT menu. Input the KEY INDEX and press ENTER key. 3-118 © 2015 Nautilus Hyosung Inc. All Rights Reserved.
- Page 142 2. Select the KEY MANAGEMENT in the HOST SETUP menu. 3. Select the CHECK KEY in the KEY MANAGEMENT menu. 4. It will display the check sum of all injected master key. © 2015 Nautilus Hyosung Inc. All Rights Reserved. 3-119...
- Page 143 ▶ The EDIT KEY function is used to enter the Master Key, Unique Key and Mac Key. The authorized people by bank or DP will enter the Key(s) with this menu. KEY MODE: [DES], [TDES], [DUAL MASTER KEY] KEY MODE: [MAC], [TDES, MAC], [TDES, TMAC] 3-120 © 2015 Nautilus Hyosung Inc. All Rights Reserved.
- Page 144 4. Verify the MASTER KEY PART A. 5. After inputting the MASTER KEY PART A, the CHECK SUM will be displayed. Press ENTER after confirming the check sum. 6. Press MASTER KEY PART B button © 2015 Nautilus Hyosung Inc. All Rights Reserved. 3-121...
- Page 145 10. After inputting the MAC KEY PART B, the CHECK SUM will be displayed. Press ENTER after confirming the check sum. <Note!> You have to input the SAME KEY INDEX for MAC KEY PART A and MAC KEY PART B. 3-122 © 2015 Nautilus Hyosung Inc. All Rights Reserved.
-
Page 146: Key Management (For 512K Epp)
KEY MANAGEMENT (for 512K EPP) ▶ START SCREEN If you select ‘KEY MANAGEMENT’ in ‘HOST SETUP’ screen, you will see the one as same as below. [STANDARD 1- RKT SUPPORTED] [STANDARD 3- RKT NOT SUPPORTED] © 2015 Nautilus Hyosung Inc. All Rights Reserved. 3-123... - Page 147 Enter the PASSWORD 1 and PASSWORD 2 to execute KEY MANAGEMENT. (Default PASSWORD 1 is ‘000000’. And default PASSWPRD 2 is ‘000000’ as well) 3-124 © 2015 Nautilus Hyosung Inc. All Rights Reserved.
- Page 148 Operator Function Chapter 3. SUPERVISOR MENU If you enter PASSWORD 1 and PASSWORD 2 correctly, the main screen of KEY MANAGEMENT will be displayed as below. © 2015 Nautilus Hyosung Inc. All Rights Reserved. 3-125...
- Page 149 There are 8 elements and these are used to support ‘Remote Key Transfer(RKT)’ each. The 6 elements from Top one –EPP Serial Number- should be needed to implement the environment of RKT. 3-126 © 2015 Nautilus Hyosung Inc. All Rights Reserved.
- Page 150 ▶ The KEY MODE can be changed by pressing KEY MODE button. Write down the description here. There are various kinds of KEY MODE. Those are [TDES(3)], [TDES, MAC(7)], and [TDES, TMAC(11)]. © 2015 Nautilus Hyosung Inc. All Rights Reserved. 3-127...
- Page 151 ▶ The CHECK KEY function is used to display the check sum of all injected Keys. The key which is displayed as “_______” means it is in empty state. The authorized people can verify the injected key(s) with this menu after key injection. 3-128 © 2015 Nautilus Hyosung Inc. All Rights Reserved.
- Page 152 The authorized people by bank or DP will enter the Key(s) with this menu. If you choose ‘MASTER KEY(TRIPLE)’,which is used to encrypt the Personal Identity Number(PIN), you will see the screen as depicted as below. © 2015 Nautilus Hyosung Inc. All Rights Reserved. 3-129...
- Page 153 ▶ If you select the button of ‘ MASTERK3’ , you will see the screen as depicted as below. If you choose ‘YES’ button, you will see the screen as depicted as below. 3-130 © 2015 Nautilus Hyosung Inc. All Rights Reserved.
- Page 154 If entering the first part 32-digit master key is successful, you will see the screen as depicted as below. In this screen, if you want to import the first part 32-digit master key, what you have to do is just selecting the ‘IMPORT’ button. © 2015 Nautilus Hyosung Inc. All Rights Reserved. 3-131...
- Page 155 2. If there is no difference between PART A PIN MASTER KEY and PART B PIN MASTER KEY, there would be error in importing whole master keys. 3-132 © 2015 Nautilus Hyosung Inc. All Rights Reserved.
- Page 156 Operator Function Chapter 3. SUPERVISOR MENU MASTERK3 IMPORTING ERROR ▶ If your importing 2 PIN MASTER KEYS is wrong, you will see the screen as depicted as below. © 2015 Nautilus Hyosung Inc. All Rights Reserved. 3-133...
- Page 157 For Example, if a owner of ATM select ‘TDES, MAC(7)’ mode, the screen as depicted as below will be shown on the screen. And if you choose MAC MASTER KEY(SINGLE) button, you will see the screen as depicted as below. 3-134 © 2015 Nautilus Hyosung Inc. All Rights Reserved.
- Page 158 Operator Function Chapter 3. SUPERVISOR MENU © 2015 Nautilus Hyosung Inc. All Rights Reserved. 3-135...
- Page 159 ▶ If you want to change the password for entering ‘KEY MANAGEMENT’, you can do that by just selecting change password in KEY MANAGEMENT screen. If you push (or touch) the ‘CHANGE PASSWORD’ button, you can see the screen as depicted as below. 3-136 © 2015 Nautilus Hyosung Inc. All Rights Reserved.
- Page 160 . After selecting it, the screen as below would appear. If ‘CONFIG DOWNLOAD AT START’ is set as ‘ENABLE’, the ATM would receive a ‘WORKING KEY’ when the ATM is switched on. © 2015 Nautilus Hyosung Inc. All Rights Reserved. 3-137...
- Page 161 ‘RANDOM NUMBER EN/DISABLE’ makes it possible to insert random number into transmitted MASTER KEY to enhance the security of ATM – HOST communication. ‘DOWNLOAD MASTER KEY’ make it feasible to receive the MASTER KEY from a HOST at once. 3-138 © 2015 Nautilus Hyosung Inc. All Rights Reserved.
-
Page 162: Telephone Number (Dial-Up Only)
This function is used to enter the primary phone number and the back-up phone number of the host. When dialing to host is failure (busy, no answer or etc), ATM switches to other phone number automatically. © 2015 Nautilus Hyosung Inc. All Rights Reserved. 3-139... -
Page 163: Host Address
These values can be saved by pressing ENTER key HOST ADDRESS 1 and HOST ADDRESS 2 buttons go to the next page. To go back to the previous screen, press the CANCEL key in pinpad. 3-140 © 2015 Nautilus Hyosung Inc. All Rights Reserved. - Page 164 ▶ The HOST ADDRESS 1 function is used to edit the host address 1. Please input the host address 1 in the field and select OK button. If it succeeded, “OPERATION SUCCESSFUL!” displays. [Function Key Type] [Touch Type] © 2015 Nautilus Hyosung Inc. All Rights Reserved. 3-141...
- Page 165 ▶ The HOST ADDRESS 2 function is used to edit the host address 2. Please input the host address 2 in the field and select OK button. If it succeeded, “OPERATION SUCCESSFUL!” displays. [Function Key Type] [Touch Type] 3-142 © 2015 Nautilus Hyosung Inc. All Rights Reserved.
-
Page 166: Terminal Id
“OPERATION SUCCESSFUL!” displays. Host will identify ATM by looking at terminal ID. Terminal ID will be included in host message and will be printed on the receipt. [Function Key Type] [Touch Type] © 2015 Nautilus Hyosung Inc. All Rights Reserved. 3-143... -
Page 167: Health Check Message
The interval is dependent on “SEND INTERVAL”. If you press SEND INTERVAL button, the value of SEND INTERVAL can be adjusted. (1 ~ 24). This value is saved by pressing ENTER button. 3-144 © 2015 Nautilus Hyosung Inc. All Rights Reserved. -
Page 168: Remote Monitor
2. RMS STATUS SEND EN/DISABLE function is used to send the status message to RMS in enable or in disable. 3. The RMS PASSWORD function is used to set the RMS password to connect to ATM from RMS. © 2015 Nautilus Hyosung Inc. All Rights Reserved. 3-145... - Page 169 [DIALUP] Display which is to set the RMS RING COUNT for the reception on standby of the ATM. [TCP/IP] Display which is to set the RMS LISTENING PORT for the reception on standby of the ATM. Default port is 5555 [DIALUP] [TCP/IP] 3-146 © 2015 Nautilus Hyosung Inc. All Rights Reserved.
- Page 170 3. PHONE 1, PHONE 2 ▪ Display RMS TELEPHONE NUMBER for RMS COMMUNICATION ▪ Set the values using PHONE NUMBER 1 and PHONE NUMBER 2. (Input the number up to 20.) © 2015 Nautilus Hyosung Inc. All Rights Reserved. 3-147...
- Page 171 5. RMS LISTENNING PORT ▪ Display “RMS LISTENING PORT”. ▪ Set the value using RMS LISTENING PORT button. (Input the number from 0 to 65535) ▪ Default port is 9999 3-148 © 2015 Nautilus Hyosung Inc. All Rights Reserved.
- Page 172 ▶ The RMS ADDRESS function is used to edit the rms address. Please input the rms address in the field and select OK button. If it succeeded, “OPERATION SUCCESSFUL!” displays [Function Key Type] [Touch Type] © 2015 Nautilus Hyosung Inc. All Rights Reserved. 3-149...
-
Page 173: Routing Id
Please input the routing id in the field and select OK button. If it succeeded, “OPERATION SUCCESSFUL!” displays. To go back to the previous screen, press the CANCEL key in pinpad. [Function Key Type] [Touch Type] 3-150 © 2015 Nautilus Hyosung Inc. All Rights Reserved. -
Page 174: Auto Day Total
▪ Set the value using TOTAL TYPE button. 3. HOUR / MINUTE ▪ Display the time for the ATM to total itself ▪ Set the value using HOUR and MINUTE button. © 2015 Nautilus Hyosung Inc. All Rights Reserved. 3-151... -
Page 175: Transaction Setup
This function is used to set the detection of cassette low level (100 bills or less). If enabled, hardware will report the low condition to the software and the machine will go to “OUT OF SERVICE” mode under low note condition. 3-152 © 2015 Nautilus Hyosung Inc. All Rights Reserved. -
Page 176: Fast Cash
FAST CASH screen. The maximum amount must be less than the DISPENSE LIMIT. You can set 6 kinds of values which are frequently requested by customer using this function. By using this function, customers withdraw the money more easily. © 2015 Nautilus Hyosung Inc. All Rights Reserved. 3-153... -
Page 177: Denomination
APPLY button, the door of ATM must be opened. This is because only person who have the authority to open the door, can set the currency information which is very important to the owner of ATM as he want to change 3-154 © 2015 Nautilus Hyosung Inc. All Rights Reserved. -
Page 178: Chapter 4. Site Map
▶ This site map shows the structure of the operator menu tree to aid in searching menu. In case of touch type, if you press each menu SETTLEMENT, JOURNAL, REPORT, DIAGNOSTICS, CUSTOMER SETUP, SYSTEM SETUP, HOST SETUP or TRANSACTION SETUP, then it will enter each sub-menu. © 2015 Nautilus Hyosung Inc. All Rights Reserved. -
Page 179: Chapter 5. Quick Replenish
▶ This menu provides convenience for replenishing note at once. This menu consists of DAY TOTAL, CASSETTE TOTAL, ADD CASH and RESULT. If you press YES button, the QUICK REPLENISH will start. © 2015 Nautilus Hyosung Inc. All Rights Reserved. -
Page 180: Day Total / Cassette Total
DAY TOTAL / CASSETTE TOTAL ▶ It will perform DAY TOTAL and CASSETTE TOTAL first. 1. DAY TOTAL : Do settlement with host. After settlement, clear transaction information. 2. CASSETTE TOTAL : Clear note count information. © 2015 Nautilus Hyosung Inc. All Rights Reserved. -
Page 181: Add Cash
ENTER key in the pinpad. If you completed the all cassettes, you have to press APPLY button to effect the value changes. <Note!> The total note count you enter must not exceed the maximum note count. (Max. note count : 2,000/CST) © 2015 Nautilus Hyosung Inc. All Rights Reserved. -
Page 182: Result
Operator Function Chapter 5. QUICK REPLENISH RESULT ▶ After performing QUICK REPLENISH, the result will be shown as below. © 2015 Nautilus Hyosung Inc. All Rights Reserved. -
Page 183: Chapter 6. Quick Configuration
Chapter 6. QUICK CONFIGURATION ▶ This menu provides convenience to configure ATM Setup Information at once. This menu consists of NETWORK SETUP, MESSAGE FORMAT SETUP, TERMINAL ID SETUP, PASSWORD SETUP and RESULT CONFIGURATION. © 2015 Nautilus Hyosung Inc. All Rights Reserved. -
Page 184: Tcp/Ip
Operator Function Chapter 6. QUICK CONFIGURATION TCP/IP ▶ This chapter shows how to configure for TCP/IP Setup Information. © 2015 Nautilus Hyosung Inc. All Rights Reserved. -
Page 185: Communication
Chapter 6. QUICK CONFIGURATION Operator Function COMMUNICATION ▶ This is to set up a type of line to communicate with Host. Select TCP/IP. In case of setting up TCP/IP, communicate with host using LAN. © 2015 Nautilus Hyosung Inc. All Rights Reserved. -
Page 186: Tcp/Ip Type
Section “EOT/ENQ OPTION”. If not, then it goes to Section “HOST ADDRESS” [The screen for USA] SSL CERT. EN/DISABLE was explained before. So in this chapter it will be skipped. © 2015 Nautilus Hyosung Inc. All Rights Reserved. -
Page 187: Eot/Enq Option
Chapter 6. QUICK CONFIGURATION Operator Function EOT/ENQ OPTION ▶ EOT/ENQ OPTION contains GENERAL, EOT OPTIONAL, NO EOT REQUIRED and NO ENQ REQUIRED functions. You can select one of these options. © 2015 Nautilus Hyosung Inc. All Rights Reserved. -
Page 188: Host Address
Press PORT NUMBER 1 button, and then the values can be input on this screen. These values can be saved by pressing ENTER key. The HOST ADDRESS 1 button is used to edit the host address 1. Please input the host address 1 in the field. © 2015 Nautilus Hyosung Inc. All Rights Reserved. -
Page 189: Terminal Dhcp
TERMINAL IP SETUP Screen. <Note!> When you press NEXT button, if you configured DHCP to DISABLE, then it goes to Section “TERMINAL IP”. If not, then it goes to Section “MESSAGE FORMAT” © 2015 Nautilus Hyosung Inc. All Rights Reserved. -
Page 190: Terminal Ip
Chapter 6. QUICK CONFIGURATION TERMINAL IP ▶ Set up STATIC IP using IP ADDRESS, SUBNET MASK, GATEWAY and DNS buttons. It is able to input up to 15 units such as XXX.XXX.XXX.XXX © 2015 Nautilus Hyosung Inc. All Rights Reserved. -
Page 191: Message Format
CSP200 message type. <Note!> When you press NEXT button, if you configured MESSAGE FORMAT to STANDARD 3, then it goes to Section “STANDARD3 OPTION”. If not, then it goes to Section “ROUTING ID” © 2015 Nautilus Hyosung Inc. All Rights Reserved. -
Page 192: Routing Id
▶ The ROUTING ID function is used to edit the Routing ID Number of ATM. Routing ID refers to the Bank ID. This field is contained to STANDARD 1, STANDARD 2 and EPS format. <Note!> When you press NEXT button, it goes to Section “TERMINAL ID”. 6-10 © 2015 Nautilus Hyosung Inc. All Rights Reserved. -
Page 193: Standard 3 Option
The COMMUNICATION ID has to be set if using the COMMUNICATION HEADER function. 4. CRC(Cyclic Redundancy Checking) OPTION function is to set up whether CRC is used or not during communication with host. © 2015 Nautilus Hyosung Inc. All Rights Reserved. 6-11... -
Page 194: Terminal Id
▶ The TERMINAL ID function is used to edit the terminal id number of ATM. Host will identify ATM by looking at terminal ID. Terminal ID will be included in host message and will be printed on the receipt. 6-12 © 2015 Nautilus Hyosung Inc. All Rights Reserved. -
Page 195: Password Setup (Master Password)
▶ This menu enables you to change current master password as new one. To change the current password, you should input the proper one in current password field. The factory default value of master password is "555555". © 2015 Nautilus Hyosung Inc. All Rights Reserved. 6-13... -
Page 196: Result
Operator Function Chapter 6. QUICK CONFIGURATION RESULT ▶ After performing QUICK CONFIGURATION, the result will be shown as below. 6-14 © 2015 Nautilus Hyosung Inc. All Rights Reserved. -
Page 197: Dial Up
Chapter 6. QUICK CONFIGURATION Operator Function 6.2 DIAL UP ▶ This chapter shows how to configure for DIALUP Setup Information. © 2015 Nautilus Hyosung Inc. All Rights Reserved. 6-15... -
Page 198: Communication
Chapter 6. QUICK CONFIGURATION COMMUNICATION ▶ This is to set up a type of line to communicate with Host. Select DIALUP. In case of setting up DIALUP, communicate with host using modem. 6-16 © 2015 Nautilus Hyosung Inc. All Rights Reserved. -
Page 199: Eot / Enq Option
Chapter 6. QUICK CONFIGURATION Operator Function EOT / ENQ OPTION ▶ EOT/ENQ OPTION contains GENERAL, EOT OPTIONAL, NO EOT REQUIRED and NO ENQ REQUIRED functions. You can select one of these options. © 2015 Nautilus Hyosung Inc. All Rights Reserved. 6-17... -
Page 200: Telephone Number (Host Phone 1)
▶ If you press each button on this menu, phone number of host can be input. You can input character, number and special symbol up to 1~20 digits by using '<' or '>'. 6-18 © 2015 Nautilus Hyosung Inc. All Rights Reserved. -
Page 201: Message Format
CSP200 message type. <Note!> When you press NEXT button, if you configured MESSAGE FORMAT to STANDARD 3, then it goes to Section “STANDARD3 OPTION”. If not, then it goes to Section “ROUTING ID”. © 2015 Nautilus Hyosung Inc. All Rights Reserved. 6-19... -
Page 202: Routing Id
▶ The ROUTING ID function is used to edit the Routing ID Number of ATM. Routing ID refers to the Bank ID. This field is contained to STANDARD 1, STANDARD 2 and EPS format. <Note!> When you press NEXT button, it goes to Section “TERMINAL ID”. 6-20 © 2015 Nautilus Hyosung Inc. All Rights Reserved. -
Page 203: Standard3 Option
The COMMUNICATION ID has to be set if using the COMMUNICATION HEADER function. 4. CRC(Cyclic Redundancy Checking) OPTION function is to set up whether CRC is used or not during communication with host. © 2015 Nautilus Hyosung Inc. All Rights Reserved. 6-21... -
Page 204: Terminal Id
▶ The TERMINAL ID function is used to edit the terminal id number of ATM. Host will identify ATM by looking at terminal ID. Terminal ID will be included in host message and will be printed on the receipt. 6-22 © 2015 Nautilus Hyosung Inc. All Rights Reserved. -
Page 205: Password Setup (Master Password)
▶ This menu enables you to change current master password as new one. To change the current password, you should input the proper one in current password field. The factory default value of master password is "555555". © 2015 Nautilus Hyosung Inc. All Rights Reserved. 6-23... -
Page 206: Result
Operator Function Chapter 6. QUICK CONFIGURATION RESULT ▶ After performing QUICK CONFIGURATION, the result will be shown as below. 6-24 © 2015 Nautilus Hyosung Inc. All Rights Reserved. -
Page 207: Appendix
If you upgrade ATM machine operating in the field, you must backup journal and remember configuration information before clearing NVRAM. ►Clear NVRAM 1. Enter Supervisor Menu as Master Password 2. Select “SYSTEM SETUP” menu © 2015 Nautilus Hyosung Inc. All Rights Reserved. Appendix-1... - Page 208 Operator Function Appendix 3. Select “SYSTEM CONTROL” menu 4. Select “CLEAR ALL” menu. Appendix-2 © 2015 Nautilus Hyosung Inc. All Rights Reserved.
- Page 209 After choosing the type of machine, just push ‘APPLY AND CLEAR’ button. And then changed machine kind would be applied to information of S/W. 5. Confirm and select “Yes” menu. 6. All NVRAM data will be cleared and ATM will be automatically rebooted © 2015 Nautilus Hyosung Inc. All Rights Reserved. Appendix-3...
-
Page 210: Installation Guide
Operator Function Appendix Installation Guide Dial-up Initial Setting ► DIAL-UP SETTING 1. Input Master password to enter main screen. 2. Select “HOST SETUP” menu. 3. Select “TELEPHONE NUMBER” menu. Appendix-4 © 2015 Nautilus Hyosung Inc. All Rights Reserved. - Page 211 HOST PHONE #2 after selecting “HOST PHONE #1” and “HOST PHONE #2” menu and click ‘ENTER’ on the pinpad. 5. After above procedures, press IN SERVICE button or ‘1’ key on the pinpad in the main screen. © 2015 Nautilus Hyosung Inc. All Rights Reserved. Appendix-5...
-
Page 212: Tcp/Ip Initial Setting
Operator Function Appendix TCP/IP Initial Setting ► TCP/IP SETTING 1. Input Master password to enter main screen. 2. Select “CUSTOMER SETUP” menu. 3. Select “SELECT PROCESSOR” menu. Appendix-6 © 2015 Nautilus Hyosung Inc. All Rights Reserved. - Page 213 5. Select “TCP/IP” menu and message in the COMMUNICATION box will be changed from DIALUP to TCP/IP. 6. Click ‘CANCEL’ button and SELECT PROCESSOR screen will be back. 7. Select “MESSAGE FORMAT” menu in the SELECT PROCESSOR screen. © 2015 Nautilus Hyosung Inc. All Rights Reserved. Appendix-7...
- Page 214 In S/W released for USA, there is the menu for SSL CERT. EN/DISABLE as like as below. If a owner want to use SSL CERT(certificate issued by host to recognize the other side when communicating with each other) please, set the SSL CERT. EN/DISABLE as ‘ENABLE’. Appendix-8 © 2015 Nautilus Hyosung Inc. All Rights Reserved.
- Page 215 11. Click ‘CANCEL’ button and CUSTOMER SETUP screen will be shown. Click ‘CANCEL’ button once more to go to the OP MAIN screen. And select “SYSTEM SETUP” menu. 12. Select “TERMINAL IP” menu. © 2015 Nautilus Hyosung Inc. All Rights Reserved. Appendix-9...
- Page 216 14. Select “IP ADDRESS”, “GATEWAY”, “SUBNET MASK” and “DNS” and set the input values individually. 15. Select “HOST SETUP” menu in the OP MAIN screen. 16. Select “HOST ADDRESS” menu in the HOST SETUP screen. Appendix-10 © 2015 Nautilus Hyosung Inc. All Rights Reserved.
- Page 217 19. After finishing all setting up, press IN SERVICE button ‘1’ or CANCEL key on the pinpad in the main screen. Then ATM will be rebooted automatically with the “REBOOTING” message shown. © 2015 Nautilus Hyosung Inc. All Rights Reserved. Appendix-11...
-
Page 218: Transaction Screen Flow
►SELECT LANGUAGE Language a customer would like to use in transaction can be selected in this screen. ►ENTER PIN This screen is to enter PIN of customer's card. Appendix-12 © 2015 Nautilus Hyosung Inc. All Rights Reserved. - Page 219 This screen is to show a customer the information of surcharge. ► WITHDRAWAL: RECEIPT SELECTION This screen is to ask a customer if he/she wants to get the receipt or not. © 2015 Nautilus Hyosung Inc. All Rights Reserved. Appendix-13...
- Page 220 This screen is to select the amount of withdrawal. If there is not any amount to withdraw, please select the “OTHER” key and can input the amount the customer would like to withdraw. 1. Amount Selection 2. Amount Input (Other) Appendix-14 © 2015 Nautilus Hyosung Inc. All Rights Reserved.
- Page 221 This screen is to show the customer that the transaction is in progress. ► WITHDRAWAL: DISPENSING MONEY AND TAKE MONEY This screen is to show the customer that his/her request amount is dispensing and to notify the customer to take his/her money. © 2015 Nautilus Hyosung Inc. All Rights Reserved. Appendix-15...
- Page 222 This screen is to show the customer that his/her transaction record is printing and to notify the customer to take his/her receipt. ► WITHDRAWAL: THANK YOU This screen is to show the customer that the transaction has been successfully completed. Appendix-16 © 2015 Nautilus Hyosung Inc. All Rights Reserved.
- Page 223 This screen is to ask a customer where he/she wants to transfer from; checking, saving, credit card ► TRANSFER: SELECT ACCOUNT TO TRANSFER TO This screen is to ask a customer where he/she wants to transfer to; checking, saving, credit card © 2015 Nautilus Hyosung Inc. All Rights Reserved. Appendix-17...
- Page 224 This screen is to show the customer that the transaction is in progress. ► TRANSFER: PRINTING TRANSACTION AND TAKE RECEIPT This screen is to show the customer that his/her transaction record is printing and to notify the customer to take his/her receipt. Appendix-18 © 2015 Nautilus Hyosung Inc. All Rights Reserved.
- Page 225 Appendix Operator Function ► TRANSFER: THANK YOU This screen is to show the customer that the transaction has been successfully completed. © 2015 Nautilus Hyosung Inc. All Rights Reserved. Appendix-19...
- Page 226 ► INQUIRY: SELECT ACCOUNT TO INQUIRE This screen is to ask a customer which account he/she wants to inquire ► INQUIRY: CONNECTING HOST This screen is to show the customer that the transaction is in progress. Appendix-20 © 2015 Nautilus Hyosung Inc. All Rights Reserved.
- Page 227 This screen is to show the customer that his/her transaction record is printing and to notify the customer to take his/her receipt. ► INQUIRY: THANK YOU This screen is to show the customer that the transaction has been successfully completed. © 2015 Nautilus Hyosung Inc. All Rights Reserved. Appendix-21...
-
Page 228: Transaction Process (Spanish)
►SELECT LANGUAGE Language a customer would like to use in transaction can be selected in this screen. ►Enter PIN This screen is to enter PIN of customer's card Appendix-22 © 2015 Nautilus Hyosung Inc. All Rights Reserved. - Page 229 This screen is to show a customer the information of surcharge. ► WITHDRAWAL: SELECT RECEIPT PRINTING OR NOT This screen is to ask a customer if he/she wants to get the receipt or not. © 2015 Nautilus Hyosung Inc. All Rights Reserved. Appendix-23...
- Page 230 This screen is to select the amount of withdrawal. If there is not any amount to withdraw, please select the “OTHER” key and can input the amount the customer would like to withdraw. 1. Amount Selection 2. Amount Input (Other) Appendix-24 © 2015 Nautilus Hyosung Inc. All Rights Reserved.
- Page 231 This screen is to show the customer that the transaction is in progress. ► WITHDRAWAL: DISPENSING MONEY AND TAKE MONEY This screen is to show the customer that his/her request amount is dispensing and to notify the customer to take his/her money. © 2015 Nautilus Hyosung Inc. All Rights Reserved. Appendix-25...
- Page 232 This screen is to show the customer that his/her transaction record is printing and to notify the customer to take his/her receipt. ► WITHDRAWAL: THANK YOU This screen is to show the customer that the transaction has been successfully completed. Appendix-26 © 2015 Nautilus Hyosung Inc. All Rights Reserved.
- Page 233 This screen is to ask a customer where he/she wants to transfer from; checking, saving, credit card ► TRANSFER: SELECT ACCOUNT TO TRANSFER TO This screen is to ask a customer where he/she wants to transfer to; checking, saving, credit card © 2015 Nautilus Hyosung Inc. All Rights Reserved. Appendix-27...
- Page 234 This screen is to show the customer that the transaction is in progress. ► TRANSFER: PRINTING TRANSACTION AND TAKE RECEIPT This screen is to show the customer that his/her transaction record is printing and to notify the customer to take his/her receipt. Appendix-28 © 2015 Nautilus Hyosung Inc. All Rights Reserved.
- Page 235 Appendix Operator Function ► TRANSFER: THANK YOU This screen is to show the customer that the transaction has been successfully completed. © 2015 Nautilus Hyosung Inc. All Rights Reserved. Appendix-29...
- Page 236 ► INQUIRY: SELECT ACCOUNT TO INQUIRE This screen is to ask a customer which account he/she wants to inquire ► INQUIRY: CONNECTING HOST This screen is to show the customer that the transaction is in progress. Appendix-30 © 2015 Nautilus Hyosung Inc. All Rights Reserved.
- Page 237 This screen is to show the customer that his/her transaction record is printing and to notify the customer to take his/her receipt. ► INQUIRY: THANK YOU This screen is to show the customer that the transaction has been successfully completed. © 2015 Nautilus Hyosung Inc. All Rights Reserved. Appendix-31...
-
Page 238: Transaction Process (French)
► SELECT LANGUAGE Language a customer would like to use in transaction can be selected in this screen. ► Enter PIN This screen is to enter PIN of customer's card. Appendix-32 © 2015 Nautilus Hyosung Inc. All Rights Reserved. - Page 239 This screen is to show a customer the information of surcharge. ► WITHDRAWAL: SELECT RECEIPT PRINTING OR NOT This screen is to ask a customer if he/she wants to get the receipt or not. © 2015 Nautilus Hyosung Inc. All Rights Reserved. Appendix-33...
- Page 240 This screen is to select the amount of withdrawal. If there is not any amount to withdraw, please select the “OTHER” key and can input the amount the customer would like to withdraw. 1. Amount Selection 2. Amount Input (Other) Appendix-34 © 2015 Nautilus Hyosung Inc. All Rights Reserved.
- Page 241 This screen is to show the customer that the transaction is in progress. ► WITHDRAWAL: DISPENSING MONEY AND TAKE MONEY This screen is to show the customer that his/her request amount is dispensing and to notify the customer to take his/her money. © 2015 Nautilus Hyosung Inc. All Rights Reserved. Appendix-35...
- Page 242 This screen is to show the customer that his/her transaction record is printing and to notify the customer to take his/her receipt. ► WITHDRAWAL: THANK YOU This screen is to show the customer that the transaction has been successfully completed. Appendix-36 © 2015 Nautilus Hyosung Inc. All Rights Reserved.
- Page 243 This screen is to ask a customer where he/she wants to transfer from; checking, saving, credit card ► TRANSFER: SELECT ACCOUNT TO TRANSFER TO This screen is to ask a customer where he/she wants to transfer to; checking, saving, credit card © 2015 Nautilus Hyosung Inc. All Rights Reserved. Appendix-37...
- Page 244 This screen is to show the customer that the transaction is in progress. ► TRANSFER: PRINTING TRANSACTION AND TAKE RECEIPT This screen is to show the customer that his/her transaction record is printing and to notify the customer to take his/her receipt. Appendix-38 © 2015 Nautilus Hyosung Inc. All Rights Reserved.
- Page 245 This screen is to show the customer that the transaction has been successfully completed. ► INQUIRY: SELECT RECEIPT PRINTING OR NOT This screen is to ask a customer if he/she wants to get the receipt or not. © 2015 Nautilus Hyosung Inc. All Rights Reserved. Appendix-39...
- Page 246 This screen is to show the customer that the transaction is in progress. ► INQUIRY: PRINTING TRANSACTION AND TAKE RECEIPT This screen is to show the customer that his/her transaction record is printing and to notify the customer to take his/her receipt. Appendix-40 © 2015 Nautilus Hyosung Inc. All Rights Reserved.
- Page 247 Appendix Operator Function ► INQUIRY: THANK YOU This screen is to show the customer that the transaction has been successfully completed. © 2015 Nautilus Hyosung Inc. All Rights Reserved. Appendix-41...
-
Page 248: Supported Usb Memory And Hub
1) SANDisk 512MB is not supported because it has 2 file systems. (CDFS and FAT) 2) Sony Storage Media is supported because it is FAT, 1 driver and 512 MB size. Appendix-42 © 2015 Nautilus Hyosung Inc. All Rights Reserved. - Page 249 USB 2.0 Aluminum 0x05E3(Genesys International 0x0606 Logics inc) I.Connector(PPA 4Port 0x05E3(Genesys PPA Int'l 0x0606 HUB) Logics inc) 0x05E3(Genesys USB 2040 Mini 0x0606 Logics inc) 0x05E3(Genesys DSP Inc E-Star QU24WR 0x0606 Logics inc) © 2015 Nautilus Hyosung Inc. All Rights Reserved. Appendix-43...
-
Page 250: Advertisement Image Update Guide
Operator Function Appendix Advertisement Image Update Guide Preparation Software Update function in Nautilus Hyosung’s Windows CE Machine is applicable to update advertisement images. ► Supported Image Format The following table describe the supporting format of welcome advertisement image File Max Size... - Page 251 6.2 [machine resolution] for NH-2700(T), MX-5000SE, NH-2600, MX-2600SE - “1024_600” folder in “ADVERTISEMENT” folder. 6.3 [machine resolution] for MX-5200SE - “1024_768” folder in “ADVERTISEMENT” folder. 7. Copy all image files to under [machine resolution] folder.(check the file name) © 2015 Nautilus Hyosung Inc. All Rights Reserved. Appendix-45...
- Page 252 ► The following picture describes the layout of the USB Drive or SD Card, in case of its [resolution folder] is ‘1024_600’. (If you have the master media which get from Nautilus Hyosung, you can see the same layout except “Patch” folder. “Patch” folder is replaced “master” folder.) Appendix-46 ©...
-
Page 253: Executing Software Update
You can update advertisement images by software downloading with MoinView server. Please refer to the MoinView manual for the detail downloading functionality. 1. Press SYSTEM SETUP button. 2. Press SYSTEM CONTROL button. © 2015 Nautilus Hyosung Inc. All Rights Reserved. Appendix-47... - Page 254 3. Plug the USB drive in USB slot and press left-top function key, “SOFTWARE UPDATE”. 4. Press left function key, “YES”. When “YES” button is selected, new software in USB drive is transferred to a dedicated directory(ATM) and ATM will start to reboot automatically. Appendix-48 © 2015 Nautilus Hyosung Inc. All Rights Reserved.
- Page 255 Appendix Operator Function ►Enable Welcome Advertisement You can enable or disable Welcomoe Advertisement in the supervisor menu. 1. Press CUSTOMER SETUP button 2. Press “WELCOME ADVERTISEMENT” button © 2015 Nautilus Hyosung Inc. All Rights Reserved. Appendix-49...
- Page 256 Operator Function Appendix 3. Press “WELCOME ADVERTISEMENT” button 4. You can enable or disable Advertisement images to view by pressing “SCREEN” Key. Appendix-50 © 2015 Nautilus Hyosung Inc. All Rights Reserved.
- Page 257 Appendix Operator Function ►Enable Transaction Advertisement You can enable or disable Transaction Advertisement in the supervisor menu. 1. Press CUSTOMER SETUP button 2. Press “ADVERTISEMENT” button © 2015 Nautilus Hyosung Inc. All Rights Reserved. Appendix-51...
- Page 258 3. Press “TRANSACTION ADVERTISEMENT” button 4. You can enable or disable welcome dvertisement images to view by pressing “SCREEN” Key. 5. You can enable or disable transaction dvertisement images to view by pressing “SCREEN” Key. Appendix-52 © 2015 Nautilus Hyosung Inc. All Rights Reserved.
-
Page 259: Making Moniview Update Media
► The following picture describe the layout of Zip file PATCH.ZIP UpdateInfo.dat ADVERTISEMENT 1024_600 Adv_01.jpg Adv_02.jpg Adv_03.jpg Adv_04.jpg Adv_05.jpg Adv_06.jpg TranAdv_01.jpg TranAdv_02.jpg TranAdv_03.jpg TranAdv_04.jpg TranAdv_05.jpg TranAdv_06.jpg And you can download the “Patch.zip” using MoniView. © 2015 Nautilus Hyosung Inc. All Rights Reserved. Appendix-53... -
Page 260: Preparation
Operator Function Appendix Background Image Update Guide Preparation Software Update function in Nautilus Hyosung’s Windows CE Machine is applicable to update advertisement images. ► Supported Image Format The following table describe the supporting format of change background image Max Size... - Page 261 10. Copy all image files to under “Function” or “ Touch” folder.(check the file name) The following picture describes the layout of the USB Drive or SD Card. (If you have the master media which get from Nautilus Hyosung, you can see the same layout except “Patch” folder. “Patch” folder is replaced “master” folder.) ©...
-
Page 262: Executing Software Update
You can update advertisement images by software downloading with MoinView server. Please refer to the MoinView manual for the detail downloading functionality. 1. Press SYSTEM SETUP button. 2. Press SYSTEM CONTROL button. Appendix-56 © 2015 Nautilus Hyosung Inc. All Rights Reserved. - Page 263 3. Plug the USB drive in USB slot and press left-top function key, “SOFTWARE UPDATE”. 4. Press left function key, “YES”. When “YES” button is selected, new software in USB drive is transferred to a dedicated directory(ATM) and ATM will start to reboot automatically. © 2015 Nautilus Hyosung Inc. All Rights Reserved. Appendix-57...
- Page 264 Operator Function Appendix ► Setup change background You can set up change background option in the supervisor menu. 1. Press CUSTOMER SETUP button 2. Press “OPTIONAL FUNCTION 2” button Appendix-58 © 2015 Nautilus Hyosung Inc. All Rights Reserved.
- Page 265 Appendix Operator Function 3. Press “SCREEN SERVICES” button 4. Press “CHANGE BACKGROUND” button 5. You can set up change background images to view by pressing “SCREEN” Key or “DEFAULT SCREEN”. © 2015 Nautilus Hyosung Inc. All Rights Reserved. Appendix-59...
-
Page 266: Making Moniview Update Media
9. Make comperessed file like the below layout. The following picture describe the layout of Zip file PATCH.ZIP UpdateInfo.dat SCREEN Backs 1024_600 Function Back_1.jpg Back_2.jpg Back_3.jpg Back_4.jpg Back_5.jpg Back_6.jpg And you can download the “Patch.zip” using MoniView. Appendix-60 © 2015 Nautilus Hyosung Inc. All Rights Reserved. -
Page 267: Weather Service Guide
Weather information set up and updated only by MoniView, ATM displaying weather information for today and tomorrow that gives How to register and update detailed weather information, please see the manual of MoniView. ► Weather Service Display Screen © 2015 Nautilus Hyosung Inc. All Rights Reserved. Appendix-61... -
Page 268: Anti Skimming Service (Warning Against Illegal Trials To Card Reader)
[Warning screen with message for anti skimming] If you want to make your ATM detect the illegal act, please refer to section ‘CARD READER SETUP’ ‘ANTI SKIMMING’, in this Manual for details. Appendix-62 © 2015 Nautilus Hyosung Inc. All Rights Reserved.
Need help?
Do you have a question about the MX2600SE and is the answer not in the manual?
Questions and answers