
Related Manuals for Nautilus Hyosung MX8200QT


Summary of Contents for Nautilus Hyosung MX8200QT
- Page 1 Operator Manual MX8200QT System V01.00.01 (2015. 1.22) © 2014 Nautilus Hyosung Inc. All Rights Reserved.
- Page 2 V01.00.01 2015/01/22 Changed the exterior images of MX8200QT Cover, 2 © 2014 Nautilus Hyosung All Rights Reserved. The content of this specification is protected by copyright laws. 2015. 1. 22. 2nd Release © 2014 Nautilus Hyosung Inc. All Rights Reserved.
-
Page 3: Table Of Contents
Remove jam from Recog Transport Section ········································································· 4-16 Remove jam from the B2 Upper Transport Path of BM2 ························································· 4-17 Remove jam from the B2 Upper Transport Path of BM2 ························································· 4-18 © 2014 Nautilus Hyosung Inc. All Rights Reserved. - Page 4 How to load the receipt paper ........................6-2 How to clear receipt jam from the Printer ..................... 6-5 Chapter7. Coin Dispenser ......................7-1 Replenishing the Coin Dispenser ......................... 7-1 Clearing a coin jam ............................7-3 Notes ............................Notes-1 © 2014 Nautilus Hyosung Inc. All Rights Reserved.
-
Page 5: Chapter1. Preface
What is in This Manual ▶ This manual is designed to provide the operation guide for the MX8200QT and the detailed description of the following: ▪ Replenishing the notes, the receipt paper and the coins ▪... -
Page 6: Conventions
Camera Unit CASSETTE Cash & Check Cassette CCIM Cash & Check In Module Contactless Card Reader Control Electronics Customer Service Module Deposit Cassette Earphone Jack Voice Converter for Visually Disabled Persons (ADA) © 2014 Nautilus Hyosung Inc. All Rights Reserved. - Page 7 RT/A6 Retract & A6 Cassette Switch Separator Control Module Sensor and Indications Unit Service Provider Slip Printer (Receipt Printer) Tape Escrow Text Terminal Unit (OPL or SPL) Utility Cassette Vacuum Fluorescent Display © 2014 Nautilus Hyosung Inc. All Rights Reserved.
-
Page 8: Safety Precautions
4. The equipment is to be secured to he building structure before operation 5. A security container shall be permitted to optionally be provided with a secondary lock, but improper use of the secondary lock feature will reduce the security level of the ATM. © 2014 Nautilus Hyosung Inc. All Rights Reserved. - Page 9 ▪ If the above-mentioned abnormalities occur, immediately turn off the power, unplug the equipment and contact the service center. ▪ If you ignore these symptoms, the equipment may catch on fire or cause electric shock. © 2014 Nautilus Hyosung Inc. All Rights Reserved.
-
Page 10: Related Document
▪ Installation Manual ▪ Service Manual ▪ Quick Reference Guide For the contact of maintenance staffs of Nautilus Hyosung, see the E-mail addresses and telephone numbers provided separately. © 2014 Nautilus Hyosung Inc. All Rights Reserved. -
Page 11: Chapter2. Introduction
Chapter2. Introduction Chapter2. Introduction About the MX8200QT ▶ The MX8200QT is a full service ATM. Customers deposit the cash/check, make the withdrawal and receive the transaction records through openings in the fascia with MX8200QT ATM. The MX8200QT is a versatile, easily maintained delivery system that can be modified to keep pace with the bank's changing needs. -
Page 12: The Exterior Overview
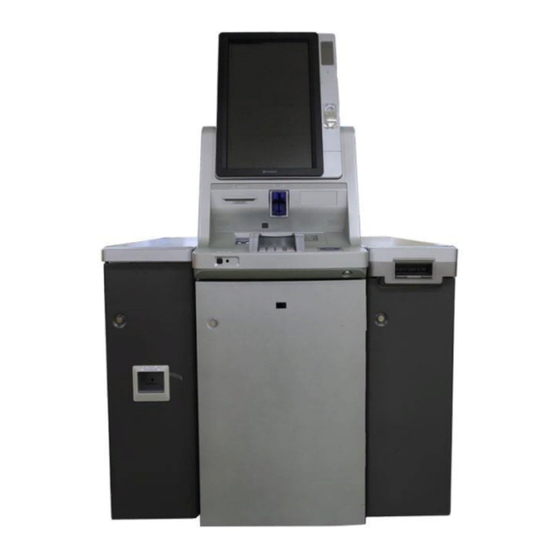
Chapter2. Introduction Operator Manual The Exterior Overview ► The following picture shows the front of MX8200QT and key units. The fascia provides the interface between the customer and MX8200QT. The customer selects transactions and requests information at the fascia. Customer... -
Page 13: The Interior Overview
Operator Manual Chapter2. Introduction The Interior Overview ► The MX8200QT consists of the main body where banknotes are stored and the side car where the CCIM and Coin Dispenser are installed. The interior and key units are as follows. Teller... -
Page 14: Basic Features
Chapter2. Introduction Operator Manual Basic Features ▶ Important features of the MX8200QT is highlighted in the following list: Main Controller Core2Duo E7400 (2.8GHz) Memory DDR Memory 4 GB Storage 128 GB Device DVD-RW Operating System Windows XP Professional Windows7 with SP3... - Page 15 Reject 50 Mixed Notes and Checks Cassette Article 6 10 Mixed Notes and Checks Cassette Escrow 50 Mixed Notes and Checks /1 transaction Deposit 50 Mixed Notes and Checks Reject /1 transaction © 2014 Nautilus Hyosung Inc. All Rights Reserved.
- Page 16 Max. 3.15inch (80mm) Max. 100Φ Outer Diameter Coin Hopper Denomination 4 sorts Dispensing Capacity 1cent 658ea, 5cent 449ea, 10cent 847ea, 25cent 355ea Journal Electronic Journal Supported Safety & Security Safety UL 291 Level-1 © 2014 Nautilus Hyosung Inc. All Rights Reserved.
- Page 17 Camera CCD Cameras (face) & 2 (hand) Additional Function Audio Guidance Sound Card On-Board ADA Audio Guidance Volume Control Supported Proximity Sensor Infrared Type Distance: 1.18 ~ 14.17inch (30~360mm) Installation Method Anchor © 2014 Nautilus Hyosung Inc. All Rights Reserved.
-
Page 18: Devices Of Mx8200Qt
▪ 21.5 inch TFT LCD ▪ WSXGA Resolution ▪ 250cd/m Brightness ▪ 21.5 inch Privacy Filter Supported Basic Specification of Keypad ▪ Polycarbonate Encryption PIN Pad (PCI Compliant) Customer Display (OPL) Encryption PIN Pad © 2014 Nautilus Hyosung Inc. All Rights Reserved. -
Page 19: Teller Display
Operator Manual Chapter2. Introduction Teller display ▶ Basic Specification of Teller Display ▪ 10.4 inch TFT LCD, 250cd/m ▪ 10.4 inch Resistive Touch Screen © 2014 Nautilus Hyosung Inc. All Rights Reserved. -
Page 20: Card Reader
The dip card reader cannot retract, capture, or retain cards. Basic Specification of Card Reader ▪ Dip Type Card Reader ▪ ISO 1, 2, 3 Read ▪ IC Card Supported 2-10 © 2014 Nautilus Hyosung Inc. All Rights Reserved. -
Page 21: Ce (Control Electronics, Pc)
▪ 4 GB DDR Memory, 128GB SSD, DVD-RW ▪ Window XP Professional ▪ 1 Serial Ports ▪ 19 USB Ports (M/B 8EA, Hub 11EA) ▪ On-Board Dual VGA (DVI, RGB) ▪ 10/100/1000Mbps On-Board © 2014 Nautilus Hyosung Inc. All Rights Reserved. 2-11... -
Page 22: Power Supply
▶ The power supply unit converts AC power to DC power and provides the voltage to various modules within the system. The power supply unit allows the user to turn on/off the system, enter power-failure mode, and perform other sequences. 2-12 © 2014 Nautilus Hyosung Inc. All Rights Reserved. -
Page 23: Cash & Check In Module (Ccim)
▪ Bundle Capacity: 50 Checks / 1 transaction (One Single Deposit Slot) ▪ Deposit Direction: 4 way ▪ Image scanning: Double side scanning (200 dpi) ▪ MICR: CMC-7, E13-B ▪ Endorsement Print: Double side printing, Ink jet ▪ Shutter Type: Automatic Shutter © 2014 Nautilus Hyosung Inc. All Rights Reserved. 2-13... -
Page 24: Brm (Bill Recycling Module)
• Automatic Shutter (Dual Shutter) • 5 Recycle / 1 Reject / 1 Utility Cassette supported • Dispense Max: 200 bills per transaction (bundle) • Input Max: 200 bills per transaction (bundle) 2-14 © 2014 Nautilus Hyosung Inc. All Rights Reserved. -
Page 25: Spr (Slip Printer/Receipt Printer)
Basic Specification of Receipt Printer ▪ Thermal Line Printing Type ▪ Black Mark Paper optionally supported Basic Specification of Paper ▪ Thermal Roll Paper ▪ Paper Roll Capacity: 1,000 Transactions / Roll (Depending on format) © 2014 Nautilus Hyosung Inc. All Rights Reserved. 2-15... -
Page 26: Coin Dispenser
ATM transactions to a precise amount. Basic Specification of Coin Dispenser ▪ 4 sorts of denomination supported ▪ Dispensing Capacity: ∙ 1cent: 658ea ∙ 5cent: 449ea ∙ 10cent: 847ea ∙ 25cent: 355ea 2-16 © 2014 Nautilus Hyosung Inc. All Rights Reserved. -
Page 27: Contactless Card Reader (Ccr)
▪ Chase Bank Logo, Octagon LED ▪ Audio Guidance: Beeper ▪ Transaction Interface: 13.56MHz ISO14443 Type A,B, NFC and MiFare ▪ Payment Applications: American Express-Express Pay Discover Zip, JCB J/speedy Mastercard PayPass Mstripe Visa payWave MSD © 2014 Nautilus Hyosung Inc. All Rights Reserved. 2-17... -
Page 28: Seismic Sensor And Heat Detector
Heat detector is thermistor based design to provide temperature sensing that quickly, accurately, and consistently identifies when fixed temperature are exceeded. And also it can detect rate-of-rise by comparing two thermistor responses. 2-18 © 2014 Nautilus Hyosung Inc. All Rights Reserved. -
Page 29: Chapter3. For The Beginning Operator
1. Insert the key in keyhole of the side car door. 2. Turn the key (Clockwise) and hold the key to open the door. 3. Pull the key and swing the door to the right side 4. Lift up the CCIM bezel. © 2014 Nautilus Hyosung Inc. All Rights Reserved. - Page 30 1. Insert the key in keyhole of the side car door. 2. Turn the key (Clockwise) and hold the key to open the door. 3. Pull the key and swing the door to the right side. © 2014 Nautilus Hyosung Inc. All Rights Reserved.
-
Page 31: Side Car Closing
2. Close the door. 3. Turn the Key (Counter Clockwise). 4. Remove the key ► Side Car (Coin Dispenser) 1. Close the door. 2. Turn the Key (Counter Clockwise). 3. Remove the key © 2014 Nautilus Hyosung Inc. All Rights Reserved. -
Page 32: Upper Front Opening
Upper Front Opening ► Upper Front Opening 1. Insert the key in keyhole of the upper front. 2. Turn the key (Clockwise). 3. Pull the key and swing the door to the upper side © 2014 Nautilus Hyosung Inc. All Rights Reserved. -
Page 33: Upper Front Closing
Operator Manual Chapter3. For the beginning operator Upper Front Closing ► Upper Front Closing 1. Close the upper front until it is fully closed. © 2014 Nautilus Hyosung Inc. All Rights Reserved. -
Page 34: Security Enclosure Opening
1. Open the outer door with key. 2. Unlock the security door, refer to the relevant instructions detailed under “Opening/ Closing The Security Enclosure (Security Door)” for the configuration of MX8200QT 3. Turn and pull the Handle. © 2014 Nautilus Hyosung Inc. All Rights Reserved. -
Page 35: Security Enclosure Closing
1. Turn the handle and swing the door until the doors are fully closed. 2. Turn the dial (cencon lock) (Counter Clockwise). 3. Close the outer door with key. 4. Remove the key. Cencon Lock Handle © 2014 Nautilus Hyosung Inc. All Rights Reserved. -
Page 36: Switching Power On/Off
The system turning-on process is as follows, 1. Open the outer door 2. Check that Main Switch is on the position of “I“. 3. Press the power switch to “ON”. 4. The system will be turn on automatically © 2014 Nautilus Hyosung Inc. All Rights Reserved. -
Page 37: Switching Power Off
4. The operating system will shut down then power will turn off. WARNING: Do NOT operate Main Switch on power supply when you would like to turn off the power. It may cause damage to operate system or destabilize control electronics in ATM. © 2014 Nautilus Hyosung Inc. All Rights Reserved. -
Page 38: Power Supply Status
<System Off> procedure starts and only [AC IN] LED is turned on. ▪ In case power failure occurs during normal system operation, the system will enter <Power Failure Mode> and only [DC OUT] will be turned off. 3-10 © 2014 Nautilus Hyosung Inc. All Rights Reserved. -
Page 39: Opening/Closing The Security Enclosure (Security Door)
Operator Manual Chapter3. For the beginning operator Opening/Closing the Security Enclosure (Security Door) ▶ The MX8200QT has locks for the Vault. Security Door with Cencon The Cencon lock is highly-secured, advanced-design lock. Even though the lock is electromechanical, they require no wiring or batteries for opening the lock because they are self-powered. - Page 40 5. Turn the handle to the left (CCW) and open the security door. 6. Turn the dial a minimum of one complete rotation to the left (CCW) to extent the bolt. 3-12 © 2014 Nautilus Hyosung Inc. All Rights Reserved.
- Page 41 The best thing to do in analyzing the lock level is to write down the entire string and then pick out the portions of it that are significant to you, or if you are experiencing a problem with the lock, report the entire string to the Tech Support group. © 2014 Nautilus Hyosung Inc. All Rights Reserved. 3-13...
- Page 42 Select and enter the new combination. “CnF” (confirm new Factory combination) will be displayed 11. Cnf Enter New Combination POC Enter new combination again to confirm. POC (Pull Out Change key) will be 3-14 © 2014 Nautilus Hyosung Inc. All Rights Reserved.
- Page 43 15. OPr Retract Bolt Turn the Dial to the right (CW) to retract the bolt. 16. Close Door 17. Extend Bolt Turn the Dial to the left (CCW) to extend the bolt. © 2014 Nautilus Hyosung Inc. All Rights Reserved. 3-15...
-
Page 44: Chapter4. Cash & Check In Module (Ccim_Checkonly)
The cash and check deposited together is separated by sheets on the separation section. In case of the transaction cancellation, cash and check in reject section is ejected to the customer in a lump by the command of higher rank. © 2014 Nautilus Hyosung Inc. All Rights Reserved. - Page 45 Cash and check received are stored in the cassette by sheets. The cassettes can be mounted or demounted from the unit with the key. And also cassette’s door can be opened using the key. © 2014 Nautilus Hyosung Inc. All Rights Reserved.
-
Page 46: Basic Specification Of Cash & Check In Module (Checkonly)
USB2.0 HUB Interface Control TM Use External Storage, Program Loading on flash Memory by SP Remote Download It is the reference value when the thickness of bill used is 0.1mm (0.004inch). © 2014 Nautilus Hyosung Inc. All Rights Reserved. -
Page 47: Specification Of External Appearance
Dimensions Width: 274 ± 2 (mm) Cassette (10.79 ± 0.08inch) Length: 169 ± 2 (mm) (6.65 ± 0.08inch) Height: 62 ± 2 (mm) (2.44 ± 0.08inch) Weight 1.1Kg (2.43ib, except Check weight) © 2014 Nautilus Hyosung Inc. All Rights Reserved. -
Page 48: Cash & Check Conditions
2. Bill has sufficient life or sizing to be handled easily 3. Bill which can be manually held straightly when one end is held by a hand and the bill is slightly curved vertically. © 2014 Nautilus Hyosung Inc. All Rights Reserved. -
Page 49: Unacceptable Condition
Operator Manual Unacceptable condition ▶ 1. Bill with serious wrinkles, torn or broken section wherein paper fiber is broken and separation begins. ▪ Wrinkle Wrinkle ▪ Torn Torn ▪ Broken section Broken Section © 2014 Nautilus Hyosung Inc. All Rights Reserved. - Page 50 (1.38inch) When the bill is held by 20mm (0.79inch) and the straightness of the bill is 35mm (1.38inch) or less, it cannot be used 5. Bill with cellophane tape, scotch tape, etc © 2014 Nautilus Hyosung Inc. All Rights Reserved.
- Page 51 Chapter4. Cash & Check In Module (CCIM) Operator Manual Tape 6. Bill with folds Fold 7. Gradually curved bill (bills tied by hand seal, etc) Band seal 8. Bill with folded lines Case 1 Case 2 © 2014 Nautilus Hyosung Inc. All Rights Reserved.
- Page 52 Operator Manual Chapter4. Cash & Check In Module (CCIM) Case 3 <Note!> Bill distortion should not exceed 10 mm (0.39inch). © 2014 Nautilus Hyosung Inc. All Rights Reserved.
-
Page 53: How To Remove Jam From Each Section
BOTTOM Module includes CASH CASSETTE Module and CHECK CASSETTE Module. Zone Abbreviation Description ① BUNDLE Bulk Note Separation Module ② Separator Control Module ③ Bill Checker ④ Alignment Module ⑤ RECOG Recognition Module 4-10 © 2014 Nautilus Hyosung Inc. All Rights Reserved. - Page 54 Control Assembly of 3Way Gate2 ⑪ B4 GUIDE B4 Guide of Body Module1 ⑫ ESCROW Escrow Module ⑬ RT/A6 Retract & A6 Cassette ⑭ CASSETTE1 Check Cassette ► LED Lighting of Unit Transport Path © 2014 Nautilus Hyosung Inc. All Rights Reserved. 4-11...
-
Page 55: Remove Jam From Bundle Module
1. After opening the Bundle Module and SCM, remove a jammed note. If necessary, turn the green Knob 1 to move the note to easily remove the jammed note. Removing jam from Bundle Module. Removing jam from Bundle Module. 4-12 © 2014 Nautilus Hyosung Inc. All Rights Reserved. -
Page 56: Remove Jam From The First Transport Path
3. After checking if the jammed bill is removed, completely close the First Transport Path pushing the lock lever in the yellow arrow direction as shown in the picture. Opening SCM to remove jam. Closing SCM after removing jam. © 2014 Nautilus Hyosung Inc. All Rights Reserved. 4-13... -
Page 57: Remove Jam From Bc
3. After checking if the jammed Note is removed, completely close the BC section by pushing the lock lever in the yellow arrow direction as shown in the picture. Opening BC (Zone ③) to remove jam. Closing BC after removing jam. 4-14 © 2014 Nautilus Hyosung Inc. All Rights Reserved. -
Page 58: Remove Jam From Alg
Note as shown in the picture below. 3. After checking if the jammed Note is removed, completely close the ALG section. Opening Zone ④ to remove jam. Turning the green knob to remove jam. © 2014 Nautilus Hyosung Inc. All Rights Reserved. 4-15... -
Page 59: Remove Jam From Recog Transport Section
Note as shown in the picture below. 3. After checking if the jammed Note is removed, completely close the Recog Transport Section. Pushing the lock lever to open Zone ⑤. Opening or Closing Zone ⑤. 4-16 © 2014 Nautilus Hyosung Inc. All Rights Reserved. -
Page 60: Remove Jam From The B2 Upper Transport Path Of Bm2
3. After checking if the jammed Note is removed, completely close Zone ⑥ as shown in the picture. Pushing the lock lever to open Zone ⑥. Opening or Closing Zone ⑥. © 2014 Nautilus Hyosung Inc. All Rights Reserved. 4-17... - Page 61 3. After checking if the jammed Note is removed, completely close Zone ⑥ as shown in the picture. Pushing the lock lever to open Zone ⑥. Opening or Closing Zone ⑥. 4-18 © 2014 Nautilus Hyosung Inc. All Rights Reserved.
-
Page 62: Remove Jam From B2 Reject Transport Section
Section as shown in the picture. 4. If it is necessary to remove the inside jam of ALG, open the ALG guide as shown in the picture. Pushing the lock lever. Opening Zone ⑦-1, ⑦-2. © 2014 Nautilus Hyosung Inc. All Rights Reserved. 4-19... -
Page 63: Remove Jam From B3 Transport Section
Note as shown in the picture below. 3. After checking if the jammed Note is removed, completely close Zone ⑧ as shown in the picture. Opening Zone ⑧ Closing Zone ⑧ 4-20 © 2014 Nautilus Hyosung Inc. All Rights Reserved. -
Page 64: Remove Jam From Reject Section
Note as shown in the picture below. 3. After checking if the jammed Note is removed, completely close the door. Removing jam from Reject Section. © 2014 Nautilus Hyosung Inc. All Rights Reserved. 4-21... -
Page 65: Remove Jam From B3 Escrow Transport Section
3. After checking if the jammed Note is removed, push the green button and completely close Zone ⑩ as shown in the picture. Opening Zone ⑩ Closing Zone ⑩ 4-22 © 2014 Nautilus Hyosung Inc. All Rights Reserved. -
Page 66: Remove Jam From B4 Transport Section
3. After checking if the jammed Note is removed, push the green button and completely close Zone ⑪ as shown in the picture. Opening Zone ⑪ Closing Zone ⑪ © 2014 Nautilus Hyosung Inc. All Rights Reserved. 4-23... -
Page 67: Remove Jam From Escrow
5. And then come out one note from the escrow module. And remove the note as shown in lower figure. If necessary, repeat it to end. Finally turn the Lock Lever8 to “CLOSED” position. Removing jam from Escrow Removing note from Escrow 4-24 © 2014 Nautilus Hyosung Inc. All Rights Reserved. -
Page 68: Remove Jam From Rt/A6 Cassette
4. After removing jam, close the door and turn the key to the left. And then it is locked. 5. To mount RT/A6 Cassette, turn the key to the left and remove it. Then mount the RT/A6 Cassette. (Auto-locking mounting) Moving BM3 Separating Retract BOX Removing jam from Retract © 2014 Nautilus Hyosung Inc. All Rights Reserved. 4-25... - Page 69 Chapter4. Cash & Check In Module (CCIM) Operator Manual Opening or closing the door of Retract BOX Removing jam from Retract Section 4-26 © 2014 Nautilus Hyosung Inc. All Rights Reserved.
-
Page 70: Remove Jam From Cassette
3. After removing jam, close the door and turn the key to the left. And then it is locked. 4. To mount the Cassette, turn the key to the left and remove it. Then it is mounted automatically. Front View of Cassette Section. Separating the Cassette. © 2014 Nautilus Hyosung Inc. All Rights Reserved. 4-27... - Page 71 Turning the key to the right to open the door and turning the key to the left to close the door. Pressing the green lever to drop down the Push Plate. 4-28 © 2014 Nautilus Hyosung Inc. All Rights Reserved.
-
Page 72: How To Change Prt Maintenance Module
※ After replacing Ink Cartridge, you have to reset "PRT Cartridge Count". And you may need to replace Ink Head Cleaner Felt if necessary Installing Ink Cartridge © 2014 Nautilus Hyosung Inc. All Rights Reserved. 4-29... -
Page 73: How To Reset Prt Cartridge Count
3. Press the green button on PRT capping module installed BM3 for 3 seconds as shows the picture (Pressing the green button). 4. Push down DIP Switch 1 DIP Switch 1 Pressing the green button 4-30 © 2014 Nautilus Hyosung Inc. All Rights Reserved. -
Page 74: How To Replace Ink Head Cleaner Felt
3. After replacing the new one by removing the tape, assemble the felt unit in the reverse process Disassembling the Felt Unit Replacing Ink Head Cleaner Felt © 2014 Nautilus Hyosung Inc. All Rights Reserved. 4-31... -
Page 75: Chapter5. Bill Recycling Module (Brm)
▶ The idea of recycling is to make the cash that is paid in during deposit transactions available again for dispensing. This considerably lengthens the replenishment or emptying cycles on cash-in/cash-out systems and, at the same time, the cash holding per system can be reduced. © 2014 Nautilus Hyosung Inc. All Rights Reserved. -
Page 76: Basic Specification Of Bill Recycling Module
Unclaimed Cassette 45mm During Stack 300bills (UTC1) (1.77inch) Reject Cassette 2 41.5mm During Stack 300bills (UTC2) (1.63inch) It is the reference value when the thickness of bill used is 0.1 mm (0.0039inch). © 2014 Nautilus Hyosung Inc. All Rights Reserved. - Page 77 Width: 217 ± 3 (mm) (8.54 ± 0.12inch) Length: 140 ± 3 (mm) Dimensions Utility Cassette (5.51 ± 0.12inch) (UTC) Height: 117 ± 3 (mm) (4.61 ± 0.12inch) Weight 1.3 Kg (2.87ib, except bill weight) © 2014 Nautilus Hyosung Inc. All Rights Reserved.
-
Page 78: Bill Conditions
2. Bill has sufficient life or sizing to be handled easily 3. Bill which can be manually held straightly when one end is held by a hand and the bill is slightly curved vertically. © 2014 Nautilus Hyosung Inc. All Rights Reserved. -
Page 79: Unacceptable Condition
Chapter5. Bill Recycling Module (BRM) Unacceptable condition ▶ 1. Bill with serious wrinkles, torn or broken section wherein paper fiber is broken and separation begins. ▪ Wrinkle Wrinkle ▪ Torn Torn ▪ Broken section Broken Section © 2014 Nautilus Hyosung Inc. All Rights Reserved. - Page 80 4. Bill ragged and cannot be held straightly when one end is supported by a hand 20mm (0.79inch) 35mm (1.38inch) When the bill is held by 20mm (0.79inch) and the straightness of the bill is 35mm (1.38inch) or less, it cannot be used © 2014 Nautilus Hyosung Inc. All Rights Reserved.
- Page 81 5. Bill with cellophane tape, scotch tape, etc Tape 6. Bill with folds Fold 7. Gradually curved bill (bills tied by hand seal, etc) Band seal 8. Bill with folded lines Case 1 Case 2 © 2014 Nautilus Hyosung Inc. All Rights Reserved.
- Page 82 Chapter5. Bill Recycling Module (BRM) Operator Manual Case 3 <Note!> Bill distortion should not exceed 10 mm (0.39inch). © 2014 Nautilus Hyosung Inc. All Rights Reserved.
-
Page 83: How To Open And Close The Lower Unit
1. To release the lock from system, push down the lever A as shown in pictured below. Then, pull the lower unit pressing lever A until the lower unit is completely taken out. 2. Lift up the Mid Transport Path pressing its handle B until it fixes. © 2014 Nautilus Hyosung Inc. All Rights Reserved. - Page 84 2 steps, so you have to close it once again pressing the lever 2. Push the lower unit into the system until it locks into its position with a click as shown in pictured below. 5-10 © 2014 Nautilus Hyosung Inc. All Rights Reserved.
-
Page 85: How To Replenish The Cassette With Bills
2. Separate the cassette from the set guide holding the handle C. 3. Unfold the holder of the cassette and lay it on the flat surface as shown in below picture. © 2014 Nautilus Hyosung Inc. All Rights Reserved. 5-11... - Page 86 5. Press the green lever D and pull the Push-Plate to the end in the arrow direction. <Note!> If pressing the lever using one finger, entire cassette can move. So please use both the thumb and forefinger. 5-12 © 2014 Nautilus Hyosung Inc. All Rights Reserved.
- Page 87 7. Replenish the cassette with the bill to the position of the label and push the Push- Plate to the end in the arrow direction pressing the green lever D. Label © 2014 Nautilus Hyosung Inc. All Rights Reserved. 5-13...
- Page 88 Fan the notes so that the notes are not sticking together. b. Remove all notes with holes or notes that are torn. c. Unfold the folded notes. d. Place the notes correctly. 5-14 © 2014 Nautilus Hyosung Inc. All Rights Reserved.
- Page 89 8. Close the door with the key. After closing the door, remove the key from the cassette. 9. Fold the holder of the cassette and mount the cassette into the set guide. 10. Mount the lower unit into the system. © 2014 Nautilus Hyosung Inc. All Rights Reserved. 5-15...
-
Page 90: How To Remove The Bills From Reject Cassette
2. Separate the Reject Cassette from the set guide holding the handle A. 3. Put the Reject Cassette on the flat surface and open the door by turning the key clockwise. 5-16 © 2014 Nautilus Hyosung Inc. All Rights Reserved. - Page 91 Reject Cassette until the space is created enough to remove the bills. Then remove the bills from the Reject Cassette. 5. Close the door of the Reject Cassette with the key. After closing the door, remove the key from the reject cassette. © 2014 Nautilus Hyosung Inc. All Rights Reserved. 5-17...
- Page 92 Chapter5. Bill Recycling Module (BRM) Operator Manual 6. After closing the door, mount the Reject Cassette into the set guide. 7. Mount the lower unit into system. 5-18 © 2014 Nautilus Hyosung Inc. All Rights Reserved.
-
Page 93: How To Remove The Bills From Utility Cassette
▶ This section describes how to remove the bills from utility cassette. 1. Turn the key clockwise to separate the Utility Cassette. 2. Pull the Utility Cassette holding the handle A to completely separate the Utility Cassette. © 2014 Nautilus Hyosung Inc. All Rights Reserved. 5-19... - Page 94 Remove the key after closing the door. 5. Mount the Utility Cassette and turn the key counterclockwise. Then completely inset the Utility Cassette into BRM20 as shown in picture below. 5-20 © 2014 Nautilus Hyosung Inc. All Rights Reserved.
-
Page 95: How To Open And Close The Upper Unit
1. Hold the handle B with one hand and pull the safety lock C in the arrow direction with another hand to release the lock. 2. Slowly push the Customer Service Module in the arrow direction to completely close © 2014 Nautilus Hyosung Inc. All Rights Reserved. 5-21... - Page 96 1. Hold the handle B with one hand and push the safety lock C in the arrow direction with another hand to release the lock. 2. Slowly push the Tape Escrow in the arrow direction to completely close it. 5-22 © 2014 Nautilus Hyosung Inc. All Rights Reserved.
- Page 97 ▶ Caution take your hands off the handle until the upper unit is completely closed because the safety lock is released! And also, do hold the other places except the handle! © 2014 Nautilus Hyosung Inc. All Rights Reserved. 5-23...
-
Page 98: How To Open And Close The Upper Body Of The Module
2. Pull the upper unit in the arrow direction by pushing down the lever A . ► Close the upper body of BRM as follows 1. Push the upper unit into the system until it is locked. 5-24 © 2014 Nautilus Hyosung Inc. All Rights Reserved. -
Page 99: How To Remove The Jam
1. Turn the green knob A counterclockwise and open the door. 2. Move the Push-Plate in the arrow direction by turning the green knob B clockwise for the jammed bill to be shown. © 2014 Nautilus Hyosung Inc. All Rights Reserved. 5-25... - Page 100 Chapter5. Bill Recycling Module (BRM) Operator Manual 3. Turn the knob C clockwise and completely remove the jammed bill. 4. After removing the jammed bill, turn the knob A clockwise and close the door. 5-26 © 2014 Nautilus Hyosung Inc. All Rights Reserved.
- Page 101 3. Turn the green knob C clockwise for the bill to be shown and remove the jammed bill with another hand. 4. After removing the jammed bill, close the upper unit. (Refer to “Upper Unit Closing” ) © 2014 Nautilus Hyosung Inc. All Rights Reserved. 5-27...
- Page 102 The lift up BC (Bill Checker). 3. While still holding the lever, turn the green knob B clockwise and the jammed bill inside BC appears along the transport path. At this time, remove the jammed bill. 5-28 © 2014 Nautilus Hyosung Inc. All Rights Reserved.
- Page 103 Operator Manual Chapter5. Bill Recycling Module (BRM) 4. After removing the jammed bill, completely close BC by pressing it. 5. Close Tape Escrow and Customer Service Module. © 2014 Nautilus Hyosung Inc. All Rights Reserved. 5-29...
- Page 104 2. Turn the green knob A clockwise for the jammed bill to be shown and remove the jammed bill while holding the transport guide B. 3. After removing jam, close Customer Service Module and Tape Escrow. 5-30 © 2014 Nautilus Hyosung Inc. All Rights Reserved.
- Page 105 4. Do not remove a normal bill wound around the drum because it is returned during BRM initialization. 5. After removing jam, close Customer Service Module and Tape Escrow. © 2014 Nautilus Hyosung Inc. All Rights Reserved. 5-31...
- Page 106 3. Turn the green knob A clockwise until the jammed bill occurred during entering into the cassette shows and then remove the jammed bill as shown in below picture. 4. Mount the lower unit into system. 5-32 © 2014 Nautilus Hyosung Inc. All Rights Reserved.
- Page 107 2. Pull the Push-Plate in the arrow direction of the below picture to remove the jammed bill. 3. Find the green knob A in the upper part of the internal of the cassette. © 2014 Nautilus Hyosung Inc. All Rights Reserved. 5-33...
- Page 108 After removing the jammed bill, return the Push-Plate to the original position as shown in below picture. 5. Close the cassette door and mount the cassette into the set guide. 6. Mount the lower unit into system. 5-34 © 2014 Nautilus Hyosung Inc. All Rights Reserved.
- Page 109 3. After removing the jammed bills from Reject Cassette, close the door of Reject Cassette and mount Reject Cassette into the set guide. 4. Mount the lower unit into system. © 2014 Nautilus Hyosung Inc. All Rights Reserved. 5-35...
- Page 110 2. Turn the green knob A counterclockwise and the jammed bill appears. At this time, put the hand into Utility Cassette and remove the jammed bills. 3. Close the door of Utility Cassette with key. Then remove the key from the cassette. 5-36 © 2014 Nautilus Hyosung Inc. All Rights Reserved.
-
Page 111: Chapter6. Receipt Printer
8. Make sure the paper is rolled evenly. 9. Miscellaneous: If the paper comes in contact with carbon copy paper or if the paper surface is scratched with a metallic object, de-coloring may occur. © 2014 Nautilus Hyosung Inc. All Rights Reserved. -
Page 112: How To Load The Receipt Paper
▪ Load a paper roll into the unit with the shape of the roll kept intact. (Deformed roll may cause jamming.) Correct shape of the paper roll ▪ The leading edge of the roll shall neatly be cut prior to loading the roll. © 2014 Nautilus Hyosung Inc. All Rights Reserved. - Page 113 3. Insert the paper axis into the center of receipt roll and mount it onto the charger. 4. Have receipt paper go down the white tension bar as shown the left picture and then pull it forward. © 2014 Nautilus Hyosung Inc. All Rights Reserved.
- Page 114 1. Be sure to remove the test sheet printed after feeding the paper and take the printer into the system. Then close the side door using key. 2. Refer to diagram stickers placed on either side of the center section of the thermal printer. © 2014 Nautilus Hyosung Inc. All Rights Reserved.
-
Page 115: How To Clear Receipt Jam From The Printer
3. Open the print head assembly by pushing down green lever of print head assembly. 4. To take out a jammed paper in front of transport path, lift up the transparent window guide and remove the jamming receipt carefully. © 2014 Nautilus Hyosung Inc. All Rights Reserved. - Page 116 Thermal Print Head (TPH) is closed. When finished loading paper, close the rear Panel and remove the key. <Note!> After all paper jams have been cleared, reload the paper and test the printer using Diagnostics. © 2014 Nautilus Hyosung Inc. All Rights Reserved.
-
Page 117: Chapter7. Coin Dispenser
1. To replenish the coin dispenser with the coin, pull the coin dispenser servicing tray out to its fully extended position while pressing the green button. 2. Open the cover of coin hopper and pour the container into the coin hopper using a pre- filled container of coins. © 2014 Nautilus Hyosung Inc. All Rights Reserved. - Page 118 ▪ If coin dust accumulates in the hopper during use, it may cover the outlet sensor, and causes the malfunction. 3. Repeat the procedure for the other three coin hoppers in the coin dispenser. 4. Push the coin dispenser’s servicing tray back to its docked position. © 2014 Nautilus Hyosung Inc. All Rights Reserved.
-
Page 119: Clearing A Coin Jam
4. Clear the jammed coin by either: ▪ Rotate the disk manually, first counter clock wise, and then clock wise to free the coin or ▪ Push the coin back in using another coin. © 2014 Nautilus Hyosung Inc. All Rights Reserved. - Page 120 Operator Manual 5. Remove any debris from the disk bed assembly. 6. Clean the exit window opto with a clean dry cloth. 7. Re-assemble, as described. 8. Refill and test the hopper. © 2014 Nautilus Hyosung Inc. All Rights Reserved.
-
Page 121: Notes
Operator Manual Notes Notes © 2014 Nautilus Hyosung Inc. All Rights Reserved. Notes-1...
Need help?
Do you have a question about the MX8200QT and is the answer not in the manual?
Questions and answers