Table of Contents
Advertisement
Advertisement
Table of Contents

Related Manuals for EFI Pro 32r


Summary of Contents for EFI Pro 32r
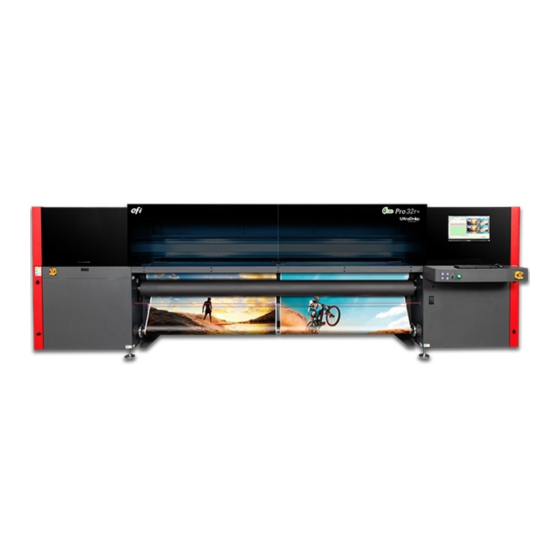
- Page 1 Pro 32r Printers Operations Guide...
- Page 2 The information contained in this document is confidential and proprietary to Electronics for Imaging, Inc (EFI). This information is provided only to authorized representatives of EFI and EFI customers solely for the purpose of facilitating the use of EFI’s products. No information contained herein may be disclosed to any unauthorized person for any purpose whatsoever without the prior written consent of EFI.
- Page 3 Description Request # 05/10/2019 Initial release DR 5347 07/19/2019 New doc style. Updated image and description for Fig. 3-7 DR 5847 12/19/2019 Corrected description of 2.3.7.3The Safety Laser Beam DR 6093 Document ID: OMM-00165 Rev. C Pro 32r Operations Guide...
-
Page 4: Table Of Contents
Overview Advanced Fine Tuning Customer Support Web Site Other Preparations GENERAL SAFETY PRINTER OPERATIONS Anti-virus Warning! EFI Pro 32r Start Up Procedures Printer-mounted Safety Labels & Components Defining Job Settings Potential Hazards Remaining Media Changing Settings During Printing HARDWARE OVERVIEW... -
Page 5: 1.0 Introduction
Introduction Operations Guide 1.0 Introduction Document ID: OMM-00165 Rev. C Pro 32r Operations Guide... -
Page 6: Before Starting
Introduction Introduction The EFI Pro 32r Operations Guide provides an overview of the features and functions of these wide format printers. The EFI Pro 32r printers use environmentally-friendly UV-curable inks to ensure higher volume production and improved resolution over traditional silkscreen printing. -
Page 7: Customer Support Web Site
The EFI Inkjet customer support website contains technical supplements, advisory bulletins, operations and maintenance guides, software, and Safety Data Sheets (SDS) available at http://inkjet.support.efi.com/index.php. Customers should log onto the EFI Inkjet Support site regularly to get current information or advisories affecting their printer or accessories. North & South Americas... - Page 8 Introduction Operations Guide 2.0 Safety Document ID: OMM-00165 Rev. C Pro 32r Operations Guide...
-
Page 9: General Safety
Once the remote connection is no longer required, it must be canceled. • Do not install any Antivirus program on the PRO 32R PC, since it consumes between 10 and 20% of the RAM and as a result, reduces the printer's performance. -
Page 10: Printer-Mounted Safety Labels & Components
Pull to immediately turn off the printer. Emergency Stop Cord Label 1: Label 2: Label 3: Automatic Cutting Device/Surface Do not place hands near Keep hands clear Keep covered when appropriate cutting edges Document ID: OMM-00165 Rev. C Pro 32r Operations Guide... - Page 11 Read the manual regarding protection is applied safe contact Label 1: Label 2: Label 3: Moving Parts Moving parts Do no open the guards Keep hood closed until moving parts stop during printing Document ID: OMM-00165 Rev. C Pro 32r Operations Guide...
- Page 12 Danger of splashing ink Keep clear of the area while Avoid contact between the ink printer is printing and your eyes. Wear goggles while working on or emptying the waste container. Document ID: OMM-00165 Rev. C Pro 32r Operations Guide...
- Page 13 Keep clear of moving parts Read the manual. of the printer. Label 1: Label 2: Label 3: Danger of Crushing Legs Keep your feet away Wear appropriate footwear. Read the manual. from the printer. Document ID: OMM-00165 Rev. C Pro 32r Operations Guide...
-
Page 14: Potential Hazards
The cover is located at the front of the printer; its function is to protect user from UV rays and from contact with the moving carriage. It opens and closes manually. Cover - Closed Figure 2-1 Document ID: OMM-00165 Rev. C Pro 32r Operations Guide... - Page 15 Close the Cover – With one hand, push the lift cylinder as you push the cover down with your other hand. NOTE: The printer does not operate unless the cover is closed. Figure 2-3 Document ID: OMM-00165 Rev. C Pro 32r Operations Guide...
- Page 16 To immediately stop the media from moving, press any emergency stop buttons along the printer's rear. To minimize the hazards above, mark the floor with wide luminous adhesive tape and create a safety exclusion zone of 1m around the printer. Document ID: OMM-00165 Rev. C Pro 32r Operations Guide...
- Page 17 To prevent unauthorized opening of the cabinet, the cabinet door is locked by a special key. Only a certified EFI technician is authorized to remove the plastic cover to access the main electricity panel.
- Page 18 To activate or reactivate printer, all emergency buttons must be released. To release the emergency button, turn it clockwise. Emergency Stop Buttons - Rear Emergency Stop Buttons - Front Figure 2-4 Document ID: OMM-00165 Rev. C Pro 32r Operations Guide...
- Page 19 Printer is equipped with two emergency cords–front and rear. Pull cord in case of emergency to immediately stop printer Emergency Stop Cord - Rear Emergency Stop Cord - Front Figure 2-5 Document ID: OMM-00165 Rev. C Pro 32r Operations Guide...
- Page 20 The safety laser beam is designed to avoid potential hazard from the tension and pinch rollers. Interruption or penetration through the laser beam during printing stops the printer. Laser Source and Mirror - Rear Laser Source and Mirror - Front Figure 2-6 Document ID: OMM-00165 Rev. C Pro 32r Operations Guide...
-
Page 21: 3.0 Hardware Overview
Introduction Operations Guide 3.0 Hardware Overview Document ID: OMM-00165 Rev. C Pro 32r Operations Guide... -
Page 22: General Description
Hardware Overview Hardware Overview This chapter describes the major assemblies and sub-assemblies of the EFI Pro 32r Wide Format printers, to familiarize you with their most important components. General Description Printing Area Operating Area Ink & Systems Area Figure 3-1 Document ID: OMM-00165 Rev. - Page 23 Hardware Overview Printer’s Printer’s Printer’s Cover Carriage Monitor Home Position Media Output Operator’s Station Access Printer’s PC Figure 3-2 Document ID: OMM-00165 Rev. C Pro 32r Operations Guide...
- Page 24 Air Outlet Air Shaft Air Shaft Control Main Switch Figure 3-3 NOTE: The location of Printer parts assumes that the user is facing the Printer, whether at front, back, or sides. Document ID: OMM-00165 Rev. C Pro 32r Operations Guide...
-
Page 25: Printer Rollers And Shafts
There is a ruler on each end of the air shaft to show the location of the media edge relative to the shaft. Rubber Bladder Ruler Air Inlet Air Outlet Figure 3-4 Document ID: OMM-00165 Rev. C Pro 32r Operations Guide... - Page 26 Load the media, then fill air into the shaft by inserting the air gun into the air inlet. To release the media, release air by pressing the air outlet (refer to ) for more details). Document ID: OMM-00165 Rev. C Pro 32r Operations Guide...
-
Page 27: Ink Systems
Waste ink tray and is collected in the waste ink container. 3.3.1 Ink Containers The Pro 32r has six ink tanks, located in the rear right cabinet. There are the five print inks (cyan, magenta, yellow, black and white) and a waste ink tank (to store ink residue collected from the waste tray). - Page 28 Hardware Overview 3.3.2 Ink Pumps and Filters Ink Pump Solenoid Valve + Filter Two-way PP Pump Connectors Pump Connector Solenoid Valve Ink Pump Filter NP Pump Figure 3-8 Document ID: OMM-00165 Rev. C Pro 32r Operations Guide...
- Page 29 Hardware Overview 3.3.3 Carriage Ink System Secondary Ink Tanks Air Release Valves Overflow Sensors Figure 3-9 Document ID: OMM-00165 Rev. C Pro 32r Operations Guide...
- Page 30 Hardware Overview 3.3.4 Waste Ink Tray Excess ink from the print heads is collected in the waste ink tray and drained into the waste ink container. Figure 3-10 Document ID: OMM-00165 Rev. C Pro 32r Operations Guide...
- Page 31 Hardware Overview 3.3.5 Ink System and Print Head Configuration The Print Head configuration: White Magenta White Cyan + Yellow Black + + Black Yellow + Cyan Magenta Figure 3-11 Document ID: OMM-00165 Rev. C Pro 32r Operations Guide...
-
Page 32: Pneumatic System
Hardware Overview Pneumatic System Air Supply Port Air Pressure Regulators Five-Way Solenoid Valve Front Back Main Outfeed Infeed Roller Roller Figure 3-12 Document ID: OMM-00165 Rev. C Pro 32r Operations Guide... - Page 33 2.4 bar (34 psi) 30 rpm 25 rpm Do not put air into the air 1.4M Vinyl shaft. Use roller collars. NOTE: Pressure can change when using different types of media. Document ID: OMM-00165 Rev. C Pro 32r Operations Guide...
- Page 34 Hardware Overview 3.4.2 Gun Air Joint Figure 3-13 Rear Air Gun Inlet Figure 3-14 Front Air Gun Inlet Document ID: OMM-00165 Rev. C Pro 32r Operations Guide...
-
Page 35: Electric/Motion Control Panel
The electric panel is located at the rear left side of the printer. X Axis Y Axis Y&T Axis Main Power Driver Motor Controller Circuit Breaker Servo Driver Switch - See Figure 3-16 Figure 3-15 Document ID: OMM-00165 Rev. C Pro 32r Operations Guide... - Page 36 Figure 3-16 Caution: Improper use of the power and electrical connections can endanger your life! Do not touch any of electric or electronic components without specific permission from an EFI Technician. Document ID: OMM-00165 Rev. C Pro 32r Operations Guide...
-
Page 37: Vacuum System
Adjust ink vacuum level in the FE Preferences Dialog (Vacuum). Pressure is displayed on the carriage and the I/O control. White CMYK Figure 3-17 Document ID: OMM-00165 Rev. C Pro 32r Operations Guide... - Page 38 -4.0 (White) Positive Pressure Seconds Time (Color) Positive Pressure Seconds Time (White) Main Air Pressure 4.5-6.0 Bars Negative Pressure ̶ (-)4 (-)3.3 (Color) Negative Pressure ̶ (-)4.5 (-)3.8 (White) Figure 3-18 Document ID: OMM-00165 Rev. C Pro 32r Operations Guide...
- Page 39 Hardware Overview 3.6.2 Print Table Vacuum System The print table vacuum motor is located at the bottom right of the printer. Figure 3-19 Document ID: OMM-00165 Rev. C Pro 32r Operations Guide...
-
Page 40: Uv Led Curing System
Each ionizer is located adjacent to a LED lamp unit, at either end of the carriage. Carriage Ionizer Figure 3-20 Shown From Side of Carriage Document ID: OMM-00165 Rev. C Pro 32r Operations Guide... -
Page 41: Front Control Buttons & Vacuum Knob
Single or Multi roll printing • Width (wider media = use lower vacuum) • Weight (heavier media = use lower vacuum) • Polyethylene (PE): Work with wings UP Air Pressure Gauges for recommended vacuum values. Document ID: OMM-00165 Rev. C Pro 32r Operations Guide... -
Page 42: Roll Tension Control
Control Buttons Tension Knob Figure 3-22 Controls • Arrows - Sets the tension • Rev - Reverse • Fwd - Forward • Stop - Stops spinning • Knob - Sets spinning speed Document ID: OMM-00165 Rev. C Pro 32r Operations Guide... -
Page 43: Purge Buttons
Yellow2 + Cyan2 of the printer close to the carriage. White Figure 3-23 3.12 Rear Left Control Button The back pinch roller button toggles the roller open / closed. Figure 3-24 Document ID: OMM-00165 Rev. C Pro 32r Operations Guide... -
Page 44: 4.0 Software Overview
Introduction Operations Guide 4.0 Software Overview Document ID: OMM-00165 Rev. C Pro 32r Operations Guide... -
Page 45: Front End Window
Window - Control Panel. OK - Saves the settings and closes the dialog. Cancel/Close - Cancels the settings and closes the dialog. Apply - Saves the local settings and dialog remains open. Document ID: OMM-00165 Rev. C Pro 32r Operations Guide... -
Page 46: Front-End Window - Control Panel
Software Overview Front-end Window - Control Panel Figure 4-2 Control Panel Document ID: OMM-00165 Rev. C Pro 32r Operations Guide... - Page 47 Causes carriage to make a pass in both directions to cure any uncured ink take-up. NOTE: Does not print. Carriage H Motor Move to Position. Set the required Height and choose Apply. Set Carriage Height. Operator Operator’s display. See the User’s Login. Document ID: OMM-00165 Rev. C Pro 32r Operations Guide...
- Page 48 Set tension and click Apply. Quick Settings Setup Enables a quick machine setup for each media. See Quick Settings Setup Feature. Left-Right Opens Left-Right Calibration window. See Left-Right Calibration Dialog for details. Document ID: OMM-00165 Rev. C Pro 32r Operations Guide...
- Page 49 X-axis. Then prints the next nozzle test on the next line. Resets Printer Counter (Grayed out; unavailable.) Resets the UV Usage Counter's values defined in the printer statistics parameter dialog box. See Printer Statistics. Figure 4-3 UV System Settings Document ID: OMM-00165 Rev. C Pro 32r Operations Guide...
- Page 50 6 rolls. Remaining Media Length. Settings – Length of Media before printing. Prints the remaining Media length. Additional Texts – Add free text to the label. Figure 4-4 Media Settings Document ID: OMM-00165 Rev. C Pro 32r Operations Guide...
- Page 51 Print Mode list and is usually set to Fast. Make sure to insert values in the correct spin box. 5 Test Print – Print the Left-Right Calibration test pattern. Document ID: OMM-00165 Rev. C Pro 32r Operations Guide...
-
Page 52: Front-End Window - One Job
Opens Job Ticket RIP Data Preview. When there is no preview file in the Job Info. Opens the Select the Job dialog box. mjob folder, the EFI FE creates a preview by calculating • Size: The size of the job. -
Page 53: Front-End Window - Queue
Software Overview Front-end Window – Queue Figure 4-7 shows the Queue version of the front-end window. Figure 4-7 Front-end Window - Queue Document ID: OMM-00165 Rev. C Pro 32r Operations Guide... - Page 54 Double-click status bar to open Printer Status dialog box. 13 Printer Statuses. The printer is not yet initialized. The printer is ready to work. The printer is printing. Document ID: OMM-00165 Rev. C Pro 32r Operations Guide...
-
Page 55: Front-End Window - View Menu
Control - Alarms and Warnings. Opens the Phoseon Client dialog box. See UV System Client. Opens the Maintenance Alerts dialog box. See Maintenance Alerts. Figure 4-8 Front-end Window - View Menu Document ID: OMM-00165 Rev. C Pro 32r Operations Guide... - Page 56 The I/O Control dialog box displays the status of the printer’s electronic systems. Screen components that are disabled can only be activated by an engineer. Figure 4-9 I/O Control Dialog Box Document ID: OMM-00165 Rev. C Pro 32r Operations Guide...
- Page 57 This option is only activated when the printer is printing on the back side in double-sided printing. Figure 4-10 Printer Status Dialog Box Document ID: OMM-00165 Rev. C Pro 32r Operations Guide...
- Page 58 This tool box floats and therefore, allows access to all the other components of the screen. Advance media 120 mm backwards. Advance media 120 mm forwards. Opens Left/Right Calibration dialog box. See Left- Right Calibration Dialog. Figure 4-11 General Tools Floating Tool Box Document ID: OMM-00165 Rev. C Pro 32r Operations Guide...
- Page 59 The Printer Statistics Parameters window shows the usage statistics of the UV LED lamps, for operator’s information only. If needed, you can export the printer statistics and send it to an engineer (click EXPORT and save the file). Figure 4-13 Document ID: OMM-00165 Rev. C Pro 32r Operations Guide...
- Page 60 If the warnings or alarms persist, shut down the printer and restart it. Clear All Alarms and Warnings. Clears the alarms and warnings that are displayed. Figure 4-14 Alarms and Warnings Dialog Box Document ID: OMM-00165 Rev. C Pro 32r Operations Guide...
- Page 61 The Phoseon Client dialog allows you to view the status of the UV LED. In the Output section, you can find the error log if it exists. This window is for the operator’s information only. Figure 4-15 UV System Client Dialog Box Document ID: OMM-00165 Rev. C Pro 32r Operations Guide...
- Page 62 The Maintenance Alerts dialog box appears daily. It displays a list of maintenance tasks that must be carried out at a specified frequency. Choose Help for further information. Figure 4-16 Maintenance Alerts Dialog Box Document ID: OMM-00165 Rev. C Pro 32r Operations Guide...
-
Page 63: Front-End Window - Tools Menu
Tools Menu - Update Sub-menu. Opens the Heads Data Mask dialog box. See Heads Data Mask. Opens the Preferences dialog box. See Preferences Dialog Box. Figure 4-17 Front-end Window - Tools Menu Document ID: OMM-00165 Rev. C Pro 32r Operations Guide... - Page 64 Enables automatic change of the Left–Right value when the user changes the carriage height, especially during printing. Left-Right Calibration Dialog (See The difference between the left and right offset. 2 To run a Test Print. Figure 4-19 Left-Right Calibration Document ID: OMM-00165 Rev. C Pro 32r Operations Guide...
- Page 65 Software Overview 4.6.1.2 Blockout Sensor (Optional) See section for details on blockout printing and the use of this dialog box. Figure 4-20 Blockout Sensor Document ID: OMM-00165 Rev. C Pro 32r Operations Guide...
- Page 66 Before carrying out media position calibration, ensure that the Left / Right settings for slow speed have been calibrated. To carry out this calibration, follow the instructions in the Media Position Calibration dialog box. Figure 4-21 Media Position Calibration Dialog Box Document ID: OMM-00165 Rev. C Pro 32r Operations Guide...
- Page 67 Open the White Ink Stirring dialog box via the White Ink Stirring option on the Tools menu. The dialog enables you to turn off or on the Main Ink Tank Mixer and Ink System Stirring. When on, these options stir the white ink for 30 seconds. Figure 4-23 White Ink Stirring Document ID: OMM-00165 Rev. C Pro 32r Operations Guide...
- Page 68 Figure 4-24 Update Sub-menu 4.6.4.1 HASP Plug The Pro 32r uses a licensed software. You must have a valid license from EFI in order to use the software. The printer’s Figure 4-25 features are HASP protected and enabled according to the client’s agreement with EFI. In see the dialog box for updating the printer’s HASP Plug.
- Page 69 From the Tools menu, choose Update > Plug. Figure 4-26 Tools Menu > Update Sub-menu > Plug Option On the Plug Update dialog box, choose Get Code. Figure 4-27 Get Code Document ID: OMM-00165 Rev. C Pro 32r Operations Guide...
- Page 70 Software Overview Browse and select the file that you saved. Choose Open. Figure 4-28 Open Selected File Choose Update. The updated HASP Plug is activated. Figure 4-29 Update Input Code Document ID: OMM-00165 Rev. C Pro 32r Operations Guide...
- Page 71 Engineer mode. Figure 4-30 Heads Data Mask Select All: Selects all print heads for masking. 2 Selects no print heads for masking. You must then select the required print head(s) for masking. Document ID: OMM-00165 Rev. C Pro 32r Operations Guide...
- Page 72 4.6.6 Preferences Dialog Box Open the Preferences dialog box via the Preferences option on the Tools menu. Figure 4-31 Preferences Dialog Box NOTE: EFI recommends that you use the metric as system of measurement. Document ID: OMM-00165 Rev. C Pro 32r Operations Guide...
- Page 73 T-roller. • Print resume option: If the printer stops for any reason, this option enables the resumption of the printing from where (See In-line Finishing (Optional).) it stopped. (See Resuming Print) Document ID: OMM-00165 Rev. C Pro 32r Operations Guide...
- Page 74 • Short Measure: Only measures media location. C arried out automatically between copies in Blockout printing. 15 Automatic White Stirring: Periodically stirs white ink tanks. 16 Connecting the printer to the iPhone server, to enable the iPhone application (optional). Document ID: OMM-00165 Rev. C Pro 32r Operations Guide...
- Page 75 Introduction Operations Guide 5.0 Printer Setup Document ID: OMM-00165 Rev. C Pro 32r Operations Guide...
-
Page 76: Printer Setup
Print Table The print table on a Pro 32r printer is a uniformly perforated metal beam, leveled with the Y and T shafts. The print table supports the media fed through the printer, at the point where the print heads release ink. -
Page 77: Printer Carriage
Printer Setup Printer Carriage Figure 5-2 : Open Carriage Cover Document ID: OMM-00165 Rev. C Pro 32r Operations Guide... - Page 78 Printer Setup Ionizer Ionizer Ink and Print Heads System UV-LED UV-LED Unit Filter Unit Filter and Lamp and Lamp Figure 5-3 : Open Carriage Cover Document ID: OMM-00165 Rev. C Pro 32r Operations Guide...
- Page 79 Click OK and start printing. When a wrinkle is detected, the printer pauses and an error message appears. Click Yes to send the carriage to home position and address the wrinkle. Figure 5-5 Click No to ignore and continue printing. Document ID: OMM-00165 Rev. C Pro 32r Operations Guide...
- Page 80 Open the press roller and adjust the media. Close it and resume printing. Change the print table vacuum level. NOTE: When working with media that tend to wrinkle, give it extra stretch by printing with the wings up. Document ID: OMM-00165 Rev. C Pro 32r Operations Guide...
- Page 81 Figure 5-6 When a crash occurs, locate the obstruction and remove it. (If necessary, move the carriage manually.) Click OK to continue printing or HELP to access the relevant documentation. Figure 5-7 Document ID: OMM-00165 Rev. C Pro 32r Operations Guide...
- Page 82 Do NOT set the Carriage height below 1.6mm. NOTE: When changing the H motor height during printing, the Left-Right parameter should be changed accordingly. Carriage Height Display Figure 5-8 : Carriage H Motor Fields Document ID: OMM-00165 Rev. C Pro 32r Operations Guide...
- Page 83 Before measuring, specify the required height above the media in the spin box. Click the Measure Media icon. The detector measures the height and adjusts the carriage height. After adjustment, the carriage height displays in the Carriage H Motor Group Box. Document ID: OMM-00165 Rev. C Pro 32r Operations Guide...
-
Page 84: Cleaning Print Heads
2 seconds. Figure 5-10 : Select Print Heads Click Apply. Press each of the purge buttons on the left side of the printer in order to conduct the purge. Figure 5-11 Document ID: OMM-00165 Rev. C Pro 32r Operations Guide... - Page 85 Printer Setup 5.3.2 Wipe Print Heads https://inkjet.support.efi.com/doc.php?doc=4728 NOTE: See OMM-00166 Pro 32r Maintenance Guide at for the details about wiping print heads. Figure 5-12 Document ID: OMM-00165 Rev. C Pro 32r Operations Guide...
- Page 86 Figure 5-13 : Wipe Print Heads Figure 5-14 Hold Folded Wipe Caution: Only use fiber-free wipes to clean the nozzles. Document ID: OMM-00165 Rev. C Pro 32r Operations Guide...
- Page 87 In the Step Offset To The Right field, select the required offset for the nozzle test on the media. Choose Print Nozzle Test. The nozzle test is printed. (See samples on following pages.) Figure 5-15 : Nozzle Test with No Missing Data Document ID: OMM-00165 Rev. C Pro 32r Operations Guide...
- Page 88 Figure 5-16 : Nozzle Test with Missing Data Carefully examine the entire test. Repeat the purge and wipe. Carry out another test and carefully examine the results, until you are satisfied that all the nozzles are firing. Document ID: OMM-00165 Rev. C Pro 32r Operations Guide...
- Page 89 If the most concentrated area of the pattern is around +32, add 32 from the Fast value, and print the Pattern again to see if it moved to the 0 area. Figure 5-17 Document ID: OMM-00165 Rev. C Pro 32r Operations Guide...
- Page 90 Figure 5-18 : Test Pattern Before and After Calibration NOTE: Calibration to zero is the goal, but +/-16 is within acceptable tolerance. Repeat this test until you are satisfied with the result. Document ID: OMM-00165 Rev. C Pro 32r Operations Guide...
- Page 91 3 mm. To enable this feature, from the Preferences dialog box, check the Auto Left-Right check box, and choose OK. Figure 5-19 : Auto Left-Right Check Box on Preferences Dialog Box Document ID: OMM-00165 Rev. C Pro 32r Operations Guide...
- Page 92 The Left–Right values are automatically adjusted according to any change in the carriage height that is less than 3 mm. • For any change above 3 mm, manually calibrate the LR for Fast speed and choose Update again. Document ID: OMM-00165 Rev. C Pro 32r Operations Guide...
-
Page 93: Advanced Fine Tuning
Print Mode you want to fine tune. Set the number of cycles (1 - 10). One cycle prints a test pattern equaling Figure 5-21 the circumference of the Y Roll. Choose Print Pattern and examine the output. Document ID: OMM-00165 Rev. C Pro 32r Operations Guide... - Page 94 The print pattern is comprised of several rows, with a fixed scale to represent the number you need to add or subtract. Mark the most concentrated pattern area for each row and decide on the average number. Figure 5-22 : Test Print Example Document ID: OMM-00165 Rev. C Pro 32r Operations Guide...
- Page 95 Print the pattern again and make further adjustments if required. NOTE: During printing, all the pass values are inactive, except for the one being used. You can adjust the fine tuning during printing. Document ID: OMM-00165 Rev. C Pro 32r Operations Guide...
-
Page 96: Other Preparations
The name of the current operator is displayed at the top right corner of the Front end window. To change the operator name, choose Tools > Operators > Switch Operator and log in. Select the required name from the list and choose OK. Figure 5-25 : Operator Name Document ID: OMM-00165 Rev. C Pro 32r Operations Guide... - Page 97 Figure 5-26 : Operator Manager Enter the Administrator’s password and choose OK. To remove a user, select the user and choose Remove (–). Choose Yes to remove or No to cancel. Document ID: OMM-00165 Rev. C Pro 32r Operations Guide...
- Page 98 Enter the current Password, enter the new Password and confirm it. Choose OK. Reset password is enabled only in Engineer mode. The reset password button appears in the dialog and choosing it resets the password back to ‘1234’. Document ID: OMM-00165 Rev. C Pro 32r Operations Guide...
- Page 99 • Press Roller Pressure (S) (Currently disabled) • Tension • Press Roller Pressure (C) (Currently disabled) • Carriage Height • Vacuum (Currently disabled) • Carriage Movement margin • Advance Fine Tuning Document ID: OMM-00165 Rev. C Pro 32r Operations Guide...
- Page 100 Choose OK to save the settings. The media name appears in the Quick Settings drop-down list. To apply quick settings, select the defined media type from the list and choose Apply. The printer is now set up. List of media types with quick setting definitions Document ID: OMM-00165 Rev. C Pro 32r Operations Guide...
- Page 101 In the Quick Setup group, select the media you wish to remove and choose Remove. Figure 5-32 : Quick Setup “Remove” Button The following prompt appears. Figure 5-33 : Deletion Confirmation Prompt Choose Yes. The settings for the selected media are removed. Document ID: OMM-00165 Rev. C Pro 32r Operations Guide...
- Page 102 Figure 5-35 : Quick Settings Dialog Box Make changes in the dialog box or choose Fetch. The Fetch button sources the current printer settings and replicates them for the media’s settings. Choose OK to save changes. Document ID: OMM-00165 Rev. C Pro 32r Operations Guide...
- Page 103 A prompt appears for each media currently defined on the Printer and prompts you to choose accordingly. Media that are not in the list will be added. Figure 5-37 : Confirmation Prompt Choose Yes to replace the existing file, or No to cancel the procedure. Document ID: OMM-00165 Rev. C Pro 32r Operations Guide...
- Page 104 Introduction Operations Guide 6.0 Printer Operations Document ID: OMM-00165 Rev. C Pro 32r Operations Guide...
-
Page 105: Printer Operations
Printer Operations Printer Operations This chapter covers the process for both standard and backlit printing on the EFI Pro 32r, including defining job settings, cropping a job, and multi-roll printing (optional). EFI Pro 32r Start Up Procedures Perform all start-up checks and actions every day before printing. -
Page 106: Defining Job Settings
Printer Operations Defining Job Settings Figure 6-3 : Job Settings Dialog Box Document ID: OMM-00165 Rev. C Pro 32r Operations Guide... - Page 107 Edit/Measure: Access to the Edit/Measure dialog box. Roll Number Specify on which of the multi rolls you wish to print the Job. Job State To put the Job on Hold or Waiting to be printed mode. Document ID: OMM-00165 Rev. C Pro 32r Operations Guide...
-
Page 108: Remaining Media
The Feed Length is the spacing between the end the front edge of the media and the place of the printing and the end of the media. where it begins to unroll. Document ID: OMM-00165 Rev. C Pro 32r Operations Guide... - Page 109 Printer Operations After loading the media, enter the length of the loaded media, in the Media Settings dialog box. Figure 6-5 : Media Settings Dialog Box Document ID: OMM-00165 Rev. C Pro 32r Operations Guide...
- Page 110 Print in the Media Settings window. The signature is stamped on the remaining Media. Figure 6-7 : Signature Stamped on Remaining Media If you don’t set the remaining media length, a confirm/ cancel prompt appears. Figure 6-8 Document ID: OMM-00165 Rev. C Pro 32r Operations Guide...
-
Page 111: Changing Settings During Printing
Step & Repeat (in Y) Specify The Job Settings dialog box. number of copies. If you have specified a Gap, then it will appear in subsequent copies. Carriage Movement Margin The Preferences dialog box. Document ID: OMM-00165 Rev. C Pro 32r Operations Guide... -
Page 112: Resuming Print
When the machine stops, the job is automatically sent to the queue's red pane. Choose the job and drag it back to the green pane. Figure 6-10 : Resume Job Prompt To resume printing where it stopped, choose Yes. Document ID: OMM-00165 Rev. C Pro 32r Operations Guide... - Page 113 If you want to start printing the job from the beginning, choose No. Figure 6-11 If you want to continue with the printing, choose OK. If you wish to make adjustments, do so, and then choose OK. Document ID: OMM-00165 Rev. C Pro 32r Operations Guide...
-
Page 114: Grouping
Printer Operations Grouping The grouping feature enables to print Multi-Jobs and Multi-Layers. • Click the Grouping button in the Queue View to open the dialog box. Figure 6-12 Document ID: OMM-00165 Rev. C Pro 32r Operations Guide... - Page 115 Click OK to add the group to the print queue. To reopen the Multi-Jobs Group Settings dialog, double-click the group in the print queue. NOTE: All jobs in a group must have the same print mode Figure 6-14 Document ID: OMM-00165 Rev. C Pro 32r Operations Guide...
-
Page 116: Printing With White Ink
White Ink System Overview The Pro 32r carriage contains 10 print head blocks, two of which are white. The white heads can be aligned with the other heads, and can be shifted forwards with the software to enable faster print. The white print heads are located at each end of the plate. - Page 117 Figure 6-16 : White Ink Stirring Dialog Box Select both ON radio buttons to stir the White Ink, and close the dialog. This process takes a few seconds, but you can continue working while it takes place. Document ID: OMM-00165 Rev. C Pro 32r Operations Guide...
- Page 118 6.7.2.2 White Under - Color Print On White Layer Method can be used for printing on non-white media. White opaque layer prints first, allowing colored layer its full gamut. White Color Layer Banner Figure 6-18 Document ID: OMM-00165 Rev. C Pro 32r Operations Guide...
- Page 119 The opaque layer on top of the color enables the colored layer its full gamut. Transparent Color White Layer Print Result Media Figure 6-19 Document ID: OMM-00165 Rev. C Pro 32r Operations Guide...
- Page 120 6.7.2.4 Backlit – Color-White-Color With this method, an image is printed on transparent media, with layer of white and additional 50% density layer of color. Color (50%) White Layer Color Transparent Media Figure 6-20 Document ID: OMM-00165 Rev. C Pro 32r Operations Guide...
-
Page 121: Multilayer Printing
Blockout on transparent media - Prints both sides in a single run. The layers are: Color1 -White-Black-White-Color2. Side A Side B Color Print Result White Black White Color Transparent Media Figure 6-21 Document ID: OMM-00165 Rev. C Pro 32r Operations Guide... - Page 122 The print workflow of a job with white (White only, White under Color, White Over Color or Color-White-Color) is identical to printing a CMYK Job. Add the job to the Print Queue Print. Document ID: OMM-00165 Rev. C Pro 32r Operations Guide...
- Page 123 Click the “+” button to add the files. The Jobs are automatically mirrored and placed in the correct order. Figure 6-23 Figure 6-24 Set the files and click OK to add the Multi-layer Job to the printing Queue. Print. Document ID: OMM-00165 Rev. C Pro 32r Operations Guide...
- Page 124 Click the “+” button to add the files. The Jobs are automatically mirrored and placed in the correct order. Figure 6-25 Figure 6-26 Set the files and click OK to add the Multi-layer Job to the printing Queue. Print. Document ID: OMM-00165 Rev. C Pro 32r Operations Guide...
- Page 125 Click the “+” button to add the files. The Jobs are automatically mirrored and placed in the correct order. Figure 6-27 Figure 6-28 Set the files and click OK to add the Multi-layer Job to the printing Queue. Print. Document ID: OMM-00165 Rev. C Pro 32r Operations Guide...
-
Page 126: Media Handling
6.9.2 Media Path The media path depends on the media, weather it is printed and collected face-in or face-out. Face-In Face-Out Figure 6-29 Document ID: OMM-00165 Rev. C Pro 32r Operations Guide... - Page 127 Operator Workstation Print Tension Shaft (Y) Table (T) Roller Roller Pinch Pinch Roller Roller Purple Line = Blue Line = Media Face In Media Face Out Air Shaft Air Shaft Figure 6-30 Document ID: OMM-00165 Rev. C Pro 32r Operations Guide...
- Page 128 Lead the media to the tension roller, over the print table and the front of the tension roller, and then between the tension and pinch rollers. Close the pinch roller Figure 6-32 Figure 6-33 Document ID: OMM-00165 Rev. C Pro 32r Operations Guide...
- Page 129 Advance the media to reach the front air shaft and attach the media’s edge to the core. You can either paste it with paper masking tape, or by winding some media. Air Pressure Gauges NOTE: See for a table with the media parameters to set before printing. Document ID: OMM-00165 Rev. C Pro 32r Operations Guide...
- Page 130 (air cores). Center Secure shaft race to the center of the unwind shaft by Support turning the spanner nut. Hand-tighten ONLY. Media Roll Stand Media Roll Collar Figure 6-35 Document ID: OMM-00165 Rev. C Pro 32r Operations Guide...
- Page 131 NOTE: Do NOT inflate air core for the rewinding shaft. Caution: The fully loaded Unwind Shaft (Air Core) is extremely heavy. Care and safe lifting procedures should be observed or serious injury can result. Center Support Stand Figure 6-36 Document ID: OMM-00165 Rev. C Pro 32r Operations Guide...
-
Page 132: Printing On Mesh
Figure 6-37 Raise the wings of the print table by pushing the button marked Wings, on the front control panel. Turn off the vacuum supply with the vacuum regulator. Figure 6-38 Document ID: OMM-00165 Rev. C Pro 32r Operations Guide... - Page 133 If necessary, clean the print table from any ink residue. 6.10.0.1 Recommended Settings Tension Front air shaft (winding) Uninflated Rear air shaft (unwinding) Until about half roll than needs to lower gradually Vacuum table Head height 14mm Document ID: OMM-00165 Rev. C Pro 32r Operations Guide...
-
Page 134: Cropping A Job
Cropping a Job Before adding a job to the queue, you have the option of cropping it. From the front-end window, choose the Add icon. Figure 6-41 : Select a File Document ID: OMM-00165 Rev. C Pro 32r Operations Guide... - Page 135 Drag the cross-hair cursor over the image, to define the area that has to be cropped, and choose OK. The job's preview box shows the job before cropping, as well as the crop marks. Document ID: OMM-00165 Rev. C Pro 32r Operations Guide...
- Page 136 Printer Operations Choose Select Job. Figure 6-43 : Crop Preview Dialog Document ID: OMM-00165 Rev. C Pro 32r Operations Guide...
-
Page 137: Multi-Roll Printing (Optional)
To measure the media choose the Measure Media button. Figure 6-44 Measure Media Button When the measurement is complete, choose OK. Import the relevant file and specify the number of copies required. Document ID: OMM-00165 Rev. C Pro 32r Operations Guide... - Page 138 The file is 120 cm wide. If there is not enough room on current roll for the next copy (along the X-axis,) the copy is printed on the next roll. Figure 6-45 Document ID: OMM-00165 Rev. C Pro 32r Operations Guide...
-
Page 139: Skip White Printing (Optional)
‘skip’, the carriage returns to its home position and the media continues to pass through the printer. When the media reaches the area marked ‘print’, the carriage resumes printing. Figure 6-46 : Print with White Areas to Skip Document ID: OMM-00165 Rev. C Pro 32r Operations Guide... - Page 140 Skip-white option is used when printing on a challenging media that is tension sensitive and tends to wrinkle. When this option is activated, the press shaft opens when the media advances to skip white and closes as the printing resumes. Figure 6-47 : Skip White Settings Document ID: OMM-00165 Rev. C Pro 32r Operations Guide...
-
Page 141: Shutdown Procedure
The following procedure can be used for printer shutdown periods of up to 72 hours. For long-term shutdown (over 72 hours) or for printer storage, contact your EFI service representative. NOTE: Unless there is an emergency, do not use the Emergency Stop Buttons or Cord to turn off the printer. - Page 142 Introduction Operations Guide 7.0 Double-sided Printing Document ID: OMM-00165 Rev. C Pro 32r Operations Guide...
-
Page 143: Double-Sided Printing (Optional)
Head-to-head – Print Side A, then roll the media back, flip it, reload it, and print Side B. • Head-to-tail - Print Side A, cut the media at the end of the job, then take the printed media, load it onto the Printer, and print Side B. Document ID: OMM-00165 Rev. C Pro 32r Operations Guide... -
Page 144: Registration Print Marks
Backlit – Side A squares, side B cross, along the Y axis. Side A Side B A & B Figure 7-2 • Blockout – Horizontal Blockout label, on side A only Label - Side A Figure 7-3 Document ID: OMM-00165 Rev. C Pro 32r Operations Guide... - Page 145 The distance between the first printed Backlit registration marks and the image, along the Y-axis. The value is usually set to 600 mm, so the initial correction is done before the image starts to print. Y Gap Before Image Figure 7-4 Document ID: OMM-00165 Rev. C Pro 32r Operations Guide...
- Page 146 The distance between the printed backlit registration marks and the image along the X-axis. This value depends on the image and the media width. It is recommended to leave a 15 mm gap between the image and the marks. X Gap from Image Figure 7-5 Document ID: OMM-00165 Rev. C Pro 32r Operations Guide...
- Page 147 Blockout Label to Image - Sets the distance of the Blockout label from the Image. The minimum value is 30 mm, there’s no need for a higher value. Short Measure - Shortens the Measure Media function between copies in Blockout. Figure 7-6 Document ID: OMM-00165 Rev. C Pro 32r Operations Guide...
-
Page 148: Backlit Printing (Optional)
The image on Side B can be printed in with either 100% or 50% density (if enables in the Print Mode). Registered Backlit Side A Side B Printing Figure 7-7 To see the marks printed on Side A when printing Side B, use the LED illumination bars. Document ID: OMM-00165 Rev. C Pro 32r Operations Guide... - Page 149 The illumination bars should be manually switched on before printing Side B. The switch is located on the front right side of the printer. Backlit Light LED Illumination LED Illumination Button Pressed Bars Bars Figure 7-8 Document ID: OMM-00165 Rev. C Pro 32r Operations Guide...
- Page 150 Before starting to print Side A, cut two slits in the left and right edges of the media, at the edge of the print table. Print Table Edge Print Starting Point Figure 7-9 In the EFI FE, add the job to the queue. In the Job Settings dialog > Double Side group box, select the Backlit option, as shown in Figure 7-10.
- Page 151 Perform Measure Media. Turn the Backlit illumination ON. In the EFI FE, take the mjob from the Done pane to the Printing Queue. Double- click the mjob to open the Job Settings. In the Job Settings dialog’s Double Side group box, check the Backside check box, and click OK.
- Page 152 Misregistration - Insert a positive value in the left-right spin box, and a negative value in the up-down spin box. NOTE: You can also open the Printer Status window by double clicking the Ink Level icon on the bottom right side of the screen. Figure 7-15 Document ID: OMM-00165 Rev. C Pro 32r Operations Guide...
- Page 153 Load suitable media onto the printer. Perform Measure Media and prepare the printer to print. In the EFI FE, add the mjob to the Queue. In the Job Settings dialog’s Double Side group box, select the Backlit option. Start printing Side A.
- Page 154 Cut the media to release it from the Printer. NOTE: Do not change Double side settings in Preferences after printing Side A. Do not change the Job settings, except for the Backside check box. Figure 7-18 Print Side A Document ID: OMM-00165 Rev. C Pro 32r Operations Guide...
- Page 155 Turn the Backlit illumination ON. In the EFI FE, take the mjob from the Done pane to the printing queue. Double-click the mjob to open the Job Settings. In Job Setting window’s Double Side group, check Backside check box, and click OK.
-
Page 156: Blockout Printing
Head to between the stripes and the image, at a minimum of 30 mm. Head EFI recommends that you check the Short Measure check box. Short Measure In Blockout printing there is a Measure Media procedure that takes place before and during printing, between copies. - Page 157 The job starts printing. This procedure is carried out for each copy. Collect the printed media on a media core, using the front limiters. After printing, roll the media back onto its roll. Document ID: OMM-00165 Rev. C Pro 32r Operations Guide...
- Page 158 In both Head-to-Head and Head-to-Tail processes, if the blockout sensor does not recognize the two stripes, Figure 7-24 appears. If this message appears, carry out a blockout sensor calibration. (See Blockout Sensor Calibration for details) Figure 7-24 Document ID: OMM-00165 Rev. C Pro 32r Operations Guide...
- Page 159 Load and collect the media properly. From the Preferences dialog box, in the Double Side Printing group, choose the Head To Tail radio button. EFI recommends that you check the Short Measure check box. (See Short Measure.) Open a job and in the Job Settings dialog, select the Double-side check box and then the Blockout option.
- Page 160 Load the media for printing Side B. Remove the Air Shaft with the printed media, and load it to the rear side of the Printer without flipping or turning it. Figure 7-27 Document ID: OMM-00165 Rev. C Pro 32r Operations Guide...
- Page 161 In both Head-to-Head and Head-to-Tail processes, if the Blockout Sensor does not recognize the two stripes, Figure 7-29 appears. Figure 7-29 If this happens you should carry out sensor calibration. (See Blockout Sensor Calibration.) Document ID: OMM-00165 Rev. C Pro 32r Operations Guide...
- Page 162 Choose End. Rewind the media back by 50 mm until it is aligned again with the front edge of the print table and continue printing the second side. Figure 7-30 Document ID: OMM-00165 Rev. C Pro 32r Operations Guide...
- Page 163 Open the Blockout Sensor Calibration dialog, select Automatic and choose Calibrate. Make sure that the media is aligned with the front edge of the print table and continue printing the second side. Figure 7-31 Document ID: OMM-00165 Rev. C Pro 32r Operations Guide...
- Page 164 Introduction Operations Guide 8.0 In-line Finishing (Optional) Document ID: OMM-00165 Rev. C Pro 32r Operations Guide...
-
Page 165: In-Line Finishing (Optional)
Double Bladed – Two blades, 8 mm apart. Caution: The slitters' blades are extremely sharp! Extreme care must be taken when handling them. You must keep the blades retracted when not in use! Document ID: OMM-00165 Rev. C Pro 32r Operations Guide... - Page 166 In the Preferences dialog box, set the relevant parameters for the slitter mark locations (in the space between the print table and the T roller) and the mark length. Figure 8-2 Document ID: OMM-00165 Rev. C Pro 32r Operations Guide...
- Page 167 After printing the slit marks, the printer pauses and the following message displays: Figure 8-4 a. Yes: The Carriage moves to the Home Position. Place the Slitters. b. No: Continue printing. Document ID: OMM-00165 Rev. C Pro 32r Operations Guide...
- Page 168 To release the slitter at the end of the session, retract the blade and pull the handle. 8.1.2 Waste Media Collect the waste media or allow it to fall freely at the front of the printer and collect only the net print. Document ID: OMM-00165 Rev. C Pro 32r Operations Guide...
Need help?
Do you have a question about the Pro 32r and is the answer not in the manual?
Questions and answers