
Related Manuals for aFe Power 52-10002D


Summary of Contents for aFe Power 52-10002D
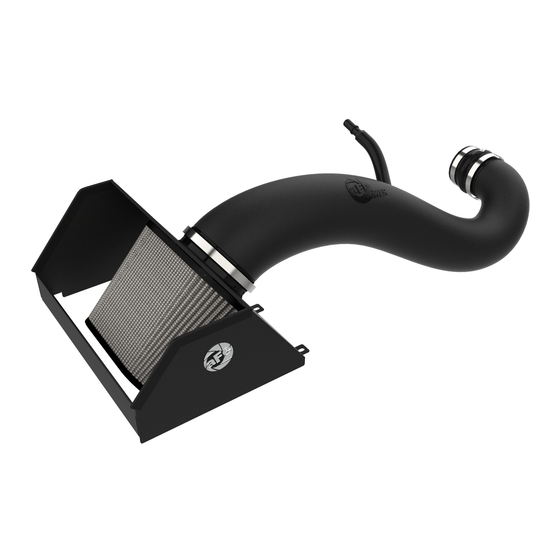
- Page 1 FLOW engineering Rapid Induction Cold Air Intake System Instruction Manual P/N: 52-10002D / 52-10002R ______________________________ Make: RAM Model: 1500 Year: 2019-2021 Engine: V6-3.6L...
- Page 2 • Please read the entire instruction manual before proceeding. • Ensure all components listed are present. • For technical support please call 951-493-7185. • Ensure you have all necessary tools before proceeding. • Do not attempt to work on your vehicle when the engine is hot. •...
- Page 3 Page 3...
- Page 4 REMOVAL Figure A Refer to Figure A for Steps 1-5 Step 1: Using an 8mm nut driver, loosen the two clamps 1 at the throttle body and factory filter housing. Step 2: Disconnect the temperature sensor wire harness 2 . Step 3: Using a 10mm deep socket and driver, remove the nut 3 securing the factory intake tube to the valve cover and set aside.
- Page 5 REMOVAL Figure B Refer to Figure B for Steps 6-7 Step 6: Using a 10mm socket and driver with extension, remove the 6x screws 5 around the factory filter housing, and remove the cover. Step 7: Remove the factory air filter. Page 5...
- Page 6 Refer to Figure C for Step 8 Step 8: Using the 6x screws 6 removed in step #6, secure your aFe POWER filter housing to the top of the factory filter housing and tighten using a 10mm socket with extension.
- Page 7 Refer to Figure D for Step 9 Step 9: Install your aFe POWER air filter into the filter housing by removing the clamp, then sliding the filter flange through the opening on the housing and pressing gently until the filter snaps into place. Place the filter clamp loosely on the filter flange when finished.
- Page 8 INSTALL Figure E Refer to Figure E for Step 10 Step 10: Install the supplied silicone reducer coupler 7 and clamp 8 with the smaller end on the throttle body. Tighten the clamp using an 8mm nut driver. Page 8...
- Page 9 INSTALL Figure F Refer to Figure F for Steps 11-12 Step 11: Install the supplied male quick connect fitting 9 into the factory female fitting. Step 12: Attach the supplied silicone hose 10 to the barbed end of the fitting. Page 9...
- Page 10 Refer to Figure G for Step 13 Step 13: Install the supplied rubber grommet and fitting 11 into your aFe Power intake tube as shown. A small amount of silicone grease may be used to ease the install of the fitting into the grommet.
- Page 11 INSTALL Figure H Refer to Figure H for Step 14 Step 14: Transfer the temperature sensor 12 from the stock intake tube into the fitting on your aFe Power intake tube. Page 11...
- Page 12 Refer to Figure I for Step 15-17 Step 15: Install your aFe POWER air intake tube 13 by sliding the remaining clamp over coupler on the throttle body, then inserting the tube end into the coupler and rotating it down counterclockwise into the filter flange.
- Page 13 INSTALL Figure J Refer to Figure J for Step 18 Step 18: Install the supplied seal trim along the top edge of your aFe POWER filter housing cutting slots if necessary to help with bend angles. Page 13...
- Page 14 Refer to Figure K for Step 20 Step 20: Check that all clamps are tight and connections are secure. Your installation is now complete. Thank you for choosing aFe POWER! NOTE: Check all bolts, clamps, and connectors after 100-200 miles.
- Page 15 PAGE LEFT BLANK INTENTIONALLY Page 15...
- Page 16 PAGE LEFT BLANK INTENTIONALLY Page 16...
- Page 17 PAGE LEFT BLANK INTENTIONALLY Page 17...
- Page 18 P/N: 90-59999 P/N: 90-50501 P/N: 90-50500 P/N: 77-46205 Sprint Booster V3 aFe POWER Backpack aFe POWER LED Flashlight aFe POWER Battery Pack P/N: 77-12010 P/N: 40-33205-B P/N: 40-10202 P/N: 40-10198 To purchase any of the items above, view airflow charts, dyno graphs, photos, and video; please go to aFepower.com...
-
Page 19: Warranty
Warranty General Terms: • aFe warrants their products to be free from manufacturer’s defects due to workmanship and material. • This warranty applies only to the original purchaser of the product and is non-transferrable. • Proof of purchase of the aFe product is required for all warranty claims. •... - Page 20 advanced FLOW engineering, inc. 252 Granite Street Corona, CA 92879 TECH: 951.493.7185 E-Mail:Tech@aFepower.com P/N: 06-81434...
Need help?
Do you have a question about the 52-10002D and is the answer not in the manual?
Questions and answers