Advertisement
Quick Links
advanced FLOW engineering
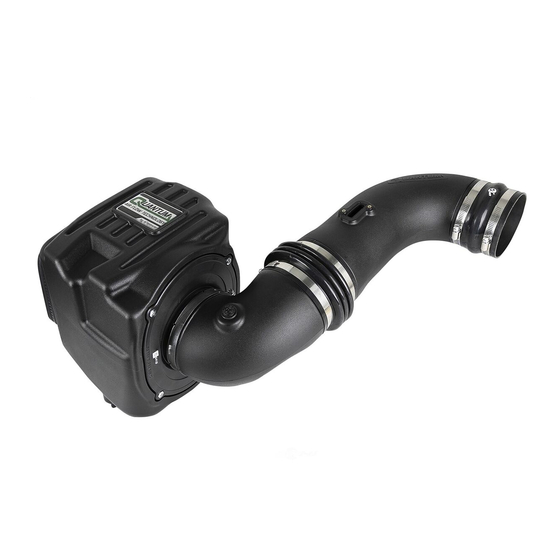
Quantum Air Intake System
Instruction Manual
Make:
Chevrolet
Make:
GMC
Note:
Includes Denali Trim.
P/N: 53-10005D / 53-10005R
Model:
Silverado HD
Model:
Sierra HD
Year:
Engine:
2007.5-2010
Year:
Engine:
2007.5-2010
V8-6.6L Duramax (LMM)
V8-6.6L Duramax (LMM)
Advertisement

Related Manuals for aFe Power QUANTUM 53-10005D


Summary of Contents for aFe Power QUANTUM 53-10005D
- Page 1 advanced FLOW engineering Quantum Air Intake System Instruction Manual P/N: 53-10005D / 53-10005R Make: Model: Year: Engine: Chevrolet Silverado HD 2007.5-2010 V8-6.6L Duramax (LMM) Make: Model: Year: Engine: Sierra HD 2007.5-2010 V8-6.6L Duramax (LMM) Note: Includes Denali Trim.
-
Page 2: Emissions Disclaimer
• Please read the entire instruction manual before proceeding. • Ensure all components listed are present. • If you are missing any of the components, call customer support at 951-493-7100. • Ensure you have all necessary tools before proceeding. • Do not attempt to work on your vehicle when the engine is hot. •... - Page 3 A1/A2 aFepower.com Page 3...
- Page 4 REMOVAL Figure A Refer to Figure A for Steps 1-4 Step 1: Disconnect the Mass Air Flow sensor. 1 Step 2: Using an 8mm nut driver, loosen the clamps 2 from the intake tube. Step 3: Remove the factory intake tube. 3 Step 4: Remove the factory airbox 4 out of the vehicle.
- Page 5 REMOVAL Figure B Refer to Figure B for Steps 5-6 Step 5: Slide the aFe filter into the aFe housing. Install the aFe filter using a #3 Phillips screwdriver. Tighten all (x4) screws. Step 6: Install the supplied filter coupling 5 onto the air filter. aFepower.com Page 5...
- Page 6 REMOVAL Figure C Refer to Figure C for Steps 7-8 Step 7: Remove the retaining plug 6 from the bottom of the factory airbox and transfer it to the aFe housing. Step 8: Install the supplied trim seal 7 on the opening of the aFe housing. Page 6...
- Page 7 REMOVAL Figure D Refer to Figure D for Step 9 Step 9: On the mounting plate, move the front right monting grommet 8 to the hole on the left. Install the aFe housing assembly into the vehicle. Firmly push it into the factory mounting grommets. aFepower.com Page 7...
- Page 8 INSTALL Figure E Refer to Figure E for Steps 10-11 Step 10: Remove the filter minder and grommet 9 from factory airbox. Install the grommet into the aFe elbow tube and then push in the filter minder. If you choose not to use the filter minder, just plug off the hole with the supplied plug with tab.
- Page 9 INSTALL Figure F Refer to Figure F for Steps 12-13 Step 12: Install the aFe elbow tube assembly onto the filter coupling. Align elbow tube but do not tighten the clamp. Step 13: Place the supplied #080 11 clamp and bellows coupling 12 onto the aFe elbow tube. aFepower.com Page 9...
- Page 10 INSTALL Figure G Refer to Figure G for Steps 14-15 Step 14: Slide the supplied hump coupling 13 and #072 clamp 14 over the turbo inlet. Step 15: Place the other supplied #072 15 clamp over the hump coupling and #080 16 clamp over the bellows couplings.
- Page 11 INSTALL Figure H Refer to Figure H for Steps 16-17 Step 16: Using a T-20 Torx driver, remove the MAF sensor 17 from the factory airbox. Step 17: Install the MAF sensor into the aFe intake tube using the provided M4 screws and a T-20 Torx driver.
- Page 12 Step 19: Reconnect the MAF sensor. 18 Step 20: Check all the components are tight and secure. Your installation is now complete. Thank you for choosing aFe POWER. NOTE: Check all bolts, clamps, and connectors after 100-200 miles. Page 12...
- Page 13 PAGE LEFT BLANK INTENTIONALLY Page 13...
- Page 14 PAGE LEFT BLANK INTENTIONALLY Page 14...
- Page 15 PAGE LEFT BLANK INTENTIONALLY aFepower.com Page 15...
- Page 16 advanced FLOW engineering, inc. 252 Granite Street Corona, CA 92879 https://afepower.com/contact...
Need help?
Do you have a question about the QUANTUM 53-10005D and is the answer not in the manual?
Questions and answers