
Related Manuals for ARTHUR HOLM AH1


Summary of Contents for ARTHUR HOLM AH1
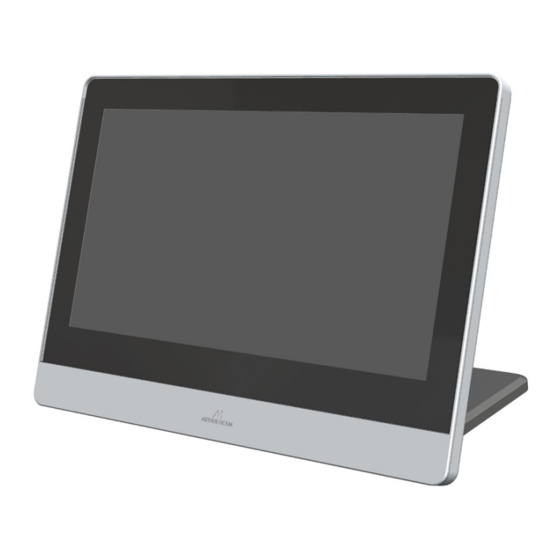
- Page 1 User manual AH12TX16GA AH17TXHDGA AH19TX16GA AH22TX16GA Manually foldable professional monitors...
-
Page 3: Table Of Contents
Table of contents EC REGULATIONS & SECURITY SAFETY INSTRUCTIONS APPLICATIONS FEATURES BOX CONTENTS CONNECTIONS TROUBLE SHOOTING CONTROLS OSD MENU PRODUCT HANDLING INPUT CONNECTORS INPUT SIGNALS PRODUCT WARRANTY... - Page 5 Welcome Thank you for purchasing an ARTHUR HOLM product. Our product range has been designed to create the perfect meeting room, where the screens are a part of the interior design as well as essential communication tools. Please, read this installation and operating instructions carefully and keep them in a safe place for future reference.
-
Page 6: Ec Regulations & Security
EC Regulations and Security ATTENTION: Do not disassemble or modify the device in any way. This symbol warns of the presence of dangerous un-insulated voltages inside some of the components, of sufficient magnitude to expose people to risk of electronic shock. This symbol draws attention to important use and maintenance instructions in the manual that accompanies the unit. -
Page 7: Safety Instructions
Safety instructions POWER AND EXTENSIONS CORDS – Use the appropriate power cord with the correct plug type – Do not overload wall outlets or power cords – Make sure the total ampere passed through a extension cord does not exceed the maximum allowed by the cable used –... -
Page 8: Applications
System Description APPLICATIONS The AH1 family consists of a manually foldable monitor in milled aluminium with anodised finish and dark cast iron base. Flush antiglare protection glass with elegant black marking. This TFT-LCD product range is specially designed for desk integration at:... -
Page 9: Connections
Connections POWER CONNECTION 1. Plug the power cable from the power supply into an AC socket of 100-240 Vac, 50-60Hz. 2. Plug the 12Vdc cable into the socket on the unit SIGNAL CONNECTION 1. Use the DVI-I input to connect a DVI-D signal or an analog RGB signal (VGA). -
Page 10: Controls
Controls OSD MONITOR CONTROL The OSD buttons, to control or configure the monitor, are located on the lower body housing of the system MENU SELECT DOWN LEFT RIGHT SOURCE POWER MENU Activates the OSD menu. Exits the OSD menu when is active Selects the OSD menu function DOWN... -
Page 11: Osd Menu
OSD menu ACCESSING THE MENU SYSTEM – With the OSD off, push the MENU button to activate the main OSD menu – Press the UP and DOWN button to move from one function to another. Please refer to the following sections below to view a complete list of all the functions available for the monitor –... - Page 12 OSD menu PICTURE Noise Reduction Adjusts the image noise filter Middle High Default Screen (Only for analogue signals) Auto Adjust Horizontal Pos. Vertical Pos. Size Phase Backlight Adjust the backlight of the screen Colour Range 0 – 255 16 – 235...
- Page 13 OSD menu OPTION OSD Language Selects OSD language Restore Factory Default Adjusts the parameters as factory Blending OSD window transparency Middle High OSD Duration Adjusts the time that the OSD menu window remains on screen Software Update (USB) Used for firmware upgrade Mirror 0: Image with no flip 1: Vertical flip...
-
Page 14: Product Handling
Monitor handling To adjust the inclination of the monitor, hold it by it’s sides and move it. The monitor has rubber bumper feet fitted on the base to stop the monitor sliding on the table surface. The cables can be secured to the plate with two phillips screws to avoid them getting under the stand. -
Page 15: Input Connectors
Input connectors 12V D.C. Power supply input connector DVI 2 DVI-D input signal. Connect a DVI (digital) input signal and select DVI 2 on the OSD monitor menu DVI 1/ DVI A DVI-I input signal. Connect a DVI (digital) input signal and select DVI 1 on the OSD monitor menu. -
Page 16: Input Signals
Input Signals AH12TX16GA / AH19TX16GA RESOLUTION Horizontal freq (KHz) Vertical freq (Hz) Scanning type 800x600@60Hz 37.879 60.317 Progressive 800x600@72Hz 48.077 72.188 Progressive 800x600@75Hz 46.875 75.000 Progressive 1024x768@60Hz 48.363 60.005 Progressive 1024x768@70Hz 56.476 70.070 Progressive 1024x768@75Hz 60.023 75.030 Progressive 1280x720@60Hz 44.697 59.915 Progressive 1280x768@60Hz... - Page 18 Information on Disposal for users of waste of Electrical & Electronic equipment This symbol on the products and/or accompanying documents means that used electrical and electronic products should not be mixed with general household waste. For proper treatment, recovery and recycling, please take these products to designated collection points, where they will be accepted on a free of charge basis.
-
Page 19: Product Warranty
Product Warranty Albiral Display Solutions S.L WARRANTY - Valid from January 2016 This warranty covers the original product purchase for a period of 24 months from the date of purchase. GENERAL WARRANTY TERMS A) Parts. During the above mentioned warranty period, the replacement of any electronic and mechanical parts against any defects in manufacturing. - Page 20 Our Product Patents P 24821 RUPC MU 1996 ES00 P 24821 USPC MU 16997 ES00 P 27178 EPPC MU 17180 ES00 P 27178 RUPC MU 17301 ES00 P 27178 USPC MU 17322 ES00 P 2784 EPPC MU 17376 ES00 P 2784 RUPC MU 1741 ES00 P 2784 USPC Fàtima 25, Sant Hipòlit de Voltregà...
Need help?
Do you have a question about the AH1 and is the answer not in the manual?
Questions and answers