
Related Manuals for SMITH SYSTEM Silhouette


Summary of Contents for SMITH SYSTEM Silhouette
- Page 1 Assembly Instructions Silhouette Sit-Stand Desk If you have damaged or missing components, please contact customer service at 1-800-328-1061 Document #: 179690 REVISED: 11/2020...
- Page 2 Hardware and Components BUTTERFLY PLATE (PN: 60058) SIT-STAND DESK TOP QTY. 1 (TOP FOR 01631 SHOWN) QTY. 1 SIT-STAND BASE (PN: 60058) QTY. 1 SIT-STAND COLUMN CASTER WRENCH (PN: 60060) (PN: 17576) QTY. 1 QTY. 1 CASTER (PN: 17576) PLASTIC LOOP CLAMP 5MM ALLEN WRENCH QTY.
- Page 3 Special Notes: • TOOLS REQUIRED: • Drill w/#2 Phillips driver bit, or #2 Phillips head screwdriver. • OPTIONAL TOOLS: • Drill w/5mm hex driver bit. • Check that all components are accounted for and undamaged before assembling. • Please assemble the product in a clean and dry area. •...
- Page 4 Assembly Instructions 1. Place wood top on clean smooth surface upside down with the pilot holes facing up. 2. Position the butterfly plate, with the counterbored holes facing up, to line up with the pilot holes in the top as shown. Install the four #10 x 5/8” Wood Screws to secure the plate to the top.
- Page 5 3. Position the column over the butterfly plate so that the eight holes line up. Make sure that the activation cable is coming out of the side of the column as shown. Secure the column to the butterfly plate using the eight M6 x 10mm Socket Head Bolts with the 5mm Allen Wrench provided or with an optional drill with 5mm hex driver bit.
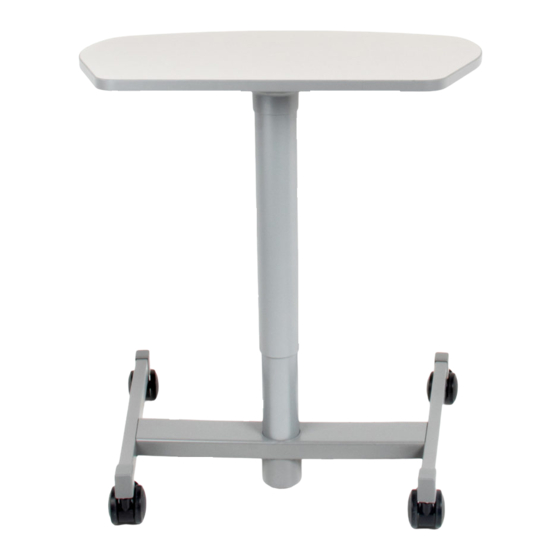
- Page 6 5. Secure the two Plastic Loop Clamps to the top by installing two #10 x 5/8” Wood Screws. 6. Insert the base onto the column making sure the longer legs face the edge of the table with the activation handle and that the three holes on the base line up with the three holes on the column.
- Page 7 7. Install the four casters into each end of the base using the caster wrench provided. 8. Flip the Sit-Stand Desk over. ASSEMBLY COMPLETE Document #: 179690 REVISED: 11/2020...
Need help?
Do you have a question about the Silhouette and is the answer not in the manual?
Questions and answers