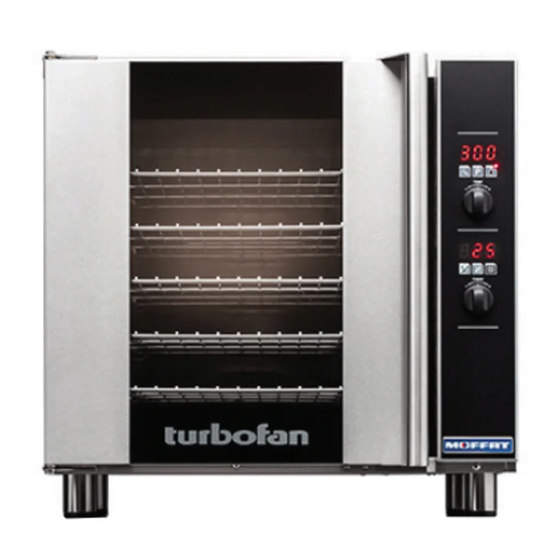
turbofan 30D Series Service Manual

turbofan 30D Series Service Manual

Digital operation single speed fan

Advertisement

30DSERIES
E 3 2 D S e r i e s
( D i g i t a l O p e r a t i o n )
( S i n g l e S p e e d F a n )
Service Manual
11 May 2015
Revision 1, Amdt 1

Advertisement

Table of Contents
loading
Need help?

Need help?

Do you have a question about the 30D Series and is the answer not in the manual?

Questions and answers

Summary of Contents for turbofan 30D Series

  • Page 1 30DSERIES E 3 2 D S e r i e s ( D i g i t a l O p e r a t i o n ) ( S i n g l e S p e e d F a n ) Service Manual 11 May 2015 Revision 1, Amdt 1...
  • Page 2 MANUFACTURED BY Moffat Limited Christchurch New Zealand INTERNATIONAL CONTACTS AUSTRALIA Moffat Pty Limited E.Mail: vsales@moffat.com.au Main Office: (tel) (03) 9518 3888 (fax) (03 9518 3833 Service: (tel): 1800 622 216 Spares: (tel): 1800 337 963 Customer Service: (tel): 1800 335 315 (fax): 1800 350 281 CANADA Serve Canada...
  • Page 3: Table Of Contents

    Contents List E32D Series Turbofan Convection Oven (Single Speed). Model Numbers Covered in this Manual E32D4 - Turbofan Oven - 4 Tray Convection Oven. E32D5 - Turbofan Oven - 5 Tray Convection Oven. 1. Specifications ....................2 2. Installation ......................3...
  • Page 4: Specifications

    Specifications E32D - (Single Speed Fan) E32D4 E32D5 220V, 1P+N+E,50/60Hz, 6.5kW 208V, 1P+N+E, 50/60Hz, 5.8kW Oven Power Ratings 230-240V, 1P+N+E, 50/60Hz, 6.5kW 220-240V, 1P+N+E, 50/60Hz, 6.5kW 5 x US Full Pan Tray Capacity 4 x US Full Pan 5 x 1/1 GN Tray Tray Spacing 110mm / 4 ”...
  • Page 5: Installation

    It is most important that this oven is installed correctly and that oven operation is correct before use.  If you have any questions regarding the proper installation and / or operation of this oven, please contact your local Turbofan distributor. Unpacking Clearances 1.
  • Page 6: Electrical Connection

    Installation Electrical Connection Positioning and Levelling of Oven 1. Correctly locate the oven into its final operating position Warning and using a spirit level, adjust the oven feet so that the This oven must be earthed / grounded. oven is level and at the correct height. Each oven should be connected to an adequately protected Initial Start-Up power supply with an appropriate three wire power cord.
  • Page 7: Operation

    Operation Oven Control Panel - E32D Series (Single Speed Fan) For detailed operation instructions please refer to the User Manual supplied with your E32D oven. Temperature Display Programming Key and LED - Shows the - Used preset chamber temperature. to enter the ‘Programming’ mode. When used with ‘Temperature’...
  • Page 8: Changing User Parameters

    Operation Changing User Parameters With the Oven in ‘Stand-By’ Mode:- ENTER THE OPERATOR PARAMETER MODE. Press 'Steam' and 'Start / Stop' keys together. ‘Temperature’ Display will show ‘PAS’. The ‘Time’ Display will flash. SET PASSWORD Rotate ‘Timer Control’ to set password; (123) (Operator Password).
  • Page 9: Error Messages And Faults

    Error Messages and Faults Controller Fault Codes Fault Code Cause Door Open. Door Microswitch, open circuit. Oven Temperature Probe Fault, - Open Circuit - check temperature probe connection PT1 on board. Err 001 - Short Circuit - Probe damaged, replace probe. - Probe value is outside the conversion range.
  • Page 10: Parts Replacement

    Parts Replacement Access 5.1.1 Front Control Panel ......................9 5.1.2 LH & RH Side Access Panels ....................9 Replacement 5.2.1 Controller ..........................9 5.2.2 Encoder ..........................9 5.2.3 Temperature Probe ......................10 5.2.4 Door Microswitch ........................ 10 5.2.5 Cooling Fan ........................10 5.2.6 Lighting Fuse Holder ......................
  • Page 11: Access

    Parts Replacement 5.1 Access 5.2 Replacement 5.1.1 Front Control Panel 5.2.1 Controller 1. Remove screw on underside of control panel. 1. Remove control panel (refer 5.1.1). 2. Lift panel up to unhook at top. 2. Disconnect cables (7). 3. Undo securing nuts (8) 7mm, 9/32”. Securing Nuts (8) 5.2.2 Encoder...
  • Page 12: Temperature Probe

    Parts Replacement 5.2.3 Temperature Probe 5.2.4 Door Microswitch 1. Remove control panel (refer 5.1.1). 1. Remove control panel (refer 5.1.1). 2. Disconnect temperature probe cable from controller. 2. Remove side panel. 3. Remove RHS oven rack. 3. Remove wires from switch. 4.
  • Page 13: Oven Lamp Assembly (Round Lamp)

    Parts Replacement 7. Depress spring loaded 5.2.7 Oven Lamp Assy (Round Lamps) locking tabs on rear of 1. Remove the oven rack light assy and push assy and LH side rack from into oven and remove. Depress Spring oven. 8. Refit oven lamp assy in Tabs 2.
  • Page 14: Water Solenoid

    Parts Replacement 5.2.12 Water Solenoid 5.2.15 Contactor 1. Turn Off water. 1. Remove RH side panel. 2. Remove RH side panel. 2. Remove wires from (refer 5.1.2) contactor terminals. Note positions. 3. Remove wires from water solenoid. 3. Pull contactor down to disengage clip then pull 4.
  • Page 15: Adjustment & Calibration

    Parts Replacement 5.3 Adjustment & Calibration 5.3.4 Adjusting Door Catch If the door sealing requires adjustment, carry out the following to adjust the door catch:- 5.3.1 Door Microswitch 1. Check that the door seals correctly when closed, by 1. Remove control panel. (refer 5.1.1) placing a sheet of paper between the door and the seal.
  • Page 16: Controller Programming

    Controller Programming Controller Parameters Controller Parameters - E32D Series - Single Speed Ovens With the Oven in ‘Stand-By’ Mode:- ENTER THE OPERATOR PARAMETER MODE. Press 'Steam' and 'Start / Stop' keys together. Upper Display will show Lower Display will flash SET PASSWORD (Service / Factory Password - 321) Rotate ‘Timer Control’...
  • Page 17 Controller Programming Parameter Unit of Description Default Pass Number Measurement Temperature Scale. Defines temperature scale used ---- (C = °C, F = °F). Changing scale from °F to °C will reset all temperature parameters to their default values. Oven Model. As the oven controller is used on E31 and E32 Ovens.
  • Page 18 Controller Programming Parameter Unit of Description Default Pass Number Measurement Program Mode - Pre-Heat Temp Condition. In Program Mode only. The temperature above ‘Set Temperature’ that the oven will ˚C (˚F) pre-heat to. (To allow for heat loss during door opening and cold product loading).
  • Page 19: Circuit Schematics

    Circuit Schematics Electrical Schematic E32D4 / E32D5 Turbofan Oven (To LOT # 1035999) E32D Series (Single Speed Fan) Service Manual May 2015 Revision 1, Amdt 1...
  • Page 20 Circuit Schematics Electrical Schematic E32D4 / E32D5 Turbofan Oven (From LOT # 1036000) E32D Series (Single Speed Fan) Service Manual May 2015 Revision 1, Amdt 1...
  • Page 21: Wiring Diagrams

    Wiring Diagrams Wiring Diagram E32D4 / E32D5 Turbofan Oven (To LOT # 1035999) E32D Series (Single Speed Fan) Service Manual May 2015 Revision 1, Amdt 1...
  • Page 22 Wiring Diagrams Wiring Diagram E32D4 / E32D5 Turbofan Oven (From LOT # 1036000) E32D Series (Single Speed Fan) Service Manual May 2015 Revision 1, Amdt 1...
  • Page 23: Exploded Parts Listings

    Exploded Parts Listings Outer Assembly Item Part Description *RPL 234224 SIDE COVER LH 233583 TOP PANEL 233585 SIDE COVER RH 232379 ADJUSTABLE LEG 3” / 76mm 232380 FOOT O-RING 234583 DOOR ASSEMBLY (COMPLETE) *Recommended Parts Level Number of Units In-Service. 5-10 A+B+C 10-50...
  • Page 24 Exploded Parts Listings Elements & Motor *Recommended Parts Level Number of Units In-Service. 5-10 A+B+C 10-50 A+B+C+D Item Part Description *RPL 236214 LAMP HOLDER (Bulb Included). 231814 LAMP G9/25W 230V HALOGEN. 021354 GASKET. 021352 GLASS LENS. 021353 SUPPORT FRAME. 232666 OVEN SEAL 010761 GROMMET 1½”...
  • Page 25 Exploded Parts Listings Oven Racks Item Part Description *RPL 233649 OVEN RACK E32 18” x 26” 234658 SIDE RACK LH 5 TRAY 234656 SIDE RACK LH 4 TRAY 234660 SIDE RACK LH 3 TRAY 235260 SIDE RACK LH 5xGN TRAY 233552 THUMBSCREW 234659...
  • Page 26 Exploded Parts Listings Gear Plate Item Part Description *RPL 021057 SPRAY NOZZLE ASSEMBLY 234774 WATER TUBE 013215 BACK NUT BRASS ¼” BSP FEMALE CONNECTOR ⅜” BSP TO ¼” COMP 020869 020851 WATER SOLENOID 025922 ADAPTOR BRASS ¾” BSP. (USA / CANADA ONLY) Shown 021527 WASHER RUBBER.
  • Page 27 Exploded Parts Listings Door Assembly Item Part Description *RPL 235275 DOOR OUTER GLASS ASSEMBLY 234626 DOOR HINGE ASSEMBLY TOP 234725 DOOR CATCH BLANKING PLATE 041045 SCREW 8 x ⅜" TRUSS HD PHL NP 234779 INNER GLASS RETAINING CLIP 234757 DOOR INNER GLASS ASSY 234767 INNER GLASS PIVOT SPACER 234627...
  • Page 28 Exploded Parts Listings Controller Item Part Description *RPL 234448 CONTROL PANEL LAMINATED E32D 234906 DIGITAL CONTROL BOARD KIT (SINGLE SPEED FAN) 234434 OVEN TEMPERATURE PROBE 234450 ENCODER MOMENTARY 228132 TUBE CLIP #5 233865 BADGE MOFFAT 234447 KNOB TFAN INDEX 041425 SCREW M4 X 6 PAN HD PHIL NP *Recommended Parts Level Number of Units In-Service.
  • Page 29: Accessories

    Accessories SK Stands DSK Double Stacking Kit Vent Tube - Part No. 235299 SK32 — Stand for E32. Spacer Frame - Part No. 235037 735mm/29”(W) x 650mm / 25½”(D) x 900mm/35½”(H). Accepts US Half and US Full Pan. Base Stand - fitted with Castors Base Stand - fitted with Adjustable Feet E32D Series (Single Speed Fan) Service Manual May 2015...
  • Page 30: Appendix 1 - Reversing Oven Door

    Appendix A Reversing Oven Door 11. Remove inner glass latching Reversing the Oven Door studs and fit to opposite side of door using Loctite 243 or NOTE: similar to secure.  Refit all screw fasteners using a low-mid strength thread locking adhesive unless otherwise stated. Remove Latching Studs ...
  • Page 31 Appendix A Reversing Oven Door 18. Remove Blanking Screw and Door Catch from front of Adjust Door for Correct Alignment. oven and swap around (refer ‘Adjusting Door Catch’). Check alignment and operation of the door. Ensure that the door is Door Catch Blanking Screw correctly aligned horizontally and...
  • Page 32 30DSERIES E 3 2 D S e r i e s ( D i g i t a l O p e r a t i o n ) ( S i n g l e S p e e d F a n ) Service Manual 11 May 2015 Revision 1, Amdt 1...

This manual is also suitable for:

E32d seriesE32d4 seriesE32d5 series

Table of Contents