
Related Manuals for turbofan G32M


Summary of Contents for turbofan G32M
- Page 1 INSTALLATION / OPERATION MANUAL G32M CONVECTION OVEN G32MS CONVECTION OVEN F24824-15...
- Page 2 MANUFACTURED BY Moffat Limited PO Box 10001 Christchurch New Zealand (03) 389 1007 Fax: (03) 389 1276 WORLD-WIDE BRANCHES UNITED KINGDOM Blue Seal Units 6-7, Mount Street Business Park Mount Street, Nechells Birmingham B7 5QU (121) 327 5575 Fax: (121) 327 9711 UNITED STATES Moffat Inc 3765 Champion Blvd...
-
Page 3: Table Of Contents
Contents Introduction ......................2 Installation ......................3 Before Connection Supply Requirements Location Electrical Connection Gas Connection Water Connection Before Use Lighting Instructions Reversing the Door Specifications....................... 7 Operation ......................8 Description of Controls Baking Roast ‘n’ Hold Oven Racks Cooking Guide ....................12 Baking Bake-Off Roasting... -
Page 4: Introduction
Introduction We are confident that you will be delighted with your TURBOFAN OVEN, and it will become a most valued appliance in your commercial kitchen. A new oven can seem very complex and confusing at first glance. To ensure you receive the utmost benefit from your new Turbofan, there are two important things you can do. -
Page 5: Installation
Installation Installation Requirements It is most important that this oven is installed correctly and that operation is correct before use. Installation shall comply with local electrical, gas, health and safety requirements. This appliance must be installed in accordance with National installation codes and in addition, in accordance with relevant National / Local codes covering gas and fire safety. -
Page 6: Location
Installation Supply Requirements (continued) Natural Gas Natural Gas - UK Propane - UK (G20) (G31) Supply Pressure 1.13 kPa 2.75 kPa 20 mbar 37 mbar (4½” w.c.) (11” w.c.) Operating Pressure 0.85 kPa 2.25 kPa 10 mbar 35 mbar (3.5” w.c.) (9.0”... -
Page 7: Gas Connection
Installation Gas Connection • A ½" BSP female elbow (½" N.P.T female - Canada only) is provided at the bottom rear of the oven. • A restraint chain anchor has been provided above the gas connection point for fitment of a restraint chain when a flexible gas line is fitted. -
Page 8: Reversing The Door
Installation Reversing the Door Important: THE FOLLOWING PROCEDURE SHOULD ONLY BE PERFORMED BY A QUALIFIED SERVICEPERSON. If desired, a left hand hinged oven door can be changed to a right hand hinged door (or vice versa). • While supporting the door, undo the door hinges from the oven. Remove the door. •... -
Page 9: Specifications
Specifications ( 28") (28") (32") 28" (2") Front Side (2¾") (3½") Plan Natural Gas Natural Gas - UK Propane - UK (G20) (G31) Input Rating 35 MJ/hr 35 MJ/hr 9.5 kW 9.5 kW (N.H.G.C.) (33,000 Btu/hr) (33,000 Btu/hr) (0.91 m³/hr) (0.67 kg/hr) Injector Size Ø2.80 mm... -
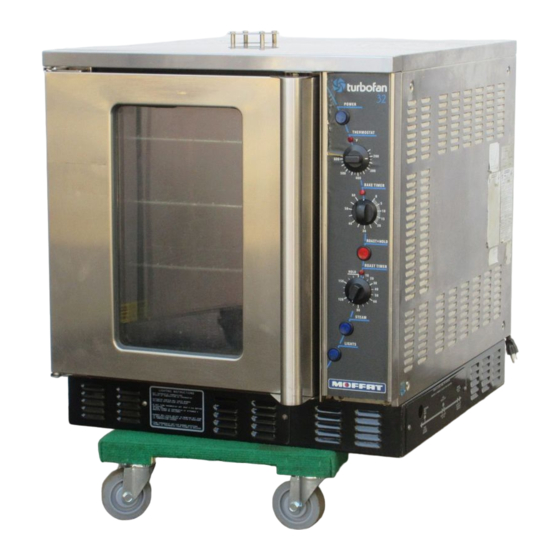
Page 10: Operation
Operation Operation Guide Important: Ensure that a clearance of 50mm (2”) from the oven ceiling is maintained when placing product on the top shelf. This ensures correct operation of the oven. Description of Controls Power Depress to switch power on or off (switch illuminates when power is on). - Page 11 Operation Baking 1. Turn power on Power switch illuminates when it is depressed and latched in the down position. 2. Set thermostat to desired temperature The heating indicator light will illuminate whenever the burner is cycling on to maintain the set temperature.
- Page 12 Operation Roast ‘n’ Hold 1. Turn power on Power switch illuminates when it is depressed and latched in the down position. 2. Set thermostat to desired temperature The heating indicator light will illuminate whenever the burner is cycling on to maintain the set temperature.
-
Page 13: Oven Racks
Operation Oven Racks The oven is supplied with four general purpose oven racks. These racks incorporate two important safety features: • Self Supporting: When fitted, the oven racks are self supporting and will not drop or angle down when the racks are withdrawn during operation, when loading and unloading products on racks or when attending to the product being cooked during it’s cook cycle. -
Page 14: Cooking Guide
Cooking guide This TURBOFAN oven will cook a greater quantity of food faster, at a lower temperature and more evenly than an ordinary oven. As many excellent recipe books are published, it is not our intention to list recipes, but to provide a temperature and time chart as a guide. -
Page 15: Roasting
Cooking guide Roasting Set the oven temperature to 150-160°C (300-320°F). The hot air circulating in the oven reduces moisture loss and shrinkage. Roasting times are reduced by approximately 20 minutes per kg. MEAT TIME per kg Beef - Rare 30-40 min Beef - Medium 40-50 min Beef - Well Done... -
Page 16: Cleaning And Maintenance
Cleaning Cleaning Guidelines Caution: ALWAYS TURN OFF THE POWER SUPPLY BEFORE CLEANING. THIS UNIT IS NOT WATER PROOF. DO NOT USE WATER JET SPRAY TO CLEAN INTERIOR OR EXTERIOR OF THIS UNIT. Exterior Clean with a good quality stainless steel cleaning compound. Harsh abrasive cleaners may damage the surface. -
Page 17: Trouble Shooting
Trouble-shooting Fault Possible Cause Remedy The oven does not operate / start. The mains isolating switch on the Turn on. wall, circuit breaker or fuses are “off” at the power board. The power switch on the oven is Depress switch. Switch will off. -
Page 18: Spare Parts
Spare parts Replacement Part List Controls 021473 Power Switch (220-240V) 021514 Power Switch (110V) 024774 Thermostat 020823 Knob - Thermostat / Bake Timer 020849 Neon Indicator (220-240V) 023857 Neon Indicator (110V) 011760 Bake Timer 011794 Buzzer (220-240V) 015822 Buzzer (110V) 021476 Roast ‘n Hold Switch (220-240V) 021515... - Page 19 Top Hinge 020083 Bottom Hinge 024809 Roller Catch 017905 Door Bush 021468 Door Handle (G32M) 024599 Door Handle Bracket (G32M) 024844 Door Outer Glass (G32M) 002340 Door Inner Glass (G32M) 024713 Door Handle (G32MS) 023063 Door Glass (G32MS) Racks 015575...
-
Page 20: Circuit Schematics
Circuit schematics Circuit Schematic - Canada Only WHITE BLACK BLUE YELLOW ELECTRICAL WATER... - Page 21 Circuit schematics Circuit Schematic - UK Only ELECTRICAL WATER...
- Page 22 Circuit schematics Circuit Schematic - Non UK/Canada ELECTRICAL WATER...
Need help?
Do you have a question about the G32M and is the answer not in the manual?
Questions and answers