Table of Contents
Advertisement
Quick Links
Advertisement
Table of Contents

Related Manuals for treesse Rest


Summary of Contents for treesse Rest
- Page 1 Rest Pre-installation manual...
- Page 2 For this reason we advise you to read this manual carefully and to carefully follow all the information contained herein. The Treesse team is always available for any information or request for assistance that may be required during preparation.
-
Page 3: Table Of Contents
Contents MEASUREMENTS AND TECHNICAL SPECIFICATIONS ___________ 4 TEMPORARY POSITIONING ______________________________________________________________________ 5 WHAT PREPARATIONS ARE REQUIRED? _______________________ 6 PREPARATION OF CONNECTION TO AN OPTIONAL EXTERNAL EXCHANGER (NOT SUPPLIED) _________ 7 IDENTIFICATION OF THE INSTALLATION SITE __________________ 8 OUTDOOR INSTALLATION _______________________________________________________________________ 8 INDOOR INSTALLATION _________________________________________________________________________ 8 FREESTANDING INSTALLATIONS _________________________________________________________________ 9 PREPARATION OF THE INSTALLATION SITE ____________________ 9... -
Page 4: Measurements And Technical Specifications
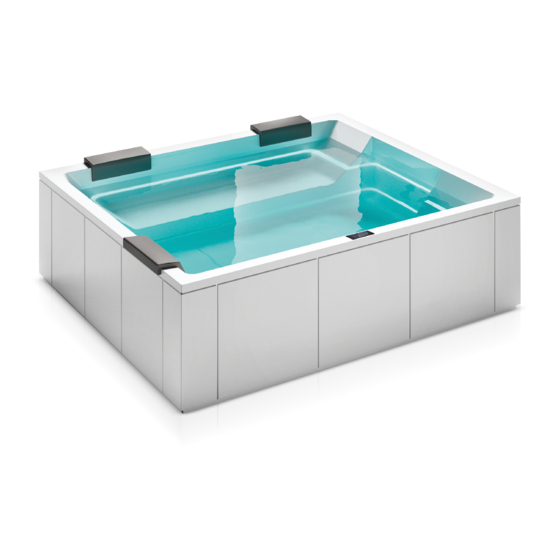
Pre-Installation Rest minipool MEASUREMENTS AND TECHNICAL SPECIFICATIONS minipool dimensions 195 x 240 x 85 cm (76.7 x 94.4x 33.4 inches) 2000 litres maximum water (528 gal) content Packaging Freestanding Recessed Drain Pipe insulation 2260 kg The manufacturer suggests a weight... -
Page 5: Temporary Positioning
Pre-Installation Rest minipool The minipool works efficiently and safely if it is installed correctly and in compliance with the regulations in force in the country of use. This pre-installation guide provides information for a proper preparation of the environments and the plumbing and electrical connections. -
Page 6: What Preparations Are Required
Pre-Installation Rest minipool WHAT PREPARATIONS ARE REQUIRED? To be installed, the minipool requires: Identification of the installation site. Room for the electrical Preparation of the installation site. connections Preparation of the plumbing. Preparation of the electrical system. a possible external heat exchanger (optional), see next page for details. -
Page 7: Preparation Of Connection To An Optional External Exchanger (Not Supplied)
Pre-Installation Rest minipool PREPARATION OF CONNECTION TO AN OPTIONAL EXTERNAL EXCHANGER (NOT SUPPLIED) Room for the electrical connections Drain incoming hot domestic water OUT: outgoing cold Technical water inspection port BL 1 EVclv Cromo 230V~ 230V 230V heater/exchanger control cable... -
Page 8: Identification Of The Installation Site
Treesse minipools are built to be positioned outdoors. If you install the minipool inside, remember that it must be able to be easily inspected or moved for any ordinary and extraordinary maintenance operations. -
Page 9: Freestanding Installations
Pre-Installation Rest minipool PREPARATION OF THE INSTALLATION SITE For the preparation of the water and electrical FREESTANDING INSTALLATIONS connections see the pertinent section on page 11 and 15. As a base, build a platform or flooring in reinforced concrete, at least 10 cm thick, perfectly flat and suitable for supporting the weight of the minipool and the people using it. -
Page 10: Recessed Installations
Pre-Installation Pre-Installation Rest minipool RECESSED INSTALLATIONS materials and thickness should be based on the minimum temperatures reached in the country of installation. As a base, create a reinforced concrete recess having For the preparation of the water and electrical a thickness of at least 10 cm, perfectly flat and able to... -
Page 11: Plumbing Preparations
Pre-Installation Rest minipool PLUMBING PREPARATIONS The water connection must be dedicated exclusively to the minipool (it is not possible to connect other equipment to the same connection) and carried out with new and never used hoses and couplings. It is recommended to use ONLY tap water as it guarantees microbiological purity and absence of metallic particles (not blocked by the filter) or organic substances. -
Page 12: Tap Water And Well Water
Pre-Installation Rest minipool More information TAP WATER AND WELL WATER To ensure maximum hygiene and durability of the minipool it is essential to pay close attention to the quality of the water that will be used to fill it. It is important that the water used be drinkable. It is always advisable not to use well water because it may be very hard, rich in metals like iron and manganese, and have bacterial loads. -
Page 13: Characteristics Of The Water Supply
Pre-Installation Rest minipool CHARACTERISTICS OF THE WATER SUPPLY OPTIMAL VALUES PARAMETER VALUES ABOVE OR BELOW CAN... between... Refer to the specific regulations ...cause problems related to the safety and well-being of POTABILITY of the country of use users SUPPLY maximum: 300,000 PA (3 bar) PRESSURE minimum: 150,000 PA (1.5 bar) - Page 14 Pre-Installation Rest minipool EXAMPLE OF PRE-INSTALLATION PLUMBING FOR A MINIPOOL Connection to the minipool using the 1/2 inch female hose Connect the drain of the floor minipool. The provided. plumber is responsible for the choice and type If the minipool is installed outdoors provide an adequate thermal of materials to be used and the verification of insulation of the pipes.
-
Page 15: Electrical Preparations
ELECTRICAL PREPARATIONS • Controlled by a multi-pole switch with a contact gap of The Treesse minipools are built in compliance with European laws (EN 60 335-2-60) and are tested during at least 3 mm and a breaking capacity equal to 60A (or production to ensure the safety of the installer and user. - Page 16 Pre-Installation Rest minipool LEGEND C Electrical connection...
- Page 17 Pre-Installation Rest minipool 220V~ 380V~ L1 L2 L3 ELECTRICAL CONNECTION DIAGRAM...
- Page 18 Notes Notes...
- Page 19 Maximum care has been paid to guarantee the accuracy of this manual. The Manufacturer reserves the right to modify the equipment or the documentation at any time, without notice. Therefore there might be small differences between this manual and the product you have received: we apologise in advance for any inconvenience. The total or partial reproduction of this manual without the Manufacturer's consent is prohibited.
- Page 20 www.gruppotreesse.it GRUPPO TRE S s.p.a. 01036 Nepi (VT) - Italy S.S. Cassia km. 36.400 Settevene industrial area tel. (+39) 0761 527242 fax (+39) 0761 527223 info@gruppotres.it...
Need help?
Do you have a question about the Rest and is the answer not in the manual?
Questions and answers