Table of Contents
Advertisement
Advertisement
Chapters
Table of Contents

Related Manuals for Dell 1230c


Summary of Contents for Dell 1230c
- Page 1 Dell 1230c Color Laser Printer User’s Guide www.dell.com | support.dell.com...
-
Page 2: Features Of Your New Laser Printer
Your new printer is equipped with a number of special features that improve the quality of the documents you print. With the printer, you can: SPECIAL FEATURES Print with excellent quality and speed •... - Page 3 ABOUT THIS USER’S GUIDE This user’s guide provides information about basic understanding of the printer as well as detailed explanation on each step during the actual usage. Both novice users and professional users can refer to this guide for installing and using the printer.
-
Page 4: Finding More Information
Help from the printer properties dialog box. website If you have Internet access, you can get help, support, printer drivers, manuals, and order information from the Dell website www.dell.com and support.dell.com. 4 | Features of your new laser printer... -
Page 5: Safety Information
7. Your printer should never be placed on, near or over a radiator, heater, air conditioner or ventilation duct. 8. Do not allow anything to rest on the power. Do not place your printer where the cords will be abused by persons walking on them. - Page 6 AC power and telephone cord for the duration of the lightning storm. 16. The Power cord supplied with your printer should be used for safe operation. If you are using a cord which is longer than 2 m with 110 V printer, then it should be 16 AWG 17.
-
Page 8: Table Of Contents
SELECTING AND LOADING PRINT MEDIA 8 | Contents Features of your new laser printer Safety information INTRODUCTION Printer overview Front view Rear view Control panel overview Understanding the control panel LEDs Stop button Supplied software Printer driver features Printer driver... - Page 9 ORDERING SUPPLIES AND ACCESSORIES TROUBLESHOOTING Tips for avoiding paper jams Clearing paper jams Solving other problems Paper feeding Printing problems Printing quality problems Common Windows problems Common Macintosh problems Supplies How to purchase SPECIFICATIONS General specifications Printer specifications GLOSSARY INDEX Contents | 9...
-
Page 10: Introduction
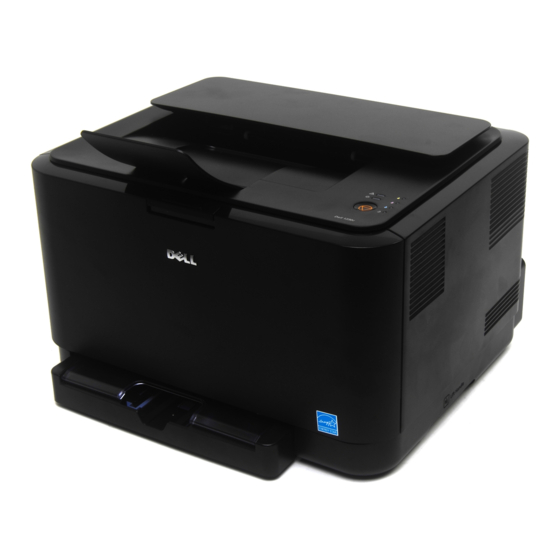
These are the main components of your printer: This chapter includes: • Printer overview • Control panel overview • Understanding the control panel PRINTER OVERVIEW Front view Top cover Output tray (face down) Control panel Tray Output support Front cover release button... -
Page 11: Control Panel Overview
CONTROL PANEL OVERVIEW status LED Shows the status of your printer. (See "Understanding the control panel" on page 12.) stop button Stops an operation at any time and also performs other functions. (See "Understanding the control panel" on page 12.) toner colors LED Show the status of each toner cartridge. -
Page 12: Understanding The Control Panel
Canceling print job Press this button during printing. The red LED blinks while the print job is cleared from both the printer and the computer, and then the printer returns to Ready mode. This may take some time depending on the size of the print job. -
Page 13: Supplied Software
SUPPLIED SOFTWARE You must install the printer software using the supplied CD after you have set up your printer and connected it to your computer. The CD provides you with the following software. CONTENTS Printer Windows • Printer driver: Use this driver to take full software CD advantage of your printer’s features. -
Page 14: Getting Started
See "Altitude adjustment" on page 16 for more information. Place the printer on a flat and stable surface, not letting it lean more than 2 mm (0.08 inches). Otherwise, it may affect the printing quality. -
Page 15: Macintosh
1. Ensure that the printer is connected to your computer and powered on. 2. Insert the supplied CD into your CD drive. The CD should automatically run, and an installation window appears. -
Page 16: Printer's Basic Settings
Before you set the altitude value, find the altitude where you are using the printer. Click Start → All programs → Dell → Dell Printer → Dell 1230c Color Laser Printer → Printer Setting Printer Setting Utility You can also click OS X. -
Page 17: Selecting Print Media
Using print media that does not meet these specifications may cause problems, requiring repairs. Such repairs are not covered by Dell’s warranty or service agreements. Ensure that you do not use the inkjet photo paper with this printer. It could cause damage to the printer. -
Page 18: Specifications On Print Media
Maximum capacity may differ depending on media weight, thickness, and environmental conditions. c. Smoothness: 100 to 250 (sheffield) d. Recommended media: Transparency for a color laser printer by Xerox such as 3R 91331(A4), 3R 2780(Letter). 18 | Selecting and loading print media DIMENSIONS 216 x 279 mm (8.5 x 11 inches) -
Page 19: Guidelines For Special Print Media
Preprinted paper Acceptable Unacceptable Using photographic paper or coated paper may cause problems, requiring repairs. Such repairs are not covered by Dell’s warranty or service agreements. GUIDELINES • To avoid damaging the printer, use only labels designed for use in laser printers. -
Page 20: Changing The Size Of The Paper In The Paper Tray
To change the tray size to other size, you must adjust the paper length guide properly. 1. Pull the tray out of the printer. Open the paper cover and remove paper from the tray if necessary. 2. Pressing and unlatching the guide lock in the top of the tray, pull the tray out manually. - Page 21 A4 or Letter, you must adjust the lever and paper width guide properly. Pull the tray out of the printer. Open the paper cover and remove paper from the tray if necessary. If you want to change the size to Letter, hold the lever at the back of the tray, and rotate the lever clockwise.
-
Page 22: Printing On Special Print Materials
PRINTING ON SPECIAL PRINT MATERIALS The printer can hold special sizes and types of print material, such as postcards, note cards, and envelopes. Especially, it is useful for single page printing on letterhead or colored paper. Feeding the print material manually •... -
Page 23: Basic Printing
For details about printing, see the Software section. CANCELING A PRINT JOB If the print job is waiting in a print queue or print spooler, such as the printer group in Windows, delete the job as follows: 1. Click the Windows Start menu. -
Page 24: Maintenance
Cleaning the inside of the printer clears or reduces these problems. 1. Turn the printer off and unplug the power cord. Wait for the printer to cool down. 2. Press the release button, completely open the front cover. - Page 25 5. Pull the imaging unit out of the printer using the groove on the front of the imaging unit. • Do not touch the green surface on the imaging unit with your hands or any other material. • Be careful not to scratch the surface of the imaging unit.
-
Page 26: Maintaining The Cartridge
• Do not remove the toner cartridge from its package until ready for use. • Do not refill the toner cartridge. The printer warranty does not cover damage caused by using a refilled cartridge. • Store toner cartridges in the same environment as your printer. -
Page 27: Replacing The Toner Cartridge
LED lights red, the printer cartridge is totally exhausted. Your printer stops printing. Also, the Dell Toner Management System™ program window appears on the computer telling you to replace the cartridge. -
Page 28: Replacing The Imaging Unit
REPLACING THE IMAGING UNIT When the life span of the imaging unit has expired, the Dell Toner Management System™ program window appears on the computer, indicating the imaging unit needs to be replaced. Otherwise your printer stops printing. 1. Turn the printer off, then wait a few minutes for the printer to cool. -
Page 29: Replacing The Waste Toner Container
REPLACING THE WASTE TONER CONTAINER When the life span of the waste toner container has expired, the Dell Toner Management System™ program window appears on the computer, indicating the waste toner container needs to be replaced. Otherwise your printer stops printing. -
Page 30: Maintenance Parts
7. Close the front cover firmly. If the front cover is not completely closed, the printer will not operate. Ensure that all toner cartridges are installed properly. If any toner cartridge is installed improperly, the front cover do not close. -
Page 31: Troubleshooting
If paper is jammed in the paper feed area, follow the next steps to release the jammed paper. 1. Pull the tray out of the printer and remove the jammed paper. If you cannot find the jammed paper, go to the next step. - Page 32 5. Open the top cover and inner cover. 6. Holding the inner cover open, carefully take the jammed paper out of the printer. The inner cover will then close automatically. Do not touch the fuser inside the inner cover. It is hot and could cause burns! The fuser’s operating temperature is 180 °C (356 °F).
-
Page 33: Solving Other Problems
Check the power cord receiving power. connections. Check the not print. power switch and the power source. The printer is not Select Dell 1230c as your selected as the default printer in your default printer. Windows. Check the printer for the following: •... -
Page 34: Printing Quality Problems
Printing quality problems If the inside of the printer is dirty or paper has been loaded improperly, you may notice a reduction in print quality. See the table below to clear the problem. CONDITION... - Page 35 Try a different kind or brand of paper. • Change the printer option and try again. Go to printer properties, click Paper tab, and set type to Thick Paper. Refer to the Software section for details.
- Page 36 Turn over the stack of paper in the tray. Also try rotating the paper 180° in the tray. • Change the printer option and try again. Go to printer properties, click Paper tab, and set type to Thin Paper. Refer to the...
-
Page 37: Common Windows Problems
CONDITION SUGGESTED SOLUTIONS An unknown image Your printer is probably being used at an altitude of 1,000 m (3,281 ft) or above. repetitively appears The high altitude may affect the print quality on a next few such as loose toner or light imaging. You can... -
Page 38: Ordering Supplies And Accessories 38 Supplies
• How to purchase HOW TO PURCHASE To order Dell-authorized supplies or accessories, contact your local Dell dealer or the retailer where you purchased your printer, or visit www.dell.com and support.dell.com and select your country/region to obtain information on calling for technical support. -
Page 39: Specifications
This chapter guides you about this printer’s specifications such as various features. This chapter include: • General specifications GENERAL SPECIFICATIONS The symbol * optional feature depending on printers. ITEM DESCRIPTION Paper input Tray: 150 sheets for plain paper, 75 g/m capacity For details about paper input capacity. -
Page 40: Printer Specifications
High speed USB 2.0 a. It will be affected by operating system used, computing performance, application software, connecting method, media type, media size and job complexity. b. Visit www.dell.com and support.dell.com to download the latest software version. 40 | Specifications... -
Page 41: Control Panel
Default The value or setting that is in effect when taking a printer out of its box state, reset, or initialized. DHCP A Dynamic Host Configuration Protocol (DHCP) is a client-server networking protocol. -
Page 42: Fuser Unit
(such as the Internet or an intranet). Fuser Unit The part of a laser printer that melts the toner onto the print media. It consists of a hot roller and a back-up roller. After toner is transferred onto the paper, the fuser unit applies heat and pressure to ensure that the toner stays on the paper permanently, which is why paper is warm when it comes out of a laser printer. - Page 43 Today NetWare supports TCP/IP as well as IPX/SPX. Organic Photo Conductor (OPC) is a mechanism that makes a virtual image for print using a laser beam emitted from a laser printer, and it is usually green or gray colored and a cylinder shaped.
-
Page 44: Toner Cartridge
Toner Cartridge A kind of bottle within a machine like printer which contains toner. Toner is a powder used in laser printers and photocopiers, which forms the text and images on the printed paper. Toner can be melted by the heat of the fuser, causing it to bind to the fibers in the paper. - Page 45 index adjustment altitude 16 cleaning inside 24 outside 24 control panel demo page, print driver installation 15 tips for avoiding paper jams 31 Status 12 Maintenance maintenance parts 30 toner cartridge 26 paper changing the size 20 clearing jam 31 printing special materials 22 paper type setting 22...
- Page 46 This user’s guide is provided for information purposes only. All information included herein is subject to change without notice. Dell is not responsible for any direct or indirect damages, arising from or related to use of this user’s guide. •...
-
Page 47: Software Section
Software section... - Page 48 OFTWARE SECTION ONTENTS NSTALLING Chapter 1: Installing Printer Software ... 3 Installing Software for Local Printing ... 3 Reinstalling Printer Software ... 5 Removing Printer Software ... 6 ASIC Chapter 2: Printing a Document ... 7 Printing to a file (PRN) ... 8 Printer Settings ...
- Page 49 Setting Up a Host Computer ... 18 Setting Up a Client Computer ... 18 SING OTHER SOFTWARE Chapter 5: Using the Dell™ Toner Management System ... 19 Printer Status Monitor ... 19 Printer Settings Utility ... 19 Dell Toner Re-order application ... 20...
-
Page 50: Installing Printer Software In Windows
Installing Software for Local Printing A local printer is a printer directly attached to your computer using the printer cable supplied with your printer, such as a USB . You can install the printer software using the typical or custom method. -
Page 51: Custom Installation
• After connecting the printer, click Next. • If you don’t want to connect the printer at this time, click Next, and No on the following screen. Then the installation will start and a test page will not be printed at the end of the installation. -
Page 52: Reinstalling Printer Software
You can reinstall the software if installation fails. Start Windows. From the Start menu select Programs or All Programs → Dell → Dell Printers → your printer driver name → Maintenance. Select Repair and click Next : If your printer is not already connected to the computer, the following window will appear. -
Page 53: Removing Printer Software
Removing Printer Software Start Windows. From the Start menu select Programs or All Programs → Dell → Dell Printers → your printer driver name → Maintenance. Select Remove and click Next. You will see a component list so that you can remove any item individually. -
Page 54: Basic Printing
See the OS Compatibility section of Printer Specifications in your Printer User’s Guide. • If you need to know the exact name of your printer, you can check the supplied CD-ROM. • When you select an option in printer properties, you may see... -
Page 55: Printing To A File (Prn)
Select the folder and assign a name of the file and then click OK. Printer Settings You can use the printer properties window, which allows you to access all of the printer options you need when using your printer. When the printer properties are displayed, you can review and change the settings needed for your print job. -
Page 56: Layout Tab
Double-sided Printing Double-sided Printing allows you to print on both sides of paper. If this option does not appear, your printer does not have this feature. • For details, see “Printing on Both Sides of Paper” on page 15. Paper Tab Use the following options to set the basic paper handling specifications when you access the printer properties. -
Page 57: Graphics Tab
) cotton paper such as Gilbert 25 % and Gilbert 100 %. Plain Paper: Normal plain paper. Select this type if your printer is monochrome and printing on the 16 lb (60 g/m Recycled Paper: 20 lb to 24 lb (75~90 g/m... -
Page 58: Extras Tab
• Print Subset: You can set the sequence in which the pages print. Select the print order from the drop-down list. - Normal (1,2,3): Your printer prints all pages from the first page to the last page. - Reverse All Pages (3,2,1): Your printer prints all pages from the last page to the first page. -
Page 59: About Tab
To use a saved setting, select the item from the Favorites drop down list. The printer is now set to print according to the Favorites setting you selected. To delete a Favorites item, select it from the list and click Delete. -
Page 60: Advanced Printing
User’s Guide may differ depending on the printer in use. However the composition of the printer properties window is similar. • If you need to know the exact name of your printer, you can check the supplied CD-ROM. This chapter includes: •... -
Page 61: Printing Posters
Printing Booklets This printer feature allows you to print your document on both sides of the paper and arranges the pages so that the paper can be folded in half after printing to produce a booklet. -
Page 62: Printing On Both Sides Of Paper
Click OK and print the document. : If your printer does not have a duplex unit, you should complete the printing job manually. The printer prints every other page of the document first. After printing the first side of your job, the Printing Tip window appears. -
Page 63: Using Watermarks
“DRAFT” or “CONFIDENTIAL” printed diagonally across the first page or all pages of a document. There are several predefined watermarks that come with the printer, and they can be modified, or you can add new ones to the list. Using an Existing Watermark To change the print settings from your software application, access printer properties. -
Page 64: Using Overlays
Regards WORLD BEST print a letter with your company’s letterhead, you do not need to load preprinted letterhead paper in the printer. You need only tell the printer to print the letterhead overlay on your document. Creating a New Page Overlay To use a page overlay, you must create a new page overlay containing your logo or image. -
Page 65: Sharing The Printer Locally
• Check the Operating System(s) that are compatible with your printer. See the OS Compatibility section of Printer Specifications in your Printer User’s Guide. • If you need to know the exact name of your printer, you can check the supplied CD-ROM. Setting Up a Host Computer Start Windows. -
Page 66: Using Other Software
• Order Supplies: Click to order replacement toner cartridges online. • User’s Guide: Allows you to view the User’s Guide. Printer Settings Utility When you install the Dell software, the Printer Settings Utility is automatically installed. To open the Printer Settings Utility. →... -
Page 67: Dell Toner Re-Order Application
Dell Toner Re-order application To order replacement toner cartridges or supplies from Dell: Double-click the Dell Toner Reorder Program icon on your desktop. → → → Click Start Programs DELL → your printer driver name Toner Reorder. The Toner Reorder window opens. -
Page 68: Using Your Printer With A Macintosh
•For MAC OS 10.5, click Default and find the USB connection. For MAC OS 10.3, if Auto Select does not work properly, select Dell in Printer Model and your printer name in Model Name. •For MAC OS 10.4, if Auto Select does not work properly, select Dell in Print Using and your printer name in Model. -
Page 69: Printing
• You can check your printer name in the supplied CD- ROM. Printing a Document When you print with a Macintosh, you need to check the printer software setting in each application you use. Follow these steps to print from a Macintosh. - Page 70 ▲ Mac OS 10.4 Printer Features This tab provides options for selecting the paper type and adjusting print quality. Select Printer Features from the Presets' drop-down list to access the following features: ▲ Mac OS 10.4 Fit to Page •...
-
Page 71: Printing Multiple Pages On One Sheet Of Paper
To print a border around each page on the sheet, select the option you want from the Border drop-down list. Click Print, and the printer prints the selected number of pages on one side of each page. Using Your Printer with a Macintosh... - Page 72 Macintosh 21 Windows 3 Layout properties, set Windows 9 Macintosh driver install 21 uninstall 21 printing 22 setting up the printer 21 n-up printing Macintosh 24 Windows 13 orientation, print Windows 9 overlay create 17 delete 17 print 17...
- Page 73 Windows 6 watermark create 16 delete 16 edit 16 print 16...
- Page 74 REV 1.00...
Need help?
Do you have a question about the 1230c and is the answer not in the manual?
Questions and answers