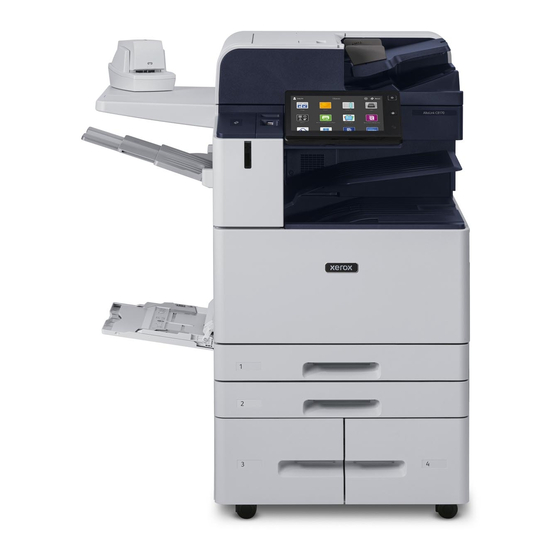
Xerox AltaLink C81 Series User Manual
Hide thumbs Also See for AltaLink C81 Series:
Table of Contents

Advertisement

Quick Links

Version 1.0
May 2020
702P08204
Xerox
AltaLink
C81XX Series Color
®
®
Multifunction Printer
User Guide

Advertisement

Table of Contents
loading

Summary of Contents for Xerox AltaLink C81 Series

  • Page 1 Version 1.0 May 2020 702P08204 Xerox AltaLink C81XX Series Color ® ® Multifunction Printer User Guide...
  • Page 2 © 2020 Xerox Corporation. All rights reserved. Unpublished rights reserved under the copyright laws of the United States. Contents of this publication may not be reproduced in any form without permission of Xerox Corporation. Copyright protection claimed includes all forms of matters of copyrightable materials and information now allowed by statutory or judicial law or hereinafter granted, including without limitation, material generated from the software programs which are displayed on the screen such as styles, templates, icons, screen displays, looks, and so on.
  • Page 3: Table Of Contents

    Power Saver ........................39 Smart Proximity Sensor....................39 Powering On the Printer, or Exiting Sleep Mode ..............39 Restarting, Placing in Sleep Mode, or Powering Off the Printer.......... 40 Accessing the Printer......................41 Xerox ® AltaLink ® C81XX Series Color Multifunction Printer...
  • Page 4 Locating the Serial Number....................66 3 Personalize..........................67 Personalize Overview......................68 Personalizing the Home Screen ....................69 Displaying or Hiding an App on the Home screen............. 69 Rearranging Apps on the Home screen................69 Xerox ® AltaLink ® C81XX Series Color Multifunction Printer User Guide...
  • Page 5 App Gallery Overview ................... 78 Creating a Xerox® App Gallery Account................78 Logging in to your Xerox® App Gallery Account............... 79 Installing or Updating an App from the Xerox® App Gallery ..........79 Device ........................... 81 Device Overview....................... 81 About ..........................82 Information Pages ......................
  • Page 6 Printing Features........................164 Selecting Paper Options for Printing ................164 Printing on Both Sides of the Paper ................165 Xerox Black and White ....................165 Print Quality........................166 Image Options....................... 166 Printing Multiple Pages to a Single Sheet ............... 167 Xerox ®...
  • Page 7 Loading Paper in Tray 6 ....................205 Printing on Special Paper ..................... 207 Envelopes ........................207 Labels ..........................211 Banner Paper ......................... 214 Glossy Media ......................... 217 Transparencies....................... 217 Xerox ® AltaLink ® C81XX Series Color Multifunction Printer User Guide...
  • Page 8 Clearing Paper Jams ...................... 285 Troubleshooting Paper Jams ..................297 Clearing Finisher Jams ....................301 Print, Copy, and Scan Problems .................... 331 Identifying Print, Copy, and Scan Problems ..............331 Xerox ® AltaLink ® C81XX Series Color Multifunction Printer User Guide...
  • Page 9 Configuration with High Capacity Feeder and Business Ready Finisher, Booklet Maker, and Tri-Fold Module ....................... 365 Environmental Specifications ....................366 Temperature ........................366 Relative Humidity ......................366 Elevation ........................366 Electrical Specifications......................367 ............................367 Performance Specifications ....................368 Xerox ® AltaLink ® C81XX Series Color Multifunction Printer User Guide...
  • Page 10 Printing Resolution......................368 Print Speed ........................368 Environmental, Health, and Safety Contact Information ............369 B Regulatory Information...................... 371 Basic Regulations......................... 372 United States FCC Regulations..................372 Xerox ® AltaLink ® B8100 and C8100 Series Printers ............372 Canada.......................... 372 Certifications in Europe....................
  • Page 11: Safety

    • Environmental, Health, and Safety Contact Information............. 19 Your printer and the recommended supplies have been designed and tested to meet strict safety requirements. Attention to the following information ensures the continued safe operation of your Xerox printer. Xerox ®...
  • Page 12: Notices And Safety

    These include safety agency evaluation and certification, and compliance with electromagnetic regulations and established environmental standards. The safety and environment testing and performance of this product have been verified using Xerox ® materials only.
  • Page 13: Electrical Safety

    P P o o w w e e r r C C o o r r d d S S a a f f e e t t y y I I n n f f o o r r m m a a t t i i o o n n Before operating your printer, read the following instructions carefully. For details, contact your Xerox representative.
  • Page 14: Battery Safety Information

    E E m m e e r r g g e e n n c c y y P P o o w w e e r r O O f f f f If any of the following conditions occur, power off the printer immediately and disconnect the power cord from the electrical outlet. Contact an authorized Xerox service representative to correct the problem if: •...
  • Page 15: Telephone Line Cord

    T T e e l l e e p p h h o o n n e e L L i i n n e e C C o o r r d d WARNING: To reduce the risk of fire, use only No. 26 American Wire Gauge (AWG) or larger telecommunication line cord. Xerox ® AltaLink ®...
  • Page 16: Operational Safety

    Ozone is heavier than air and is not produced in amounts large enough to harm anyone. Install the printer in a well-ventilated room. For more information in the United States and Canada, go to www.xerox.com/environment. In other markets, please contact your local Xerox representative or go to www.xerox.com/environment_europe.
  • Page 17: Printer Supplies

    Use of non-Xerox supplies is not recommended. The Xerox Warranty or Service Agreement do not cover damage, malfunction, or degradation of performance caused by use of non-Xerox supplies, or the use of Xerox supplies not specified for this printer. Xerox ®...
  • Page 18: Maintenance Safety

    Do not attempt any maintenance procedure that is not specifically described in the documentation supplied with your printer. • Clean the device with a dry lint-free cloth only. • Do not burn any consumables or routine maintenance items. For information on Xerox ® supplies recycling programs, go to www.xerox.com/gwa...
  • Page 19: Environmental, Health, And Safety Contact Information

    Safety Environmental, Health, and Safety Contact Information For more information on Environment, Health, and Safety in relation to this Xerox product and supplies, contact: • United States and Canada: 1-800-ASK-XEROX (1-800-275-9376) • Europe: EHS-Europe@xerox.com For product safety information in the United States and Canada, go to www.xerox.com/environment.
  • Page 20 Safety Xerox ® AltaLink ® C81XX Series Color Multifunction Printer User Guide...
  • Page 21: Getting Started

    • The Embedded Web Server ......................47 • Installation and Setup ....................... 51 • Connecting the Printer ....................... 53 • Initial Printer Setup........................60 • Installing the Software....................... 61 • More Information ........................65 Xerox ® AltaLink ® C81XX Series Color Multifunction Printer User Guide...
  • Page 22: Parts Of The Printer

    4. Near Field Communication (NFC) Area 11. Tray 5: Bypass Tray 5. Center Output Tray 12. Smart Proximity Sensor 6. Center Bottom Tray 13. Left Tray 7. Main Power Switch behind the front door Xerox ® AltaLink ® C81XX Series Color Multifunction Printer User Guide...
  • Page 23 2. Left Cover 7. Lint Free Cloth Compartment 3. Top Cover 8. Second-Side Scanning Lens Assembly 4. Document Guides 9. Constant Velocity Transport (CVT) Glass 5. Document Feeder Tray Xerox ® AltaLink ® C81XX Series Color Multifunction Printer User Guide...
  • Page 24 • Paper with paper clips or staples attached • Paper with wrinkles, curls, folds, tears, or notches • Coated or carbonless paper or items other than paper, such as cloth or metal • Envelopes • Books Xerox ® AltaLink ® C81XX Series Color Multifunction Printer...
  • Page 25: Internal Parts

    6. 2nd Bias Transfer Roll 2. Main Power Switch 7. Fuser Assembly 3. Waste Container 8. Transfer Belt Cleaner 4. Waste Toner Transport Assembly 9. Drum Cartridges 5. Waste Toner Transport Release Switch Xerox ® AltaLink ® C81XX Series Color Multifunction Printer User Guide...
  • Page 26: Rear View

    1. Tray 5 - Bypass Tray 5. Rear Right Cover 2. Door B 6. USB Port, Type B 3. Leveler Foot 7. USB Port, Type A 4. Circuit Breaker 8. Ethernet Port Xerox ® AltaLink ® C81XX Series Color Multifunction Printer User Guide...
  • Page 27: Control Panel

    Power/Wake Button This button serves several power-related functions: • When the printer is powered off, pressing this button powers on the printer. Xerox ® AltaLink ® C81XX Series Color Multifunction Printer User Guide...
  • Page 28 • Blinks amber to indicate a more serious system or hardware error. For most errors, an error message appears on the control panel. Some errors can require support from your local Xerox ® service representative. Notification Area Notifications appear above the Apps area.
  • Page 29: Configurations And Options

    Note: Sometimes this option is hidden from view. For details, see the System Administrator Guide at www.xerox. com/office/ALC81XXdocs. Reset Use the Reset button to reset all the apps to the default settings. C C o o n n f f i i g g u u r r a a t t i i o o n n s s a a n n d d O O p p t t i i o o n n s s 1.
  • Page 30: Finishing Options

    I I n n t t e e g g r r a a t t e e d d O O f f f f i i c c e e F F i i n n i i s s h h e e r r 1. Finisher Tray 4. Staple Cartridge 2. Finisher Tray Extension 5. Finisher Front Cover 3. Integrated Office Finisher 6. Finisher Top Cover Xerox ® AltaLink ® C81XX Series Color Multifunction Printer User Guide...
  • Page 31: Office Finisher With Optional Booklet Maker

    9. Office Finisher 4. Booklet Maker Staple Cartridge (optional) 10. Hole Punch Waste Container (optional) 5. Finisher Top Cover 11. Hole Punch Unit (optional) 6. Creaser Unit (optional) 12. Center Tray Xerox ® AltaLink ® C81XX Series Color Multifunction Printer User Guide...
  • Page 32: Business Ready Finisher With Optional Booklet Maker

    6. Booklet Staple Unit 2. Center Tray 7. Booklet Maker Tray 3. Right Top Tray 8. Booklet Maker Unit 4. Right Middle Tray 9. Finisher Front Cover 5. Staple Cartridge Xerox ® AltaLink ® C81XX Series Color Multifunction Printer User Guide...
  • Page 33: Business Ready Finisher With Optional Tri-Fold Module

    B B u u s s i i n n e e s s s s R R e e a a d d y y F F i i n n i i s s h h e e r r w w i i t t h h O O p p t t i i o o n n a a l l T T r r i i - - F F o o l l d d M M o o d d u u l l e e 1. Folder Front Cover 3. Folder Bin 2. Folder Bin Release Button Xerox ® AltaLink ® C81XX Series Color Multifunction Printer...
  • Page 34: Paper Tray Options

    • Auto Confirmation: This option confirms automatically the paper type, color, and size without showing a prompt. Note: To configure the paper size confirmation prompt, refer to the System Administrator Guide at www.xerox.com/office/ALC81XXdocs. Xerox ® AltaLink ®...
  • Page 35: Configuring Trays 3 And 4 Of The Tandem Tray Module

    2. Pinch the guide lock on the front paper guide, then slide the paper guide to the required paper size. 3. To lock the paper guides into place, release the guide lock. Note: The paper guides lock into place only at the designated standard paper sizes. Xerox ® AltaLink ® C81XX Series Color Multifunction Printer...
  • Page 36: Configuring Tray 6

    2. Open the side gate. Remove the screw that holds the spacer plate at the back of the tray, then lift the spacer plate out of the tray. Repeat the procedure for the spacer plate at the front of the tray. Xerox ® AltaLink ®...
  • Page 37 6. At the control panel, select the correct type and color. 7. To confirm the settings, touch Confirm. For information about loading paper in Tray 6, refer to Loading Paper in Tray Xerox ® AltaLink ® C81XX Series Color Multifunction Printer...
  • Page 38: Wireless Network Adapter

    (LAN). The wireless network adapter supports common wireless security protocols, such as WEP, WPA, WPA2, and 802.1X standard port-based network access control. The wireless network adapter allows multiple users on a wireless LAN to print to and scan from Xerox ®...
  • Page 39: Power Options

    To configure the Smart Proximity Sensor, refer to the System Administrator Guide at www.xerox.com/office/ALC81XXdocs. P P o o w w e e r r i i n n g g O O n n t t h h e e P P r r i i n n t t e e r r , , o o r r E E x x i i t t i i n n g g S S l l e e e e p p M M o o d d e e The printer has two power switches.
  • Page 40: Restarting, Placing In Sleep Mode, Or Powering Off The Printer

    • If Auto Power Off is enabled, the printer powers off automatically after the specified conditions are met. To enable Auto Power Off mode, contact your System Administrator. For details, refer to the System Administrator Guide at www.xerox.com/office/ALC81XXdocs. Caution: Do not plug or unplug the power cord while the printer is powered on.
  • Page 41: Accessing The Printer

    RFID reader is installed, for authentication, users place a pre-programmed card over the RFID reader at the control panel. • Xerox Secure Access - Unified ID System: This option enables authentication for the Xerox Secure Access Unified ID System. Users present a pre-programmed identification card to a card reader at the control panel.
  • Page 42: Personalization

    The administrator can generate reports that list usage data for individual users and groups. For details, refer to the System Administrator Guide at www.xerox.com/office/ALC81XXdocs. L L o o g g g g i i n n g g I I n n Logging in is the process by which you identify yourself to the printer for authentication.
  • Page 43 L L o o g g g g i i n n g g I I n n a a t t t t h h e e C C o o n n t t r r o o l l P P a a n n e e l l Note: • Before logging in for the first time at the Xerox device control panel, log in to the Embedded Web Server, then update your password. For details, refer to...
  • Page 44: Introduction To Apps

    Getting Started Introduction to Apps Xerox Apps are a gateway to the features and functions of your device. Standard Apps are installed already on the device and appear on the Home screen. Some Apps are installed as standard, but are hidden the first time you use the device.
  • Page 45: Information Pages

    C C o o n n f f i i g g u u r r a a t t i i o o n n R R e e p p o o r r t t The Configuration Report provides product information, including installed options, network settings, port setup, tray information, and more. Xerox ® AltaLink ®...
  • Page 46 1. At the printer control panel, press the Home button. 2. Touch Device→Information Pages. 3. Touch Configuration Report, then touch Print. The printer prints the Configuration Report. 4. To return to the Home screen, press the Home button. Xerox ® AltaLink ® C81XX Series Color Multifunction Printer...
  • Page 47: The Embedded Web Server

    3. Touch Configuration Report, then touch Print. The printer prints the Configuration report. The IP address appears in the Connectivity section of the Configuration Report for IPv4 or IPv6. 4. To return to the Home screen, press the Home button. Xerox ® AltaLink ®...
  • Page 48: Accessing The Embedded Web Server

    For detailed instructions on how to use the Embedded Web Server to configure printer settings, refer to the System Administrator Guide at www.xerox.com/office/ALC81XXdocs. L L o o g g g g i i n n g g I I n n U U s s i i n n g g t t h h e e E E m m b b e e d d d d e e d d W W e e b b S S e e r r v v e e r r To access certain features, tools, and apps, log in to the Embedded Web Server for your device.
  • Page 49: Certificates For The Embedded Web Server

    Xerox device. Note: • The Embedded Web Server page for your Xerox device can display an error message that the security certificate is not trusted. This configuration does not lessen the security of the communications between your computer and the Xerox device.
  • Page 50: Using The Remote Control Panel Feature

    Note: To access the Remote Control Panel, first enable the feature. For details, contact your system administrator or refer to the System Administrator Guide at www.xerox.com/office/ ALC81XXdocs. To access the Remote Control Panel feature: 1. At your computer, open a Web browser. In the address field, type the IP address of the printer, then press Enter or Return.
  • Page 51: Installation And Setup

    U U p p d d a a t t i i n n g g t t h h e e P P r r i i n n t t e e r r S S y y s s t t e e m m S S o o f f t t w w a a r r e e Before installing print driver software, verify that the printer has the latest version of system software loaded. You can update your device when Xerox releases a new version of printer system software or Xerox ®...
  • Page 52 Getting Started firmware. To ensure a successful software update, follow the steps provided with the software files. Printer system software is downloaded from www.xerox.com/office/ALC81XXsupport. Before you download and install new software, determine the current software version installed on your device. Print the Configuration Report to compare the system software version with the version available for download.
  • Page 53: Connecting The Printer

    Before you connect the printer to a computer using a USB cable, ensure that the printer USB Type B port is set to Printer Port. For details, contact your system administrator or refer to the System Administrator Guide at www.xerox.com/office/ALC81XXdocs. Note: The printer USB Type B port is set to SW Tools by default.
  • Page 54: Connecting To A Wired Network

    Embedded Web Server or at the control panel touch screen using the Wireless Install Wizard. Note: • For more information, refer to the Xerox Dual Band Wireless Kit Hardware Install and ® Setup instructions that are included with the kit.
  • Page 55 For information about configuring the Wi-Fi Direct feature on your printer, refer to the System Administrator Guide at www.xerox.com/office/ALC81XXdocs. U U s s i i n n g g W W i i - - F F i i D D i i r r e e c c t t o o n n Y Y o o u u r r M M o o b b i i l l e e D D e e v v i i c c e e The Wi-Fi Direct WPS Push Button feature requires the Mopria Print Service App installed on your mobile device.
  • Page 56: Connecting With Near Field Communication (Nfc)

    NFC supports Android 4.4 or greater devices. Installing the Xerox Print Service Plugin 1. On your mobile device, go to the Google Play Store, then search for Xerox Print Service Plugin. 2. Install the Xerox Print Service Plugin app. 3. Go to Settings, then touch Printing.
  • Page 57 Getting Started 5. To enable Xerox Print Service, touch On. 6. Exit Settings. Enabling NFC on the Mobile Device Most mobile devices have NFC disabled by default. To enable NFC: 1. Go to Settings. 2. Go to the NFC setting, then touch On.
  • Page 58: Configuring Airprint

    For information about AirPrint configuration settings, refer to the System Administrator Guide at www.xerox.com/office/ALC81XXdocs. Alternatively, use a desktop computer to access the Embedded Web Server for your device, then click the Help link that appears at the bottom of each page. For...
  • Page 59: Connecting To A Telephone Line

    Getting Started 5. To give the printer a user-friendly name, click Edit. Note: Xerox recommends that you choose a user-friendly name that includes the printer location and department. 6. Click Continue to Register. The Options for Registering Your Printer page opens.
  • Page 60: Initial Printer Setup

    • Measurements • LDAP Settings • Apps Setup • Security Settings For more information on configuring the printer settings at the control panel or using the Embedded Web Server, refer to the System Administrator Guide at www.xerox.com/office/ALC81XXdocs. Xerox ® AltaLink ®...
  • Page 61: Installing The Software

    I I n n s s t t a a l l l l i i n n g g t t h h e e W W i i n n d d o o w w s s P P r r i i n n t t D D r r i i v v e e r r . . z z i i p p F F i i l l e e You can download print drivers from Xerox.com in a .zip file, then use the Windows Add Printer Wizard to install the print drivers on your computer.
  • Page 62: Installing The Print Drivers For A Windows Usb Printer

    Setup.exe installer file. 5. Click Xerox Smart Start — Driver Installer (Recommended). 6. At the License Agreement, click Agree. 7. From the list of discovered printers, select your printer, then click Quick Install.
  • Page 63: Installing The Drivers And Utilities For Macos

    For networking, set up your printer using Bonjour (mDNS), or for an LPD, LPR connection, connect ® using the IP address of your printer. For a non-network printer, create a desktop USB connection. For more information, go to the Online Support Assistant at: www.xerox.com/office/ALC81XXsupport. Xerox ® AltaLink ®...
  • Page 64: Installing Print Drivers And Utilities For Unix And Linux

    I I n n s s t t a a l l l l i i n n g g P P r r i i n n t t D D r r i i v v e e r r s s a a n n d d U U t t i i l l i i t t i i e e s s f f o o r r U U N N I I X X a a n n d d L L i i n n u u x x For more information on installing print drivers and utilities for UNIX and Linux, refer to www.xerox. com/office/ALC81XXdrivers. Xerox ®...
  • Page 65: More Information

    Installation Guide Packaged with the printer. Getting Started guide Print from the control panel. For details, refer to Information Pages. Other documentation for your printer www.xerox.com/office/ALC81XXdocs Recommended Media List United States: www.xerox.com/rmlna European Union: www.xerox.com/rmleu Technical support information for your printer, www.xerox.com/office/ALC81XXsupport...
  • Page 66: Locating The Serial Number

    L L o o c c a a t t i i n n g g t t h h e e S S e e r r i i a a l l N N u u m m b b e e r r When you order supplies or contact Xerox for assistance, you need the serial number of your device.
  • Page 67: Personalize

    • Personalize Overview........................68 • Personalizing the Home Screen ....................69 • Personalizing the Apps ....................... 71 • Creating and Using 1–Touch Apps....................73 • Removing All Personalizations ....................75 Xerox ® AltaLink ® C81XX Series Color Multifunction Printer User Guide...
  • Page 68: Personalize Overview

    • Configure and save the default settings For details, contact your system administrator, or refer to the System Administrator Guide at www. xerox.com/office/ALC81XXdocs. Note: Personalization settings configured by individual users override any equivalent Customization settings configured by the system administrator.
  • Page 69: Personalizing The Home Screen

    To delete an app from the Home screen for the logged-in user: 1. At the printer control panel, press the Home button. 2. Touch Log In. Type the User Name using the keypad, then touch Next. Type the Password using the keypad, then touch Done. Xerox ® AltaLink ®...
  • Page 70: Removing Personalization From The Home Screen

    Any customizations configured by the system administrator, including 1-Touch, EIP, Single Touch, and Weblet apps, are not affected. 5. At the prompt, touch Remove. Apps appear in the default location on the Home screen. 6. Touch Done. Xerox ® AltaLink ® C81XX Series Color Multifunction Printer...
  • Page 71: Personalizing The Apps

    2. Touch Log In. Type the User Name using the keypad, then touch Next. Type the Password using the keypad, then touch Done. 3. Touch the app required. 4. Select the job settings that you want to save as the default settings. Xerox ® AltaLink ®...
  • Page 72: Removing App Personalization Using The Control Panel

    Done. 3. Touch the app required. 4. Scroll to the bottom, then touch Personalize. 5. Touch Remove App Personalizations. 6. At the prompt, touch Remove. Xerox ® AltaLink ® C81XX Series Color Multifunction Printer User Guide...
  • Page 73: Creating And Using 1-Touch Apps

    For information about Cloning and using the Fleet Orchestrator feature, refer to the System Administrator Guide at www.xerox.com/office/ALC81XXdocs. C C r r e e a a t t i i n n g g a a 1 1 – – T T o o u u c c h h A A p p p p To create a 1-Touch App for the logged-in user: 1.
  • Page 74: Deleting Or Hiding A 1-Touch App

    • If you selected the Show Feature Settings option during the 1-Touch App setup, update the feature settings, as required. 5. Touch Start. 6. To return to the Home screen, press the Home button. Xerox ® AltaLink ® C81XX Series Color Multifunction Printer...
  • Page 75: Removing All Personalizations

    4. Touch Remove All Personalizations. Caution: The Remove Home Personalization option removes personalization from the Home screen, and other personalized device settings. 5. At the prompt, touch Remove All. Xerox ® AltaLink ® C81XX Series Color Multifunction Printer User Guide...
  • Page 76 Personalize Xerox ® AltaLink ® C81XX Series Color Multifunction Printer User Guide...
  • Page 77: Xerox® Apps

    Embedded Web Server. For details about displaying, configuring, and customizing the Apps, refer to the System Administrator Guide at www.xerox.com/office/ALC81XXdocs. A range of Apps is available for download and installation from the Xerox ® App Gallery. These apps include Xerox Extensible Interface Platform (EIP) Apps.
  • Page 78: Xerox® App Gallery

    App Gallery App, ensure that your device uses either the wireless or the wired network connection. Note: If your device is configured to access the Internet through a proxy, to allow the Xerox ® App Gallery App to access the Internet, ensure that the proxy is configured correctly.
  • Page 79: Logging In To Your Xerox® App Gallery Account

    5. 8. To complete the account creation process, verify your account: a. Access the inbox for the email address provided in step 5, then open the Welcome to Xerox ® App Gallery email.
  • Page 80 U U p p d d a a t t i i n n g g a a n n A A p p p p f f r r o o m m t t h h e e A A p p p p G G a a l l l l e e r r y y 1. At the printer control panel, press the Home button. 2. Touch Xerox App Gallery, then select Log In. 3. To enter your email address, use the touch screen keypad.
  • Page 81: Device

    Xerox® Apps Device D D e e v v i i c c e e O O v v e e r r v v i i e e w w The Device App gives you access to information about your printer, including the serial number and model.
  • Page 82: About

    Remote Services Use the Remote Services option to send error and usage information to the Xerox support team. Note: Your System Administrator is required to enable this feature using the Embedded Web Server.
  • Page 83: Supply Status

    Xerox® Apps Description Name Supplies Usage Page The Supplies Usage Page provides coverage information and part numbers for reordering supplies. Graphics Demo Page Print this page to check the quality of graphics. PCL Font List The PCL Font List provides a printout of all PCL fonts that are available on the printer.
  • Page 84: Billing And Usage Counters

    R R e e m m o o t t e e S S e e r r v v i i c c e e s s You can use the Remote Services option to send error and usage information to the Xerox support team to help them resolve problems quickly.
  • Page 85: Jobs

    Xerox® Apps Jobs J J o o b b s s O O v v e e r r v v i i e e w w You can use Jobs to view current jobs, print saved and secure jobs, and view details about completed jobs.
  • Page 86: Managing Special Job Types

    For Windows, click Printer Properties. Depending on your application, the title of the button can vary. • For Macintosh, in the Print window, in the print options list, click Xerox Features. 3. For Job Type, select Saved Job. a. Type a job name or select a name from the list.
  • Page 87 • For Windows, click Printer Properties. Depending on your application, the title of the button varies. • For Macintosh, in the Print window, click Preview, then select Xerox Features. 3. For Job Type, select Secure Print. 4. Type the passcode, confirm the passcode, then click OK.
  • Page 88 • For Windows, click Printer Properties. Depending on your application, the title of the button varies. • For Macintosh, in the Print window, click Preview, then select Xerox Features. 3. For Job Type, select Sample Set. 4. Select any other required printing options.
  • Page 89: Managing Jobs Using The Embedded Web Server

    Xerox® Apps 3. Touch the Sample Set job. Note: The Sample Set file description shows the job as Held for Future Printing, and shows the number of remaining copies of the job. 4. Select an option. • To print the remaining copies of the job, touch Release.
  • Page 90 Xerox® Apps 6. For Job Type, select an option: • Normal Print: This option prints a job immediately. • Secure Print: This option prints a job after you enter your passcode at the printer control panel. • Sample Set or Proof Print: These options print one copy of a multiple-copy print job. The device holds the remaining copies in memory until you release them for printing at the control panel.
  • Page 91: Copy

    Xerox® Apps Copy C C o o p p y y O O v v e e r r v v i i e e w w To make a copy, the device scans your original documents and temporarily stores the images. It then prints the images based on the options that you selected.
  • Page 92: Making A Copy

    Xerox® Apps M M a a k k i i n n g g a a C C o o p p y y To make a copy: 1. Load your original documents. • For single pages or paper that cannot be fed using the duplex automatic document feeder, use the document glass.
  • Page 93: Copy Workflows

    Xerox® Apps 4. To clear previous app settings, touch Reset. 5. To enter the number of copies needed, use the numeric keypad. 6. Adjust copy settings as needed. • To scan more documents using the document glass, or to change settings for different sections of the job, touch Build Job.
  • Page 94 Xerox® Apps 4. For Output Color, touch an option. • Auto Detect: The device detects the color content in the original document. If the original content is a color document, the printer makes copies in full color. If the original content is a black and white document, the printer makes copies in black only.
  • Page 95 Xerox® Apps 4. To adjust the saturation, move the slider. 5. Touch OK. E E r r a a s s i i n n g g t t h h e e E E d d g g e e s s o o f f C C o o p p i i e e s s You can erase content from the edges of your copies using the Edge Erase feature.
  • Page 96 Xerox® Apps S S h h i i f f t t i i n n g g t t h h e e I I m m a a g g e e You can change the placement of an image on the copy page. This is useful if the image is smaller than the page size.
  • Page 97 Xerox® Apps C C r r e e a a t t i i n n g g a a B B o o o o k k l l e e t t The Booklet Creation feature prints two pages on each side of the paper. The printer reorders and reorients the pages so that they are in the correct order and orientation when folded.
  • Page 98 Xerox® Apps 5. For Printing Options, select an option. • Blank Cover: This option inserts a blank cover. • Print on Side 1 Only: This option prints on the front side of the cover only. To rotate the image on side 2 by 180degrees, touch Rotate Side 2.
  • Page 99 Xerox® Apps S S p p e e c c i i f f y y i i n n g g C C h h a a p p t t e e r r S S t t a a r r t t P P a a g g i i n n a a t t i i o o n n If you select 2-sided copies, you can set each chapter to start on the front or back of the page.
  • Page 100 Xerox® Apps c. Touch OK. 6. Touch Add. The page range is added to the list on the right side of the screen. 7. To set other pages, repeat the previous steps. 8. Touch X. The options that you selected appear on the Special Pages screen.
  • Page 101 Xerox® Apps f. Touch OK. 6. To insert the current date: a. Touch the desired current date location. b. Touch Date. c. Touch On, then touch the date format that you wish to use. d. Touch Apply To, then select an option.
  • Page 102 Xerox® Apps 4. Select one of the following options. • Pages per Side: This option places a defined number of pages on one or both sides of the paper. Select the required number of pages per side. • Repeat Image: This option places a defined number of the same image on one or both sides of the paper.
  • Page 103 Xerox® Apps 10. Continue scanning segments until all original documents are scanned. 11. Touch Submit. P P r r i i n n t t i i n n g g a a S S a a m m p p l l e e J J o o b b Sample Job allows you to print a test copy of a job to inspect before printing multiple copies.
  • Page 104 Xerox® Apps 3. Touch Retrieve Saved Settings. 4. Touch the saved setting required. Note: To delete a saved setting, touch the setting, then touch Delete Settings. Touch Delete to confirm. 5. Touch OK. The saved settings are loaded for the current copy job.
  • Page 105: Id Card Copy

    Xerox® Apps ID Card Copy I I D D C C a a r r d d C C o o p p y y O O v v e e r r v v i i e e w w You can use the ID Card Copy App to copy both sides of an ID card or small document onto one side of paper.
  • Page 106: Email

    Xerox® Apps Email E E m m a a i i l l O O v v e e r r v v i i e e w w You can use the Email App to scan images and attach them to emails. You can specify the file name and format of the attachment, and include a subject heading and message for the email.
  • Page 107: Sending A Scanned Image In An Email

    Xerox® Apps S S e e n n d d i i n n g g a a S S c c a a n n n n e e d d I I m m a a g g e e i i n n a a n n E E m m a a i i l l To send a scanned image in an email: 1.
  • Page 108: Previewing Jobs

    Xerox® Apps 5. Enter recipients. • If the entry screen appears, to enter a recipient, touch an option, or touch X. • To select a contact or group from the Address Book, touch Device Address Book. Touch Favorites or Contacts, then select a recipient. Touch OK.
  • Page 109: Adding Or Editing Contacts In The Device Address Book From The Control Panel

    Xerox® Apps 4. Touch the app required, then select the job settings. 5. To enable preview, touch Preview. 6. If you are scanning from 2-sided original documents, touch 2-Sided Scanning, then select an option. 7. To start scanning, touch Preview.
  • Page 110 Xerox® Apps 7. Do one of the following steps. • To create an entry, touch Create New Contact. To enter contact details, touch a field, then use the touch screen keypad. Touch OK. • To add to an existing entry, touch Add to Existing Contact. In the list, touch a contact. To find a contact, touch Search.
  • Page 111: Workflow Scanning

    Note: The system administrator must set up this feature before you can use it. For details, refer to the System Administrator Guide at www.xerox.com/office/ALC81XXdocs. The Workflow Scanning App enables you to scan documents using pre-defined settings to a range of file destinations quickly and easily.
  • Page 112: Using Workflow Scanning

    Xerox® Apps U U s s i i n n g g W W o o r r k k f f l l o o w w S S c c a a n n n n i i n n g g To scan an original document: 1.
  • Page 113 • In the Workflow Scanning App, for a selected workflow, you can add more file destinations from the predefined list. For details, refer to the System Administrator Guide at www.xerox.com/office/ALC81XXdocs. 8. Adjust the workflow scanning settings as needed. • To save the scanned document as a specific file name, touch the attachment file name, enter a new name, then touch OK.
  • Page 114 The system administrator configures the file repositories available as predefined scanned file destinations. At least one repository must be set up for the Workflow Scanning feature to be available. For details, refer to the System Administrator Guide at www.xerox.com/office/ALC81XXdocs. Note: On the Pick a Workflow screen, the DEFAULT workflow is associated with the default file repository.
  • Page 115 Xerox® Apps c. Enter the name of the destination folder as needed. In SMB, the destination folder is the shared folder. d. In Document Path, enter the name of the subfolder within the destination folder. Select a Filing Policy. e. Enter a valid login name and password.
  • Page 116 Xerox® Apps 6. Click Options, then select a share-folder option. • To share the folder, select Share files and folders using SMB. • To share the folder with specific users, next to the user name, select On. 7. Click Done.
  • Page 117 Xerox® Apps 8. If Build Job is enabled, when prompted, do these steps. • To change settings, touch Program Next Segment. • To scan another page, touch Scan Next Segment. • To finish, touch Submit. 9. To move the file to your computer, use the Embedded Web Server. For details, refer to...
  • Page 118 Note: If the Display section does not appear, Scan to Mailbox is not enabled. For details, refer to the System Administrator Guide at www.xerox.com/office/ALC81XXdocs. 4. In the Scan to Mailbox section, click Create Folder. 5. Click the Folder Name: field, then type a name for the folder.
  • Page 119 Xerox® Apps 4. In the Scan to Mailbox section, click the folder containing the scan. Note: • For a password protected private folder, click the Folder Password field, type the password, then click OK. • If your image file does not appear, click Update View.
  • Page 120 Xerox® Apps 7. Adjust the workflow scanning settings as needed. • To save the scanned document as a specific file name, touch the attachment file name, enter a new name, then touch OK. • To save the scanned document as a specific file format, touch the attachment file format, then select the required format.
  • Page 121 You can use the Embedded Web Server to design the app, associate it with a workflow, and assign user rights. For details about creating Single-Touch Apps for workflow scanning destinations, refer to the System Administrator Guide at www.xerox.com/office/ALC81XXdocs. Xerox ®...
  • Page 122: Scan To

    Xerox® Apps Scan To S S c c a a n n T T o o O O v v e e r r v v i i e e w w You can use the Scan To App to scan documents to multiple destinations and recipients in a single scan.
  • Page 123: Scanning To A Usb Flash Drive

    Note: For details about using the Address Book and managing and creating Favorites, refer to the System Administrator Guide at www.xerox.com/office/ALC81XXdocs. 6. To add another Scan To destination, touch Add Destination, then select the required destination. 7. To save the scanned document as a specific filename, touch the attachment filename, then enter a new name using the touch screen keypad.
  • Page 124: Scanning To A Shared Folder On A Networked Computer

    Xerox® Apps 5. Insert your USB Flash drive into the USB port on the front of the printer, then touch USB. Note: If you select USB as the Scan To destination before inserting a USB Flash drive, you will be prompted to insert it.
  • Page 125 Note: For information on configuring SMB folders, refer to the System Administrator Guide at www.xerox.com/office/ALC81XXdocs. • To scan to a folder associated with a contact in the address book, touch Device Address Book. Select the required contact, then touch the Scan To location.
  • Page 126: Scanning To The Logged-In User

    Before scanning to a logged in user, ensure that LDAP user authentication is configured. For details, refer to the System Administrator Guide at www.xerox.com/office/ALC81XXdocs. The Scan To App produces scans in .jpg, .pdf, .pdf (a), .xps, and .tif file formats.
  • Page 127 Xerox® Apps 3. Load your original documents. • For single pages or paper that cannot be fed using the duplex automatic document feeder, use the document glass. Lift the duplex automatic document feeder, then place the original document face down in the upper-left corner of the document glass.
  • Page 128 Xerox® Apps 3. To add or edit a contact in the address book: • To add a contact, click Add, then enter the contact information. • To edit a contact, select the contact, then click Edit. Note: If the Add button is unavailable, the address book has reached its limit. The Device Address Book can contain up to 5000 contacts.
  • Page 129: Fax

    For details about configuring the fax function and customizing the Apps, refer to the System Administrator Guide at www.xerox.com/office/ALC81XXdocs. For information about all the App features and available settings, refer to Apps Features.
  • Page 130 Xerox® Apps S S e e n n d d i i n n g g a a F F a a x x To send a fax: 1. Load your original documents. • For single pages or paper that cannot be fed using the duplex automatic document feeder, use the document glass.
  • Page 131: Sending A Fax

    24 hours. Note: Before you use this feature, ensure that the printer is set to the current time. For details, refer to the System Administrator Guide at www.xerox.com/office/ALC81XXdocs. To specify the time to send your fax: 1. Load your original documents.
  • Page 132 Xerox® Apps A A d d d d i i n n g g a a C C o o v v e e r r S S h h e e e e t t You can use the Cover Sheet option to add an introduction page to the beginning of your fax. You can add a short comment to the cover sheet, as well as To and From details.
  • Page 133 Xerox® Apps D D e e l l e e t t i i n n g g a a S S e e c c u u r r e e F F a a x x To delete a secure fax: 1.
  • Page 134 Xerox® Apps Deleting Documents Stored for Polling 1. At the printer control panel, press the Home button, then touch Fax. 2. If the entry screen is displayed, touch Polling, or touch Add Recipient, then touch Polling. 3. Touch Store Polling Files.
  • Page 135 Storing a Fax in a Local Mailbox The system administrator must create a mailbox before you can use this feature. For details, refer to the System Administrator Guide at www.xerox.com/office/ALC81XXdocs. To store a fax in a local mailbox: 1. Load your original documents.
  • Page 136 Xerox® Apps 4. Touch Store To Mailbox. 5. Touch Remote Mailbox. 6. To enter the fax number of the remote device, touch Enter Remote Fax Number, then use the numeric keypad. Touch OK. 7. To enter the mailbox number, touch the Mailbox Number field, then use the numeric keypad.
  • Page 137 Xerox® Apps 7. Do one of the following steps. • To create an entry, touch Create New Contact. Touch each field, then enter the contact details using the touch screen keypad. Touch OK. • To add to an existing entry, touch Add to Existing Contact. Touch a contact in the list, or use the Search option to find a contact.
  • Page 138 File→Print or press CMD+P. 2. Select the required printer. 3. In the Print window, in the print options list, click Xerox Features. 4. From the Paper/Output window, click Job Type, then click Fax. 5. To add a recipient, in the Fax window, click the Recipients tab, then click the Add Recipient icon.
  • Page 139: Server Fax

    Xerox® Apps Server Fax S S e e r r v v e e r r F F a a x x O O v v e e r r v v i i e e w w Server Fax allows you to send a fax over a network to a fax server. The fax server then sends the fax to a fax machine over a phone line.
  • Page 140: Sending A Server Fax

    Xerox® Apps S S e e n n d d i i n n g g a a S S e e r r v v e e r r F F a a x x If a fax server is connected to the network, you can send a document to a fax machine without requiring a dedicated telephone line.
  • Page 141: Sending A Delayed Server Fax

    Xerox® Apps 2. At the device control panel, press the Home button. 3. Touch Server Fax. 4. To clear previous app settings, touch Reset. 5. Enter recipients. • If the entry screen appears, touch an option, or touch X. • To select a contact or group from the Device Address Book, touch Device Address Book, then select a recipient.
  • Page 142 Xerox® Apps 8. Touch Send. The fax is scanned and saved, then sent at the time you specified. 9. To return to the Home screen, press the Home button. Xerox ® AltaLink ® C81XX Series Color Multifunction Printer User Guide...
  • Page 143: Internet Fax

    Xerox® Apps Internet Fax I I n n t t e e r r n n e e t t F F a a x x O O v v e e r r v v i i e e w w You can use the Internet Fax App to scan images and attach them to emails.
  • Page 144: Sending A Scanned Image In An Internet Fax

    Xerox® Apps S S e e n n d d i i n n g g a a S S c c a a n n n n e e d d I I m m a a g g e e i i n n a a n n I I n n t t e e r r n n e e t t F F a a x x To send a scanned image in an email: 1.
  • Page 145 Xerox® Apps 5. Enter recipients: • If the entry screen appears, to enter a recipient, touch an option, or touch X. • To select a contact from the Address Book, touch Device Address Book. Select a recipient, then touch OK.
  • Page 146: Print From

    Xerox® Apps Print From P P r r i i n n t t F F r r o o m m O O v v e e r r v v i i e e w w You can use the Print From App to print jobs from various sources. You can print jobs stored in a print-ready format from a USB stick.
  • Page 147: Printing From A Mailbox

    Xerox® Apps 3. Touch the name of the saved job that you want to print. 4. Select the options for paper supply, quantity, 2-sided printing, and finishing. 5. Touch Print. Note: To print a private saved job, at the Passcode Required screen, enter the passcode, then touch OK.
  • Page 148: Printbyxerox

    You can use the Xerox ® @PrintByXerox App to print email attachments and documents sent to your printer from mobile devices. When your Xerox device is connected to the Internet, the @PrintByXerox App works with the Xerox ® Workplace Cloud for simple email-based printing.
  • Page 149: Printing

    • Printing Overview ........................150 • Selecting Printing Options ......................151 • Print Jobs ..........................160 • Printing Features ........................164 • Using Custom Paper Sizes ......................175 • Print From ..........................178 Xerox ® AltaLink ® C81XX Series Color Multifunction Printer User Guide...
  • Page 150: Printing Overview

    4. Select your printer. 5. To access the print driver settings, for Windows, select Printer Properties, Print Options, or Preferences. For Macintosh, select Xerox Features. The name of the option can vary depending on your application. 6. Modify the print driver settings as necessary, then click OK.
  • Page 151: Selecting Printing Options

    Printing Selecting Printing Options Printing options, also called print driver software options, are specified as Printing preferences in Windows and Xerox Features in Macintosh. Printing options include settings for 2-sided printing, ® page layout, and print quality. Printing options that you set from Printing preferences within the Devices and Printers window become the default setting.
  • Page 152: Windows Printing Options

    3. Click a tab in the Printing Preferences window, then make selections. 4. To save your selections and close the Printing Preferences window, click OK. 5. To send the job to the printer, click Print. Xerox ® AltaLink ®...
  • Page 153 • Right Bottom Tray: This option selects the output tray that is on the bottom of the Business Ready Finisher when the optional Booklet Maker is not installed. 4. To send the job to the printer, click OK, then click Print. Xerox ® AltaLink ®...
  • Page 154 6. Click OK. 7. To print with these settings: • From the Saved Settings or Presets list, select the name of the preset. • For a 1–Touch preset, click 1–Touch, then click the required 1–Touch preset. Xerox ® AltaLink ®...
  • Page 155: Macintosh Printing Options

    To use specific printing options, change the settings before sending the job to the printer. 1. With the document open in your application, click File→Print. 2. Select your printer. 3. In the Print window, in the print options list, click Xerox Features. Note: To see all printing options, click Show Details.
  • Page 156: Unix, Linux, And As/400 Printing

    U U N N I I X X , , L L i i n n u u x x , , a a n n d d A A S S / / 4 4 0 0 0 0 P P r r i i n n t t i i n n g g To provide printer spooling and network print server functionality, UNIX-based printing uses LPD/LPR port 515 or lp to port 9100. Xerox printers can communicate using either protocol. X X e e r r o o x x ®...
  • Page 157 Linux or a CUPS (Common UNIX Printing System) print driver. You do not need both drivers. Xerox recommends that you install one of the full-featured custom print drivers for Linux. To locate drivers for your printer, go to www.xerox.com/support/drivers.
  • Page 158: Mobile Printing Options

    ® for CUPS (Common UNIX Printing System). 2. Copy the PPD file into the CUPS ppd/Xerox folder on your workstation. If you are unsure of the location of the folder, use the Find command to locate the PPD files. 3. Follow the instructions that are included with the PPD file.
  • Page 159 You can obtain a free download of the software from the Google Play Store. • To connect the printer to Wi-Fi or Wi-Fi Direct, purchase and install the Xerox Wireless Network Adapter. For more information, refer to the Xerox ®...
  • Page 160: Print Jobs

    1. At the printer control panel, press the Home button. 2. Touch Jobs. 3. From the jobs list, touch the held job name. The resources required for the job appear on the control panel. Xerox ® AltaLink ® C81XX Series Color Multifunction Printer...
  • Page 161: Printing Special Job Types

    For Windows, click Printer Properties. Depending on your application, the title of the button can vary. • For Macintosh, in the Print window, in the print options list, click Xerox Features. 3. For Job Type, select Saved Job. a. Type a job name or select a name from the list.
  • Page 162 • For Windows, click Printer Properties. Depending on your application, the title of the button varies. • For Macintosh, in the Print window, click Preview, then select Xerox Features. 3. For Job Type, select Secure Print. 4. Type the passcode, confirm the passcode, then click OK.
  • Page 163 • For Windows, click Printer Properties. Depending on your application, the title of the button varies. • For Macintosh, in the Print window, click Preview, then select Xerox Features. 3. For Job Type, select Sample Set. 4. Select any other required printing options.
  • Page 164: Printing Features

    • To locate paper options in Windows, in the print driver, click the Printing Options tab. • To locate paper options on Macintosh, in the Print window, in the print options list, click Xerox Features. Within Xerox Features, in the options list, click Paper/Output.
  • Page 165: Printing On Both Sides Of The Paper

    X X e e r r o o x x B B l l a a c c k k a a n n d d W W h h i i t t e e You can select printing in color or black and white. Xerox ®...
  • Page 166: Print Quality

    • To locate color options in Windows, in the print driver, click the Image Options tab. • To locate color options on Macintosh, in the Print window, in the print options list, click Xerox Features. Within Xerox Features, in the options list, click Color Options.
  • Page 167: Printing Multiple Pages To A Single Sheet

    With 2-sided printing, you can print a document in the form of a small booklet. You can create booklets from any paper size that is supported for 2-sided printing. The print driver automatically reduces each page image and prints four page images per sheet of Xerox ® AltaLink ®...
  • Page 168: Using Special

    • To locate booklet creation in Windows, on the Document Options tab, click Page Layout. • To locate booklet creation on Macintosh, in the Print window, in the print options list, click Xerox Features. Within Xerox Features, in the options list, click Booklet Layout.
  • Page 169 To print exception pages on the same paper size, color, or type as the main body of the job, select Use Job Setting. • 2-Sided Printing: Allows you to select 2-sided printing options for the exception pages. Available options are: Xerox ® AltaLink ®...
  • Page 170: Printing Annotations For Windows

    4. For a date or time stamp, click Add Time Stamp. Specify the date and time option, select the required settings, then click OK. 5. To add a picture annotation, click Add Picture. To locate the picture, click the Browse icon. Select the required settings, then click OK. Xerox ® AltaLink ®...
  • Page 171: Printing Watermarks For Windows

    1. In the print driver, click the Document Options tab. 2. Click the Watermark tab. 3. From the Watermark menu, select the watermark. You can choose from preset watermarks, or create a customized watermark. You can also manage watermarks from this menu. Xerox ® AltaLink ®...
  • Page 172: Orientation

    • Landscape: Orients the paper so that the text and images print across the long dimension of the paper. • Rotated Landscape: Orients the paper so that the content is rotated 180 degrees and with the long bottom side up. Xerox ® AltaLink ®...
  • Page 173: Advanced Printing Options

    • Notify for Completed, but Altered Jobs: This option provides a notification on all jobs that completed with restrictions. • Notify for Failed or Canceled Jobs: This option provides notification of all jobs that failed to print or were canceled. Xerox ® AltaLink ®...
  • Page 174 • Manually Encrypt Documents: This option allows you to set encryption for specific jobs that you send to the printer. Note: Manually Encrypt Documents is the default printer setting. 5. Click Apply. 6. To save the settings, click OK. Xerox ® AltaLink ® C81XX Series Color Multifunction Printer User Guide...
  • Page 175: Using Custom Paper Sizes

    1. From Windows Control Panel, select Devices and Printers. 2. Select the printer, then click Print server properties. 3. On the Forms tab, for Create a new form, click the check box. 4. For Form name, type a name for the new paper size. Xerox ® AltaLink ®...
  • Page 176: Printing On Custom-Size Paper

    Before you print on custom-size paper, define the custom width and length of the paper in the print driver software and on the printer control panel. For more information, refer to Defining Custom Paper Sizes. Xerox ® AltaLink ® C81XX Series Color Multifunction Printer...
  • Page 177 1. Load the custom-size paper. For details, refer to Loading Paper. 2. In the application, click File→Print. 3. From the Paper Size list, select the custom paper size. 4. Click Print. Xerox ® AltaLink ® C81XX Series Color Multifunction Printer User Guide...
  • Page 178: Print From

    If the Print from USB feature does not appear, enable the feature, or contact your system administrator. For details, refer to the System Administrator Guide at www.xerox. com/office/ALC81XXdocs. 3. To select a file for printing, browse to the file, then touch the check box. If multiple files require printing, browse to each file, then select the check box for each file.
  • Page 179: Printing From A Mailbox

    Note: If Mailboxes does not appear, enable the feature or contact the system administrator. For details, refer to the System Administrator Guide at www.xerox.com/ office/ALC81XXdocs. 3. Touch the name of the document that you want to print. 4. Select the options for paper supply, quantity, 2-sided printing, and finishing.
  • Page 180 Printing Xerox ® AltaLink ® C81XX Series Color Multifunction Printer User Guide...
  • Page 181: Paper And Media

    This chapter contains: • Paper and Media Overview....................... 182 • Supported Paper ........................183 • Configuring Paper Tray Settings ....................191 • Loading Paper.......................... 196 • Printing on Special Paper......................207 Xerox ® AltaLink ® C81XX Series Color Multifunction Printer User Guide...
  • Page 182: Paper And Media Overview

    • Tray 5 - Bypass Tray • Tray 6 - High Capacity Feeder Labels inside each tray show the correct orientation for loading certain types of media. The MAX label shows the maximum fill line for the tray. Xerox ® AltaLink ®...
  • Page 183: Supported Paper

    For best results, use Xerox paper and media recommended for your printer. R R e e c c o o m m m m e e n n d d e e d d M M e e d d i i a a A list of paper and media recommended for your printer is available at: •...
  • Page 184: Paper Storage Guidelines

    Paper and Media Caution: The Xerox Warranty or Service Agreement does not cover damage caused by using unsupported paper or specialty media. For more information, contact your local Xerox representative. P P a a p p e e r r S S t t o o r r a a g g e e G G u u i i d d e e l l i i n n e e s s Storing your paper and other media properly contributes to optimum print quality.
  • Page 185 Heavyweight Cardstock 257–300 g/m² Heavyweight Cardstock Reloaded Heavyweight Glossy Cardstock Heavyweight Glossy Cardstock Reloaded Custom Type 7 Transparencies Tray 5 – Bypass Tray Lightweight 52–63 g/m² Plain 64–90 g/m² Xerox ® AltaLink ® C81XX Series Color Multifunction Printer User Guide...
  • Page 186 257–300 g/m² Heavyweight Cardstock Reloaded Heavyweight Glossy Cardstock Heavyweight Glossy Cardstock Reloaded Custom Type 7 Transparencies Envelopes 75–90 g/m² Envelope Tray Envelopes 75–90 g/m² Note: Pre-cut tabs are not supported. Xerox ® AltaLink ® C81XX Series Color Multifunction Printer User Guide...
  • Page 187: Supported Standard Paper Sizes

    Letter (216 x 279 mm, 8.5 x 11 in.) Module JIS B5 (182 x 257 mm, 7.2 x 10.1 Executive (184 x 267 mm, 7.25 x Tray 6 - High Capacity Feeder in.) 10.5 in.) Xerox ® AltaLink ® C81XX Series Color Multifunction Printer User Guide...
  • Page 188 Monarch envelope (98 x 190 mm, C5 envelope (162 x 229 mm, 6.4 x 3.9 x 7.5 in.) 9 in.) No. 6 3/4 Envelope (92 x 165 mm, 3.6 x 6.5 in.) Xerox ® AltaLink ® C81XX Series Color Multifunction Printer User Guide...
  • Page 189: Supported Paper Sizes And Weights For 2-Sided Printing

    Note: • Do not use transparencies, envelopes, labels, lightweight paper, or reloaded paper for 2-sided printing. • For 2-sided printing, paper weights above 220 g/m² can cause misfeeds and paper jams. Xerox ® AltaLink ® C81XX Series Color Multifunction Printer...
  • Page 190: Supported Paper Sizes For The Envelope Tray

    JIS B5 (182 x 257 mm, 7.2 x 10.1 in.) Executive (184 x 267 mm, 7.25 x 10.5 in.) Envelope Tray Minimum: 90 x 98 mm (3.5 x 3.9 in.) Maximum: 241 x 372 mm (9.5 x 14.6 in.) Xerox ® AltaLink ® C81XX Series Color Multifunction Printer...
  • Page 191: Configuring Paper Tray Settings

    • Auto Confirmation: This option confirms automatically the paper type, color, and size without showing a prompt. Note: To configure the paper size confirmation prompt, refer to the System Administrator Guide at www.xerox.com/office/ALC81XXdocs. Xerox ® AltaLink ®...
  • Page 192: Configuring Trays 3 And 4 Of The Tandem Tray Module

    2. Pinch the guide lock on the front paper guide, then slide the paper guide to the required paper size. 3. To lock the paper guides into place, release the guide lock. Note: The paper guides lock into place only at the designated standard paper sizes. Xerox ® AltaLink ® C81XX Series Color Multifunction Printer...
  • Page 193: Configuring Tray 6

    2. Open the side gate. Remove the screw that holds the spacer plate at the back of the tray, then lift the spacer plate out of the tray. Repeat the procedure for the spacer plate at the front of the tray. Xerox ® AltaLink ®...
  • Page 194 6. At the control panel, select the correct type and color. 7. To confirm the settings, touch Confirm. For information about loading paper in Tray 6, refer to Loading Paper in Tray Xerox ® AltaLink ® C81XX Series Color Multifunction Printer...
  • Page 195: Changing Paper Size, Type, And Color

    • To select a new paper color, touch Color. 4. To confirm the settings, touch Confirm. To set the paper size, type, or color when a tray is set to Dedicated, refer to Configuring Dedicated Paper Trays. Xerox ® AltaLink ® C81XX Series Color Multifunction Printer User Guide...
  • Page 196: Loading Paper

    1. Pull out the tray until it stops. 2. Remove any paper that is a different size or type. 3. To move out the length or width paper guides, pinch the guide locks, then slide out the length or width paper guides. Xerox ® AltaLink ®...
  • Page 197 • Insert letterhead and pre-printed paper face down with the top edge toward the left. • Load hole-punched paper with the holes to the back. Note: Use short-edge feed for custom-size paper and special media. Xerox ® AltaLink ® C81XX Series Color Multifunction Printer...
  • Page 198 • If pre-printed paper is loaded in the printer, for type, select Pre-printed. 9. To confirm the settings, touch Confirm. Note: To change the paper settings when the tray is set to Dedicated mode, refer to Configuring Dedicated Paper Trays. Xerox ® AltaLink ® C81XX Series Color Multifunction Printer User Guide...
  • Page 199: Adjusting The Paper Guides In The 520-Sheet Adjustable Trays

    1. Pull out the tray until it stops. 2. Remove any paper from the tray, pinch the guide levers, and move the guides outward until they stop. 3. To move out the paper-length guide, pinch the guide lever and slide the guide outward. Xerox ® AltaLink ®...
  • Page 200 4. To move out the paper-width guide, pinch the guide lever and slide the guide outward. 5. Load the custom-size paper in the tray. 6. To engage the fine-adjustment block, pinch the levers and slide the guides inward. The paper guides move in increments of 1mm. Xerox ® AltaLink ®...
  • Page 201: Loading Paper In Trays 3 And 4 Of The Tandem Tray Module

    Note: To avoid paper jams and misfeeds, do not remove the packaging from the paper until you are ready to use it. Xerox ® AltaLink ®...
  • Page 202 5. At the control panel, select the correct paper type and color. • If letterhead paper is loaded in the printer, for type, select Letterhead. • If pre-printed paper is loaded in the printer, for type, select Pre-printed. 6. To confirm the settings, touch Confirm. Xerox ® AltaLink ®...
  • Page 203: Loading Paper In The Bypass Tray

    The procedure separates any sheets that are stuck together and reduces the possibility of jams. Note: To avoid jams and misfeeds, do not remove paper from its packaging until you are ready to use it. Xerox ® AltaLink ® C81XX Series Color Multifunction Printer...
  • Page 204 6. At the control panel, select the correct paper size, type, and color. • If letterhead paper is loaded in the printer, for type, select Letterhead. • If pre-printed paper is loaded in the printer, for type, select Pre-printed. 7. To confirm the settings, touch Confirm. Xerox ® AltaLink ®...
  • Page 205: Loading Paper In Tray 6

    Note: To avoid paper jams and misfeeds, do not remove paper from the packaging until necessary. Xerox ® AltaLink ® C81XX Series Color Multifunction Printer...
  • Page 206 7. At the control panel, select the correct type and color. • If letterhead paper is loaded in the printer, for type, select Letterhead. • If pre-printed paper is loaded in the printer, for type, select Pre-printed. 8. To confirm the settings, touch Confirm. Xerox ® AltaLink ®...
  • Page 207: Printing On Special Paper

    Paper and Media Printing on Special Paper To order paper, transparencies, or other media, contact your local reseller or go to www.xerox.com/ office/supplies. For reference: www.xerox.com/rmlna : Recommended Media List (United States) www.xerox.com/rmleu : Recommended Media List (Europe) E E n n v v e e l l o o p p e e s s You can print envelopes from Tray 5.
  • Page 208 2. Move the width guides to the edges of the tray. Note: If you do not load envelopes in the Bypass Tray right after they are removed from the packaging, they can bulge. To avoid jams, flatten the envelopes. Xerox ® AltaLink ®...
  • Page 209 Rotate Image 180 Degrees. 4. At the control panel, select the correct paper size, type, and color. Ensure that the paper type is set to Envelope. 5. To confirm the settings, touch Confirm. Xerox ® AltaLink ® C81XX Series Color Multifunction Printer...
  • Page 210 3. Adjust the paper guides so that they rest lightly against the edges of the envelopes. Ensure that the maximum fill line is visible or that there are no more than 50 envelopes loaded in the tray. Xerox ® AltaLink ®...
  • Page 211: Labels

    • Rotate stock frequently. Long periods of storage in extreme conditions can cause labels to curl and jam in the printer. • In the print driver software, select Label as the paper type. • Before loading labels, remove all other paper from the tray. Xerox ® AltaLink ®...
  • Page 212 2. Ensure that the paper guides are set in the correct position for the size of labels you are loading. 3. Remove any paper that is a different size or type. 4. To move out the length or width paper guide, release the guide lock, then slide out the length or width paper guide. Xerox ® AltaLink ®...
  • Page 213 Note: Do not load paper above the maximum fill line. Overfilling can cause paper jams. 6. Adjust the length and width paper guides to fit the labels. 7. Slide the tray back into the printer. Xerox ® AltaLink ® C81XX Series Color Multifunction Printer...
  • Page 214: Banner Paper

    L L o o a a d d i i n n g g B B a a n n n n e e r r P P a a p p e e r r i i n n t t h h e e B B y y p p a a s s s s T T r r a a y y 1. Open the Bypass Tray, then pull out the extension tray. Remove any paper that is a different size or type. 2. Move the width guides to the edges of the tray. Xerox ® AltaLink ®...
  • Page 215 7. To return to the Home screen, press the Home button. Note: As the paper feeds into the printer, support the paper with your hands. To prevent paper jams, feed one sheet of paper at a time. Xerox ® AltaLink ®...
  • Page 216 Ensure that the leading edge feeds underneath the front guide. 4. Carefully roll the remaining length of the banner paper into the Long Sheet Feed Extension guides. Ensure that the trailing edge rests against the front guide. Xerox ® AltaLink ®...
  • Page 217: Glossy Media

    T T r r a a n n s s p p a a r r e e n n c c i i e e s s Transparencies can be printed from trays 1–5. For best results, use only recommended Xerox ®...
  • Page 218 Paper and Media Caution: The Xerox Warranty or Service Agreement does not cover damage caused by using unsupported paper or specialty media. For more information, contact your local Xerox representative. G G u u i i d d e e l l i i n n e e s s f f o o r r P P r r i i n n t t i i n n g g o o n n T T r r a a n n s s p p a a r r e e n n c c i i e e s s •...
  • Page 219: Maintenance

    This chapter contains: • General Precautions ......................... 220 • Cleaning the Printer ......................... 221 • Supplies ........................... 232 • Managing the Printer ....................... 272 • Moving the Printer ........................273 Xerox ® AltaLink ® C81XX Series Color Multifunction Printer User Guide...
  • Page 220: General Precautions

    • Do not touch the electrical contacts or gears. Doing so could damage the printer and cause the print quality to deteriorate. • Ensure that any parts removed during cleaning are replaced before you plug in the printer. Xerox ® AltaLink ®...
  • Page 221: Cleaning The Printer

    2. To remove fingerprints and smudges, clean the touch screen and control panel with a soft, lint- free cloth. Note: There is a lint-free cloth stored in a compartment on the document feeder. Xerox ® AltaLink ® C81XX Series Color Multifunction Printer...
  • Page 222 To ensure optimum print quality, clean the document glass regularly. Cleaning helps avoid output with streaks, smears, and other marks that transfer from the glass while scanning documents. Note: For best results, use Xerox ® Glass Cleaner to remove marks and streaks.
  • Page 223 Maintenance 5. Wipe the white underside of the document cover until it is clean and dry. 6. Close the document cover. Xerox ® AltaLink ® C81XX Series Color Multifunction Printer User Guide...
  • Page 224 There is a lint-free cloth stored in a compartment on the document feeder. Caution: Do not use alcohol or chemical cleaners on the document feed rollers. 3. Close the document feeder top cover. If available, close the document feeder left cover. Xerox ® AltaLink ®...
  • Page 225 1. To access the second-side scanning lens assembly, on the left side of the document cover, lower the lever. 2. To separate the left end of the document cover from the lens assembly, continue to lower the lever. Xerox ® AltaLink ®...
  • Page 226 To prevent damage to the film around the glass, do not press heavily on the mirrored glass. 4. Return the document cover to the original position, and ensure that the lever is locked in place. If you touch the document cover, before you close the document feeder, clean the cover. Xerox ® AltaLink ®...
  • Page 227: Cleaning The Printer Interior

    Do not perform this procedure when the printer is copying or printing. 1. Open the front door of the printer. 2. Remove the waste toner transport unit: a. To unlock the waste toner transport unit, rotate the locking lever 45 degrees counterclockwise. Xerox ® AltaLink ® C81XX Series Color Multifunction Printer...
  • Page 228 Place the removed waste toner transport unit on a level surface, with the openings facing up. Caution: To avoid toner spills, do not lay the waste toner transport unit face down, or on its side. Xerox ® AltaLink ®...
  • Page 229 Repeat this action two more times. 5. Repeat step 4 for each printhead LED lens. 6. Return the cleaning rod to its original location. 7. To insert the waste toner transport unit: Xerox ® AltaLink ®...
  • Page 230 Maintenance a. Position the waste toner transport unit as shown. b. Press the waste toner transport unit toward the printer, until both ends click into place. Xerox ® AltaLink ® C81XX Series Color Multifunction Printer User Guide...
  • Page 231 Maintenance c. To lock the waste toner transport unit, rotate the locking lever 45 degrees clockwise. 8. Close the printer front door. Xerox ® AltaLink ® C81XX Series Color Multifunction Printer User Guide...
  • Page 232: Supplies

    ® controls by Xerox for specific use with this printer. R R o o u u t t i i n n e e M M a a i i n n t t e e n n a a n n c c e e I I t t e e m m s s Routine maintenance items are printer parts that have a limited life and require periodic replacement.
  • Page 233: Ordering Supplies

    Agreement do not cover damage, malfunction, or degradation of performance caused by use of non-Xerox supplies, or the use of Xerox supplies not specified for this printer. S S u u p p p p l l y y S S t t a a t t u u s s You can check the status and percentage of life remaining for your printer supplies at the control panel or from the Embedded Web Server.
  • Page 234 Use a damp cloth to wipe off spilled toner. Never use a vacuum cleaner to remove spills. Electric sparks inside the vacuum cleaner can cause a fire or explosion. If you spill a large volume of toner, contact your local Xerox representative. WARNING: Never throw a toner cartridge into an open flame.
  • Page 235 Do not perform this procedure when the printer is copying or printing. 1. Open the front cover of the printer. 2. Firmly grip the cartridge handle, then pull the toner cartridge straight out of the printer. Xerox ® AltaLink ®...
  • Page 236 3. Remove the new toner cartridge from the packaging. Tilt the cartridge up and down, then left and right 10 times. 4. Hold the new toner cartridge with the arrow facing up, then push the cartridge in slowly until it stops. Xerox ® AltaLink ®...
  • Page 237 Maintenance 5. Push gently on the toner cartridge to ensure that it is seated. 6. Close the printer front cover. Xerox ® AltaLink ® C81XX Series Color Multifunction Printer User Guide...
  • Page 238: Waste Container

    Caution: Do not perform this procedure when the printer is copying or printing. 1. Open the front cover of the printer. 2. Remove the new waste container from the packaging. Retain the packaging. Xerox ® AltaLink ® C81XX Series Color Multifunction Printer...
  • Page 239 3. Pull the used waste container out slowly while supporting it with your other hand. 4. Place the used waste container in the plastic bag, then seal the bag firmly using the zipper. 5. Place the used waste container in the empty box. Xerox ® AltaLink ®...
  • Page 240 6. Hold the left side of the new waste container and slide it into the printer until it clicks. 7. Clean the printhead lenses. For details, refer to Cleaning the Printhead Lenses. 8. Close the printer front cover. Xerox ® AltaLink ® C81XX Series Color Multifunction Printer...
  • Page 241: Drum Cartridges

    Do not touch or scratch the surface of the drum. 1. Open the front cover of the printer. 2. Remove the waste toner transport unit: a. To unlock the waste toner transport unit, rotate the locking lever 45 degrees counterclockwise. Xerox ® AltaLink ® C81XX Series Color Multifunction Printer...
  • Page 242 Place the removed waste toner transport unit on a level surface, with the openings facing up. Caution: To avoid toner spills, do not lay the waste toner transport unit face down, or on its side. Xerox ® AltaLink ®...
  • Page 243 Place the used drum cartridge in the plastic bag, then place the bag in the box. WARNING: Do not touch any toner that adheres to the drum cartridge. 5. Remove the packing material from the end of the new drum cartridge. Xerox ® AltaLink ®...
  • Page 244 7. With the guides inserted in the slot, remove the black paper sheet. Remove the tape from the top of the cartridge shield. 8. Hold the shield, then use the orange handle to push the cartridge into the printer. 9. Continue to push the orange handle until it stops. Xerox ® AltaLink ®...
  • Page 245 10. Carefully remove the protective shield. 11. To lock the drum cartridge, turn the orange lever to the left. 12. To insert the waste toner transport unit: a. Position the waste toner transport unit as shown. Xerox ® AltaLink ®...
  • Page 246 Press the waste toner transport unit toward the printer, until both ends click into place. c. To lock the waste toner transport unit, rotate the locking lever 45 degrees clockwise. 13. Close the printer front door. 14. Dispose of the protective shield and tape as normal office waste. Xerox ® AltaLink ®...
  • Page 247: Replacing The Transfer Belt Cleaner

    Do not perform this procedure when the printer is copying or printing. 1. Open the front cover of the printer. 2. Remove the waste toner transport unit: a. To unlock the waste toner transport unit, rotate the locking lever 45 degrees counterclockwise. Xerox ® AltaLink ® C81XX Series Color Multifunction Printer...
  • Page 248 Place the removed waste toner transport unit on a level surface, with the openings facing up. Caution: To avoid toner spills, do not lay the waste toner transport unit face down, or on its side. Xerox ® AltaLink ®...
  • Page 249 Retain the packaging. Caution: Do not touch the surface of the transfer belt cleaner. This action can cause image quality to deteriorate. 5. Place the used transfer belt cleaner in the packaging. Xerox ® AltaLink ® C81XX Series Color Multifunction Printer...
  • Page 250 7. Push the belt cleaner until it clicks into place, then to lock the belt cleaner, turn the orange lever to the right. 8. To insert the waste toner transport unit: a. Position the waste toner transport unit as shown. Xerox ® AltaLink ®...
  • Page 251 Press the waste toner transport unit toward the printer, until both ends click into place. c. To lock the waste toner transport unit, rotate the locking lever 45 degrees clockwise. 9. Close the printer front cover. Xerox ® AltaLink ®...
  • Page 252: Second Bias Transfer Roller

    Do not touch the transfer belt. Touching the belt can reduce image quality or damage the transfer belt. Do not touch the transfer roller. Touching the roller can reduce image quality. 3. Remove the new transfer roller from the packaging. Retain the packaging. Xerox ® AltaLink ®...
  • Page 253 5. Lift the used transfer roller out of the printer. Note: Do not touch any toner that adheres to the transfer roller. 6. Place the used transfer roller in the plastic bag. Xerox ® AltaLink ® C81XX Series Color Multifunction Printer...
  • Page 254: Fan Filter

    When it is time to replace the fan filter, the printer displays a message on the control panel. 1. Remove the new fan filter from the packaging. Retain the packaging. 2. To remove the fan filter cover, press down on the R9 cover release tab, then lift the cover away from the printer. Xerox ® AltaLink ®...
  • Page 255 7. To confirm that you replaced the fan filter, when the confirmation message appears, touch Yes. Note: If the confirmation message does not appear, to generate the message, open, then close, the front door of the printer. Xerox ® AltaLink ®...
  • Page 256: Staple Cartridges And Staple Refills

    2. To remove the staple cartridge, grasp the orange handle, then pull it firmly toward you. 3. Check inside the finisher for any loose staples and remove them. 4. Pinch both sides of the staple pack and remove the staple pack from the cartridge. Xerox ® AltaLink ®...
  • Page 257 5. Insert the front side of the new staple pack into the staple cartridge, then push the rear side into the cartridge. 6. Grasp the new staple cartridge by the orange handle, then insert the cartridge into the stapler until it clicks. 7. Close the finisher front door. Xerox ® AltaLink ® C81XX Series Color Multifunction Printer...
  • Page 258 2. Reach into the finisher cabinet and pull the stapler toward you until it stops. 3. Push the stapler assembly to the right, as shown. 4. To remove the staple cartridge, grasp the orange handle, then pull it firmly toward you. Xerox ® AltaLink ®...
  • Page 259 6. Insert the front side of the new staple pack into the staple cartridge, then push the rear side into the cartridge. 7. Grasp the new staple cartridge by the orange handle, then insert the cartridge into the stapler assembly until it clicks. 8. Close the finisher front door. Xerox ® AltaLink ® C81XX Series Color Multifunction Printer...
  • Page 260 2. If the staple cartridges are not visible, grip the vertical panels at the left and right of the opening and slide the panels to the center. 3. Hold the tabs on both sides of the staple cartridge and pull the cartridge out of the finisher. Xerox ® AltaLink ®...
  • Page 261 The booklet maker uses two staple cartridges. Booklet stapling requires that both staple cartridges contain staples. 5. Repeat the procedure for the other staple cartridge. 6. Close the finisher side cover. Xerox ® AltaLink ® C81XX Series Color Multifunction Printer...
  • Page 262 1. Open the front door of the Business Ready finisher. 2. Grasp the stapler assembly lever R1, then move the lever to the right. 3. To remove the staple cartridge, grasp the orange handle, then pull it firmly toward you. Xerox ® AltaLink ®...
  • Page 263 6. Grasp the new staple cartridge by the orange handle, then insert the cartridge into the stapler assembly until the staple cartridge clicks into place. 7. Return the stapler assembly to its original position, then close the finisher door. Xerox ® AltaLink ®...
  • Page 264 3. To remove a staple cartridge from the booklet maker, push down on the staple cartridge handle, as shown, then pull the cartridge out and up. 4. Turn over the staple cartridge. Xerox ® AltaLink ®...
  • Page 265 6. Insert the front side of the new staple pack into the staple cartridge, then push the rear side into the cartridge. 7. To close the staple cartridge, push back the cartridge handle until it clicks. Xerox ® AltaLink ®...
  • Page 266 8. To return the staple cartridge to the booklet maker, insert the staple cartridge and push up on the cartridge handle as shown. 9. Return the booklet maker to its original position, then close the finisher door. Xerox ® AltaLink ®...
  • Page 267: Emptying The Hole Punch Waste Container

    E E m m p p t t y y i i n n g g t t h h e e H H o o l l e e P P u u n n c c h h W W a a s s t t e e C C o o n n t t a a i i n n e e r r A message appears on the control panel when the hole punch waste container is full. Xerox ®...
  • Page 268 Do not perform this procedure when the printer is copying or printing. 1. Lift the finisher transport top cover, then open the front transport cover. 2. Pull out the hole-punch waste container. 3. Empty the container. Xerox ® AltaLink ®...
  • Page 269 Maintenance 4. Insert the container all the way into the finisher. 5. Close the finisher front transport cover, then close the top cover. Xerox ® AltaLink ® C81XX Series Color Multifunction Printer User Guide...
  • Page 270 The hole punch counter resets after 10 seconds. • If you remove the hole punch waste container before the device instructs you to, empty the container before you reinsert it into the finisher. 3. Empty the container. Xerox ® AltaLink ®...
  • Page 271: Recycling Supplies

    1. At the printer control panel, press the Home button. 2. Touch the Log In button, enter the system administrator login information, then touch Done. For details, refer to the System Administrator Guide at www.xerox.com/office/ALC81XXdocs. 3. Touch Device→Tools→Device Settings→Supplies. 4. Touch Supply Counter Reset.
  • Page 272: Managing The Printer

    Services Upload feature to simplify the process. You can enable Remote Services to send billing meter readings to Xerox automatically so that you do not have to collect the readings manually. Refer to the System Administrator Guide for further information.
  • Page 273: Moving The Printer

    Failure to repackage the printer properly for shipment can result in damage not covered by the Xerox ® Warranty or Service Agreement. The Xerox ® Warranty or Service Agreement do not cover damage to the printer caused by improper moving.
  • Page 274 Maintenance Xerox ® AltaLink ® C81XX Series Color Multifunction Printer User Guide...
  • Page 275: Troubleshooting

    This chapter contains: • General Troubleshooting ......................276 • Paper Jams ..........................283 • Print, Copy, and Scan Problems ....................331 • Fax Problems..........................339 • Getting Help ..........................342 Xerox ® AltaLink ® C81XX Series Color Multifunction Printer User Guide...
  • Page 276: General Troubleshooting

    Wake button on the control panel. c. Close the front door. If restarting the printer does not resolve the issue, see the table in this chapter that best describes the problem. Xerox ® AltaLink ® C81XX Series Color Multifunction Printer...
  • Page 277: Printer Has Two Power Switches

    Caution: Plug the three-wire cord with grounding prong directly into a grounded AC outlet. Do not use a power strip. If necessary, contact a licensed electrician to install a properly grounded outlet. Xerox ® AltaLink ® C81XX Series Color Multifunction Printer...
  • Page 278: Printer Resets Or Powers Off Frequently

    A system error occurred. Power off the printer, then power on again. If the error persists, contact your Xerox representative. The printer is connected to an uninterruptible power Only use an extension cord designed to handle the supply (UPS), extension cord, or power strip.
  • Page 279: Printing Takes Too Long

    Configuration Report. If the page prints, there could be a wireless or network connectivity issue. Contact your system administrator or refer to the System Administrator Guide at www.xerox.com/ office/ALC81XXdocs. Incorrect print driver. Check that you have the latest print driver installed.
  • Page 280: Document Fails To Print

    5 To return to the Home screen, press the Home button. Incorrect network settings. To reset network settings, contact your system administrator or refer to the System Administrator Guide at www.xerox.com/office/ALC81XXdocs. Xerox ® AltaLink ® C81XX Series Color Multifunction Printer...
  • Page 281: Document Prints From Wrong Tray

    There is an obstruction or debris inside the printer. Power off the printer and remove the obstruction or debris. If you cannot remove the obstruction, contact your Xerox ® service representative. The printer beeps at each touch on the control panel.
  • Page 282: Automatic 2-Sided Printing Problems

    Probable Causes Solutions Scanner is not communicating. Power off the printer, and check the scanner cable. Wait two minutes and power on the printer again. If the problem is not resolved, contact your Xerox ® service representative. Xerox ® AltaLink ®...
  • Page 283: Paper Jams

    Caution label. Power off the printer immediately, then wait 40 minutes for the fuser to cool. After the printer has cooled, try to remove the jammed paper. If the error on the control panel remains, contact your Xerox representative. Caution: Do not attempt to clear any paper jams using tools or instruments.
  • Page 284: Minimizing Paper Jams

    M M i i n n i i m m i i z z i i n n g g P P a a p p e e r r J J a a m m s s The printer is designed to function with minimal paper jams using Xerox supported paper. Other paper types can cause jams.
  • Page 285: Clearing Paper Jams

    1. Lift the lever and open the top cover of the document feeder. 2. If the original document is not caught in the entry to the document feeder, pull the document straight out in the direction shown. Xerox ® AltaLink ®...
  • Page 286 Close the document feeder top cover, then close the document feeder left cover. 4. Lift the document feeder, then remove the original document from the document glass. Xerox ® AltaLink ®...
  • Page 287 The printer skips the scanned pages automatically, then scans the remaining pages. Caution: Torn, wrinkled, or folded original documents can cause jams and damage the printer. To copy torn, wrinkled, or folded original documents, use the document glass. Xerox ® AltaLink ® C81XX Series Color Multifunction Printer...
  • Page 288 If a prompt does not appear, and you have changed the paper size, type, or color, update the Required Paper Policies. For details, refer to the System Administrator Guide at www.xerox.com/office/ALC81XXdocs. 7. To return to the Home screen, press the Home button.
  • Page 289 • To select a new paper size, touch Size. • To select a new paper type, touch Type. • To select a new paper color, touch Color. 6. To confirm the settings, touch Confirm. Xerox ® AltaLink ® C81XX Series Color Multifunction Printer...
  • Page 290 2. Remove any jammed paper from the side of the tray. 3. Open the top cover, lift the inner cover, then remove any jammed paper in the direction shown. 4. Close the top cover, then push the tray back toward the printer, until it locks into position. Xerox ® AltaLink ®...
  • Page 291 8. At the control panel, select the correct type and color. • To select a new paper type, touch Type. • To select a new paper color, touch Color. 9. To confirm the settings, touch Confirm. Xerox ® AltaLink ®...
  • Page 292 Caution: Do not touch the transfer belt. Touching the belt can reduce image quality or damage the transfer belt. Do not touch the transfer roller. Touching the roller can reduce image quality. Xerox ® AltaLink ® C81XX Series Color Multifunction Printer...
  • Page 293 4. If paper is jammed on the inside of door A, lift handle A3, then remove the jammed paper. Return handle A3 to the original position. 5. If paper is jammed in the fuser, remove the jammed paper from areas A1 and A2. a. To open the paper guide, pull handle A1 toward you. Xerox ® AltaLink ®...
  • Page 294 Troubleshooting b. Remove any jammed paper in area A1. c. Return handle A1 to the original position. d. To open the paper guide, lift handle A2. Xerox ® AltaLink ® C81XX Series Color Multifunction Printer User Guide...
  • Page 295 If the paper is torn, remove all torn pieces of jammed paper from the printer. f. To close the paper guide, push down handle A2, then push in the handle until the paper guide clicks into place. Xerox ® AltaLink ®...
  • Page 296 Note: Toner can adhere to the transfer roller. The toner that does adhere to the transfer roller does not affect print quality. 7. To close door A, push up the door until it clicks into place. Xerox ® AltaLink ®...
  • Page 297: Troubleshooting Paper Jams

    The paper tray is too full. Remove some of the paper. Do not load paper past fill line. The edges of the paper are not even. Remove the paper, align the edges, and then reload Xerox ® AltaLink ® C81XX Series Color Multifunction Printer...
  • Page 298 • Try a new ream of paper. Too much static electricity is present. • Do not fan transparencies before loading in tray. Using unsupported paper. Use only Xerox approved paper. For details, refer to Supported Paper. Humidity is too high for coated paper.
  • Page 299 Remove the moist paper and replace it with new, dry paper. Using paper of the wrong size, thickness, or type. Use only Xerox approved paper. For details, refer to Supported Paper. L L a a b b e e l l a a n n d d E E n n v v e e l l o o p p e e M M i i s s f f e e e e d d s s...
  • Page 300 One of the printer doors is open. Check the doors on the printer. Close any door that is open. Note: Check for, and remove, torn pieces of paper in the paper path. Xerox ® AltaLink ® C81XX Series Color Multifunction Printer...
  • Page 301: Clearing Finisher Jams

    C C l l e e a a r r i i n n g g J J a a m m s s i i n n t t h h e e I I n n t t e e g g r r a a t t e e d d O O f f f f i i c c e e F F i i n n i i s s h h e e r r 1. Open the finisher front door. 2. Carefully remove the jammed paper. Note: If the paper is torn, remove all torn pieces of jammed paper from the printer. Xerox ® AltaLink ® C81XX Series Color Multifunction Printer...
  • Page 302 Troubleshooting 3. Rotate the green knob in the direction shown, then carefully remove the jammed paper. 4. Close the finisher front door. Xerox ® AltaLink ® C81XX Series Color Multifunction Printer User Guide...
  • Page 303 1. Pull up the lever on the top cover, then open the top cover. 2. Remove the jammed paper. Note: If the paper is torn, remove all torn pieces of the jammed paper from the finisher. 3. Close the top cover of the finisher. Xerox ® AltaLink ® C81XX Series Color Multifunction Printer...
  • Page 304 1. To open the transport cover, lift the handle of the center tray straight up. 2. Remove the jammed paper. Note: If the paper is torn, remove all torn pieces of the jammed paper from the finisher. 3. Close the transport cover. Xerox ® AltaLink ® C81XX Series Color Multifunction Printer...
  • Page 305 C C l l e e a a r r i i n n g g J J a a m m s s i i n n t t h h e e B B u u s s i i n n e e s s s s R R e e a a d d y y F F i i n n i i s s h h e e r r Clearing Jams in the Center Tray 1. If the paper is jammed at the exit to the center output tray, pull the paper in the direction shown. 2. Open, then close, the finisher transport cover. Xerox ® AltaLink ®...
  • Page 306 1. Open the finisher transport cover. 2. Remove the jammed paper. Note: If the paper is torn, remove all torn pieces from the finisher. 3. Close the finisher transport cover. Xerox ® AltaLink ® C81XX Series Color Multifunction Printer User Guide...
  • Page 307 2. Open the front door of the Business Ready Finisher. 3. Lift handle 3a, then carefully remove the jammed paper. Note: If the paper is torn, remove all torn pieces of the jammed paper from the finisher. Xerox ® AltaLink ®...
  • Page 308 5. Close the front door of the Business Ready Finisher. Clearing Jams at Area 3c in the Business Ready Finisher 1. Open the front door of the Business Ready Finisher. 2. Move lever 3c to the left. Xerox ® AltaLink ®...
  • Page 309 • If the paper is inaccessible, or if the control panel prompts you, to release the jammed paper, rotate knob 3b in the direction shown. 4. Return lever 3c to the original position. 5. Close the front door of the Business Ready finisher. Xerox ® AltaLink ®...
  • Page 310 3. Carefully remove the jammed paper. Note: If the paper is torn, remove all torn pieces of the jammed paper from the finisher. 4. Return lever 3d to the original position, then close the front door of the Business Ready Finisher. Xerox ® AltaLink ®...
  • Page 311 Troubleshooting Clearing Jams at Area 4 in the Business Ready Finisher 1. Open the front door of the Business Ready Finisher. 2. Grasp the handle, then pull out the booklet maker until it stops. Xerox ® AltaLink ® C81XX Series Color Multifunction Printer...
  • Page 312 3. Rotate knob 4 in either direction as shown, then carefully remove the paper. Note: If the paper is torn, remove all torn pieces of the jammed paper from the finisher. 4. Return the booklet maker to its original position, then close the finisher door. Xerox ® AltaLink ®...
  • Page 313 3. To remove the paper, pull the paper in the direction shown. Note: If the paper is torn, remove all torn pieces of the jammed paper from the finisher. 4. Close the front door of the Business Ready Finisher. Xerox ® AltaLink ®...
  • Page 314 Note: If the paper is torn, remove all torn pieces of paper from the folder. 3. Return handle 2a to the original position. 4. Close the front door of the tri-fold module. Xerox ® AltaLink ® C81XX Series Color Multifunction Printer...
  • Page 315 Note: If the paper is torn, remove all torn pieces of paper from the folder. 3. Return lever 2b to the original position. 4. Close the front door of the tri-fold module. Xerox ® AltaLink ® C81XX Series Color Multifunction Printer...
  • Page 316 If the paper is torn, remove all torn pieces of paper from the folder. 3. Return lever 2e to the original position, then close the folder tray. 4. Close the front door of the tri-fold module. Xerox ® AltaLink ®...
  • Page 317 If the paper is torn, remove all torn pieces of paper from the folder. 3. Return lever 2f to its original position, then close the folder tray. 4. Close the front door of the tri-fold module. Xerox ® AltaLink ®...
  • Page 318 If the paper is torn, remove all torn pieces of paper from the folder. 3. Return lever 2g to the original position, then close the folder tray. 4. Close the front door of the tri-fold module. Xerox ® AltaLink ®...
  • Page 319 2. To remove the staple cartridge, grasp the orange handle, then pull it firmly toward you. 3. Check inside the finisher for any loose staples, then remove the staples. 4. To remove the staple cartridge, and open the clamp, pull the clamp in the direction shown. Xerox ® AltaLink ®...
  • Page 320 The points of the jammed staples are sharp. Remove the jammed staples carefully. 6. Grasp the staple cartridge handle, then insert the cartridge into the stapler until the cartridge clicks into position. 7. Close the finisher front door. Xerox ® AltaLink ® C81XX Series Color Multifunction Printer...
  • Page 321 3. Push the stapler assembly to the right, as shown. 4. To remove the staple cartridge, grasp the orange handle, then pull the handle toward you. 5. Check inside the finisher for any loose staples, then remove the staples. Xerox ® AltaLink ®...
  • Page 322 The points of the jammed staples are sharp. Remove the jammed staples carefully. 8. Grasp the orange handle, then insert the cartridge into the stapler assembly until the cartridge clicks into place. 9. Close the finisher front door. Xerox ® AltaLink ® C81XX Series Color Multifunction Printer...
  • Page 323 2. If the staple cartridges are not visible, grip the vertical panels at the left and right of the opening and slide the panels to the center. 3. Hold the tabs on both sides of the staple cartridge and pull the cartridge out of the finisher. Xerox ® AltaLink ®...
  • Page 324 The booklet maker uses two staple cartridges. Booklet stapling requires that both staple cartridges contain staples. 6. Repeat the procedure for the other staple cartridge. 7. Close the finisher side cover. Xerox ® AltaLink ® C81XX Series Color Multifunction Printer...
  • Page 325 1. Open the front door of the Business Ready Finisher. 2. Grasp the stapler assembly lever R1, then move the lever to the right. 3. To remove the staple cartridge, grasp the orange handle, then pull it firmly toward you. Xerox ® AltaLink ®...
  • Page 326 6. Grasp the staple cartridge by the orange handle, then insert the cartridge into the stapler assembly until the staple cartridge clicks into place. 7. Return the stapler assembly to the original position, then close the finisher door. Xerox ® AltaLink ®...
  • Page 327 2. Grasp the green handle, then pull out the booklet maker until it stops. 3. To remove a staple cartridge from the booklet maker, push down on the staple cartridge handle, as shown, then pull the cartridge out and up. 4. Turn over the staple cartridge. Xerox ® AltaLink ®...
  • Page 328 If you cannot see the staple jam, open the staple cartridge clamp. 7. To open the staple cartridge clamp, pull the clamp firmly in the direction shown. WARNING: The points of the jammed staples are sharp. Remove the jammed staples carefully. Xerox ® AltaLink ® C81XX Series Color Multifunction Printer...
  • Page 329 9. To return the staple cartridge to the booklet maker, insert the staple cartridge, then push up on the cartridge handle as shown. 10. Return the booklet maker to the original position, then close the finisher door. Xerox ® AltaLink ®...
  • Page 330 If the printer stops printing and reports a hole-punch jam, empty the hole-punch waste container. For details, refer to Emptying the Hole Punch Waste Container. After emptying the hole-punch waste container, locate and remove any paper jams. Xerox ® AltaLink ® C81XX Series Color Multifunction Printer...
  • Page 331: Print, Copy, And Scan Problems

    For more information, go to www.xerox.com/office/ALC81XXsupport. Caution: The Xerox Warranty or Service Agreement does not cover damage caused by using unsupported paper or specialty media. For more information, contact your local Xerox representative.
  • Page 332 C C o o l l o o r r C C o o r r r r e e c c t t i i o o n n s s a a n n d d C C o o l l o o r r A A d d j j u u s s t t m m e e n n t t s s For best printing results of mixed text, graphics, and images on a range of supported paper, set the Color Correction feature to Xerox Automatic Color. For instructions on setting the Color Correction Xerox ®...
  • Page 333 For more information, go to www.xerox.com/office/ALC81XXsupport. Caution: The Xerox Warranty or Service Agreement does not cover damage caused by using unsupported paper or specialty media. For more information, contact your local Xerox representative.
  • Page 334 Scroll to Related settings, then click Devices and printers. Note: If you are using a custom Start Menu application, it can change the navigation path to your list of printers. b. Right-click on the name of the printer. Xerox ® AltaLink ® C81XX Series Color Multifunction Printer...
  • Page 335 If you find a match in the Troubleshooting Print-Quality Pages, look in the Solutions column for the action to take to resolve the problem. If the problem persists, for online support information, go to www.xerox.com/office/ALC81XXsupport. Performing the Print Calibration Procedure 1.
  • Page 336 3 To print procedures on resolving print-quality problems, at the control panel, press the Home button. Touch Device→Information Pages→Troubleshooting Print Quality Page→Print. Xerox ® AltaLink ® C81XX Series Color Multifunction Printer User Guide...
  • Page 337: Copy And Scan Problems

    C C o o p p y y a a n n d d S S c c a a n n P P r r o o b b l l e e m m s s Your printer is designed to produce consistently high-quality scans and copies. If you observe quality problems, use the information in this section to troubleshoot the problem. For more information, go to www.xerox.com/office/ALC81XXsupport. Xerox ®...
  • Page 338 Troubleshooting Caution: The Xerox Warranty or Service Agreement does not cover damage caused by using unsupported paper or specialty media. For more information, contact your local Xerox representative. C C o o p p y y a a n n d d S S c c a a n n P P r r o o b b l l e e m m s s a a n n d d S S o o l l u u t t i i o o n n s s...
  • Page 339: Fax Problems

    Fax was not transmitted. The fax number is wrong. Verify the fax number. The telephone line is connected Verify the telephone line incorrectly. connection. If the telephone line is disconnected, connect it. Xerox ® AltaLink ® C81XX Series Color Multifunction Printer User Guide...
  • Page 340: Problems Receiving Faxes

    If the problem persists, for online support information, go to www.xerox.com/office/ALC81XXsupport. P P r r o o b b l l e e m m s s R R e e c c e e i i v v i i n n g g F F a a x x e e s s...
  • Page 341: Printing Fax Reports

    If the problem persists, for online support information, go to www.xerox.com/office/ALC81XXsupport. P P r r i i n n t t i i n n g g F F a a x x R R e e p p o o r r t t s s You can print the following fax reports from the printer control panel: •...
  • Page 342: Getting Help

    Troubleshooting Getting Help Xerox provides several automatic diagnostic utilities to help you maintain productivity and print quality. V V i i e e w w i i n n g g E E r r r r o o r r a a n n d d A A l l e e r r t t M M e e s s s s a a g g e e s s o o n n t t h h e e C C o o n n t t r r o o l l P P a a n n e e l l When an error or warning condition occurs, the printer alerts you of the problem.
  • Page 343: Online Support Assistant

    To access the Online Support Assistant, go to www.xerox.com/office/ALC81XXsupport. I I n n f f o o r r m m a a t t i i o o n n P P a a g g e e s s Your printer has a set of information pages that you can print.
  • Page 344: More Information

    Installation Guide Packaged with the printer. Getting Started guide Print from the control panel. For details, refer to Information Pages. Other documentation for your printer www.xerox.com/office/ALC81XXdocs Recommended Media List United States: www.xerox.com/rmlna European Union: www.xerox.com/rmleu Technical support information for your printer, www.xerox.com/office/ALC81XXsupport...
  • Page 345 L L o o c c a a t t i i n n g g t t h h e e S S e e r r i i a a l l N N u u m m b b e e r r When you order supplies or contact Xerox for assistance, you need the serial number of your device.
  • Page 346 Troubleshooting Xerox ® AltaLink ® C81XX Series Color Multifunction Printer User Guide...
  • Page 347: A Specifications

    • Physical Specifications ......................353 • Clearance Requirements......................359 • Environmental Specifications ....................366 • Electrical Specifications......................367 • Performance Specifications ...................... 368 • Environmental, Health, and Safety Contact Information............369 Xerox ® AltaLink ® C81XX Series Color Multifunction Printer User Guide...
  • Page 348: Printer Configurations And Options

    • Two-Tray module (Trays 3–4) each with 520-sheet capacities • High Capacity Tandem Tray (Trays 3–4) with total 2000 A4 or Letter sheet capacity • 8-GByte DDR3 System Memory for C8170, and 4-GByte DDR3 System Memory for Xerox ® AltaLink...
  • Page 349: Options And Upgrades

    • One-Line and Dual-Line Fax Kits • Fax forward to Email or SMB software • EFI ™ Fiery ® Network Server • Xerox Secure Access Unified ID System • CAC and PIV Card Reader Enablement Kit • Xerox Network Accounting Enablement ® • Xerox ®...
  • Page 350: Finishing Options

    • McAfee Integrity Control Enablement Kit and McAfee enhanced security features • RFID Card Reader Kit • SIPRNet Enablement Kit • Bluetooth Kit • Support for AirPrint ® with iBeacon • Software for Unicode print • Xerox ® Scan to PC Desktop ® Professional software Note: For AirPrint ®...
  • Page 351 50 sheets 3.85 x 5.8–12.6 x Hole Punch: 19 in. Optional 2–3, 2–4, or Swedish 4-hole Stacking: 203 x punch 320–320 x 483 8 x 12.6–12.6 x 19 Xerox ® AltaLink ® C81XX Series Color Multifunction Printer User Guide...
  • Page 352 Supported Paper. Note: Sheet quantities for tray capacities and finishing options are based on 80 g/m². Quantities are reduced for heavier media and must be within the specified weight range. Xerox ® AltaLink ® C81XX Series Color Multifunction Printer User Guide...
  • Page 353: Physical Specifications

    *C8170: 79.3 cm (31.2 in.) • Height: – C8130 / C8135 / C8145 / C8155: 114.7 cm (45.1 in.) – *C8170: 117.3 cm (46.2 in.) • Weight: <160 Kg (353 lb.) Xerox ® AltaLink ® C81XX Series Color Multifunction Printer User Guide...
  • Page 354: Configuration With Integrated Office Finisher

    C C o o n n f f i i g g u u r r a a t t i i o o n n w w i i t t h h H H i i g g h h C C a a p p a a c c i i t t y y F F e e e e d d e e r r • Width: 109.6 cm (43.15 in.) • Depth: Xerox ® AltaLink ®...
  • Page 355: Configuration With Office Finisher

    C C o o n n f f i i g g u u r r a a t t i i o o n n w w i i t t h h O O f f f f i i c c e e F F i i n n i i s s h h e e r r w w i i t t h h B B o o o o k k l l e e t t M M a a k k e e r r Xerox ®...
  • Page 356: Configuration With High Capacity Feeder And Office Finisher With Booklet Maker

    *C8170: 79.3 cm (31.2 in.) • Height: – C8130 / C8135 / C8145 / C8155: 114.7 cm (45.1 in.) – *C8170: 117.3 cm (46.2 in.) • Weight: 228 Kg (502.7 lb.) Xerox ® AltaLink ® C81XX Series Color Multifunction Printer User Guide...
  • Page 357: Configuration With Business Ready Finisher, Booklet Maker, And Tri-Fold Module

    B B u u s s i i n n e e s s s s R R e e a a d d y y F F i i n n i i s s h h e e r r , , B B o o o o k k l l e e t t M M a a k k e e r r , , a a n n d d T T r r i i - - F F o o l l d d M M o o d d u u l l e e • Width: 148.2 cm (58.3 in.) • Depth: Xerox ® AltaLink ®...
  • Page 358 *C8170: 79.3 cm (31.2 in.) • Height: – C8130 / C8135 / C8145 / C8155: 114.7 cm (45.1 in.) – *C8170: 117.3 cm (46.2 in.) • Weight: 286.1 Kg (630.7 lb.) Xerox ® AltaLink ® C81XX Series Color Multifunction Printer User Guide...
  • Page 359: Clearance Requirements

    *C8170: 155.6 cm (61.2 in.) Clearance • Front: 40 cm (15.7 in.) • Rear: 10 cm (3.9 in.) • Left: 57.9 cm (22.8 in.) • Right: 10 cm (3.9 in.) Xerox ® AltaLink ® C81XX Series Color Multifunction Printer User Guide...
  • Page 360: Configuration With Integrated Office Finisher

    *C8170: 155.6 cm (61.2 in.) Clearance • Front: 40 cm (15.7 in.) • Rear: 10 cm (3.9 in.) • Left: 57.9 cm (22.8 in.) • Right: 21.8 cm (8.6 in.) Xerox ® AltaLink ® C81XX Series Color Multifunction Printer User Guide...
  • Page 361: Configuration With High Capacity Feeder

    *C8170: 155.6 cm (61.2 in.) Clearance • Front: 40 cm (15.7 in.) • Rear: 10 cm (3.9 in.) • Left: 25 cm (9.8 in.) • Right: 10 cm (3.9 in.) Xerox ® AltaLink ® C81XX Series Color Multifunction Printer User Guide...
  • Page 362: Configuration With Office Finisher With Booklet Maker

    *C8170: 155.6 cm (61.2 in.) Clearance • Front: 40 cm (15.7 in.) • Rear: 10 cm (3.9 in.) • Left: 57.9 cm (22.8 in.) • Right: 5 cm (2 in.) Xerox ® AltaLink ® C81XX Series Color Multifunction Printer User Guide...
  • Page 363: Configuration With High Capacity Feeder And Office Finisher With Booklet Maker

    *C8170: 155.6 cm (61.2 in.) Clearance • Front: 40 cm (15.7 in.) • Rear: 10 cm (3.9 in.) • Left: 25 cm (9.8 in.) • Right: 5 cm (2 in.) Xerox ® AltaLink ® C81XX Series Color Multifunction Printer User Guide...
  • Page 364: Configuration With Business Ready Finisher, Booklet Maker, And Tri-Fold Module

    *C8170: 155.6 cm (61.2 in.) Clearance • Front: 40 cm (15.7 in.) • Rear: 10 cm (3.9 in.) • Left: 57.9 cm (22.8 in.) • Right: 8 cm (3.1 in.) Xerox ® AltaLink ® C81XX Series Color Multifunction Printer User Guide...
  • Page 365: Configuration With High Capacity Feeder And Business Ready Finisher, Booklet Maker, And Tri-Fold Module

    *C8170: 155.6 cm (61.2 in.) Clearance • Front: 40 cm (15.7 in.) • Rear: 10 cm (3.9 in.) • Left: 25 cm (9.8 in.) • Right: 8 cm (3.1 in.) Xerox ® AltaLink ® C81XX Series Color Multifunction Printer User Guide...
  • Page 366: Environmental Specifications

    Operating: 15% to 85% (non-condensing) E E l l e e v v a a t t i i o o n n For optimum performance, use the printer at elevations below 2500 m (8200 ft.). Xerox ® AltaLink ®...
  • Page 367: Electrical Specifications

    110–127 VAC +/-10% 50 Hz +/- 3 Hz 16 A 60 Hz +/- 3 Hz 220–240 VAC +/-10% 50 Hz +/- 3 Hz 10 A 60 Hz +/- 3 Hz Xerox ® AltaLink ® C81XX Series Color Multifunction Printer User Guide...
  • Page 368: Performance Specifications

    P P r r i i n n t t S S p p e e e e d d Xerox reports speeds for continuous printing using long-edge feed on A4 (210 x 297 mm, 8.27 x 11.69 in.) or Letter (216 x 279 mm, 8.5 x 11 in.) Bond 60–105 g/m² (18–28 lb.) paper from any tray except for tray 5.
  • Page 369: Environmental, Health, And Safety Contact Information

    Specifications Environmental, Health, and Safety Contact Information For more information on Environment, Health, and Safety in relation to this Xerox product and supplies, contact: • United States and Canada: 1-800-ASK-XEROX (1-800-275-9376) • Europe: EHS-Europe@xerox.com For product safety information in the United States and Canada, go to www.xerox.com/environment.
  • Page 370 Specifications Xerox ® AltaLink ® C81XX Series Color Multifunction Printer User Guide...
  • Page 371: B Regulatory Information

    Regulatory Information This appendix contains: • Basic Regulations ........................372 • Copy Regulations ........................377 • Fax Regulations........................380 • Material Safety Data Sheets ....................384 Xerox ® AltaLink ® C81XX Series Color Multifunction Printer User Guide...
  • Page 372: Basic Regulations

    • Connect the equipment into an outlet on a circuit that is different from where the receiver is connected. • Consult the dealer or an experienced radio or TV technician for help. Changes or modifications to this equipment not approved by Xerox can void the authority of the user to operate this equipment. WARNING: To ensure compliance with Part 15 and Part 18 of the FCC rules, use shielded interface cables.
  • Page 373: Certifications In Europe

    C C e e r r t t i i f f i i c c a a t t i i o o n n s s i i n n E E u u r r o o p p e e The CE mark applied to this product symbolizes a declaration of conformity by Xerox...
  • Page 374 45-ppm monochrome, the duplex function has been auto-enabled during the setup and driver installation. Some Xerox models below these speed bands can be enabled with 2-sided printing settings defaulted on at the time of installation. Continuous use of the duplex function reduces the environmental impact of your work.
  • Page 375: Eurasian Economic Community Certification

    To change the Energy Saver mode settings, refer to the System Administrator Guide at www.xerox. com/office/ALC81XXdocs. For further assistance, contact your System Administrator. To learn more about Xerox participation in sustainability initiatives, go to: www.xerox.com/ environment or www.xerox.com/environment_europe.
  • Page 376: Germany

    2. This device must accept any interference received, including interference that can cause an undesired operation. Changes or modifications to this device not approved by the Xerox Corporation can void the user’s authority to operate this equipment. G G e e r r m m a a n n y y...
  • Page 377: Copy Regulations

    Further information of these provisions can be obtained from the Copyright Office, Library of Congress, Washington, D.C. 20559. Ask for Circular R21. Xerox ® AltaLink ®...
  • Page 378: Canada

    Canada or a department, board, Commission, or agency established by the Government of Canada or of a province or of a government of a state other than Canada Xerox ® AltaLink ®...
  • Page 379: Other Countries

    • Copyright material or trademarks without the consent of the owner • Postage stamps and other negotiable instruments This list is not inclusive and no liability is assumed for either its completeness or accuracy. In case of doubt, contact your legal counsel. Xerox ® AltaLink ®...
  • Page 380: Fax Regulations

    Ask your local Telephone Company for the modular jack type installed on your line. Connecting this printer to an unauthorized jack can damage the telephone company equipment. You, not Xerox, assume all responsibility and liability for any damage caused by the connection of this printer to an unauthorized jack.
  • Page 381: Canada

    Telephone Company can request that you disconnect the equipment until the problem is resolved. Only a Xerox Service Representative or an authorized Xerox Service provider is authorized to make repairs to the printer. The printer repair applies at any time during or after the service warranty period.
  • Page 382 Malta United Kingdom If you have problems with your product, contact your local Xerox representative. This product can be configured to be compatible with other country networks. Before reconnecting the device to a network in another country, contact your Xerox representative for assistance.
  • Page 383: New Zealand

    S S o o u u t t h h A A f f r r i i c c a a This modem must be used in conjunction with an approved surge-protection device. Xerox ® AltaLink ®...
  • Page 384: European Union

    Material Safety Data Sheets For Material Safety Data information regarding your printer, go to: • North America: www.xerox.com/msdsna • European Union: www.xerox.com/msds For the Customer Support Center phone numbers, go to www.xerox.com/office/worldcontacts. Xerox ® AltaLink ® C81XX Series Color Multifunction Printer...
  • Page 385: C Recycling And Disposal

    Recycling and Disposal This appendix contains: • All Countries..........................386 • North America ......................... 387 • European Union ........................388 • Other Countries........................390 Xerox ® AltaLink ® C81XX Series Color Multifunction Printer User Guide...
  • Page 386: All Countries

    Recycling and Disposal All Countries If you are managing the disposal of your Xerox product, note that the printer may contain lead, mercury, perchlorate, and other materials whose disposal may be regulated due to environmental considerations. The presence of these materials is fully consistent with global regulations applicable at the time that the product was placed on the market.
  • Page 387: North America

    North America Xerox operates an equipment take-back and reuse or recycle program. Contact your Xerox representative at 1-800-ASK-XEROX to determine if your Xerox product is part of the program. For more information about Xerox environmental programs, visit www.xerox.com/environment, or for recycling and disposal information, contact your local authorities.
  • Page 388: European Union

    In accordance with European legislation, end of life electrical and electronic equipment subject to disposal must be managed within agreed procedures. Prior to disposal, please contact your local reseller or Xerox representative for end of life take-back information. Xerox ®...
  • Page 389: Collection And Disposal Of Equipment And Batteries

    B B a a t t t t e e r r y y R R e e m m o o v v a a l l Batteries should only be replaced by a manufacturer-approved service facility. Xerox ®...
  • Page 390: Other Countries

    Recycling and Disposal Other Countries Contact your local waste management authority to request disposal guidance. Xerox ® AltaLink ® C81XX Series Color Multifunction Printer User Guide...
  • Page 391: D Product Symbols

    Product Symbols This appendix contains: • Product Symbols ........................392 Xerox ® AltaLink ® C81XX Series Color Multifunction Printer User Guide...
  • Page 392: Product Symbols

    Do not touch the part or area of the printer. Do not expose the drum cartridges to direct sunlight. Do not burn the item. Do not burn the toner cartridges. Do not burn the drum cartridges. Xerox ® AltaLink ® C81XX Series Color Multifunction Printer...
  • Page 393 Do not use paper attached with staples or any form of binding clip. Do not use folded, creased, curled, or wrinkled paper. Do not load or use inkjet paper. Do not reload paper that is used or printed previously. Xerox ® AltaLink ®...
  • Page 394 Do not use postcards. Do not use envelopes. Do not copy money. Add paper or media. Paper jam Lock Unlock Paper clip Cooling Elapsed time Supply paper 1-Sided original document Hole-punched paper Xerox ® AltaLink ® C81XX Series Color Multifunction Printer User Guide...
  • Page 395 Load letterhead face up. Load letterhead face down. Load labels face down. USB: Universal Serial Bus LAN: Local Area Network Telephone Line Weight Services Home button This item can be recycled. Xerox ® AltaLink ® C81XX Series Color Multifunction Printer User Guide...
  • Page 396 Product Symbols Xerox ® AltaLink ® C81XX Series Color Multifunction Printer User Guide...
  • Page 397: E Apps Features

    Apps Features This appendix contains: • Apps Features .......................... 398 Xerox ® AltaLink ® C81XX Series Color Multifunction Printer User Guide...
  • Page 398: Apps Features

    Apps Features Apps Features Xerox ® AltaLink ® C81XX Series Color Multifunction Printer User Guide...
  • Page 399 Work- flow Scan- ID Card Server Inter- ning/ Description Copy Copy Feature Email net Fax Scan To Output Color Use Output Color to control the • • • • • color rendering of the output image or print. 2-Sided Copying You can use the 2-sided options •...
  • Page 400 Work- flow Scan- ID Card Server Inter- ning/ Description Copy Copy Feature Email net Fax Scan To choose the finishing options required for your printed output. Reduce / Enlarge You can reduce the image to as • • little as 25% of the original size or enlarge it to as much as 400%.
  • Page 401 Work- flow Scan- ID Card Server Inter- ning/ Description Copy Copy Feature Email net Fax Scan To Sharpness Use this option to sharpen the • • • • • output image or print. For best results, sharpen text images and soften photos. Saturation Saturation allows you to adjust •...
  • Page 402 Work- flow Scan- ID Card Server Inter- ning/ Description Copy Copy Feature Email net Fax Scan To determine whether images require rotation to produce the required output. Image Shift Image Shift allows you to • modify the location of the image on the page.
  • Page 403 Work- flow Scan- ID Card Server Inter- ning/ Description Copy Copy Feature Email net Fax Scan To Mirror Image Use Mirror Image to reverse • the image and text on the page. Negative Image Negative Image reverses the • light and dark areas in your document, and prints the image as if it is a photo negative.
  • Page 404 Work- flow Scan- ID Card Server Inter- ning/ Description Copy Copy Feature Email net Fax Scan To Page Layout You can print the selected • number of pages on one side of a sheet of paper. Selecting multiple pages per sheet saves paper and provides a way to review the layout of a document.
  • Page 405 Work- flow Scan- ID Card Server Inter- ning/ Description Copy Copy Feature Email net Fax Scan To the segments are scanned, the job is processed and completed. Save Current To use a particular combination • Settings of copy settings for future copy jobs, you can save the settings with a name and retrieve the settings for later use.
  • Page 406 Work- flow Scan- ID Card Server Inter- ning/ Description Copy Copy Feature Email net Fax Scan To From Use the From option to specify • • the originator of the email. Note: The system administrator can preset this option to populate automatically with your user account details.
  • Page 407 Work- flow Scan- ID Card Server Inter- ning/ Description Copy Copy Feature Email net Fax Scan To File Format Use the File Format option to • • • specify the format of the saved image or to define a searchable image.
  • Page 408 Work- flow Scan- ID Card Server Inter- ning/ Description Copy Copy Feature Email net Fax Scan To Add File Use this option to choose more • Destinations destinations to file the scanned images. Book Faxing You can use the Book Faxing •...
  • Page 409 Work- flow Scan- ID Card Server Inter- ning/ Description Copy Copy Feature Email net Fax Scan To setting for lines that can have transmission interference. Cover Sheet You can use the Cover Sheet • option to add an introduction page to the beginning of your fax.
  • Page 410 Work- flow Scan- ID Card Server Inter- ning/ Description Copy Copy Feature Email net Fax Scan To Polling Fax Polling allows you to store • a fax document on the printer and make the document available for other fax machines to poll. You can retrieve faxes stored on other fax machines.

This manual is also suitable for:

C8130C8135C8145C8155C8170

Table of Contents