Table of Contents
Advertisement
Quick Links
Advertisement
Table of Contents

Related Manuals for Life Fitness Insignia Series


Summary of Contents for Life Fitness Insignia Series
- Page 1 Insignia Series OWNER'S MANUAL 9481201 REV BA...
- Page 3 Latin America and Caribbean* Spain Hong Kong Life Fitness, Inc. Life Fitness IBERIA Life Fitness Asia Pacific LTD Columbia Centre III C/Frederic Mompou 5,1º1ª 32/F, Global Trade Square 9525 West Bryn Mawr Avenue 08960 Sant Just Desvern Barcelona 21 Wong Chuk Hang Road Rosemont, IL 60018 U.S.A.
- Page 4 User and Service Documents Link https://www.lftechsupport.com/web/document-library/documents Additional information is available online using the link above. أ علاه إل ر إبط باستخدإم إ لإ ن تر نت على إضافية معلومات تتوفر 点击上面的链接可在线获取更多信息。 Flere oplysninger er tilgængelige online gennem linket ovenfor. Bijkomende informatie is online beschikbaar via bovenstaande link. Vous trouverez plus d'informations en ligne à...
-
Page 5: Table Of Contents
Cable Handling Guide © Copyright 2019, Life Fitness, LLC. All Rights Reserved. Life Fitness, Hammer Strength, Cybex, ICG and SCIFIT are registered trademarks of Life Fitness, LLC and its affiliated companies and subsidiaries. Brunswick and related trademarks used under license from Brunswick Corporation. -
Page 6: Safety Information
• DO NOT attempt to use or repair any accessory approved for use with the equipment which appears to be damaged or worn. • DO NOT use or permit use of any equipment that is damaged and/or has worn or broken parts. For all Life Fitness equipment use only replacement parts supplied by Life Fitness. - Page 7 • Ensure that any person(s) making adjustments or performing maintenance or repair of any kind is qualified to do so. Life Fitness will provide service and maintenance training at our corporate facility upon request or in the field if proper arrangements are made.
-
Page 8: Product Labels
Product Labels General Warning Label Bolt to Floor Tag Cable Maintenance Tag Found on the Weight Tower Found at Head Plate Found on the Head Plate Cable FCC Label Found next to Serial Label Pinch Hazard Label Found at Contact and Moving Parts Page 6 of 46... -
Page 9: General Exercise
2. Exercise and Product Information General Exercise Information Intended Use The intended commercial use of this machine is to aid exercise and improve general physical fitness. Prior to Exercise Prior to starting a training program, get a complete physical exam to make sure your physician agrees that you are ready. -
Page 10: Exercise And Product Information
Abdominal (SS-AB) Exercise Muscles Used: Abdominal Setup: Adjust the seat height so that lower back pad is resting on your lower back. Check the weight stack to ensure appropriate resistance. Grip handles. Movement: With a controlled motion upper torso crunch, emphasize the use of your abdominal muscles. Avoid using your arms to power through the motion, they should provide a guide for the motion. -
Page 11: Assisted Dip Chin
Assisted Dip Chin (SS-ADC) Exercise Muscles Used: Dip Assist: Triceps, Anterior Deltoid, & Pectoralis Major Chin Assist: Latissimus Dorsi & Biceps Setup: Dip Assist: Select weight and step up on footplates. Rotate handles to inner or outer position. Grip handles and place knees on pad. Chin Assist: Select weight and step up on footplates. -
Page 12: Back Extension
Back Extension (SS-BE) Exercise Muscles Used: Erector Spinae & Gluteus Setup: From a seated position - with hips pushed against lumbar pad - place feet on foot support. Adjust start position on back pad for desired range of motion. Movement: With chest up and shoulders back - grip handles and extend back - until low back contacts lumbar pad. -
Page 13: Bicep Curl (Ss-Bc)
Bicep Curl (SS-BC) Exercise Muscles Used: Biceps Setup: Adjust the seat height so elbows are slightly off arm pads and aligned with axis of rotation. Check the weight stack to ensure appropriate resistance. Sit with chest-up and shoulders back and grip the handles keeping the elbows slightly bent. Movement: Grip the handles with palms up. -
Page 14: Biceps Curl
Biceps Curl (SS-BCD) Exercise Muscles Used: Biceps Setup: Adjust the seat height so backs of arms rest fully on arm pad, aligning elbows with machines pivot. Check the weight stack to ensure appropriate resistance. Rotate handle forward and grip firmly. Body is positioned with chest up and shoulder back, leaning forward slightly if necessary to increase stability. -
Page 15: Calf Extension
Calf Extension (SS-CE) Exercise Muscles Used: Gastrocnemius & Soleus Setup: Adjust the seat back to allow a slight bend in the knees when the balls-of-the-feet are positioned on the footplate. Check the weight stack to ensure appropriate resistance. Position the hips firmly against the back pad and grip the handles located on the sides of the seat pad. -
Page 16: Chest Press
Chest Press (SS-CP) Exercise Muscles Used: Pectoralis Major, Anterior Deltoid & Triceps Setup: Adjust the seat height so handles are aligned with mid-chest. Using the start adjuster knob located on both press arms, adjust to the desired range of motion. Check the weight stack to ensure appropriate resistance. -
Page 17: Glute (Ss-Gl)
Glute (SS-GL) Exercise Muscles Used: Gluteus & Quadriceps Setup: Adjust torso pad to fit between chest and abdominals. Place one foot on footplate while knees are slightly flexed. Movement: Extend hip and knee. Slowly return footplate to starting position. Rotate footplate and repeat with opposite leg. -
Page 18: Hip Abduction
Hip Abduction (SS-HAB) Exercise Muscles Used: Hip Abductors Setup: Sit down with feet on foot pegs so knees are bent 90 degrees. Adjust start position with range of motion adjustment and slowly move the pads out - pushing with knees - and return. Movement: Hold the handles and slowly move the pads out, pushing with knees. -
Page 19: Hip Adduction
Hip Adduction (SS-HAD) Exercise Muscles Used: Hip Adductors Setup: Sit down with feet on foot pegs so knees are bent 90 degrees. Adjust start position with range of motion adjustment and slowly move the pads in - pushing with knees - and return. Movement: Hold the handles and slowly move the pads in, pushing with knees. -
Page 20: Lateral Raise
Lateral Raise (SS-LR) Exercise Muscles Used: Deltoid Setup: Adjust seat height to align shoulders with machine pivots. Sit facing the machine and position forearms on pads. Lightly grip handles and raise elbows until even with shoulders. Return slowly to starting position. Movement: When elbows reach shoulder height, hold the position briefly and then lower the pads slowly to starting position. -
Page 21: Leg Curl (Ss-Lc)
Leg Curl (SS-LC) Exercise Muscles Used: Hamstrings Setup: Lie face down on the pads, positioning the knees just off the pad aligned with the machine pivot, as indicated by the axis of rotation. The lower leg pad should be positioned comfortably above the back of the ankles, adjusting pad if necessary. -
Page 22: Leg Extension
Leg Extension (SS-LE) Exercise Muscles Used: Quadriceps Setup: Adjust the back pad to align with the knee joint with the machine pivot (axis of rotation). Adjust the lower leg pad to a comfortable position above the ankle. Using the adjustment knob located near the machine cam, adjust the start position to the desired range of motion. -
Page 23: Pectoral Fly
Pectoral Fly (SS-PEC) Exercise Muscles Used: Pectoralis Major & Anterior Deltoid Setup: Adjust seat height so that elbows are slightly below shoulders when hands are placed on the handles. Adjust the start position with the range of motion adjustment. With hands placed on grips - sit with chest up and shoulders back - and slowly push hands together while keeping your shoulders placed against the back pad. -
Page 24: Pectoral Fly / Rear Deltoid
Pectoral Fly / Rear Deltoid (SS-FLY) Exercise Muscles Used: Pectoralis, Anterior Deltoids, Posterior Deltoids, & Trapezius Setup: Pectoral Fly: Adjust the seat height so elbows are slightly below shoulders, when holding the vertical handles. Adjust the start position using the overhead range of motion adjustments for each arm. -
Page 25: Pulldown (Ss-Pd)
Pulldown (SS-PD) Exercise Muscles Used: Latissimus Dorsi & Biceps Setup: Check the weight stack to ensure appropriate resistance. Stand and grip bar in desired position, then pull down and sit with thighs under pads. Upper body is positioned leaning slightly forward from the hips, pulling directly over shoulders. TIP: Attempt to stabilize the body without the use of the thigh pads until necessary. -
Page 26: Row (Ss-Rw)
Row (SS-RW) Exercise Muscles Used: Latissimus Dorsi, Trapezius, Rhomboids, Teres Major and Minor, Posterior Deltoids & Biceps Setup: Adjust the seat height to align the mid-chest with the top of the chest pad. Keeping feet firmly on the floor or foot rests, adjust the chest pad position to allow full arm extension. Check the weight stack to ensure appropriate resistance. -
Page 27: Seated Leg Curl
Seated Leg Curl (SS-SLC) Exercise Muscles Used: Hamstring Setup: Sit down on seat and adjust the back pad by pulling the knob under the left side of the seat. The seat should be adjusted so that the knee lines up with the axis of rotation (pivot point). Adjust the ankle pad so it’s positioned just under the ankles. -
Page 28: Seated Leg Press
Seated Leg Press (SS-SLP) Exercise Muscles Used: Quadriceps, Hamstrings & Gluteus Setup: Adjust the start position, using the release lever located on the seat’s left side, to the desired range of motion. Position feet on the footplate hip width apart, with the feet turned out slightly. -
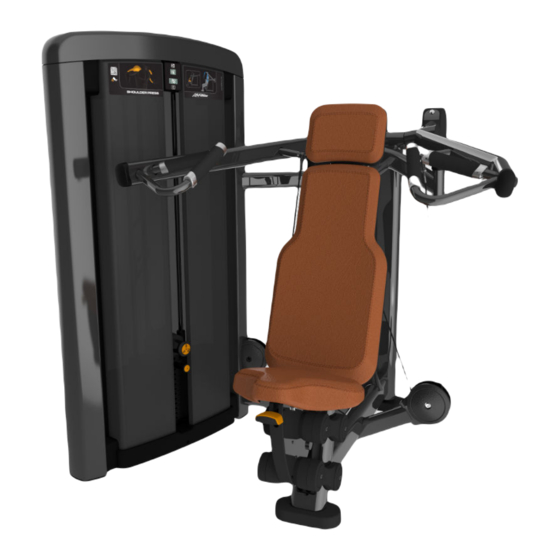
Page 29: Shoulder Press
Shoulder Press (SS-SP) Exercise Muscles Used: Deltoids & Triceps Setup: Adjust the seat height so handles are aligned with or above shoulder height. Check the weight stack to ensure appropriate resistance. Grip either set of handles. Body is positioned with chest-up, shoulders and head back against back pad. NOTE: The neutral handles are ideal for persons with limited shoulder flexibility or orthopedic limitations. -
Page 30: Torso Rotation
Torso Rotation (SS-TR) Exercise Muscles Used: Obliques & Abdominals Setup: Adjust seat position for desired range of motion. Place knees on the front edge of seat pad while facing chest pads. Adjust chest support pads so that the center of the pads align with the top of the chest. -
Page 31: Triceps Extension
Triceps Extension (SS-TE) Exercise Muscles Used: Triceps Setup: Adjust the seat height so backs of arms rest fully on arm pad, aligning elbows with machines pivot. Check the weight stack to ensure appropriate resistance. Rotate handle back and grip firmly and position feet under foot bar for stability. Body is positioned leaning forward from hips keeping back straight. -
Page 32: Triceps Press
Triceps Press (SS-TP) Exercise Muscles Used: Triceps & Anterior Deltoid Setup: Adjust seat up or down so that elbows are bent at 90-degree angles when gripping the handles. Select desired weight. Rotate handles inward or outward as desired. Rest feet on floor. -
Page 33: Repetition And Time Counter
Repetition and Time Counter (Optional) An optional battery-operated console is available for use on Insignia Series Selectorized Strength Equipment. The console tracks workout time, rest time, and number of repetitions per set. Console Display Repetition Counter Time Counter Workout Mode The displays will automatically turn on and begin counting the Repetitions and Time, when both of the work arms are moved simultaneously. - Page 34 Upon entering the mode, the Total Time will be displayed (flashing digits) for 15 seconds followed by the Total Repetitions (non-flashing digits) for 15 seconds. • Total Time is the time of active workout use over the entire life of the product. •...
-
Page 35: Lf Codes
LF Codes Intro (what are LFcodes?) LFcodes are both QR codes and NFC tags that integrate with the Life Fitness Android® and Apple® LFconnect app to provide product demo videos, strength tracking and product setup guidelines. How it works: Select the LFcodes feature within the LFconnect app. Using the LFcodes scanner, scan the LFcode on the product. If using an NFC-enabled device, simply touch or tap the LFcode with the device. -
Page 36: Maintenance Procedures
3. Maintenance Procedures Maintenance Schedule ACTION DAILY WEEKLY MONTHLY AS NEEDED CLEAN Upholstery Guide Rods Shrouds Hand Grips Frames INSPECT Paint Cable Belt Hardware Frame Hand Grips Shrouds LUBRICATE Guide Rods Clean • Upholstery with an approved or compatible cleaner. •... - Page 37 • Visually inspect cables for wear at and around connections and along the entire length of the cable. Always replace at first sign of wear. Once a Week • Visually inspect all hardware for loosening, tampering or wear. • Check jam nut at top of weight stack for tightness. •...
- Page 38 • Manufacturer recommends that cables be inspected daily after installation and replaced annually. Page 36 of 46...
-
Page 39: Warranty
Who Pays Transportation and Insurance For Service If the Product or any covered part must be returned to a service facility for repairs, We, Life Fitness, will pay all transportation and insurance charges for the first year. You are responsible for transportation and insurance charge after the first year. - Page 40 Item 10 Years 5 Years 1 Year 90 Days Frame Pillow Blocks Pulleys Weight Plates Guide Rods Cables Grips Bearings Electronics Springs Upholstery Hardware / Mechanical Page 38 of 46...
-
Page 41: Cable Handling Guide
WARNING: Use of non certified “techs” note: Service warranties may be void if a non-Life Fitness-certified technician performs service work. Replacement of any strength cables should be performed by a Life Fitness certified technician. - Page 42 Cabling Procedure Direct Link 1. Thread the cable into the head plate assembly at least to the jam nut. 2. Cycle the machine to ensure that it is in proper working order. 3. Check the cable to ensure there is proper tension. 4.
-
Page 43: Tensioning Cable
Tensioning Cable Cable should have enough tension so it stays seated into the pulley but not so tight that it pulls the head plate off the weight plate below it. 1. If the head plate has lifted, loosen the jam nuts at the terminations and loosen the threaded plugs a half turn until the head plate comes to rest on the weight plate below. - Page 44 FRAYED/EXPOSED WIRE ROPE: Any exposed wire rope protruding through the casing or at either end. FLATTENED: Section of cable is compressed and will not retain its shape (outside diameter). PERMANENTLY BENT: Cable has ‘kink’ and prohibits cable from laying straight. Wire rope may be unraveling beneath casing and is compromised warranting replacement.
-
Page 45: Bolt To Floor Guide
6. Bolt to Floor Guide Introduction Life Fitness designs its products to be stable when used as designed. Because strength training is dynamic, we cannot predict how users will ultimately use the products in all circumstances. Therefore, Life Fitness recommends that strength training equipment be secured to a solid, level surface to stabilize and eliminate rocking or tipping over. -
Page 46: Anchor Types
3000psi (20 N/mm2) beyond anchor length Pullout Force Life Fitness specifies Hilti ™ static and dynamic anchors. According to the anchor manufacturer, the recommended design pullout force (in tension) for the specified anchors, when properly installed in cracked concrete, is provided in the side table. -
Page 47: Static Anchor Procedure
Static Anchor Procedure CAUTION: If it is possible that the length of your bolt will not provide the minimum requirement of 2.5” (63.5mm) of engagement, a longer anchor should be used. 1. Place unit into position to be mounted and cycle unit to set stance. 2. -
Page 48: Foot Dimensions
Foot Dimensions Use below image to determine foot specifications. Page 46 of 46...
Need help?
Do you have a question about the Insignia Series and is the answer not in the manual?
Questions and answers