Advertisement
Fits: 1999-2004
ASSISTANCE IS RECOMMENDED.
REMOVE CONTENTS FROM BOX. VERIFY ALL PARTS ARE PRESENT.
READ INSTRUCTIONS CAREFULLY BEFORE STARTING INSTALLATION.
DO NOT OVER TORQUE. STANDARD OPERATING LOAD FOR TIGHTEN
BODY MOUNT NUTS & BOLTS VARIES FROM 45 TO 65 FOOT POUND.
Qty
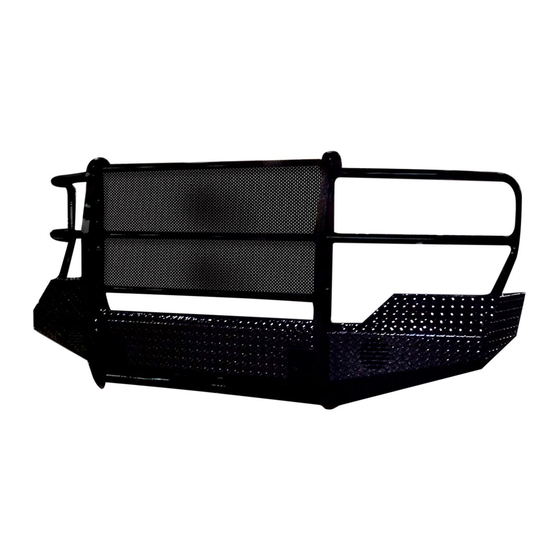
Replacement Bumper
1
5x20mm Phillips Screws
4
5mm Lock Washers
4
12x50mm Hex Bolts
4
12mm Lock Washers
8
12x60mm Hex Bolts
4
Page 1 of 5
Replacement Front Bumper
Part No. FX3003
Ford Super Duty
Part Description
PARTS LIST:
Qty
Towing Hooks
2
5x15x1.2mm Flat Washers
8
5mm Hex Nuts
4
12x24x2.5mm Flat Washers
16
12mm Hex Nuts
8
www.TrailFX.com
Cutting Not
60-180 min
Required
support@trailfx.com
1 866 638 4870
POLISHED STAINLESS STEEL – LIMITED LIFETIME
POWDER COATED BLACK – 3 YEARS
Part Description
Drilling Not
Required
Rev 031518
Advertisement
Table of Contents

Related Manuals for TrailFX FX3003


Summary of Contents for TrailFX FX3003
- Page 1 Replacement Front Bumper Part No. FX3003 Fits: 1999-2004 Ford Super Duty ASSISTANCE IS RECOMMENDED. Cutting Not Drilling Not 60-180 min Required Required REMOVE CONTENTS FROM BOX. VERIFY ALL PARTS ARE PRESENT. support@trailfx.com READ INSTRUCTIONS CAREFULLY BEFORE STARTING INSTALLATION. 1 866 638 4870 DO NOT OVER TORQUE.
- Page 2 INSTALLATION PROCEDURE BUMPER IS HEAVY, ASSISTANCE IS HIGHLY RECOMMENDED TO AVOID POSSIBLE INJURY OR DAMAGE TO THE VEHICLE. Vehicle Preparation Disconnect factory fog lamp connectors, zip tie harness to frame. Remove fasteners holding OEM bumper to chassis (Fig 1).
- Page 3 Attach the license plate to the Replacement Bumper (Fig 4). Fasten the license plate with the hardware. (1)5mm Lock Washers (1)5×15×1.2mm Flat Washer (1)5mm Hex Nut (1)5×15×1.2mm Flat Washer (1) 5×20 Phillips Screw Fig 4 Fasten the provided Towing Hooks to thg Bumper with the hardware (Fig 5).
- Page 4 Attach the Bumper to the frame. Fasten the Bumper with the hardware (Fig 6). (2)12×50mm Hex Bolts (4)12×24×2.5mm Flat Washers (2)12mm Lock Washers (2)12mm Hex Nuts Fig 6 Reinstall the factory wiring harness to the fog light. Level and adjust the bumper, make sure that all hardware is secure and tight.
- Page 5 Product not installing properly. Ensure make model year, cab length and bed size of your vehicle is listed in the application. All installation steps are followed correctly. Check out these other TrailFX Products!! www.TrailFX.com Keystone Automotive Operations Inc. (KAO) warrants this product to be free of defects in material and workmanship at the time of purchase by the original retail consumer.
Need help?
Do you have a question about the FX3003 and is the answer not in the manual?
Questions and answers