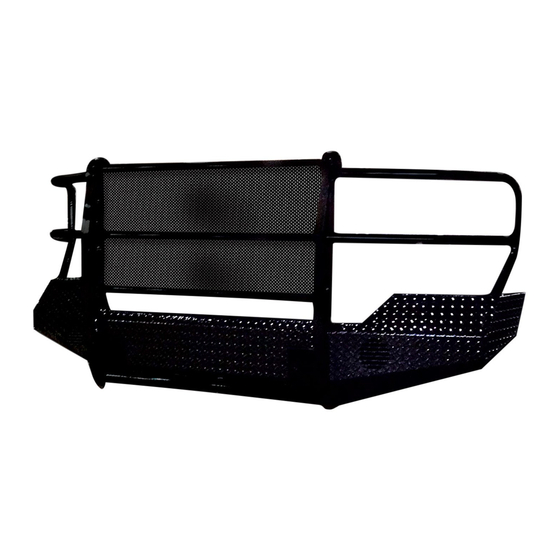
Advertisement
Fits: 2015 - Current
ASSISTANCE IS RECOMMENDED.
REMOVE CONTENTS FROM BOX. VERIFY ALL PARTS ARE PRESENT.
READ INSTRUCTIONS CAREFULLY BEFORE STARTING INSTALLATION.
DO NOT OVER TORQUE. STANDARD OPERATING LOAD FOR TIGHTEN
BODY MOUNT NUTS & BOLTS VARIES FROM 45 TO 65 FOOT POUND.
Qty
Replacement Bumper
1
Driver side Mounting Bracket
1
5x20mm Phillips Screws
4
5mm Lock Washers
4
12x140mm Half Thread Hex Bolts
2
12mm Lock Washers
14
12x40mm Hex Bolts
6
12x40mm Hex Bolts
4
Page 1 of 7
Replacement Front Bumper
Part No. FX3021
Chevrolet Silverado 2500/3500 HD
Part Description
PARTS LIST:
Qty
Towing Hooks
2
Passenger side Mounting Bracket
1
5x15x1.2mm Flat Washers
8
5mm Hex Nuts
4
12x37x3mm Flat Washers
18
12mm Hex Nuts
14
12x24x2.5mm Flat Washers
8
12mm T-Bolts
2
www.FX-Products.com
Cutting Not
60-180 min
Required
support@trailfx.com
1 866 638 4870
POLISHED STAINLESS STEEL – LIMITED LIFETIME
POWDER COATED BLACK – 3 YEARS
Part Description
Drilling Not
Required
Rev 010518
Advertisement
Table of Contents

Subscribe to Our Youtube Channel
Summary of Contents for TrailFX FX3021
- Page 1 Replacement Front Bumper Part No. FX3021 Fits: 2015 - Current Chevrolet Silverado 2500/3500 HD ASSISTANCE IS RECOMMENDED. Cutting Not Drilling Not 60-180 min Required Required REMOVE CONTENTS FROM BOX. VERIFY ALL PARTS ARE PRESENT. support@trailfx.com READ INSTRUCTIONS CAREFULLY BEFORE STARTING INSTALLATION.
- Page 2 www.FX-Products.com INSTALLATION PROCEDURE BUMPER IS HEAVY, ASSISTANCE IS HIGHLY RECOMMENDED TO AVOID POSSIBLE INJURY OR DAMAGE TO THE VEHICLE. Vehicle Preparation Note: Keep all the OEM parts carefully until finishing the installation! Open the hood and locate push pins on radiator cover. Using a flathead screwdriver, pull the head of the push pin up, remove push pin and lift radiator cover off.
- Page 3 www.FX-Products.com Disconnect the electrical harness (Fig 3A) from vehicle and remove tow hooks. Tow hooks are mounted with one cross bolt through the side and a bolt through the bottom of the frame (Fig 3B). Remove bolts connecting bumper to mounting bracket. There is one bolt on each side which requires a socket wrench with an extension to easily reach (Fig 4).
- Page 4 www.FX-Products.com Remove OEM electrical harness from bumper. Disconnect harness from fog lights and sensors. Pop out the three plastic clips holding fog lights to fog light housing and carefully pull away, the plastic clips are indicated by a circle. Unbolt bumper support frames as necessary to more easily access sensors, star with the bottom bolts indicated by squares (Fig Bumper Installation Remove the fog light from the vehicle.
- Page 5 www.FX-Products.com Attach the license plate to the Replacement Bumper (Fig 8). Fasten the license plate with the hardware. (1)5mm Lock Washers (1)5×15×1.2mm Flat Washer (1)5mm Hex Nut (1)5×15×1.2mm Flat Washer (1) 5×20 Phillips Screw Fig 8 Attach the Mounting Brackets (left and right) to the frame (Fig 9). Do not fully tight the hardware at this time. (1)12×140mm Hex Bolt (2)12×37×3mm Flat Washers (1)12mm Lock Washer...
- Page 6 www.FX-Products.com Attach the Bumper to Mounting Brackets with the hardware. Attach the Towing Hooks to the Mounting Brackets (Fig 10). Level and adjust the bumper and fully tighten all hardware. (2)12×60mm Hex Bolts (4)12×37×3mm Flat Washers (3)12×40mm Hex Bolts (2)12mm Lock Washers (6)12×37×3mm Flat Washers (2)12mm Hex Nuts (3)12mm Lock Washers...
- Page 7 www.FX-Products.com PRODUCT CARE Periodically check the product to ensure all fasteners are tight and components are intact. Regular waxing is recommended to protect the finish of the product. Use ONLY Non-Abrasive automotive wax. Use of any soap, polish or wax that contains an abrasive is detrimental and can scratch the finish leading to corrosion.


Need help?
Do you have a question about the FX3021 and is the answer not in the manual?
Questions and answers