Table of Contents
Advertisement
Quick Links
Advertisement
Table of Contents

Related Manuals for IKEA DISKAD


Summary of Contents for IKEA DISKAD
- Page 1 DISKAD DISHWASHER...
-
Page 3: Table Of Contents
Table of contents Safety.......... 5 Etagere .......... 25 General information ...... 5 Folding prongs ......... 26 Intended use ........ 5 Basket heights........ 26 Restriction on user group.... 5 Before using for the first time .. 27 Safe installation ........ 6 Performing the initial configura- Safe use .......... 7 tion.......... 27 Damaged appliance ...... - Page 4 Malfunctions ........ 54 Mechanical damage...... 55 Noise .......... 56 Clean wastewater pump .... 57 Transportation, storage and dis- posal .......... 57 Removing the appliance.... 57 Protect appliance from frost.... 58 Transporting the appliance .... 58 Disposing of old appliance .... 58 Technical specifications .... 58 IKEA guarantee ...... 59 After-sales service ...... 62...
-
Page 5: Safety
Safety Please read the safety information to ensure that you use the appliance safely. General information You can find general information about this instruction manual here. Read this instruction manual carefully. Only this will ensure ● you use the appliance safely and efficiently. This manual is intended for the user of the appliance. -
Page 6: Safe Installation
Cleaning and user maintenance must not be performed by children unless they are being supervised. Keep children under the age of 8 years away from the appli- ance and power cable. Safe installation Follow these safety instructions when installing the appliance. WARNING ‒ Risk of injury! Improper installation may cause injury. -
Page 7: Safe Use
If built-under or integrable appliances are not in a cavity ● so that one side is accessible, the hinge area must be covered at the side. Covers are available from IKEA or Customer Service. WARNING ‒ Risk of tipping! Improper installation may cause the appliance to tip up. - Page 8 WARNING ‒ Risk of explosion! Adding solvents to the interior of the appliance may cause ● explosions. Never add solvents to the interior of the appliance. ● Highly caustic alkaline or highly acidic cleaning agents in ● conjunction with aluminium parts in the interior of the ap- pliance may cause explosions.
-
Page 9: Damaged Appliance
WARNING ‒ Risk of electric shock! An ingress of moisture can cause an electric shock. ● Only use the appliance in enclosed spaces. ● Never expose the appliance to intense heat or humidity. ● Do not use steam- or high-pressure cleaners to clean the ●... -
Page 10: Risk To Children
Improper repairs are dangerous. ● Repairs to the appliance should only be carried out by ● trained specialist staff. Only use genuine spare parts when repairing the appli- ● ance. If the power cord of this appliance is damaged, it must ●... - Page 11 WARNING ‒ Risk of crushing! With higher-level appliances, children can become crushed between the appliance door and cabinet doors under- neath. Keep an eye on children when opening and closing the ● appliance door. WARNING ‒ Risk of chemical burns! Rinse aid and detergent may cause chemical burns to the mouth, throat and eyes.
-
Page 12: Preventing Material Damage
Preventing material damage Preventing material damage Follow these instructions to prevent ma- Never kink, crush, modify or cut ● terial damage to your appliance, ac- through water hoses. cessories or other objects in your kit- Only use the water hoses supplied ●... -
Page 13: Environmental Protection And Saving Energy
The appliance is equipped with a con- tainer which has a mineral inside. This Information about current disposal mineral can store moisture and heat en- methods is available from IKEA or ergy and then release them again. Such your local authority. drying lets you save energy. -
Page 14: Aquasensor
If you have any complaints, contact IKEA under a continuous worktop that is se- or our Customer Service. curely connected to adjacent cabinets. -
Page 15: Drainage Connection
Install the drainage connection. When doing so, check that the drink- ing water connection is not kinked, → Page 15 crushed or twisted. Install the drinking water connection. → Page 15 Electrical connection Connect the appliance to the power supply. Connect your appliance to the power supply. -
Page 16: Familiarising Yourself With Your Appliance
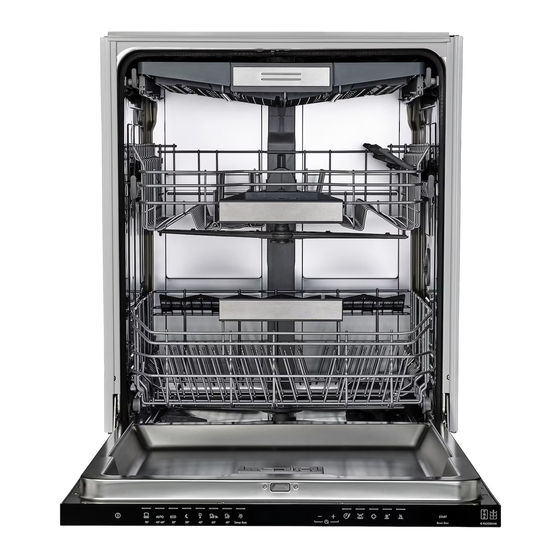
Familiarising yourself with your appliance Familiarising yourself with your appliance Familiarise yourself with the parts of your appliance. Appliance You can find an overview of the parts of your appliance here. Rating plate Rating plate with E number and FD number. The data you need for Customer Service. -
Page 17: Controls
Bottom basket Bottom basket → Page 24 Dispenser for special salt Add the special salt to the dispenser for spe- cial salt. → "Water softening system", Page 27 Lower spray arm The lower spray arm washes the tableware in the bottom basket. If the tableware has not been washed prop- erly, clean the spray arms. - Page 18 3 4 5 Switching on the appliance → Page 36 ON/OFF button Switching off the appliance → Page 37 Programme buttons Programmes Water supply display Display for water supply lights up → Page 45 Special salt refill indicator Water softening system → Page 27 Rinse aid refill indicator Rinse aid system → Page 30 Programme buttons and addi- Programmes...
-
Page 19: Programmes
Programmes Programmes You can find an overview of the pro- → "Additional functions", Page 21 selec- grammes that can be selected here. Dif- ted. The running time will change if the ferent programmes, which can be rinse aid system is switched off or rinse found on the control panel of your ap- aid needs to be added. - Page 20 PROGRAMME PROGRAMME SE- ADDITIONAL QUENCE FUNCTIONS Tableware: Most economical Cleaning mixed programme: → "Additional func- ● Eco 50° tableware and PreRinse tions", Page 21 ● cutlery. Cleaning 50 °C ● Level of soiling: Intermediate ● Removing com- rinse ● mon household Final rinse 35 °C ●...
-
Page 21: Information For Test Institutes
PROGRAMME PROGRAMME SE- ADDITIONAL QUENCE FUNCTIONS Tableware: Time-optimised: ExtraDry Cleaning delic- Cleaning 45 °C → "Additional func- ● ● Quick 45° ate tableware, tions", Page 21 Intermediate ● cutlery, temper- rinse ature-sensitive Rinsing 50 °C ● plastics and glasses. Level of soiling: Removing ● lightly adhering fresh food rem- nants. - Page 22 panel of your appliance, are available ADDITIONAL depending on the appliance configura- FUNCTIONS tion. For a better ● drying result ADDITIONAL ExtraDry the final rinse FUNCTIONS temperature is The running ● increased and time is Reduce time the drying shortened by phase exten- 20% to 66% de- ded.
-
Page 23: Features
ADDITIONAL FUNCTIONS Switch on with ● mixed loads Intensive Zone containing tableware with different soiling levels, e.g. place very soiled pots and pans in the bot- tom basket and normally soiled tableware in the top basket. The spray pres- ● sure in the bot- tom basket is increased and... -
Page 24: Top Basket
Raise or lower the basket evenly to Top basket the right level. Arrange cups and glasses in the top → "Basket heights", Page 26 basket. Check that the basket is level on both sides. You can adjust the height of the top Slide the basket back in. -
Page 25: Cutlery Drawer
Cutlery drawer If you want to return the cutlery drawer to the original position, fold the side Arrange cutlery in the cutlery drawer. shelf back up until it clicks into position. Arrange cutlery with the points and Etagere sharp edges downwards. You can reorganise the cutlery drawer Use the cutlery shelf and space under- to make more space for longer/wider... -
Page 26: Folding Prongs
Folding down prongs If you do not need the cutlery shelf, you can fold it up. If you do not need the prongs, fold them down. Folding prongs Push the lever forwards and fold Use the folding prongs to position down the prongs ... -
Page 27: Before Using For The First Time
Before using for the first time Before using for the first time Configure the settings for initial start- Add special salt. → Page 28 Add rinse aid. → Page 30 Switch on the appliance. → Page 36 Performing the initial config- Setting the water softening system. uration → Page 28 Set the amount of rinse aid to be dis-... -
Page 28: Setting Water Softening System
Note: Set the water hardness determ- Only fill the dispenser of the water ● ined on your appliance. softening system with special dish- With a water hardness of 0 - 8 °E you washer salt. can dispense with special salt and Special salt can damage the tub due ●... -
Page 29: Switching Off Water Softening System
The display shows . Switching off water softening system Press repeatedly until the display shows H:00. Note To save the settings, press To avoid damage to the appliance, only for 3 seconds. switch off the water softening system in the The water softening system is following cases: switched off and the salt refill indic-... -
Page 30: Rinse Aid System
The consumption values specified are able standard and using the Eco 50° laboratory measurements determined programme and the factory value of the in accordance with the currently applic- water hardness is set to 16 - 20°E. Rinse aid system Rinse aid system You can use the rinse aid system and rinse aid to get tableware and glasses rinsed perfectly without marks. -
Page 31: Switching Rinse Aid System Off
– A low setting adds less rinse aid Press . during the wash cycle and reduces To open the basic settings, press streaking on tableware. for 3 seconds. – A higher setting adds more rinse The display shows H:xx. aid during the wash cycle, reduces The display shows ... -
Page 32: Unsuitable Detergents
combination (4in1, 5in1, ...), additional DETERGENT DESCRIPTION components such as glass protection or Liquid deter- Liquid detergent stainless steel cleaner. gent works faster and is re- According to manufacturers, combined commended for detergents generally only function up shorter Programmes to a water hardness of 26 °E. With a wa- without PreRinse. -
Page 33: Adding Detergent
Set the rinse aid and the water If you are using tablets, one is ● softening system to the separate de- enough. Insert the tablets in a hori- tergent or combined detergent in zontal position. use. If you are using powder or liquid de- According to manufacturers, com- tergent, follow the manufacturer's in- ●... -
Page 34: Tableware
Tableware Tableware Only clean tableware that is suitable for CAUSE RECOMMENDA- dishwashers. TION Note: Decorated glassware and parts Glass and table- Only put glasses made of aluminium or silver may fade ware was not and china in the or discolour with dishwashing. Delicate dishwasher-safe. -
Page 35: Arrange Tableware
– To prevent injury, arrange cutlery Arrange tableware with the points and sharp edges Arrange the tableware correctly to op- downwards. timise the dishwashing result and pre- – Position containers with the open- vent damage to both the appliance and ings facing down so no water can tableware. -
Page 36: Basic Operation
Check the washing tank and ac- cessories for soiling and clean if ne- cessary. → "Cleaning and servicing", Page 41 Basic operation Basic operation You can find out everything you need to Setting additional functions know about operating your appliance You can set additional functions to com- here. -
Page 37: Interrupting Programme
You can only change a programme Tip: If you press during the wash ● when running if you cancel it. cycle, the programme currently running → "Terminate programme", Page 37 will be interrupted. When you switch The appliance switches off automat- the appliance back on, the programme ●... -
Page 38: Basic Settings
Basic settings Basic settings You can configure the appliance to meet your needs. Overview of basic settings The basic settings depend on the features of your appliance. BASIC SETTING DISPLAY SELECTION DESCRIPTION TEXT Water hardness H:04 H:00 - H:07 Set the water softening sys- tem to your water hardness. - Page 39 BASIC SETTING DISPLAY SELECTION DESCRIPTION TEXT Hot water A:00 A:00 - A:01 Set cold water or hot water connection. Only set the ap- pliance to hot water if this can be prepared with little energy and a suitable installation is available, e.g.
- Page 40 BASIC SETTING DISPLAY SELECTION DESCRIPTION TEXT Time-beam-on- S:01 S:00 - S:01 Switch Time-beam-on-floor on floor or off. While the programme is run- ning, status information is projected onto the floor be- low the appliance door relat- ing to timer programming, the programme or the time remaining.
-
Page 41: Changing Basic Settings
Changing basic settings Press repeatedly until the display shows the required setting. Open the appliance door. Press repeatedly until the Press . display shows the right value. To open the basic settings, press You can change several settings. for 3 seconds. To save the settings, press The display shows H:xx. -
Page 42: Filter System
Filter system The filter system removes coarse soiling from the dishwashing cycle. Press the locking catches together and lift the coarse filter out . Micro filter Fine filter Coarse filter Cleaning filters Soiling in the dishwashing water may block the filters. After each wash check the filters for Clean the filter elements under run- residue. -
Page 43: Cleaning Spray Arms
Cleaning spray arms Limescale and soiling in the dishwash- ing water may block the nozzles and bearings on the spray arms. Clean the spray arms regularly. Unscrew the upper spray arm pull down to remove . Pull up the lower spray arm to re- move. -
Page 44: Troubleshooting
Troubleshooting Troubleshooting You can rectify minor faults on your appliance yourself. Read the troubleshooting information before contacting after-sales service. This will avoid unnecessary costs. WARNING Risk of electric shock! Improper repairs are dangerous. Repairs to the appliance should only be carried out by trained specialist staff. ●... - Page 45 FAULT CAUSE TROUBLESHOOTING E:18 or indicator for Unscrew the water connec- water supply lights up. tion. Remove the filter from the supply hose Clean the filter. Re-insert the filter in the sup- ply hose. Screw the water connection back on. Check the water connection for leaks.
-
Page 46: Washing Results
FAULT CAUSE TROUBLESHOOTING E:27 lights up. Mains voltage is too This is not a fault on the appli- low. ance. Contact an electrician. Have the mains voltage and electrical installation checked by an electrician. Another error code ap- A technical fault is Press pears on the display. - Page 47 FAULT CAUSE TROUBLESHOOTING Tableware is not dry. The combined deter- Use rinse aid to improve dry- gent used has a poor ing performance. drying performance. Use a different combined de- tergent with a better drying performance. Extra Dry not activated Activate Extra Dry.
- Page 48 FAULT CAUSE TROUBLESHOOTING Appliance interior still Not a fault. The con- No action required. wet after wash cycle. densation drying prin- ciple causes water droplets in the tub – they are indeed desir- able here. The mois- ture in the air con- denses on the inside walls, runs off and is pumped out.
- Page 49 FAULT CAUSE TROUBLESHOOTING Remnants of food on gramme. Stubborn Adjust the sensitivity of the ● tableware. soiling cannot be en- sensors. tirely removed. Tall narrow receptacles Do not position tall narrow ● in corner areas are not receptacles at too great an rinsed adequately.
- Page 50 FAULT CAUSE TROUBLESHOOTING Water marks on plastic Due to laws of physics Select a more intensive pro- ● parts. droplet formation on gramme. plastic surfaces is un- Position tableware at an ● avoidable. After drying angle. water marks are vis- → "Arrange tableware", ible.
- Page 51 FAULT CAUSE TROUBLESHOOTING Stubborn white coat- Too little detergent is Increase the amount of de- ● ings are present on being used. tergent used or change De- tableware, inside the tergent → Page 31. appliance or the door. Washing programme Select a more intensive ●...
- Page 52 FAULT CAUSE TROUBLESHOOTING Coloured deposits (yel- The formation of films Check the setting of the wa- low, orange, brown) is due to ingredients of ter softening system. that are easy to re- food remnants and tap Add special salt. move are present in- water (limescale) → "Adding special salt", side the appliance...
- Page 53 FAULT CAUSE TROUBLESHOOTING Removable streaks are Tableware has been Only remove large remnants ● present on glasses, precleaned too in- of food and do not prerinse glassware with a tensely. The sensors tableware. metallic appearance chose a weaker pro- Adjust the sensitivity of the ●...
-
Page 54: Information On Display Panel
FAULT CAUSE TROUBLESHOOTING Excessive formation of Rinse aid has been Remove the rinse aid with a ● foam occurs. spilled. cloth. Detergent or appliance Change the brand of deter- ● care product used gent. causes excessive foam- ing. Information on display panel FAULT CAUSE TROUBLESHOOTING... -
Page 55: Mechanical Damage
FAULT CAUSE TROUBLESHOOTING Appliance cannot be Appliance functions Pull out the mains plug or switched on or oper- have failed. switch off the fuse. ated. Wait at least 2 minutes. Connect the appliance to the power supply. Switch the appliance on. Appliance does not The mains fuse has Check the relevant fuse. -
Page 56: Noise
FAULT CAUSE TROUBLESHOOTING Appliance door cannot Door cannot be closed Check whether the appliance ● be closed. due to installation has been installed properly. method. When closed, the appliance door, its decor or attached parts should not knock against adjacent cabinets or the worktop. -
Page 57: Clean Wastewater Pump
Clean wastewater pump Large remnants of food or foreign bod- ies can block the waste water pump. As soon as the rinsing water no longer drains properly, the waste water pump must be cleaned. WARNING Risk of injury! Sharp and pointed objects or frag- ments of glass may block the waste Lift the pump cover inwards at an water pump and cause injury. -
Page 58: Protect Appliance From Frost
Pull the appliance out carefully, along Disposing of old appliance with the hose behind it. Valuable raw materials can be re- claimed by recycling. Protect appliance from frost If there is a risk of frost where the appli- WARNING ance will be standing, e.g. in a holiday Risk of harm to health! home, empty the appliance completely. -
Page 59: Ikea Guarantee
FAQs about the guarantee: What does this guarantee cover? This guarantee only applies to domestic How long is the IKEA guarantee valid? use of the relevant product. The excep- This guarantee is valid for five (5) years tions are specified under the headline from the original date of purchase of “What is not covered under this guaran-... - Page 60 What will IKEA do to correct the Cases where no fault could be found ● problem? during a technician’s visit. IKEA appointed Service Provider will ex- Repairs not carried out by our ap- ● amine the product and decide, at its...
- Page 61 ● country in which the guarantee claim The sales receipt also shows the IKEA is made; designation and article number (8-digit the assembly instructions and safety code) for each of the appliances you ●...
-
Page 62: After-Sales Service
Po - Čt 8.30 - 18.00 Pá 8.30 operátora - 17.00 Danmark 70150909 Lokal takst Mandag - fredag 9.00 - 20.00 Lørdag (Åbent ud- valgte søndage, se IKEA.dk) 9.00 - 18.00 Deutschland 08912475328 Ortstarif 7 Tage die Woche 7.00 - 22.00 Ελλάδα +302104277770 Τυπική αστική χρέωση... - Page 63 Cijene lokalnog poziva Pon-Sub: 8.00 - 20.00 ovisno o tarifama i paketu vašeg pružatelja usluga Slovenská republika +420251095028 Závisí na tarife lokálneho Po - Št 8.30 - 18.00 Pia 8.30 operátora - 17.00 Latvija www.ikea.com Slovenija www.ikea.com Україна www.ikea.com Eesti www.ikea.com...
- Page 64 23320 © Inter IKEA Systems B.V. 2020 AA-2186763-1...
Need help?
Do you have a question about the DISKAD and is the answer not in the manual?
Questions and answers