Table of Contents
Advertisement
Quick Links
Advertisement
Table of Contents

Related Manuals for Oliver 4275


Summary of Contents for Oliver 4275
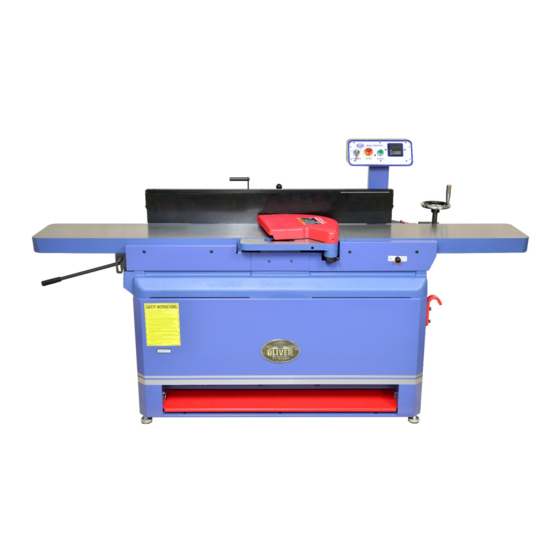
- Page 1 Jointer Model 4275 Owner’s Manual For Models Manufactured Since 06/2019 175370 Oliver Machinery 1-800-559-5065 6902 S 194th St, Kent, WA 98032 Stock Number: 4275.101.4S info@olivermachinery.net 4275.102.4S Manual Version: 1.0.0 WWW.OLIVERMACHINERY.NET...
- Page 3 USAGE OF SAFETY AND PROTECTION DEVICE. OLIVER MACHINERY DISCLAIMS ANY LIABILITY FOR MACHINES THAT HAVE BEEN ALTERED OR ABUSED. OLIVER MACHINERY RESERVES THE RIGHT TO EFFECT AT ANY TIME, WITHOUT PRIOR NOTICE, THOSE ALTERATIONS TO PARTS, FITTINGS, AND ACCESSORY EQUIPMENT WHICH THEY MAY DEEM NECESSARY FOR ANY REASON WHATSOEVER.
-
Page 4: Table Of Contents
Operation ·············································· 29 Electricals ···············································15 Preparation ·············································· 29 Minimum Circuit Size Required for Model Inspect Wood Grain ·································· 30 4275 Jointer ············································· 15 Squaring Stock ·········································· 30 Grounding ················································ 15 Surface Planing ········································· 31 Electrical Wiring ······································· 15 Edge Jointing ············································ 33 Setup ······················································17... - Page 5 Touchup Paint ·········································· 36 Wiring Diagram ····································· 51 Power Feeder ··········································· 37 For Stock # 4275.101.4S (230V, 1Ph) ·········· 51 Maintenance ··········································38 For Stock # 4275.102.4S (230/460V, 3Ph) ·· 52 Maintenance Schedule ····························· 38 Parts List ················································ 53 Inspect / Adjust Jointer Tables ·················· 39 Fence Assembly ········································...
-
Page 6: Introduction
Introduction Thank you for choosing Oliver! This manual contains important information on how to safely set up, operate, and maintain this machine. Please take the time to read through this manual, and make sure you understand all the instructions. While this manual may provide tips on optimizing the result of your workpiece, the manual is not intended as a substitute for formal woodworking training. -
Page 7: Specifications
Specifications Quick View Model 4275 Jointer Stock Number 4275.101.4S 4275.102.4S Motor Baldor TEFC Induction Motor Baldor TEFC Induction Motor 5HP, 230V, 1Ph 7.5HP, 230/460V, 3Ph Jointer Size 16” Max. Depth of Cut (Jointing) 1/8" Max. Depth of Cut (Rabbeting) 3/4”... -
Page 8: Motor
Cutter Blade Angle 30 degree Cutter Insert Screw Tensioning Torque 52-60 lbs.-inch Table Table Dimensions 100”(L) x 16”(W) Table Height Above Ground 34-3/4” Table Lifting / Adjustment Mechanism Parallelogram Material Precision ground cast iron 8 | Page Oliver Machinery 4275 Jointer... -
Page 9: Measurements
Sound Rating @ 2’ distance 90-95 dB 92-96 dB Others Serial Number Location On the back of the machine. Spare Parts Included Ten cutter inserts and compatible Torx screws. Certification CSA 175370 Country of Origin Taiwan 4275 Jointer OLIVERMACHINERY.NET 9 | Page... -
Page 10: Identification
Identification 10 | Page Oliver Machinery 4275 Jointer... - Page 11 4275 Jointer OLIVERMACHINERY.NET 11 | Page...
-
Page 12: Safety
Safety Oliver Machinery has made every attempt to provide a safe, reliable, easy-to-use piece of machinery. Safety, however, is ultimately depending on the individual machine operator. Before operating this machine, please become familiar with the following safety labels and guidelines. -
Page 13: Safety Guidelines Specific To Jointer
12. PROPER USE: Do not use this machine for other than its intended use. If used for other purposes, Oliver Machinery disclaims any real or implied warranty and holds itself harmless for any injury or damage which may result from that use. - Page 14 After Operation 1. STOP THE MACHINE if the operator leaves the machine for any reason. 2. WAIT until the machine comes to a complete stop. 3. CLEAN UP and LOCK POWER SWITCH before departure. 14 | Page Oliver Machinery 4275 Jointer...
-
Page 15: Electricals
Please ensure the electrical circuit for this machine meets the minimum circuit size requirement. Minimum circuit size requirement applies to a dedicated circuit which provides power to one 4275 Jointer. If more machines are sharing the same circuit, consult a qualified electrician to ensure the designated circuit is properly sized for safe operation. - Page 16 Using undersized wires may cause overheating and increase the risk of fire WARNING and machine damage. Improper copper-aluminum wire connection is a fire hazard. If the power circuit available uses aluminum wires, use certified CU/AL wire connectors. WARNING 16 | Page Oliver Machinery 4275 Jointer...
-
Page 17: Setup
Piping of dust collection system introduces additional air resistance, and decreases the effective CFM measured at the dust ports. Ensure there is significant suction at the dust port, so dust and debris can be effectively removed from the machine. 4275 Jointer OLIVERMACHINERY.NET 17 | Page... -
Page 18: Receiving
On the day of delivery, please be sure help is available to move the machine to its final location. 4275 Jointer has a gross weight of 1,136 lbs. and a net weight of 1,099 lbs. Safe moving techniques and proper lifting equipment required, or serious personal WARNING injury may occur. -
Page 19: Inventory
Cutter inserts installation and for checking Torx screw tension (52-60 lbs.- inch). T25 Star Bit Socket Cutter inserts installation. Ring Terminal Connector Connecting machine to power. and Crimping Tool IMPORTANT: Always follow local electrical code for electrical work. 4275 Jointer OLIVERMACHINERY.NET 19 | Page... -
Page 20: Removing Machine From Crate
Gently lift machine up from the pallet and move to its final location. 4275 Jointer has a net weight of 1,099 lbs. All lifting devices must be capable to handle the load, or serious personal injury and machine damage may occur. -
Page 21: Assembly
2. Remove all six cap screws from control panel post. Install Batteries for Digital Readout Locate the digital readout on the control panel. Remove the battery cover and install 2 AA sized batteries. 4275 Jointer OLIVERMACHINERY.NET 21 | Page... -
Page 22: Inspect / Adjust Jointer Tables (Optional)
Always operate this jointer with a cutterhead guard, except for some rabbeting operations. Serious personal injury may occur when operating a jointer without WARNING cutterhead guard. 22 | Page Oliver Machinery 4275 Jointer... -
Page 23: Leveling Machine
IMPORTANT inside the jointer. This can damage the machine and cause other hazardous situations. Check your dust collection system regularly to make sure it is not jammed or filled up. 4275 Jointer OLIVERMACHINERY.NET 23 | Page... -
Page 24: Wiring And Grounding
6. Hand tighten sealing nut of the strain relief to keep the cord in place. 7. Re-install junction box cover. 24 | Page Oliver Machinery 4275 Jointer... -
Page 25: Controls And Components
The depth of cut scale next to the handwheel located right below the control panel: indicates the position of the infeed table. • Turn CLOCKWISE to raise the table. • Turn COUNTERCLOCKWISE to lower the table. 4275 Jointer OLIVERMACHINERY.NET 25 | Page... -
Page 26: Infeed Table Depth Stop Knob
Without these plates, the cutterhead will strike the auxiliary fence. Fence This extruded aluminum fence has two adjustable positive stops at 45° and 90°. 26 | Page Oliver Machinery 4275 Jointer... -
Page 27: Digital Readout (Dro)
OR if user recalibrates the DRO. Incremental mode shows distance infeed table travelled since the last reset. The readings can be reset by leaving incremental mode. 4275 Jointer OLIVERMACHINERY.NET 27 | Page... -
Page 28: Test Run
Congratulations for completing the test run! Now your jointer is ready for production work. If you discover any issue from the tests, please refer to the troubleshooting section and maintenance section for how to diagnose the issue and make adjustments. 28 | Page Oliver Machinery 4275 Jointer... -
Page 29: Operation
Avoid using boards with severe warping, as they can be unstable and might cause severe kickbacks during operation. Glue Deposits Glue left on the workpiece surface can dull the cutters and lower cut quality. Scrape off all glue deposits from the workpiece before operation. 4275 Jointer OLIVERMACHINERY.NET 29 | Page... -
Page 30: Inspect Wood Grain
• Keep hands at least 3” away from the cutterhead. • Use push blocks whenever possible. Ensure dust collection system is functional and use dusk mask to avoid inhaling harmful airborne particles. CAUTION 30 | Page Oliver Machinery 4275 Jointer... -
Page 31: Surface Planing
8. As left hand approaches the cutterhead, lift it up and move across the cutterhead to avoid accidental contact. Put left hand on stock that sits on the outfeed table, and continue to feed. Maintain control of stock with right hand while repositioning left hand. 4275 Jointer OLIVERMACHINERY.NET 31 | Page... - Page 32 TIP: For thin stock, avoid excessive downward pressure which will flatten any cup or warp as the stock pass through the cutterhead. After pressure is released, the cup or warp will spring back. Only apply adequate pressure to maintain control of the stock when feeding. 32 | Page Oliver Machinery 4275 Jointer...
-
Page 33: Edge Jointing
Use push blocks whenever permissible. 7. Follow steps [6-10] in “Surface Planing” for feeding stock through the jointer. Repeat the process until the entire edge is jointed flat and square. 4275 Jointer OLIVERMACHINERY.NET 33 | Page... -
Page 34: Rabbet Cutting
Take extra caution and maintain support of the entire workpiece throughout the operation. If cutterhead guard is removed for rabbeting operation, use extreme caution when performing cuts. Reinstall the guard immediately when operation WARNING completes. 34 | Page Oliver Machinery 4275 Jointer... -
Page 35: Common Cutting Problems
Can happen when planing wood with high moisture content or if the cutter is dull. Sometimes fuzzy grain is unavoidable due to the nature of certain wood types. To mitigate this issue, avoid using wood with high moisture content and use sharp cutters. 4275 Jointer OLIVERMACHINERY.NET 35 | Page... -
Page 36: Accessories
Accessories Oliver Machinery has a collection of accessories and add-ons to enhance productivity of your jointer. To purchase these items, please call us at 1-800-559-5065, our representatives are available Monday through Friday, 9AM - 5PM pacific time. You may also purchase them online: WWW.OLIVERMACHINERY.NET/ACCESSORIES... -
Page 37: Power Feeder
Power Feeder Two models of power feeder are available for 4275 Jointer. They can be installed on the power feeder mount located behind outfeed table. Features • Polyurethane covered rollers provide excellent grip while protecting the work surface. • Eight feed speeds and choice of three or four rollers to fit any application. -
Page 38: Maintenance
Check V-belt tension and replace if belt shows signs of cracking or glazing. Every 6 months Lubricate worm gears with grease. Notice: Motor bearings are permanently sealed and lubricated, and do not require lubrication. 38 | Page Oliver Machinery 4275 Jointer... -
Page 39: Inspect / Adjust Jointer Tables
If outfeed table height is set properly, jump to height. section “Inspect Outfeed Table Parallelism”. Inspect Outfeed Table Parallelism 1. Disconnect jointer from power source!! 2. Place a straight edge on outfeed table in positions as shown below: 4275 Jointer OLIVERMACHINERY.NET 39 | Page... -
Page 40: Inspect Infeed Table
7. If infeed / outfeed table are out of alignment, move section “Adjust Table Parallelism/Coplanarity”. 8. Otherwise, congratulations! The jointer tables are well calibrated for your next project! 40 | Page Oliver Machinery 4275 Jointer... -
Page 41: Adjust Table Parallelism/Coplanarity
6. This picture shows the jointer with the parallelogram mechanism exposed. Table parallelism /coplanarity can be adjusted by rotating the eccentric nuts on the shafts [1-4]. There is a pair of eccentric nuts located on each end of these shafts. 4275 Jointer OLIVERMACHINERY.NET 41 | Page... - Page 42 11. When adjustments complete, retighten the set screws to lock all outfeed table eccentric nuts. 12. With the fence locked, gently rock the fence to ensure the outfeed table is stable. If the 42 | Page Oliver Machinery 4275 Jointer...
-
Page 43: Infeed Table Adjustments
If not, loosen the 2 hex adjustment worm gears. This stop nut screws and readjust the pointer. should stop the table with 1/32” depth of cut. Loosen the jam nuts when making adjustments. 4275 Jointer OLIVERMACHINERY.NET 43 | Page... -
Page 44: Cutterhead Maintenance
IMPORTANT: Obstacles between the insert and cutterhead platform will create uneven pressure against the insert. This will lower cut quality and may cause the insert to crack. 44 | Page Oliver Machinery 4275 Jointer... -
Page 45: Adjust Fence Positive Stops
4. With the stop bolt holding in place, tighten 4. With the set screws holding in place, tighten the jam nut. the jam nuts. 5. Re-check fence stop settings. 5. Re-check fence stop settings. 4275 Jointer OLIVERMACHINERY.NET 45 | Page... -
Page 46: Adjust Belt Tension
(#1). Lower the motor until proper belt needed. tension is reached. Secure the motor mounting plate by tightening both upper 8. Replace belt cover and motor access panel mounting bolts (#2), and the lower when maintenance completes. mounting bolts. 46 | Page Oliver Machinery 4275 Jointer... -
Page 47: Align Belt Pulleys
5mm hex wrench, and the motor pulley can move along the motor shaft. 5. Realign motor pulley with cutterhead pulley. 6. Retighten the motor pulley locking screws, then close the belt cover and motor access panel when adjustments complete. 4275 Jointer OLIVERMACHINERY.NET 47 | Page... -
Page 48: Troubleshooting
Outfeed table is Outfeed table is Loosen the locking cap screw before adjusting the stuck/difficult to adjust. locked. outfeed table. Digital readout not Dead battery. Replace battery. functional. 48 | Page Oliver Machinery 4275 Jointer... - Page 49 Clean belt and pulleys. Adjust belt tension. Replace V- or hitting belt cover. belt if it shows signs of aging. Improper motor Check and adjust motor mounting. mounting. Loose components. Tighten fasteners of the component. Worn bearings. Contact customer service for assistance. 4275 Jointer OLIVERMACHINERY.NET 49 | Page...
- Page 50 Apply even feeding pressure on workpiece. Keep pressure applied to feed rate consistent. workpiece. Finished stock is Infeed/outfeed table Ensure outfeed table is parallel with cutterhead, concave/convex in the are not coplanar. and outfeed/infeed table are coplanar. middle. 50 | Page Oliver Machinery 4275 Jointer...
-
Page 51: Wiring Diagram
Wiring Diagram For Stock # 4275.101.4S (230V, 1Ph) 4275 Jointer OLIVERMACHINERY.NET 51 | Page... -
Page 52: For Stock # 4275.102.4S (230/460V, 3Ph)
For Stock # 4275.102.4S (230/460V, 3Ph) 52 | Page Oliver Machinery 4275 Jointer... -
Page 53: Parts List
Parts List Fence Assembly 4275 Jointer OLIVERMACHINERY.NET 53 | Page... - Page 54 Table and Cutterhead Assembly...
-
Page 55: Base Assembly
Base Assembly 4275 Jointer OLIVERMACHINERY.NET 55 | Page... -
Page 56: Motor And Cabinet
Motor and Cabinet... -
Page 57: Maintenance Record
Parts List for 4275 Part No. Description Specification 000104-104 Cap Screw M8*1.25P*16 006305-100 Spring Washer 8.2*13.7 174706-008 Cover 000804-101 Flat Head Cap Screw M5*0.8P*8 250372-615 Knob 361331-904 361330-902 Axis 011003-104 Spring Pin 5*25 008304-800 Lock Nut M6*1.0P(10B*7H) 330066-000 Bushing 330068-000... - Page 58 051435-902 Bearing Housing (Rear) 012006-001 8*8*40 001903-105 Set Lock Screw M8*1.25P*8 381414-902 Cutterhead Pulley 030208-002 Ball Bearing 6204-2NSE 030210-002 Ball Bearing 6206-2NSE 051183-000 Rabbeting Table 200105-615 Sponge 30*30*22(L*W*H) 051434-000 Table (infeed or outfeed) 58 | Page Oliver Machinery 4275 Jointer...
- Page 59 001902-102 Set Lock Screw M6*1.0P*8 002602-101 Cap Lock Screw M6*1.0P*12 361349-902 Shaft 381392-902 Eccentric Bushing 174513-902 Shaft Plate 381393-902 Bushing 174512-902 Shaft Plate 174705-000 Plate 174650-902 Shaft Plate 174515-902 Shaft Plate 070070-902 Toothed Bracket 4275 Jointer OLIVERMACHINERY.NET 59 | Page...
- Page 60 SN 192994 and beyond. 361304-902 Handwheel Shaft SN 192988 to 192993 361395-902 Handwheel Shaft SN 192994 and beyond. 012002-004 SN 192988 to 192993 012002-006 SN 192994 and beyond. 006001-071 Flat Washer 10*25*3.0t 006703-100 Wavy Washer WW-10 60 | Page Oliver Machinery 4275 Jointer...
- Page 61 Cap Screw M5*0.8P*6 021801-000 Snap Bushing NB-1722 006001-131 Flat Washer 5.3*10*2.0t 006001-181 Flat Washer 5*16*3.0t 950785-000 Magnetic Strip Assembly Depth:3/4" 002603-702 Cap Lock Screw M5*0.8P*16 000805-101 Flat Head Cap Screw M4*0.7P*6 574956-000 Switch Panel 4275 Jointer OLIVERMACHINERY.NET 61 | Page...
- Page 62 Cap Screw M5*0.8P*8 174651-902 Bracket 490229-615 Switch Cover KSSCB-2 491101-000 Micro Switch MJ2-1307 280274-000 Spring 174642-000 Belt Guard 001603-102 Phillip Head Screw w/Flat Washer M6*1.0P*10/6*13.2*1.0t 174641-008 Dust Port 014343-000 V-Belt 490J-9 JP02-12 Cutterhead Assembly 62 | Page Oliver Machinery 4275 Jointer...
- Page 63 MG25A-18B (w/nut) 491116-008 Junction Box Lower Cover 490124-008 Junction Box Upper Cover 003303-102 Pan Phillips Screw 3/16"-24NC*1/4" 242.1 381412-902 Motor Pulley 242.2 001903-105 Set Lock Screw M8*1.25P*8 242.3 013003-001 1/4”*1/4”*1-1/2” 242.4 008007-100 Hex. Nut M10*1.5P(17B*8H) 4275 Jointer OLIVERMACHINERY.NET 63 | Page...
- Page 64 SJT 10AWG*4C*760mm 244.08 474001-013 CSA Cable SJT 18AWG*4C*1550mm 244.09 472001-050 CSA Cable SJT 18AWG*2C*2000mm Note: 440V 3Phase operation requires special components, contact Oliver Machinery. 491192-000 440V Magnetic Contactor 490717-000 440V Overload 8 - 10 - 12A Part No. Description Specification...
- Page 65 Maintenance Record Date Task Operator 4275 Jointer OLIVERMACHINERY.NET 65 | Page...
-
Page 66: Notes
Notes 66 | Page Oliver Machinery 4275 Jointer... -
Page 67: Warranty And Service
Oliver Machinery makes every effort to assure that its equipment meets the highest possible standards of quality and durability. All products sold by Oliver Machinery are warranted to the original customer to be free from defects for a period of two (2) years on all parts excluding electronics and motors which are warranted for one (1) year from the date of shipment. -
Page 68: Appendix
23.018 27/64 .4219 10.715 59/64 .9219 23.415 7/16 .4375 11.112 15/16 .9375 23.812 29/64 61/64 .4531 11.509 .9531 24.209 15/32 .4687 11.906 31/32 .9687 24.606 31/64 .4844 12.303 63/64 .9844 25.003 12.700 25.400 68 | Page Oliver Machinery 4275 Jointer... - Page 69 Oliver Machinery is always adding new Industrial Woodworking products to the line. For complete, up-to-date product information, visit us online at: WWW.OLIVERMACHINERY.NET or call toll free 1-800-559-5065 ** SAVE THIS MANUAL FOR FUTURE REFERENCES. **...
Need help?
Do you have a question about the 4275 and is the answer not in the manual?
Questions and answers