
Related Manuals for DCS CP-366


Summary of Contents for DCS CP-366
-
Page 1: Installation Guide
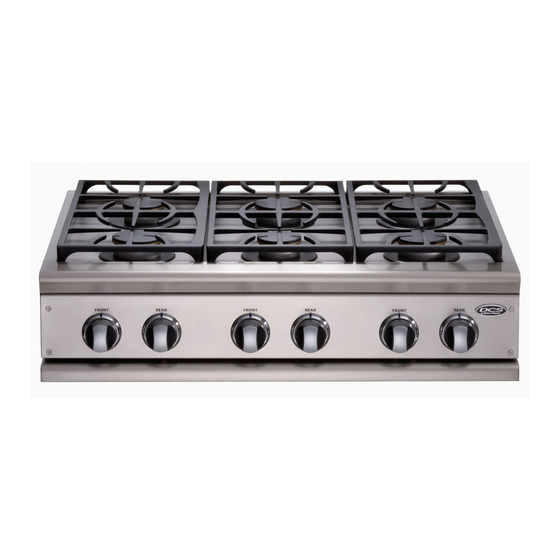
CP SERIES PROFESSIONAL GAS COOKTOP Installation Guide MODELS: CP-366 CP-364GL CP-485GD CP-364GD CP-486GL CP-486GD CP-484GG... - Page 3 A MESSAGE TO OUR CUSTOMERS Thank you for selecting this DCS professional Cooktop. Because of this appliance’s unique features we have developed this Installation Guide. It contains valuable information on how to properly install your new appliance for years of safe and enjoyable cooking.
-
Page 4: Table Of Contents
TABLE OF CONTENTS INTRODUCTION SAFETY PRACTICES AND PRECAUTIONS MODELS PLANNING THE INSTALLATION UNPACKING AND HANDLING 9-10 VENTILATION REQUIREMENTS CABINET PREPARATION 12-14 BACKGUARD INSTALLATION ELECTRICAL CONNECTIONS GAS HOOK-UP TEST AND ADJUSTMENTS CLEANING EXTERIOR SURFACES INSTALLER FINAL CHECKLIST HOW TO OBTAIN SERVICE WARRANTY 21-22... -
Page 5: Introduction
INTRODUCTION The DCS Professional CP Cooktops feature a large number of features varying with each model. All models feature a minimum of 4 surface burners, with the option of up to 6 surface burners on all models. All of the 48"... -
Page 6: Safety Practices And Precautions
SAFETY PRACTICES AND PRECAUTIONS When properly cared for, your new DCS Appliance has been designed to be a safe, reliable cooking appliance. When using this restaurant caliber appliance, use it with extreme care, as this type appliance provides intense heat and can increase the accident potential. Basic safety precautions must be followed when using kitchen appliances, including the following: Read the Use and Care Manual, which came with this appliance, thoroughly before using your new appliance. - Page 7 SAFETY PRACTICES AND PRECAUTIONS Do not use aluminum foil to line any part of the cooktop. Doing so, heat will be trapped underneath it. This trapped heat can upset the cooking performance and can damage the finish of the cooktop parts. This appliance is for cooking.
- Page 8 SAFETY PRACTICES AND PRECAUTIONS Clean the cooktop with caution. Avoid steam burns; do not use a wet sponge or cloth to clean the cooktop while it is hot. Some cleaners produce noxious fumes if applied to a hot surface. Follow directions provided by the cleaner manufacturer.
-
Page 9: Models
MODELS 48” CP COOKTOP MODELS CP-484GG CP-486GL CP-486GD CP-485GD 36” CP COOKTOP MODELS CP-366 CP-364GL CP-364GD... -
Page 10: Planning The Installation
PLANNING THE INSTALLATION IMPORTANT INSTALLATION INFORMATION All cooktop models with less than a 12” clearance between combustable material and the back edge of the cooktop, require the installation of one of the two offered Wall Mount Backguards – see page 15. Wall Mount Full Backguard 15/16”... -
Page 11: Unpacking And Handling
PLANNING THE INSTALLATION RECOMMENDED INSTALLATION INSTRUCTION Install components in the following order: A. Vent Hood B. Backguard System (sold separately) C. Cooktop 1. Locate cooktop according to cooktop installation instructions. 2. Measure distance from counter surface to top of trim on cooktop adding 1/8” for backguard clearance. 3. - Page 12 UNPACKING AND HANDLING The professional cooktop should be moved close to its final location. Electric and gas connections should Shipping Screw be made (pgs. 15 & 16) and the backguard installed (remove) (as required, pg. 8 & 15) before the cooktop is placed in its final position.
-
Page 13: Ventilation Requirements
VENTILATION REQUIREMENTS A suitable exhaust hood must be installed above the range. The following chart indicates the minimum blower capacity recommended for hood ventilation. Standard Counter Island Installation Ventilation Unit Installation Recommendatons Recommendatons HOOD 24" Deep x Unit Width 30" Deep x 36" at Bottom 48”... -
Page 14: Cabinet Preparation
CABINET PREPARATION 1. To ensure professional results, the cabinet and countertop openings should be prepared by a qualified cabinet worker. We recommend having the cooktop available before cutting the opening for more precise dimension verification. 2. The clearances shown in Fig. 8 pg. 14 are required for all types of backguard installations. 3. - Page 15 CABINET PREPARATION 6. Cut the openings for the following installation: I Standard counter top installation, see Fig. 8A I Deep counter or island installation, see Fig. 8B NOTE: If the deck is used, the sides or bottom of the cutout may be solid combustible or non-combustible material.
- Page 16 CABINET PREPARATION 26-1/2" Countertop level 8-7/16" 1/2" 3" To Center Line 5/8" of Gas Inlet 22-3/4" 1/2" 23-1/4" 2-1/2" Cabinet face for installation with projecting control panel Cabinet face for installation with flush control panel Fig. 7 26-1/2" 15/16" 12" Min. to Combustibles without Backguard Wall Mount 36”...
-
Page 17: Backguard Installation
12” clearance between combustibles and the back of Wall Mount the range (above the cooking surface). See fig. 8. Low Backguard 12" (Model #’s BGC-1236, BGC-1248) DCS backguards are sold separately. Fig. 9 ELECTRICAL CONNECTIONS ELECTRICAL REQUIREMENTS Receptacle Box 120 VAC, 60 Hz., single phase Cover Plate CP-48: 15 Amp. -
Page 18: Gas Hook-Up
GAS HOOK-UP GAS REQUIREMENTS Verify the type of gas supplied to the location. The cooktop is shipped from the factory set up and adjusted for Natural Gas or LP (propane), depending on the specific model ordered. Verify that the cooktop is compatible with gas supply at the installation site before proceeding further. -
Page 19: Test And Adjustments
TEST AND ADJUSTMENTS WARNING: COOKTOP BURNER For warranty coverage, DCS requires that burner adjustments be made by a qualified technician at the time of installation. Extreme care should be used 1-1/2" when adjustments are made after installation. COOKTOP BURNERS The cooktop burners are not adjustable. Proper operation is achieved when FIG. -
Page 20: Cleaning Exterior Surfaces
CLEANING EXTERIOR SURFACES The stainless steel surfaces may be cleaned by wiping with a damp soapy cloth or sponge. Any liquid soap (like Dawn or Stainless Steel Magic) will remove fingerprints and smears. Do not use steel wool as it will scratch this surface. -
Page 21: Installer Final Checklist
INSTALLER FINAL CHECKLIST GENERAL Placement of unit. Specified clearance maintained to cabinet surfaces. Unit Level - front to back, side to side. All packaging material and tie straps removed, drip pans clean and empty. Backguard attached if there is less than 12" clearance above the cooking surface to combustibles behind unit. Radiant tray placed in grill unit (if equipped). -
Page 22: How To Obtain Service
HOW TO OBTAIN SERVICE For warranty service, please contact DCS Customer Care Representative at (888) 936-7872. Before you call, please have the following information ready: Model Number (located on the rating plate behind the unit right side) Serial Number (located on the rating plate behind the unit right side) -
Page 23: Warranty
WARRANTY LIMITED WARRANTY When you purchase a new DCS Professional Cooktop you automatically receive a One Year Limited Warranty covering parts and labor for the entire product, a Five Year Limited Warranty on surface burners, griddle burners and grill burners (parts only) for servicing within the 48 mainland United States, Hawaii, Washington D.C. and Canada. - Page 24 Please read your User Guide. If you then have any questions about operating the Product, need the name of your local DCS Authorized Service Agent, or believe the Product is defective and wish service under this Limited Warranty, please contact your dealer or call us at: TOLL FREE 1-888-936-7872 or contact us through our web site: www.dcsappliances.com...
- Page 25 Fisher & Paykel Appliances, Inc. 5900 Skylab Road, Huntington Beach, CA 92647 Customer Care: 888.936.7872 Fax: 714.372.7003 www.dcsappliances.com As product improvement is an ongoing process, we reserve the right to change specifications or design without notice. Nous améliorons constamment ses produits et se réserve le droit de modifier les spécifications ou la conception de ses produits sans aucun préavis.
Need help?
Do you have a question about the CP-366 and is the answer not in the manual?
Questions and answers