Table of Contents
Advertisement
Quick Links
Advertisement
Table of Contents

Related Manuals for DARAY X240


Summary of Contents for DARAY X240
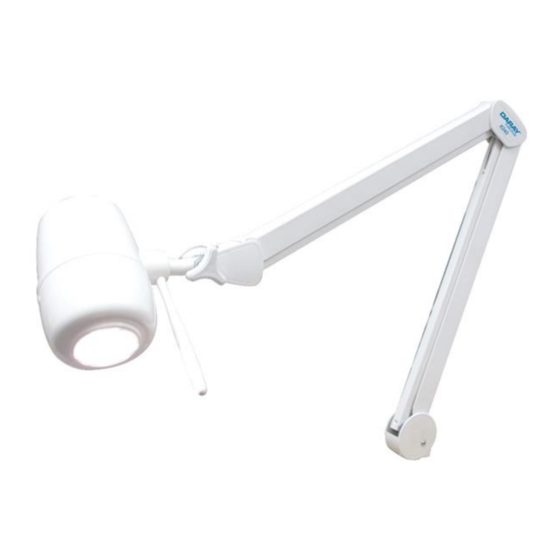
- Page 1 X240 LED Examination Light Operating & Installation Manual QAM.X240.0219.10...
- Page 2 Page 1 of 27...
-
Page 3: Table Of Contents
Table of Contents 1. Introduction ................3 1.1 Supported Lights ..............4 2. Technical Specifications ............5 2.1 Pre-Installation Responsibilities and component packing list ... 6 2.2 Pre-Start Checks ..............7 3. Operation ................8 3.1 Range of Motion ..............8 3.2 Powering On &... -
Page 4: Introduction
DARAY. Changes made to the information in this document will be incorporated in new editions of the publication. No responsibility is assumed by DARAY for the use or reliability of software or equipment that is not supplied by DARAY. -
Page 5: Supported Lights
For further information on our product range and find out more about our Company please visit www.daray.co.uk or call 0333 321 0971. This product was designed & manufactured in Great Britain by: Daray Ltd. Edison House Robian Way Swadlincote Derbyshire DE11 9DH 1.1 Supported Lights... -
Page 6: Technical Specifications
2. Technical Specifications Light Source Light Intensity (Lux) @ 0.5m 32,000 Lux ±5% Light Intensity (Lux) @ 0.75m 14,000 Lux ±5% Light Intensity (Lux) @ 1.0m 8,000 Lux ±5% Light Intensity Adjustment Range 10% - 100% Colour Temperature (Kelvin) 4,300K ±500 Colour Rendering Index (CRI) Colour Rendering (R9) @ 0.5m: 120mm... -
Page 7: Pre-Installation Responsibilities And Component Packing List
2.1 Pre-Installation Responsibilities and component packing list This document is a guide to the steps that need to be performed to correctly install the X240 Examination light. However, the work required to be performed is the responsibility of the owner or designated contractor/s. -
Page 8: Pre-Start Checks
X240LE3 Qty. X240LE4 Plug top transformer Light head and spring balanced rigid arm inc. base box (transformer integrated) Panel Mount Bracket (W5) Microfibre cloth Light head and spring balanced rigid User Manual Microfibre cloth User Manual 2.2 Pre-Start Checks Please check that the power cable is without visible damage, harsh folds, knots or cuts in the rubberised coating. -
Page 9: Operation
3. Operation 3.1 Range of Motion The full range of motion between the X240 Range varies. This is an image depicting the range of motion on a standard wall mount fitting. Page 8 of 27... -
Page 10: Powering On & Variable Intensity
3.2 Powering On & Variable Intensity The X240 uses a single button on the back of the head to power the light on and off, and to adjust the brightness (intensity). Press once to power ON. Press and hold to adjust the intensity. It takes approximately 4 seconds to switch between the highest and lowest settings. -
Page 11: Adjusting The Light Head
3.3 Adjusting the Light Head The X240 head is secured using a large thumb screw. This also controls the forward and backward motion of the head itself. Thumb Screw Loosening this thumb screw will allow you to position the light-head up or down. -
Page 12: Installation
4. Installation 4.1 Wall mounted versions Compatible versions: X240LW / X240LE1 / X240LE2 / X240LE3 / X240LE4 The wall bracket needs to be true on the vertical plane. PIVOTW2: supplied with PIVOTW3: supplied X240LW with X240LE1 PIVOTW4: supplied with X240LE2 PIVOTW5: supplied Page 11 of 27 with X240LE3... -
Page 13: Considerations
Locations of nearest The X240 wall mounted light uses a plug top transformer mains sockets with a DC jack connection. Only the supplied certified power adapter should be used with the light. -
Page 14: X240Lw - Placement And Installation
• Tighten the thumbscrew to secure the light in position. The power supply for the X240 is a plug top transformer with a DC jack connection, these can be inserted into any standard UK wall socket. Please note, under no circumstances should this product be connected... - Page 15 The light can now be tested by connecting the DC jacks and applying power. Press the switch on the head to power your light on. See page 8 Check arm and head for smooth and correct movement. Your new DARAY light is now ready for use.
-
Page 16: X240Le1 - Placement And Installation
4.1.3 X240LE1 – Placement and Installation Remove the light from its packaging. This version includes our PIVOTW3 BESA mounting bracket, for mounting to a BESA box. Ensure the BESA back-box is mounted between recommended 850-1100mm from the floor to the underside of the bracket – dependent on couch height. -
Page 17: X240Le3 - Placement And Installation
4.1.5 X240LE3 – Placement and Installation Remove the light from its packaging Fit front bracket and rear plate to pre-drilled panel Fit light spigot into bracket and pass cable through to rear of panel Make electrical connection to transformer ... - Page 18 CAUTION: This product must be earthed. Check you have all of the items included in the checklist on Page 7 Note the mounting position advice and warnings offered in Section 4.1.1 Considerations on page 10 Flush-fitting the wall box (chased-in cables): ...
-
Page 19: Rail Mounted Version (X240Lr)
4.2 Rail mounted version (X240LR) Remove the light from its packaging. If you have also purchased our XRAIL accessory, hold the rail against the selected location on the wall, bearing in mind the final position and range of travel of the light-head required to project its light patch where it will be needed. -
Page 20: Mobile Version (X240Lm)
Mark the position on the desk for mounting. Use screws the fix the bracket securely. Fit the spigot on the end of the light arm into the top of the clamp, make sure it is fully secured in place. Apply the power cable, and power the light on. -
Page 21: Optional Battery Back-Up
4.5 Optional battery back-up 4.5.1 Packing List Battery back-up unit Double-ended bridge cable 12V PSU + extension cable 4.5.2 Install Plug the power adapter into the wall and insert the DC connector into the battery. Switch the battery to the ON position and the red light on the top of the battery pack will illuminate. -
Page 22: Maintenance
The proposed maintenance is only a suggestion. Depending on the use of the product and the operating environment, this may need to be revised more often. DO NOT ATTEMPT ANY FIXES BEFORE CONSULTING DARAY. If you cannot resolve a problem then please contact our helpline on 0800 878 9864 or email support@daray.co.uk... -
Page 23: Product Cleaning & Care Guidelines
Acetone-based cleaners (e.g. nail polish remover, Goo-off™) MEK (Methyl Ethyl Ketone) If you are unsure whether you are using the correct cleaning fluids on your DARAY equipment, please feel free to get in touch with us for advice. Page 22 of 27... -
Page 24: Adjustments
5.4 Adjustments The head of the X240 light has a 180 degree forward and backward motion; this is adjusted secured by the thumb screw at the bottom of the light head. The head has a total turning capability of 320 degrees, attempting to push further may cause damage to the movement and internal wiring of the light. -
Page 25: Rigid Arm Adjustments
5.5 Rigid Arm Adjustments The X240 light is mounted on spring-tensioned rigid arms which are balanced specifically to be able to be moved using a single finger touch. Your light will have been balanced during manufacture, so there should be no need for you to make any adjustments out of the box. -
Page 26: Troubleshooting Guide & Spare Parts
6. Troubleshooting Guide & Spare Parts Problem Possible Cause Corrective Actions Wall Version - Check the plug top adapter is plugged in and switched Power Supply on at the power socket. Press the button on the back of the On/Off/Intensity light to check if the light will power Button on (if dimmed refer to poor light... - Page 27 Wall bracket thumb D16247 screw Plug-top transformer DRK1418 For any SPARE PARTS or TECHNICAL ISSUES phone DARAY’S Service Delivery Team on: +44 (0) 800 878 9864 Opening times 9am–5pm Monday to Thursday (excluding bank holidays) 9am-2:30pm on Friday Or email: support@daray.co.uk...
-
Page 28: Warranty Information
DARAY Ltd, please read the following information carefully. The DARAY Ltd returns policy provides guidance on when you can return goods we have supplied, and what you can expect from us once you do. To see our detailed returns policy and procedure visit www.daray.co.uk/returns... -
Page 29: Warranty Details
Direct damage to your property caused by the proven negligence of Daray. 6. This agreement does not give any rights other than those expressly set out above and in particular, Daray will not be responsible for any loss of income, profits or contracts or any direct or indirect consequential loss, damage caused to or suffered by the purchaser as a direct result of this agreement. - Page 30 Service Notes Page 29 of 27...
- Page 31 Page 30 of 27...
- Page 32 DARAY Ltd. Edison House Robian Way Swadlincote Derbyshire United Kingdom DE11 9DH +44 (0)800 878 9864 +44 (0)333 321 0973 sales@daray.co.uk www.daray.co.uk...
Need help?
Do you have a question about the X240 and is the answer not in the manual?
Questions and answers