Table of Contents
Advertisement
Quick Links
Advertisement
Table of Contents

Related Manuals for DARAY V409


Summary of Contents for DARAY V409
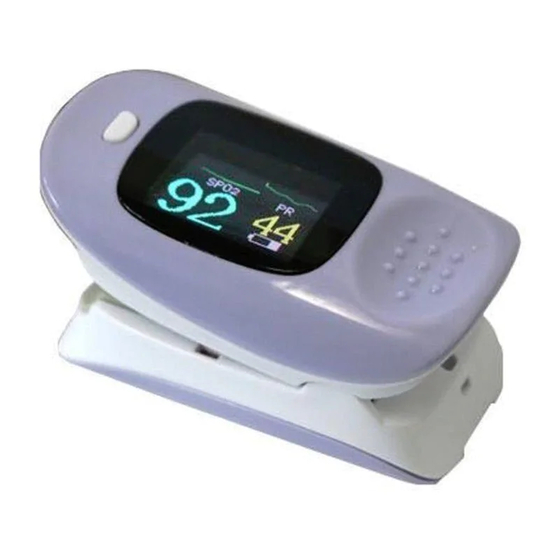
- Page 1 V409 Fingertip Pulse Oximeter QAM V409 0616 4...
-
Page 3: Table Of Contents
ABOUT THIS MANUAL SAFETY INFORMATION INTRODUCTION APPEARANCE AND DISPLAY INSTALLATION OPERATION SpO2 MEASUREMENT MAINTENACE DISPOSAL TROUBLESHOOTING SPECIFICATIONS Returns policy Warranty WARRANTY REGISTRATION Tel: 0800 878 9864 Fax: 0333 321 0973... -
Page 4: About This Manual
1. About this manual This manual provides the instructions necessary to operate the V408 fingertip pulse oximeter (hereinafter called as the device) in accordance with its function and intended use. Observance of this manual is a prerequisite for proper performance and correct operation, and ensures patient and operator safety. -
Page 5: Introduction
CAUTION The device is a commonly sealed device. Keep its surface dry and clean, and prevent any liquid from infiltrating it. The device is precision and fragile. Avoid pressure, knock, strong vibration or other mechanical damage. Hold it carefully and lightly. If it is not in use, it should be appropriately placed. -
Page 6: Appearance And Display
4. Appearance and display Figure 4.1 Front panel Table 4-1 Description of appearance and display Description Remarks Power and rotation button Press this button to power on the device. After 6 seconds, press the button for 3 seconds to change the direction of display. -
Page 7: Installation
5. Installation Unpacking and Inspection Open the package and remove the instrument and accessories carefully. Check all materials against the packing list. Check the device for any mechanical damage. Contact supplier immediately in case of any problem. Installing Batteries The device is powered by two batteries. Follow the steps below to install batteries before use. -
Page 8: Operation
6 Operation Press the power button to turn on the device. The OED screen appears display. If there is no finger inserted into the device, the device will automatically shut down in 8 seconds to save power. NOTE The device is powered by batteries. The batteries must be installed in the device before powering on. - Page 9 NOTE Make sure to place the device on the finger in a correct direction. The LED part of the sensor should he at the backside of the patient hand and the photodetector part at the inside. Make sure to insert the finger to a suitable depth into the sensor so that the fingernail is just opposite to the light emitted from the sensor.
-
Page 10: Maintenace
ceaselessly, especially for child and patient of poor perfusion or immature dermographia by light collimation. Iris recommended that the device should not be applied to the same finger for over 2 hours. Make sure no contamination or scar exists in the site where the device is placed. Otherwise, the measured result may be incorrect because the signal received by the sensor is affected. - Page 11 Isopropanol (70%) Diluted ammonia water Hydrogen peroxide (3%) Alcohol Ethanol (70%) Diluted formaldehyde (35%-37%) Diluted sodium hypochlorite solution (bleaching agent) NOTE Sodium hypochlorite solution with a concentration of 500ppm (1:100 diluted bleacher solution used in family) ~ 5000ppm (1:10 diluted bleacher solution used in family) is very effective.
-
Page 12: Disposal
9. Disposal To avoid contaminating or infecting personnel, the environment or other equipment, make sure you disinfect or decontaminate the device appropriately before disposing of it in accordance with your country's law for equipment containing electrical and electronic parts. 10. Troubleshooting Problem Possible reason Solution... -
Page 13: Returns Policy
If you send us goods that do not qualify for return, you will invalidate your claim to any refund, and you will be obliged to compensate DARAY Ltd for the cost of return postage and any other reasonable costs incurred processing the goods. -
Page 14: Warranty
Failure to use or install the product in accordance with the manufacturer’s instructions. 5. Nothing in this warranty shall have the effect of restricting or excluding the liability of Daray in respect of: a) Death and personal injury caused by the negligence of Daray, or for fraud;...
Need help?
Do you have a question about the V409 and is the answer not in the manual?
Questions and answers